When I decided to update my outdated home with modern tile flooring, I had no idea how many options existed or how transformative the right choice could be. I spent months visiting showrooms, scrolling through design blogs, and talking to contractors before finally selecting tiles for my kitchen, bathroom, and entryway.
Each space taught me something different about modern tile styles, installation challenges, and long-term performance. Now that I’ve lived with my choices for over a year, I want to share the insights I gained, the mistakes I made, and the ideas that truly elevated my spaces into something special.
Large Format Tiles That Create Seamless Spaces
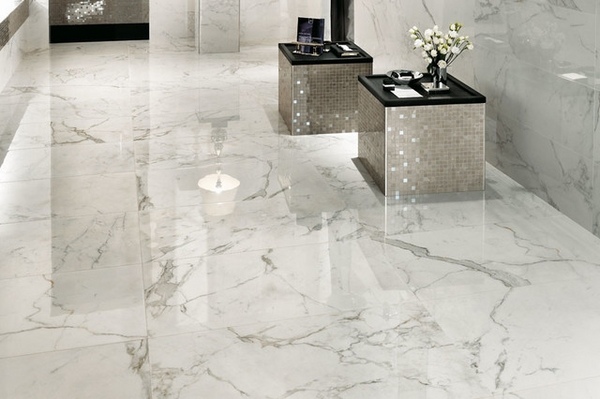
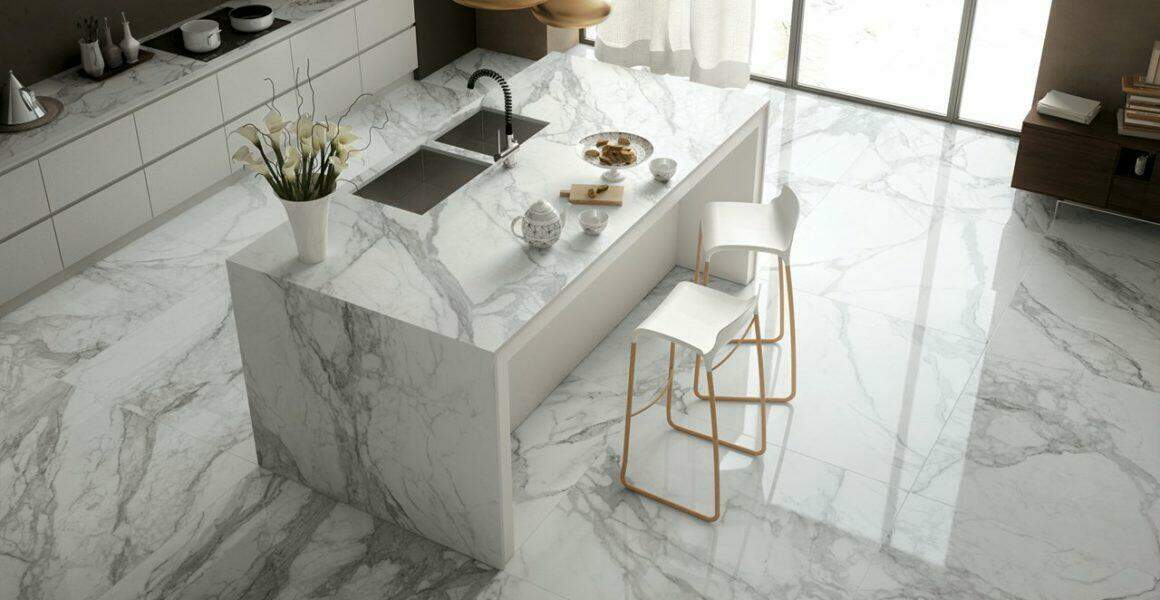
My introduction to modern tile design began when I discovered large format tiles, and they completely changed my perspective on flooring. I’d always thought of tile as those standard 12×12 squares, but modern tiles come in sizes like 24×48 inches and even larger. When I first saw a showroom floor done in 24×24 porcelain tiles with minimal grout lines, I was amazed by how seamless and expansive the space felt. The fewer grout lines created a cleaner, more contemporary look that made my relatively small kitchen appear significantly larger.
I chose 12×24 inch rectified porcelain tiles for my kitchen, which gave me that modern aesthetic while being slightly more manageable for my installer to work with. Rectified tiles have precisely cut edges that allow for much tighter grout lines, sometimes as narrow as 1/16 inch. This detail makes a huge difference in achieving that sleek, modern appearance. My contractor explained that larger tiles require a flatter subfloor because any imperfections become more noticeable. We spent an extra day leveling my subfloor with self-leveling compound, which added $400 to the project but was absolutely worth it for the flawless final result.
The installation process for large format tiles proved more complex than I anticipated. My installer used a special, large-tile trowel to achieve proper coverage on the back of each tile. He explained that inadequate mortar coverage causes large tiles to crack or sound hollow when walked on. We also used leveling clips during installation, small plastic devices that ensure adjacent tiles sit at the same height. Watching him work taught me that modern tile installation is as much art as craft. The investment in skilled labor and proper technique paid off with floors that look absolutely stunning and have performed flawlessly through daily use.
Geometric Patterns That Add Visual Drama
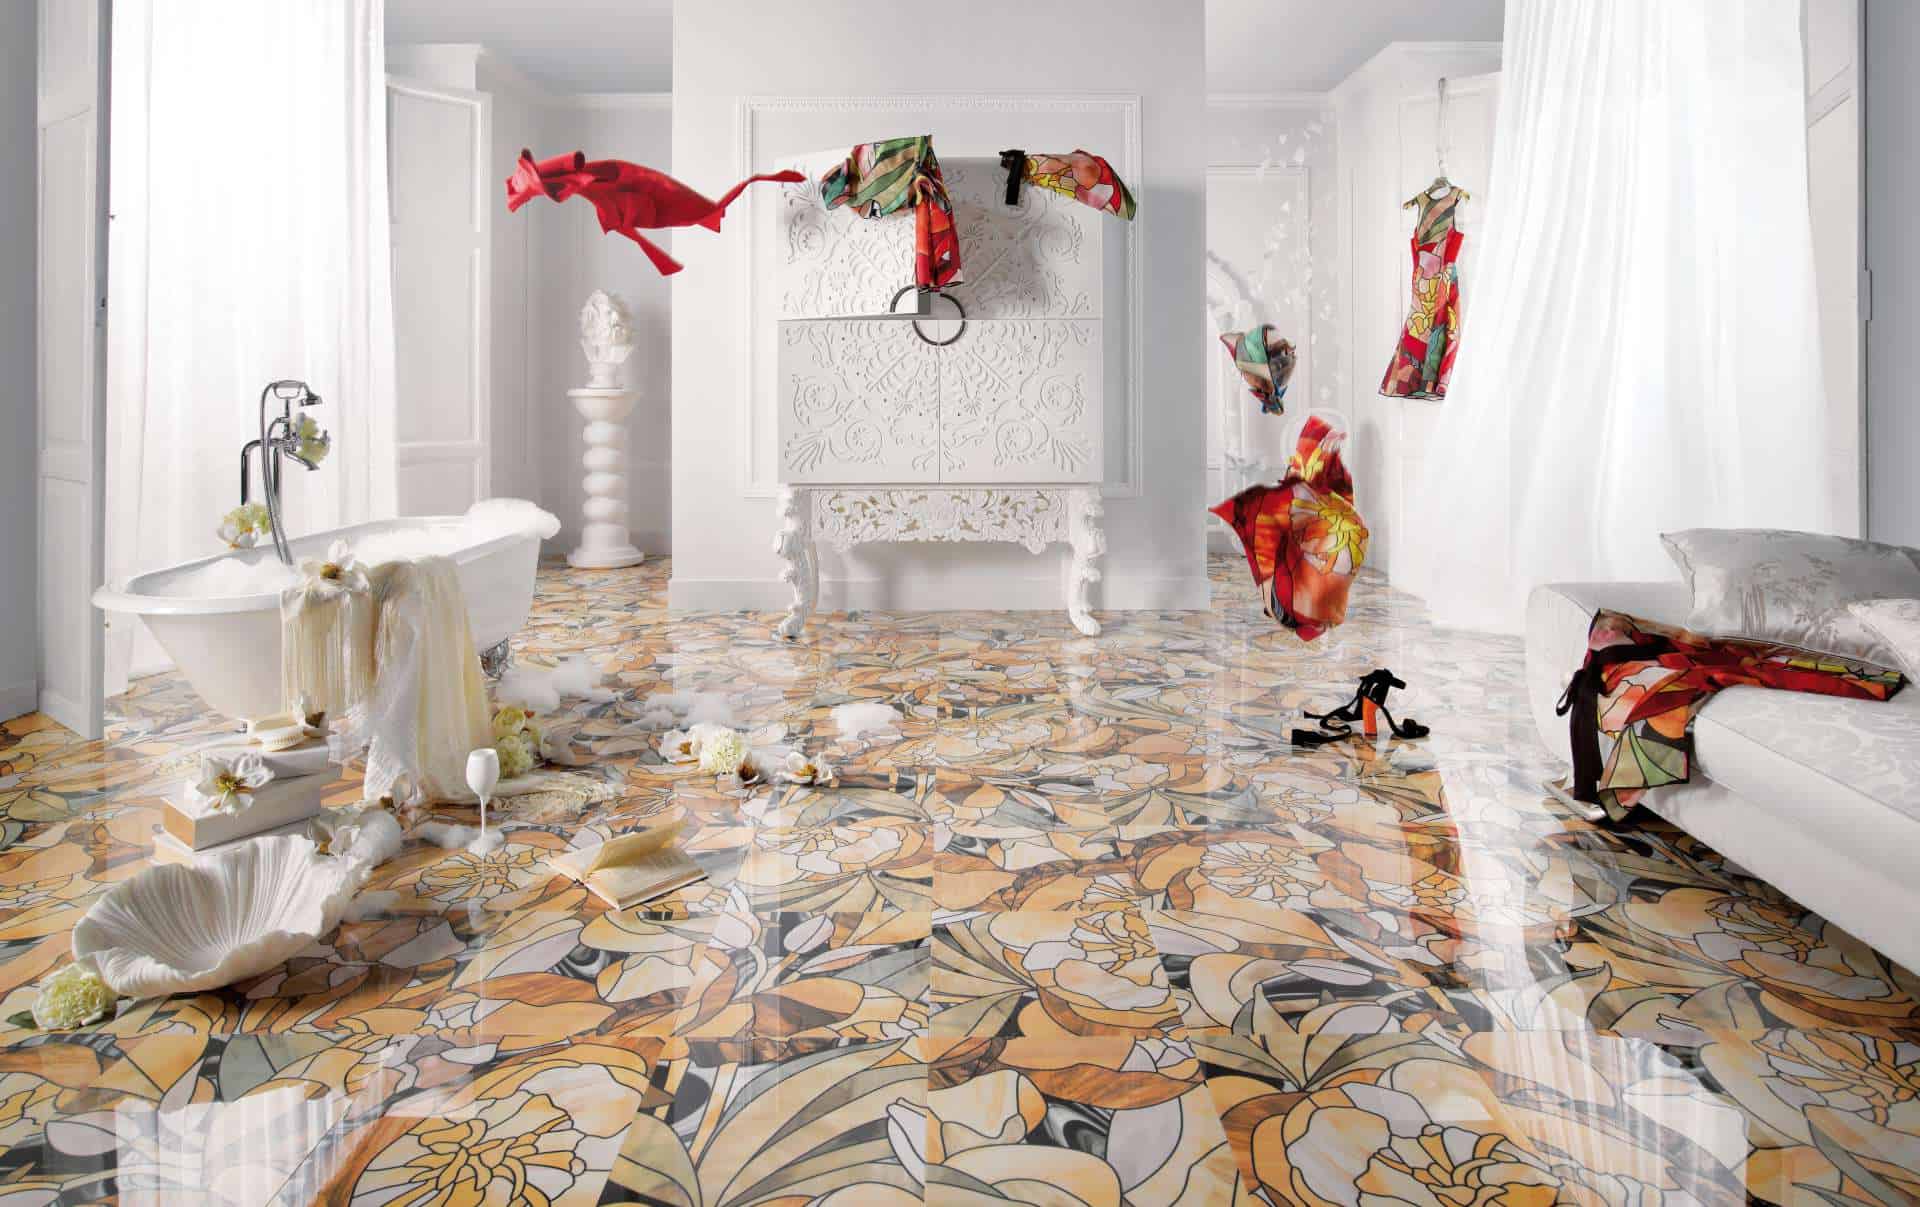
After choosing neutral large-format tiles for my kitchen, I wanted something bolder in my entryway. I discovered geometric tile patterns, and suddenly I saw possibilities everywhere. Hexagons, triangles, arabesques, and chevrons offered ways to create focal points and add personality. I fell in love with hexagon tiles after seeing them in a boutique hotel lobby. The honeycomb pattern created movement and interest without overwhelming the space. I knew immediately that hexagons would transform my plain entryway into something memorable.
I selected 8-inch matte white hexagon porcelain tiles with black grout, creating a graphic, modern look that welcomed guests the moment they entered my home. The contrast between white tile and dark grout made the geometric pattern really pop. My installer warned me that geometric tiles require more planning and precision than standard layouts. We spent an afternoon just mapping out the pattern, determining where to start and how to handle the edges where hexagons met walls. Some tiles needed cutting at angles, which required specialized tools and expertise.
The installation took twice as long as my kitchen floor because each hexagonal tile needed careful placement to maintain the pattern integrity. My contractor used spacers designed specifically for hexagon tiles to ensure consistent gaps. I watched nervously as he worked, worried about how it would turn out, but my concerns disappeared when he removed the spacers and I saw the pattern emerge. The geometric floor became the star of my entryway, and I chose simple, neutral elements everywhere else to let the tile shine. Guests always comment on it, and I love telling the story of how we created this modern statement piece.

Wood-Look Tile for Warmth Without Maintenance
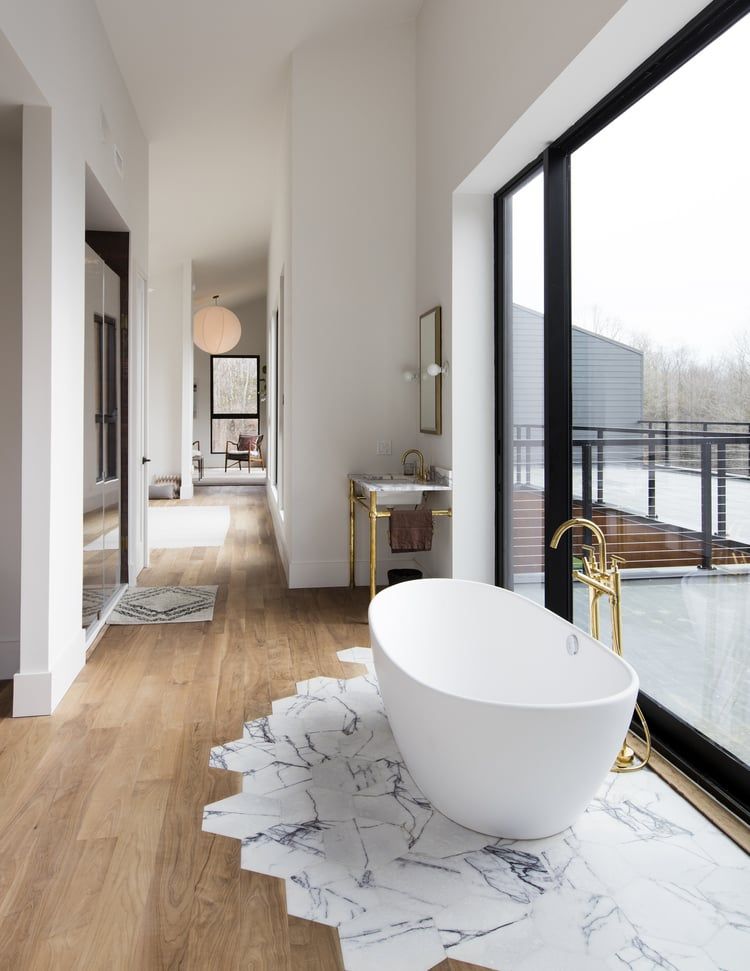
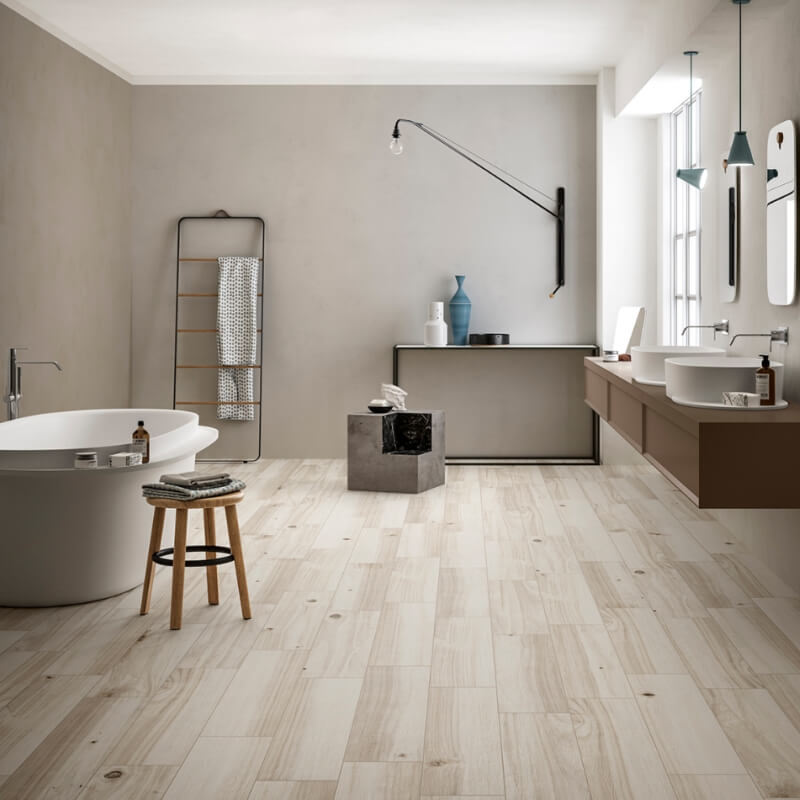
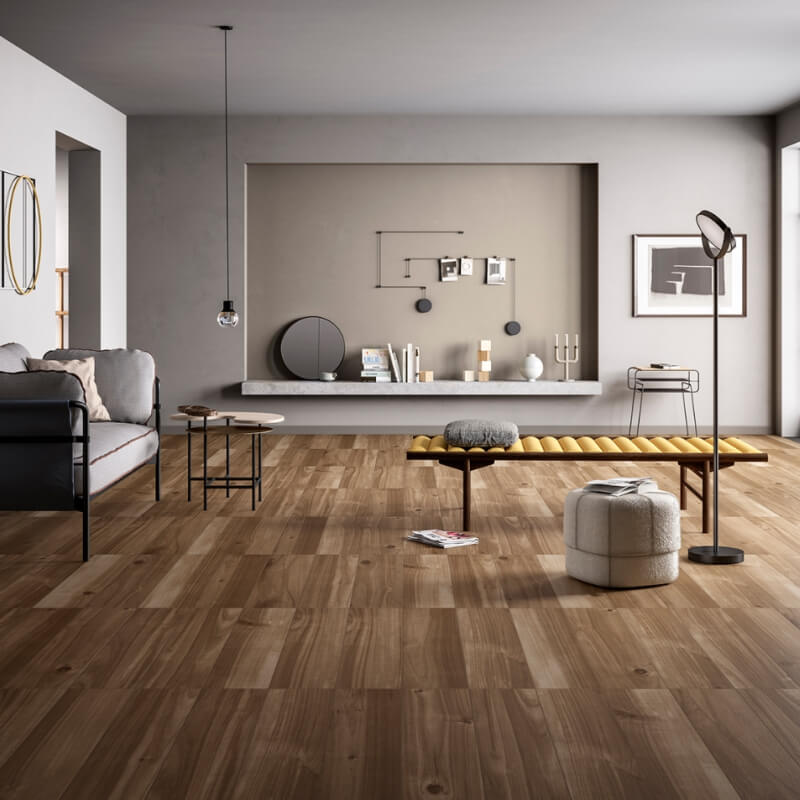
I wanted hardwood floors in my master bathroom, but knew real wood and moisture don’t mix well. My designer suggested wood-look porcelain tile, and I was skeptical at first. I’d seen fake wood tile that looked obviously artificial, and I didn’t want that. However, modern wood-look tile has evolved dramatically. When I visited showrooms and examined current options, I was shocked by how realistic they’d become. The grain patterns, color variations, and even the texture felt remarkably close to actual hardwood.
I chose wood-look tile in a weathered oak finish with planks measuring 8×48 inches. The longer, narrower format mimicked real hardwood planks beautifully. Each tile had unique grain patterns and color variations, just like natural wood. I selected a matte finish rather than glossy because it felt more authentic. The tiles even had a subtle texture that mimicked wood grain, though not so much that cleaning became difficult. I installed them in a staggered pattern, the same way you’d lay hardwood, which enhanced the realistic appearance.
Living with wood-look tile in my bathroom has been fantastic. I get the warm, natural aesthetic of hardwood without worrying about water damage. I can step out of the shower directly onto the floor without concern. Spills and splashes wipe up easily. The tile stays warmer than traditional ceramic would, though I did install radiant floor heating underneath for ultimate comfort. After a year, the tile still looks brand new despite daily use. I’ve recommended wood-look tile to several friends renovating bathrooms, and they’ve all been thrilled with the results. It’s the perfect solution for anyone wanting wood aesthetics in moisture-prone areas.

Textured and Three-Dimensional Tiles for Depth
My powder room needed something special since it’s a small space that guests use. I discovered three-dimensional tiles that create incredible depth and visual interest. These tiles have raised surfaces, geometric reliefs, or wave patterns that catch light and create shadows throughout the day. I found a stunning option with a subtle ripple pattern that looked like water frozen in motion. The dimensional quality transformed what would have been a flat surface into something dynamic and engaging.
I installed the 3D tiles on one accent wall rather than the entire floor, using them to create a feature wall behind the floating vanity. This application showed off the dimensional quality perfectly while keeping costs manageable. The tiles were white with a glossy finish, and I positioned a wall sconce to highlight the texture with dramatic lighting. The way light and shadow played across the surface changed throughout the day, giving the small space constantly evolving visual interest. My contractor suggested the accent wall approach because covering an entire floor with heavily textured tile can make cleaning more challenging.
For my laundry room floor, I chose a different textured option with raised dots creating a tactile, slip-resistant surface. This practical texture provided excellent traction even when wet, which matters in a space where water occasionally splashes. The modern dot pattern looked intentional and stylish rather than purely functional. I learned that texture serves both aesthetic and practical purposes in modern tile design. You can choose subtle texture that adds visual interest without impacting maintenance, or more pronounced texture that provides slip resistance. Understanding your space’s functional needs helps determine the right level of texture.
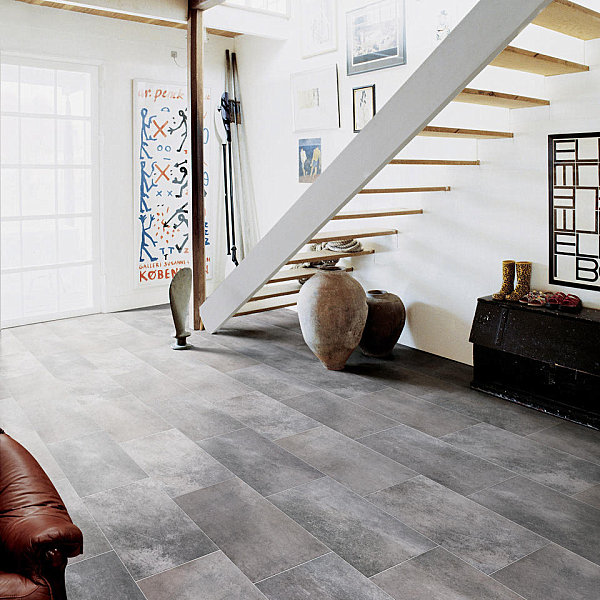
Concrete-Look Tile for Industrial Chic Style
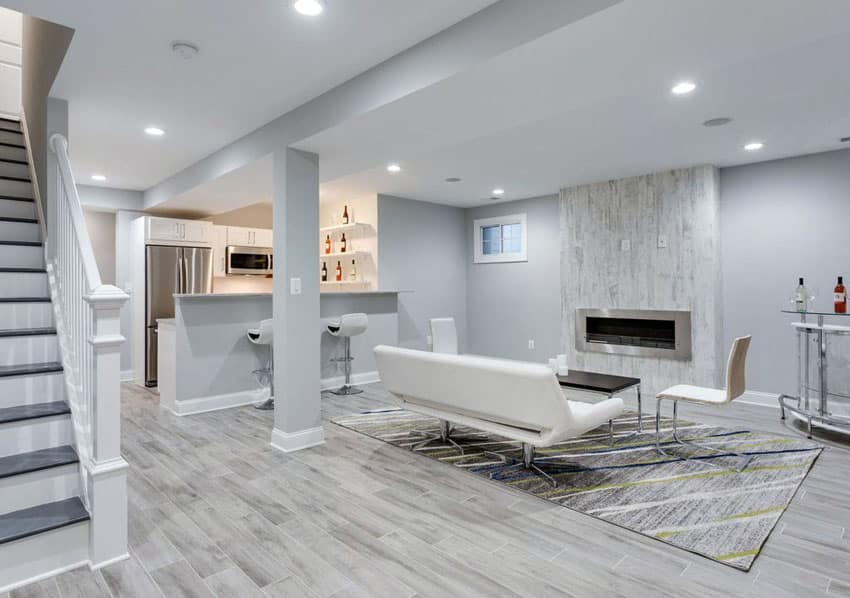
I transformed my basement into a modern living space and wanted flooring that felt urban and industrial. Real polished concrete appealed to me, but seemed risky; I’d heard stories about cracking and difficult maintenance. Concrete-look porcelain tile offered the aesthetic I wanted with better durability and easier care. Modern manufacturing techniques create tiles that perfectly capture concrete’s mottled appearance, subtle color variations, and even the slight imperfections that give concrete character.
I selected large 24×24 inch concrete-look tiles in a medium gray with subtle clouding and tonal variation. Each tile was slightly different, just like poured concrete sections would be. I specified the widest possible format to minimize grout lines, which enhanced the concrete’s appearance. We used gray grout that blended seamlessly with the tile color, making grout lines nearly invisible. The result looked remarkably like polished concrete but without the cold feel or maintenance concerns. I added area rugs in warm textures to soften the industrial aesthetic and define seating areas.
The concrete-look tile proved perfect for my basement’s modern industrial design scheme. I paired it with exposed ductwork, metal light fixtures, and leather furniture. The floors provided a neutral foundation that let other design elements shine. They’re incredibly durable, which matters in a space my kids use as a playroom. Spills, dropped toys, and heavy foot traffic haven’t left any marks. The tile stays cleaner than I expected, too; the matte finish hides dust and dirt well. I mop weekly with just water and a neutral cleaner, and the floors look great with minimal effort.

Mixed Materials and Creative Layouts
After completing several rooms with traditional tile layouts, I wanted to get more creative in my guest bathroom. I discovered that mixing different tile shapes, sizes, and even materials creates stunning modern designs. I combined small hexagon marble tiles with linear subway tiles, creating a unique pattern that felt contemporary and luxurious. The contrast between shapes added visual complexity, while the shared neutral color palette kept everything cohesive. This mixed approach let me express more creativity than using a single tile type would allow.
I created a custom layout with a hexagon tile field bordered by subway tiles arranged in a herringbone pattern. My tile installer thought I was crazy when I first described my vision, but he got excited once we mapped it out on paper. The installation required meticulous planning and precise cuts where different tile types met. We used brass transition strips where the hexagons and subway tiles joined, which became an intentional design detail rather than trying to hide the transition. The brass added warmth and a touch of glamour to the modern geometric design.
This project taught me that modern doesn’t mean boring or minimalist. You can combine patterns, materials, and layouts in unexpected ways to create something truly unique. I’ve seen gorgeous modern floors combining wood-look planks with geometric insets, concrete-look tiles with decorative borders, and large format neutrals with colorful accent strips. The key is maintaining some unifying element, whether that’s color, finish, or overall style, so the mix feels intentional rather than chaotic. Don’t be afraid to experiment and push boundaries. My guest bathroom floor gets more compliments than any other design choice in my home.

How much did you spend per square foot on your modern tile flooring?
My costs varied significantly by tile type and room. The large format porcelain in my kitchen ran $8 per square foot for materials, while installation added $12 per square foot, totaling about $20 per square foot. My hexagon entryway cost more due to complex installation, about $28 per square foot total. The wood-look bathroom tile was $10 per square foot for materials and $14 for installation. Budget modern tiles start around $3-5 per square foot, while premium options reach $15-25 per square foot before installation. I found spending more on quality tile and skilled installation proved worthwhile for long-term satisfaction.
Is modern tile flooring slippery when wet?
This depends entirely on the finish you choose. My glossy 3D wall tiles would be dangerous on floors when wet, but my matte-finish floor tiles provide good traction. I specifically chose textured, slip-resistant tiles for my bathroom and laundry room, where water exposure occurs. Look for tiles with a COF rating above 0.5 for wet areas. When tile shopping, I asked to see slip-resistance ratings and selected appropriately for each space. My kitchen’s matte porcelain feels secure even when I’m cooking and things get messy. The wood-look bathroom tile hasa subtle texture that prevents slipping without making cleaning difficult.
Can I install modern tile flooring myself or do I need professionals?
I hired professionals for all my tile installations after attempting a small DIY project that turned out poorly. Large format tiles especially require expertise, skill with leveling systems, proper trowel techniques, and flat substrates. My hexagon pattern would have been nearly impossible to execute well without professional experience. If you’re considering DIY, start with small areas using standard-sized tiles in simple layouts. Invest in proper tools, including a quality wet saw, trowels, and leveling systems. Watch installation videos and practice on a garage or shed first. For main living areas, I strongly recommend hiring experienced installers; the results justify the cost.
How do I clean and maintain modern tile floors?
My cleaning routine is surprisingly simple. I sweep or vacuum daily to remove dirt and debris that could scratch the surface. Weekly, I mop with warm water and a pH-neutral tile cleaner. I avoid vinegar, ammonia, or acidic cleaners that can damage grout or certain tile finishes. For my textured tiles, I occasionally use a soft brush to clean in the crevices. I reseal my grout annually to prevent staining and moisture penetration. Spills get wiped immediately to prevent any potential staining. My tile floors have stayed beautiful with this basic routine; they’re far easier to maintain than the hardwood floors I had previously.

Do modern tiles work in homes with traditional architecture?
Absolutely, and I’ve successfully mixed modern tiles into my 1960s ranch house. The key is choosing tiles that bridge contemporary and traditional styles. My wood-look tile has modern, clean lines, but the warm wood aesthetic suits traditional homes. Neutral concrete-look or large format tiles in soft colors work in any architectural style. I kept surrounding elements slightly traditional, like my vanities and fixtures, which helped the modern floors feel integrated rather than jarring. Modern doesn’t mean cold or minimalist; it can simply mean updated, clean, and current while respecting your home’s character.
What’s your biggest regret about your tile choices?
My only regret is not going with even larger format tiles in my kitchen. I chose 12×24, thinking bigger would be too contemporary, but now I wish I’d been bolder with 24×24 or even 24×48 tiles. The larger sizes would have created an even more seamless, expansive look. I also wish I’d splurged on higher-quality grout in my entryway; the standard grout I used has required more maintenance than premium epoxy grout would have needed. Otherwise, I’m thrilled with all my tile choices. They’ve held up beautifully, stayed looking new, and transformed my spaces exactly as I’d hoped.

Fashionable and Functional: Most Popular Tile Floor
Beautiful Tile Flooring Ideas for Living Room, Kitchen
Our Newest Collection of Modern Wood and Stone Look Porcelain Tile
Basement Flooring Ideas (Best Design Options) – Designing Idea
Tile Floor Design Ideas
Related articles: