When I bought my converted warehouse loft, the exposed concrete floors seemed like a temporary solution until I could afford “real” flooring. I spent months pricing hardwood, tile, and luxury vinyl, but the quotes kept coming back at $8,000 or more for my 1,200 square foot space.
Then a designer friend suggested staining the existing concrete instead, and I was skeptical until she showed me photos of beautifully stained floors that looked like polished stone or aged leather. Two years after completing my stained concrete project for a fraction of traditional flooring costs, I’m constantly fielding compliments and questions from visitors. Let me share everything I learned about designing, staining, and living with these surprisingly versatile floors.
Understanding Acid Stain Versus Water-Based Stain Options
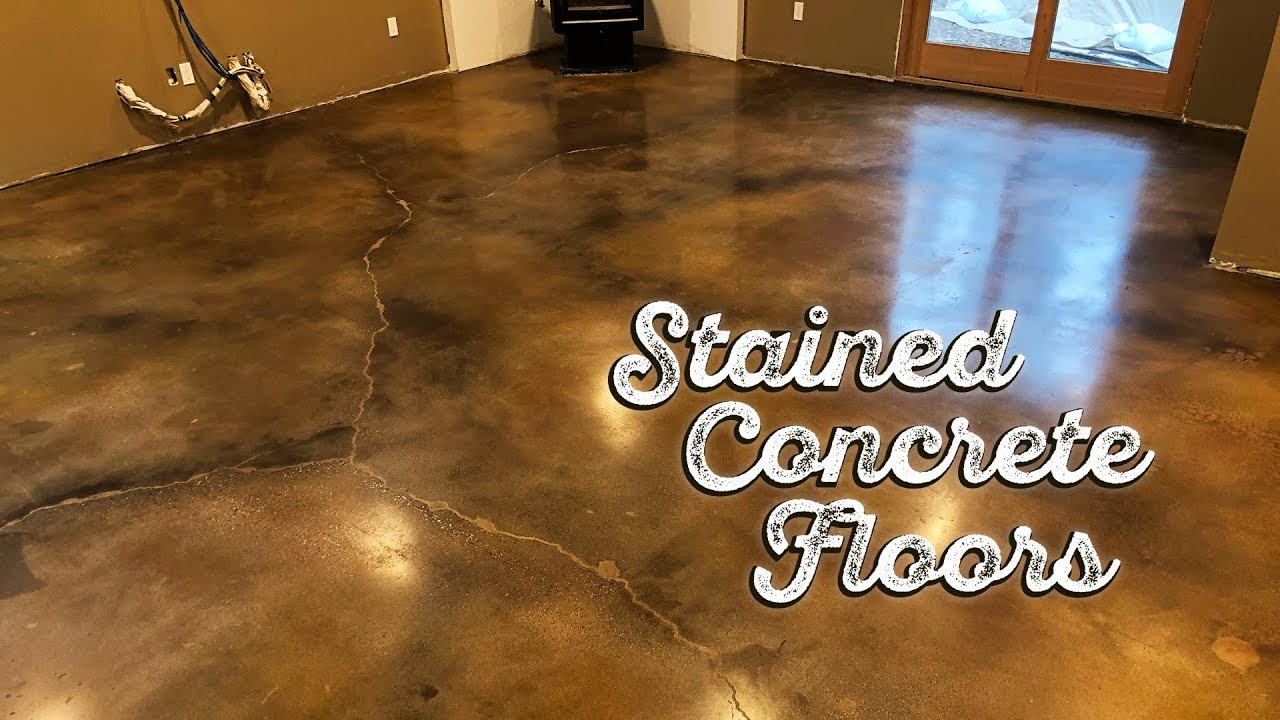
My first major decision involved choosing between acid-based and water-based concrete stains, two completely different products that create distinct visual effects. Acid stains contain metallic salts that chemically react with the concrete’s lime content, creating variegated, translucent colors with organic variation and mottling. The unpredictability initially worried me, but I came to appreciate how acid stains create depth and character similar to natural stone. No two areas look identical, which adds visual interest and authenticity.
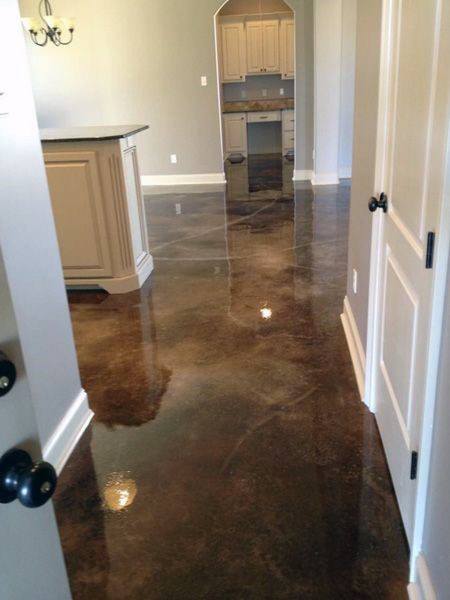
I tested acid stains in my laundry room first, a smart move that taught me valuable lessons without risking my main living space. The chemical reaction process fascinated me as I watched the stain fizzing and changing color over several hours. Acid stains offer limited color options, primarily earth tones like terra cotta, brown, tan, and blue-green. I couldn’t achieve bright colors or pure whites with acid stains, but the natural, aged appearance they created aligned perfectly with my industrial loft aesthetic. The results looked organic and timeless rather than obviously applied.
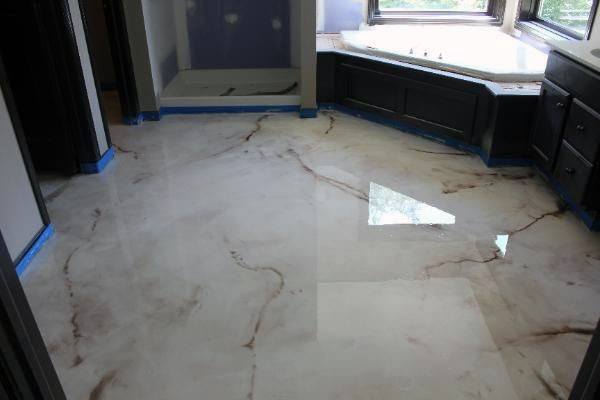
Water-based stains offered an alternative approach I considered seriously. These products contain pigments that penetrate concrete pores without chemical reactions, providing more color control and predictability. I could achieve virtually any color, including bright blues, greens, reds, or blacks that acid stains couldn’t produce. Water-based stains create a more uniform appearance with less variation, which some people prefer. I ultimately chose acid stain for my main space because I loved the organic mottling, but I used water-based stain in my bathroom, where I wanted consistent charcoal gray without variation. Understanding both options let me use each type where its characteristics worked best.
Planning Your Color Palette and Design Layout
Choosing colors proved more complex than I’d anticipated because concrete staining isn’t like painting walls. I couldn’t simply pick a color chip and expect that exact shade on my floor. Acid stain colors depend on the concrete’s composition, age, and existing stains or sealers. Two identical stains can produce completely different results on different concrete slabs. This variability meant I absolutely needed to test samples before committing to the full project.
I created a test board using a small piece of concrete with a similar composition to my floors. My concrete contractor poured a 2×2-foot sample slab that we tested with various stain colors and application techniques. We tried different dilution ratios, layering multiple colors, and varying application methods. This experimentation revealed that my concrete responded beautifully to terra cotta acid stain, creating warm browns with amber undertones and organic mottling. The sample testing cost about $200, but prevented expensive mistakes and gave me confidence in my color selection.
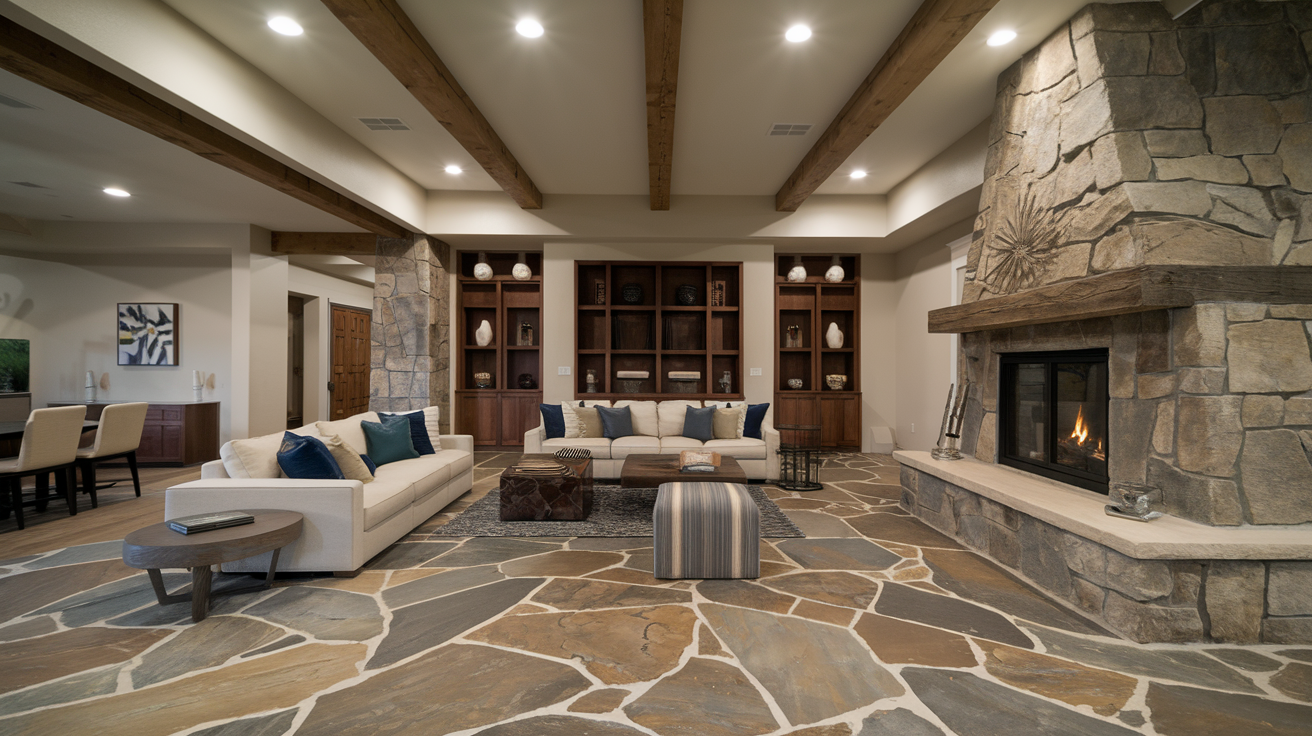
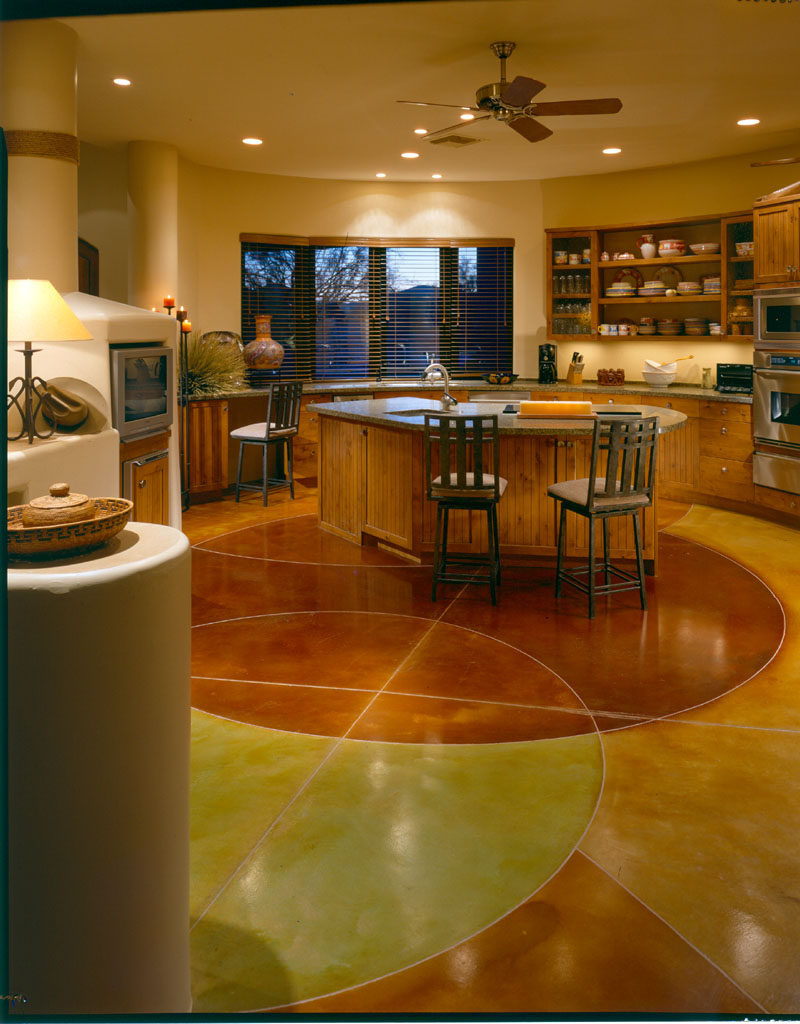
My design incorporated multiple colors to create visual zoning within my open loft space. I used terra cotta stain throughout most of the living area, then transitioned to a darker brown stain to define the dining zone, and added charcoal water-based stain in the kitchen for a more formal appearance. These color transitions happened gradually through blending and layering rather than hard lines, creating subtle definition between spaces without the visual interruption of physical borders or different flooring materials. Planning these color zones carefully before starting prevented awkward transitions and ensured cohesive flow throughout my home.

Preparing Your Concrete Surface Properly
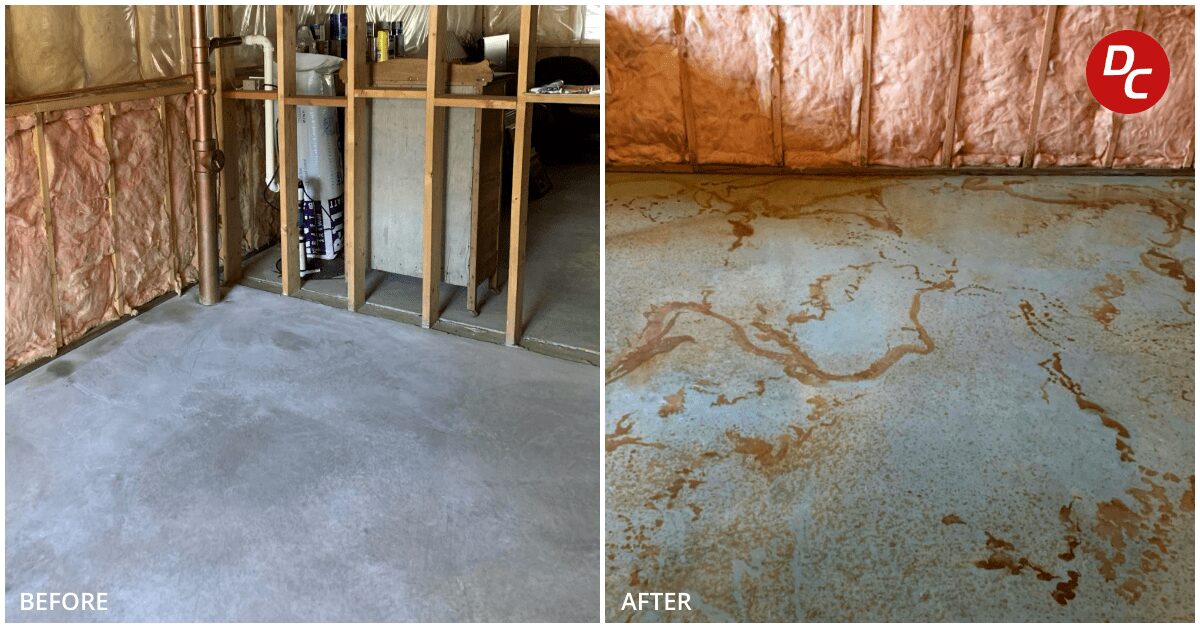
Surface preparation became the most critical phase of my project, determining whether the stain would penetrate evenly and bond permanently. My concrete had an existing sealer from the building’s commercial use, which had to be completely removed before staining could occur. We tested for sealer by sprinkling water on the floor; sealed concrete causes water to bead up rather than absorbing. My floors failed this test dramatically, with water sitting in puddles rather than soaking in.
Removing old sealer required aggressive mechanical grinding using professional equipment I rented from a tool supply company. The concrete grinder, a heavy walk-behind machine with rotating diamond disks, stripped away the sealer along with the concrete’s top layer, exposing a fresh, porous surface ready to accept stain. This process generated enormous amounts of dust despite the grinder’s vacuum attachment, and I spent two days wearing a respirator and protective gear while working through my space methodically. The rental cost $150 for the weekend, but attempting this work without proper equipment would have been impossible.
After grinding, I addressed cracks, holes, and imperfections in the concrete. Small cracks got filled with color-matched concrete patch compound, while larger damaged areas required more extensive repair. I accepted that repairs might stain slightly differently than the original concrete, creating additional character rather than flawless uniformity. We also acid-etched the entire floor after grinding to open the concrete’s pores further and neutralize any remaining contaminants. This preparation phase consumed three exhausting days but proved essential to achieving the beautiful, long-lasting results I wanted. Skipping or rushing preparation guarantees disappointment and potential failure.
Application Techniques for Professional Results
Applying the acid stain terrified me initially because the chemical reaction couldn’t be reversed or easily corrected. I practiced extensively on my test board and garage floor before attempting my living space. The application process itself was surprisingly simple. I used a pump sprayer to apply thin, even coats of stain, working in small sections and maintaining wet edges to prevent obvious lines. The stain initially looked dark and wet, then gradually changed color as the chemical reaction progressed over several hours.
I learned to embrace imperfection and variation rather than fighting for uniformity. My first section came out too perfect because I’d worked so carefully to apply even coats. The result looked flat and artificial compared to the organic mottling I’d admired in photos. For subsequent sections, I deliberately varied my application, spraying heavier in some areas and lighter in others, allowing drips and puddles in places, and even walking through wet stains to create foot traffic patterns. These “imperfections” created the depth and character that make stained concrete so appealing.
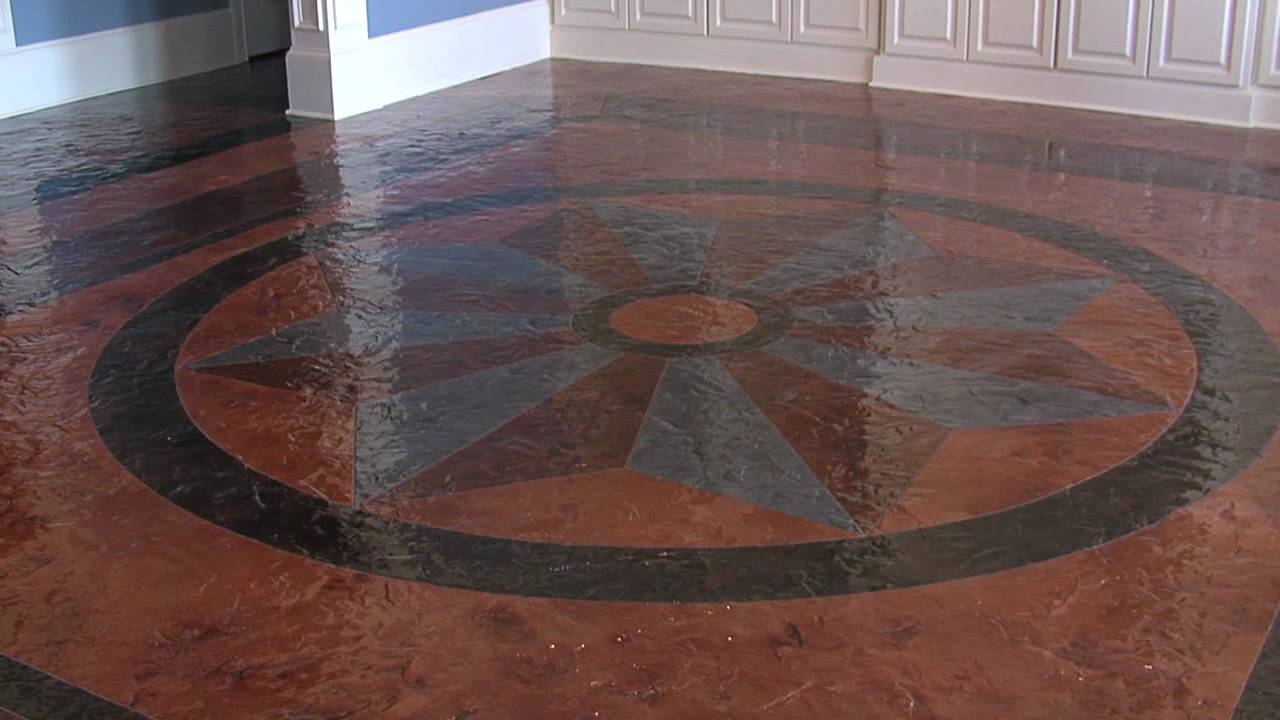
Layering multiple stain colors added complexity and richness to my floors. After the initial terra cotta stain dried completely, I applied diluted brown stain selectively in high-traffic areas and along walls, creating shadow effects andan aged appearance. This layering technique required patience as each layer needed 24 hours to complete its chemical reaction before applying the next. I also used resists, materials applied before staining that prevent stain penetration in specific areas, to create subtle geometric patterns near my entry. The creative possibilities seemed endless once I understood the basic techniques and gained confidence through practice.

Sealing and Finishing for Durability
After completing the staining process and allowing 48 hours for full curing, I needed to seal my floors to protect the stain and the concrete surface. This step proved just as important as proper preparation and staining. I researched sealer options extensively, discovering significant differences in appearance, durability, and maintenance requirements. Sealer choice dramatically impacts the floor’s final look and performance, so I took this decision seriously.
I selected a penetrating sealer followed by a topical acrylic sealer system that provided both internal protection and surface durability. The penetrating sealer soaked into the concrete, protecting it from within without changing its appearance. I applied two coats using a paint roller, allowing four hours between coats. The topical sealer came next, providing a protective surface layer with a slight sheen that enhanced the stain colors. I chose a semi-gloss finish that added depth without looking obviously plastic or reflective like high-gloss sealers can.
Application required careful attention to avoid roller marks, bubbles, or uneven coverage. I worked in small sections, maintaining wet edges and using long, smooth strokes. The first coat looked terrible with visible roller marks and cloudy areas, but the second coat evened everything out beautifully. I applied four coats total over two days, achieving the durability needed for my high-traffic loft. The sealer transformed my floors from interesting but vulnerable surfaces into practical, protected floors that handle daily life beautifully. My contractor warned that topical sealers need reapplication every 2-3 years in high-traffic areas, maintenance I’ve budgeted for and consider worthwhile given the floors’ overall affordability and beauty.

Living With and Maintaining Stained Concrete Floors
Two years into living with my stained concrete floors, I can honestly assess their real-world performance beyond the initial excitement of completion. Daily maintenance is remarkably simple. I sweep or vacuum regularly and damp mop weekly using a pH-neutral cleaner. The sealed surface resists most stains effectively, though I wipe spills promptly as a precaution. Red wine, oil, and other notoriously problematic substances have caused no permanent damage when cleaned within reasonable timeframes.
The floors’ durability has exceeded my expectations. My heavy dining table, constant foot traffic, rolling desk chair, and even dropped items haven’t damaged the sealed surface. I do use furniture pads under chair legs and area rugs in seating zones for comfort and additional protection. The concrete’s hardness means dropped glasses or dishes break more readily than on softer flooring like vinyl or carpet, something to consider if you have young children or are particularly clumsy. I’ve learned to be more careful, and the tradeoff seems worthwhile for the floors’ beauty and durability.
Temperature and comfort considerations became apparent through my first winter. Concrete floors stay naturally cool, wonderful during summer but potentially chilly in winter. I added area rugs in seating areas and bedroom zones for warmth underfoot during cold months. The thermal mass of concrete actually helps regulate indoor temperatures, staying cool in summer and retaining heat in winter once warmed. I’ve noticed lower heating and cooling costs compared to my previous apartment, though I can’t attribute this entirely to the floors. Standing for long periods while cooking or working can be hard on feet and joints, another factor to consider if you have mobility issues or spend significant time on your feet at home.
How much does staining concrete floors typically cost?
My 1,200 square foot loft cost approximately $2,400 for professional staining, including preparation, acid stain, sealer, and labor. DIY costs would be about $800-1,000 for materials and equipment rental. Professional installation typically ranges from $2-6 per square foot, depending on complexity, existing conditions, and your location. Simple single-color staining costs less, while multiple colors, patterns, or extensive repairs increase expenses. This compares very favorably to hardwood at $8-15 per square foot or quality tile at $10-20 per square foot installed.
Can I stain concrete floors in any room including bathrooms and kitchens?
Absolutely. I stained my entire loft, including the kitchen and bathroom. Properly sealed concrete resists moisture, stains, and daily wear excellently. In fact, concrete works better than hardwood in moisture-prone areas since water won’t warp or damage it. I used a water-based stain in my bathroom for a uniform appearance and applied extra sealer coats for added protection. Kitchen spills wipe away easily from the sealed surface. Just ensure proper sealing and maintain it according to manufacturer recommendations for best results in high-moisture areas.

How long does the staining process take from start to finish?
My project took about 10 days total, though actual working time was maybe 5-6 days spread across that period due to drying requirements. Preparation and grinding took 3 days. Staining required 1 day for application plus 48 hours curing. Sealing took 2 days with drying time between coats. Professional contractors often complete projects faster due to experience and multiple crew members. Plan for at least a week from start to finish, longer if extensive repairs are needed or you’re working solo.
Will stained concrete floors work with radiant floor heating?
Yes, concrete is actually ideal for radiant heating systems. The concrete’s thermal mass distributes heat evenly and retains warmth efficiently. Staining and sealing don’t interfere with radiant heating performance. I don’t have radiant heat personally, but friends who do report excellent results with stained concrete. Just ensure any heating system is installed before staining and tested thoroughly. The warmth transforms concrete’s naturally cool surface into comfortable year-round flooring. If adding radiant heat, mention it to your contractor as timing and preparation may need adjustment.

Can pet claws or furniture damage stained concrete floors?
Properly sealed concrete is incredibly durable. My friends have large dogs whose claws haven’t scratched or damaged their stained concrete. Furniture moving across the floor typically doesn’t cause damage if you use furniture pads and avoid dragging heavy items. The sealer coat can wear down in high-traffic paths over time, requiring resealing every 2-3 years, but the stain beneath remains intact and protected. This maintenance is far less intensive than refinishing hardwood. Concrete is harder than most flooring materials, making it highly resistant to damage.
What if I don’t like the results or want to change colors later?
Acid stain permanently changes the concrete through a chemical reaction, so you can’t simply wash it away. However, you can apply darker stains over lighter ones or use water-based stains to change the appearance. I’ve also seen people apply concrete overlays or microtopping products over existing stained concrete to create entirely new surfaces. Grinding off stain is possible, but labor-intensive and expensive. My advice is to test extensively before committing and choose colors you’ll love long-term. The permanence actually appeals to me as it encourages thoughtful decisions.

Best Polished Concrete Design Ideas Dallas Epoxy Pros

Stained Concrete Floors
Best Concrete Floor Ideas – Smooth Flooring Interior Designs
Unleash Your Inner Artist with Easy-to-Use Concrete Acid Stain
Best Concrete Floor Ideas – Smooth Flooring Interior Designs
Concrete Basement Floor Benefits u0026 Options – Concrete Network

Modern Concrete Floor Design Ideas To Beautify Your Home – Maple

Polished Concrete Floors Las Vegas NV Top-Rate Contractor

Related articles:
- Stained Concrete Floors Design
- Decorative Concrete Floors
- Acid Stained Concrete Floors
- Polished Concrete Floor In Bathroom
- Concrete Floor Stain And Polish
- White Mold On Concrete Floor
- Polished Concrete Floor
- Polished Concrete Floor Cleaning
- Staining Concrete Floors Indoors Yourself
- Flooring Options For Concrete Floors