When my contractor first suggested decorative concrete floors for my industrial loft renovation two years ago, I’ll admit I was skeptical. The words “concrete floors” conjured images of cold, gray warehouse spaces that felt more like parking garages than homes. But after seeing my neighbor’s stunning polished concrete with metallic accents that looked like flowing water, I was completely sold.
My research on decorative concrete has taught me that these floors offer incredible versatility, durability, and beauty that can complement any design style from ultra-modern to rustic farmhouse. The process has been challenging at times, but the results have exceeded my wildest expectations and transformed my space into something truly unique.
Exploring Stained Concrete Options
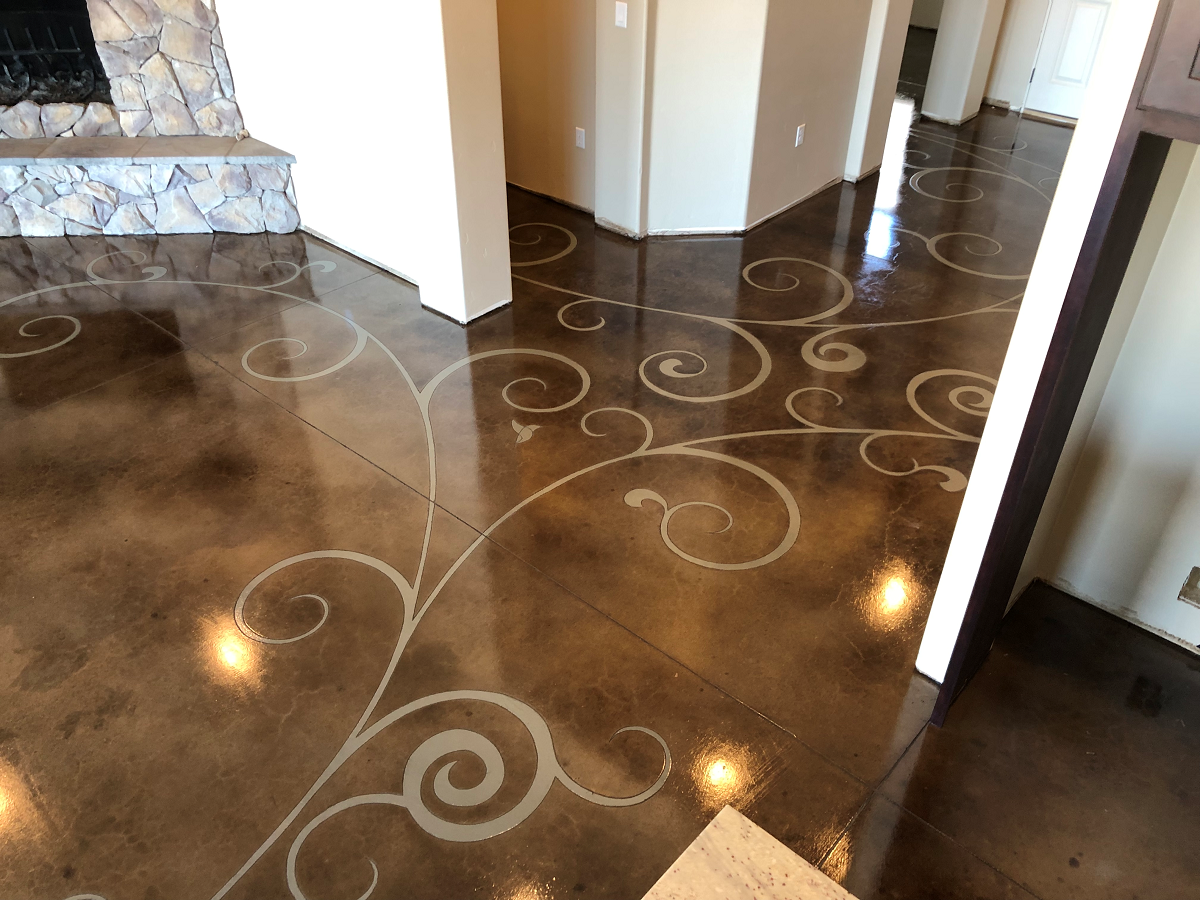
Acid staining was my first introduction to decorative concrete, and I was amazed by the rich, variegated colors it could produce on what started as plain gray concrete. When I decided to stain my basement workshop floor, I chose a warm amber acid stain that reacted with the minerals in my concrete to create beautiful, organic patterns that look like aged leather. The process fascinated me because no two areas react the same way, creating a one-of-a-kind floor with natural variation and depth. I learned that acid stains penetrate deep into the concrete rather than sitting on the surface, making them incredibly durable and fade-resistant.
Water-based stains offered me more color control and predictability when I tackled my home office flooring project. Unlike acid stains that react chemically with the concrete, water-based stains work more like paint, allowing for precise color matching and consistent results. I was able to create a sophisticated charcoal gray floor with subtle blue undertones that perfectly complemented my modern furniture and artwork. The application process was more forgiving than acid staining, and I appreciated being able to blend colors and create custom shades that matched my exact vision for the space.
Combining different staining techniques opened up endless creative possibilities that I never expected from concrete flooring. In my living room, I used acid stain as a base color and then applied water-based stain in strategic areas to create a faux marble effect that guests consistently mistake for natural stone. I also experimented with stenciling and masking techniques to create geometric patterns and borders that add visual interest without overwhelming the space. The key to successful stained concrete is understanding how different products interact and taking time to test combinations on sample areas before committing to the entire floor.
Mastering Polished Concrete Techniques
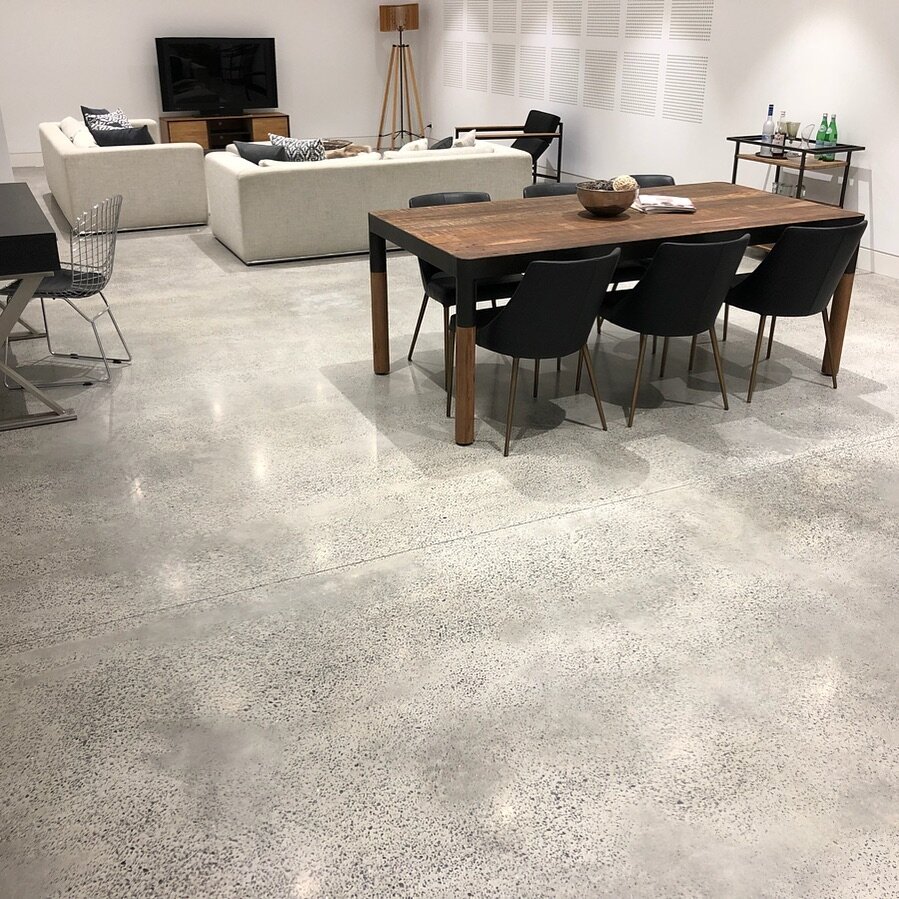
The polishing process completely transformed my understanding of what concrete floors could achieve, turning rough, porous surfaces into mirror-like finishes that rival natural stone in beauty and sophistication. I started with 30-grit diamond pads to remove surface imperfections and gradually worked up to 3000-grit for the final polish, learning that patience during each step determines the quality of the final result. The process took several days for my 800-square-foot living area, but watching the concrete gradually develop depth and clarity was incredibly satisfying. I discovered that proper densification between grinding steps is crucial for achieving that coveted high-gloss finish.
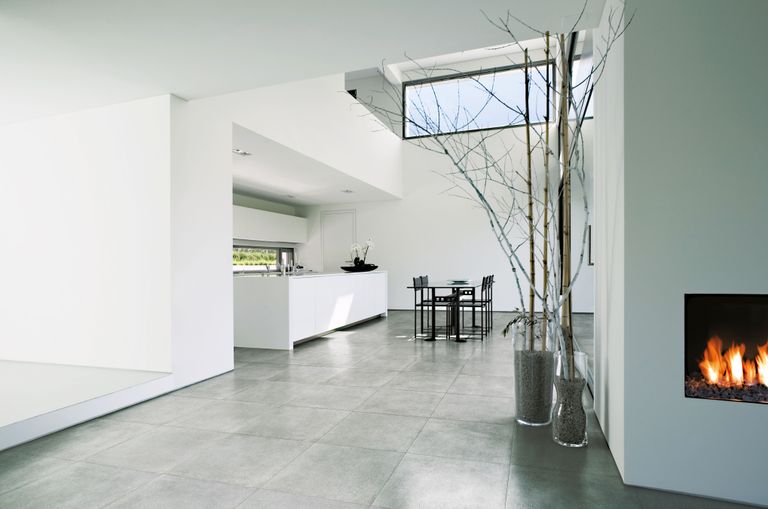
Different aggregate exposure levels create dramatically different aesthetic effects, and I experimented with various techniques to find my preferred look. A light polish that barely exposes the sand created a smooth, sophisticated surface perfect for my bedroom, while heavy grinding that revealed large decorative aggregate became the star of my kitchen floor. I learned that the concrete’s age, composition, and original finish significantly affect how it responds to polishing, and what works in one room might not be suitable for another. Understanding your concrete’s characteristics before beginning the polishing process saves time, money, and frustration.
Maintaining polished concrete requires specific techniques that differ from other flooring types, and I’ve developed a routine that keeps my floors looking showroom-perfect. I use pH-neutral cleaners designed specifically for polished concrete and avoid traditional floor waxes that can create buildup and dull the finish. Weekly dust mopping followed by damp cleaning with microfiber mops maintains the high-gloss appearance, and I reapply penetrating sealers annually to protect against stains and etching. I’ve found that immediate cleanup of spills and regular maintenance actually makes polished concrete easier to care for than many other flooring options.
Creating Stunning Stamped Patterns
Stamped concrete opened up a whole new dimension of design possibilities that I never knew existed when I decided to upgrade my patio and extend the pattern indoors through my sunroom. The variety of available patterns amazed me, from realistic stone and brick textures to wood grain and even exotic designs like fossilized leaves and shells. I chose a slate pattern for my outdoor space that seamlessly transitions to my indoor sunroom, creating visual continuity that makes both areas feel larger and more connected. The three-dimensional texture adds incredible realism that consistently fools visitors into thinking they’re looking at natural stone.
The stamping process requires precise timing and technique that I learned through careful observation of my contractor and plenty of practice on sample areas. Fresh concrete has a narrow window of workability where it’s firm enough to support the stamps but still soft enough to accept detailed impressions. I discovered that weather conditions dramatically affect this timing, with hot, dry days requiring faster work and cool, humid conditions allowing more flexibility. Proper release agent application is crucial for both achieving clean stamp impressions and creating realistic color variation that mimics natural materials.
Color integration in stamped concrete involves multiple techniques that work together to create authentic-looking results that stand up to close inspection. I used integral color in the concrete mix for the base tone, then applied colored hardener for surface durability and enhanced color depth. The release agent added realistic highlights and shadow effects that bring the stamped pattern to life. After curing, I applied antiquing stains to certain areas to enhance the natural stone appearance and create depth that makes the pattern more convincing. The layering of these color techniques creates complexity that single-color approaches simply cannot match.

Working with Decorative Overlays
Concrete overlays became my solution for transforming existing floors that were structurally sound but aesthetically outdated, particularly in my kitchen where I wanted decorative concrete but couldn’t justify removing perfectly good subflooring. These thin layers of specialized concrete can be applied over existing concrete, tile, or even plywood, opening up decorative possibilities for spaces where full concrete replacement isn’t practical or cost-effective. I was amazed at how a quarter-inch overlay completely transformed my dated tile floor into a sophisticated decorative concrete surface that looks like it was poured specifically for the space.
Self-leveling overlays proved perfect for creating smooth, consistent surfaces that serve as canvases for decorative techniques like staining, stamping, or polishing. When I tackled my guest bathroom renovation, the existing concrete floor had minor cracks and surface irregularities that would have telegraphed through any decorative treatment. The self-leveling overlay created a perfect foundation that accepted stain beautifully and polished to a consistent sheen. I learned that proper surface preparation is absolutely critical for overlay success, requiring thorough cleaning, crack repair, and sometimes mechanical abrading to ensure proper adhesion.
Spray texture overlays allowed me to create unique surface effects that would be impossible with traditional concrete pours, particularly in my home theater, where I wanted something that looked like aged limestone but needed to work over an existing concrete slab. These overlays can be built up in multiple layers and manipulated with various tools to create realistic stone textures, smooth modern finishes, or even artistic effects limited only by imagination. I experimented with different troweling techniques and found that practice on sample boards was essential for developing the muscle memory needed to create consistent, professional-looking results across large areas.

Advanced Decorative Techniques
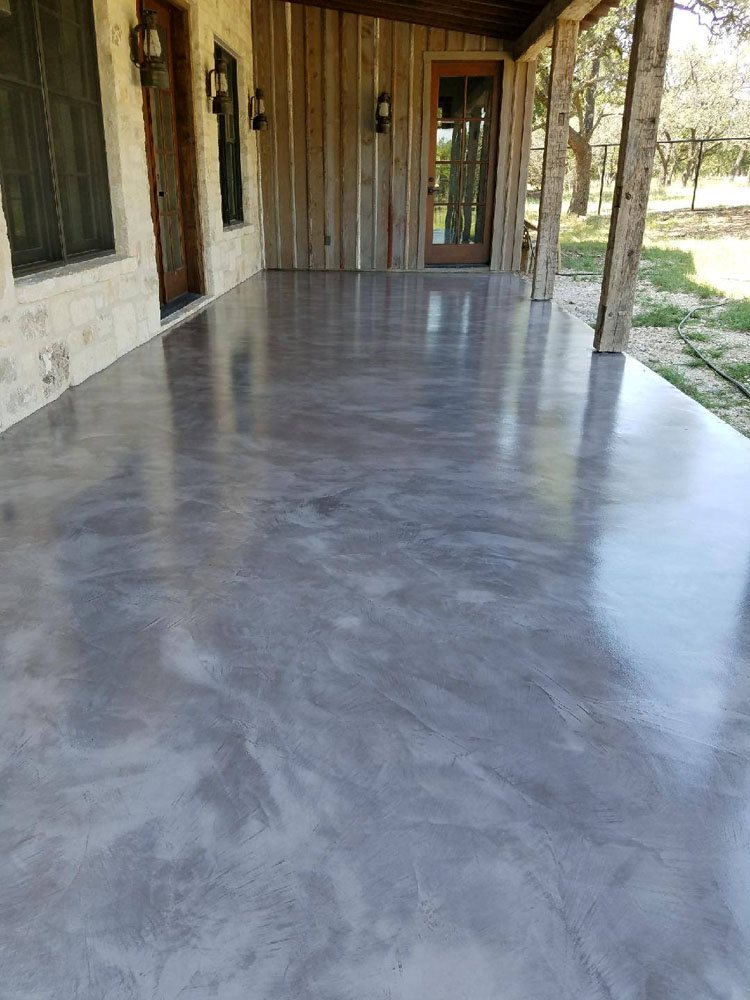
Metallic epoxy treatments introduced me to decorative possibilities that seem almost magical, transforming ordinary concrete into surfaces that look like flowing metal, deep water, or even outer space. My first attempt at metallic epoxy in my powder room created a stunning copper and gold finish that shifts and changes as you move around the room, catching light in ways that create depth and movement. The technique involves applying specially formulated metallic pigments over epoxy base coats and manipulating them with brushes, rollers, and even air to create organic, flowing patterns that can’t be replicated with other decorative methods.
Concrete engraving and saw cutting opened up precision decorative possibilities that I used to create custom borders, logos, and geometric patterns in my concrete floors. Using diamond-blade saws and specialized engraving tools, I was able to cut intricate designs directly into cured concrete, then fill the cuts with contrasting colors or leave them as shadow lines for subtle texture effects. In my home office, I created a company logo engraved into the floor and filled with colored epoxy that serves as both decoration and conversation starter. The permanence and precision of engraved designs make them perfect for spaces where you want decorative elements that will never wear away.
Aggregate seeding and broadcast techniques allowed me to customize the appearance of my concrete by incorporating decorative elements directly into the surface during the pour or finishing process. I experimented with everything from colored glass chips and metallic flakes to natural stones and even recycled materials like crushed shells or ceramic pieces. The key is understanding how different materials behave during the finishing process and choosing aggregates that complement rather than compete with other decorative elements. These techniques work particularly well in transitional spaces where you want to tie together different areas with common decorative themes.
Maintenance and Long-Term Care
Developing proper cleaning routines for decorative concrete floors requires understanding how different treatments and sealers respond to various cleaning products and methods. I learned this lesson the hard way when I used an acidic cleaner on my stained concrete floor and created permanent etching that required professional restoration. Now I use only pH-neutral cleaners specifically designed for decorative concrete, and I test any new products in inconspicuous areas before using them on the entire floor. My daily maintenance routine includes dust mopping to remove abrasive particles and weekly damp mopping with appropriate cleaners to maintain the floor’s appearance and protective sealer.
Sealer maintenance became a crucial part of preserving my decorative concrete floors’ appearance and protecting my investment in these beautiful surfaces. Different decorative treatments require different sealer types and reapplication schedules, ranging from annually for high-traffic areas to every three years for spaces with lighter use. I keep detailed records of when each area was sealed and what products were used, making it easier to maintain consistency and ensure proper protection. I’ve learned to recognize early signs of sealer wear, like increased staining susceptibility or loss of sheen, and address them before damage occurs to the underlying decorative treatment.
Repair and restoration techniques for decorative concrete require specialized knowledge and materials that differ significantly from standard concrete repair methods. When my polished concrete developed a small crack, I learned that proper repair involves not just filling the crack but also blending the repair material with the surrounding decorative finish. I keep touch-up materials on hand for each of my decorative concrete areas and have developed relationships with contractors who specialize in decorative concrete restoration. Understanding when DIY repairs are appropriate versus when professional intervention is needed has saved me from expensive mistakes and maintained the professional appearance of my floors.

How durable are decorative concrete floors compared to other flooring options?
In my experience, properly installed and maintained decorative concrete floors are incredibly durable and long-lasting. I’ve had heavy furniture, dropped tools, and high foot traffic on my floors for over two years with minimal wear. The key is proper installation with adequate sealers and following maintenance routines. Unlike carpet or hardwood that may need replacement every 10-15 years, my decorative concrete should last decades with proper care. However, the concrete substrate must be structurally sound, and installation quality significantly affects longevity.
Are decorative concrete floors cold and uncomfortable to walk on?
This was one of my biggest concerns initially, but I’ve found the temperature issue to be manageable with proper planning. Concrete does feel cooler than carpet or wood, but radiant heating systems work excellently with concrete and make the floors quite comfortable. In moderate climates, the thermal mass actually helps regulate room temperature. I use area rugs in seating areas for comfort and warmth. The hardness takes some adjustment, but supportive footwear and strategic rug placement address comfort concerns for daily living.

What’s the typical cost range for decorative concrete floors?
Costs vary dramatically based on complexity and location, but I can share my experience. Basic stained concrete ran about $3-5 per square foot, including materials and labor. Polished concrete was $5-8 per square foot, while complex stamped or overlay work reached $8-15 per square foot. These costs compare favorably to high-end tile or hardwood when you factor in durability and longevity. I always get multiple quotes and budget extra for unexpected substrate issues that can add to costs during installation.
Can decorative concrete floors be installed over existing flooring?
Yes, in many cases, though it depends on the existing flooring and chosen decorative technique. I successfully used overlays over existing tile and concrete with excellent results. However, carpet, vinyl, or loose materials must be removed first. The existing floor must be structurally sound and properly prepared for overlay adhesion. Some techniques, like polishing, require existing concrete, while others, like overlays, work over various substrates. Professional evaluation is essential to determine feasibility and proper preparation methods for your specific situation.
How do decorative concrete floors handle moisture and spills?
Properly sealed decorative concrete handles moisture very well, which is why I chose it for my kitchen and bathrooms. Quality sealers create excellent barriers against water, oils, and most household spills when cleaned promptly. However, unsealed concrete is porous and will stain, so proper sealing and maintenance are crucial. I’ve found that most spills wipe up easily from sealed surfaces, and even stubborn stains can often be removed with appropriate cleaners. Regular sealer maintenance is essential for continued moisture resistance.
Are there any design limitations with decorative concrete floors?
The design possibilities are surprisingly vast, though some limitations exist. Color choices in acid staining are limited to earth tones, though water-based stains offer broader palettes. Complex patterns may require skilled contractors and increase costs significantly. Repairs to decorative concrete can be challenging to blend seamlessly with existing finishes. However, I’ve been amazed at the creative possibilities, from realistic stone and wood looks to unique artistic effects. The key is working with experienced contractors who understand both the possibilities and limitations of different techniques.

Plain Concrete Tiles – Living Concrete

Floor & Decor: High Quality Flooring and Tile Floor tile design

Related articles:
- Stained Concrete Floors Design
- Decorative Concrete Floors
- Acid Stained Concrete Floors
- Polished Concrete Floor In Bathroom
- Concrete Floor Stain And Polish
- White Mold On Concrete Floor
- Polished Concrete Floor
- Polished Concrete Floor Cleaning
- Staining Concrete Floors Indoors Yourself
- Flooring Options For Concrete Floors