When I first mentioned installing epoxy flooring in my living room, my friends thought I’d lost my mind. Epoxy in a living space? Wasn’t that just for garages and industrial warehouses? But after years of dealing with worn hardwood that showed every scratch from my dogs and stained carpet that never looked clean, I was ready for something dramatically different.
I’d seen stunning epoxy installations online and became fascinated by the possibilities. Now, two years after taking the plunge, my epoxy living room floor remains one of the best renovation decisions I’ve ever made, and I’m excited to share everything I learned through this unconventional journey.
Why I Chose Epoxy Over Traditional Flooring Options
My decision to use epoxy came after exhausting research into every flooring type imaginable. I’d replaced my hardwood twice in ten years, spending thousands each time, only to watch my large dogs scratch it within months. The carpet felt perpetually dirty despite professional cleanings, and I was tired of worrying about spills. The tile seemed cold and uninviting for a living space. When I stumbled across residential epoxy installations, something clicked. Here was a flooring solution that could withstand my lifestyle while looking absolutely stunning.
The durability factor sold me immediately. Epoxy creates a seamless, rock-hard surface that can handle whatever life throws at it. I have three dogs, two teenagers, and a habit of rearranging furniture frequently. My research showed that properly installed epoxy could last 20 years or more without the wear patterns that plagued my previous floors. The chemical resistance meant I could stop panicking about wine spills during dinner parties, and the scratch resistance promised freedom from the constant anxiety my dogs’ nails had caused me for years.
Cost comparison surprised me in epoxy’s favor. Quality hardwood installation quotes ranged from $8 to $15 per square foot, and I’d be replacing it again in five to seven years based on my track record. Premium epoxy installation cost me $7 per square foot for my 400 square foot living room, totaling $2,800. When I factored in the longevity and virtually zero maintenance costs, epoxy became the clear financial winner. Plus, I loved that I could achieve a completely custom look, something impossible with pre-manufactured flooring products that limited my design vision.
Selecting My Design and Color Scheme
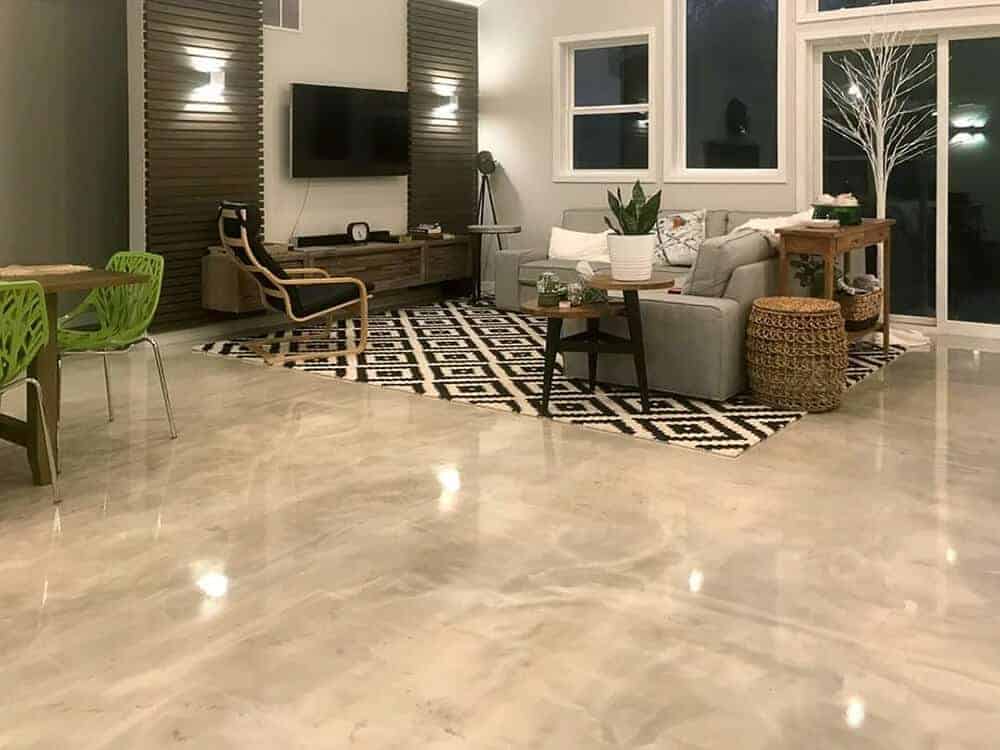
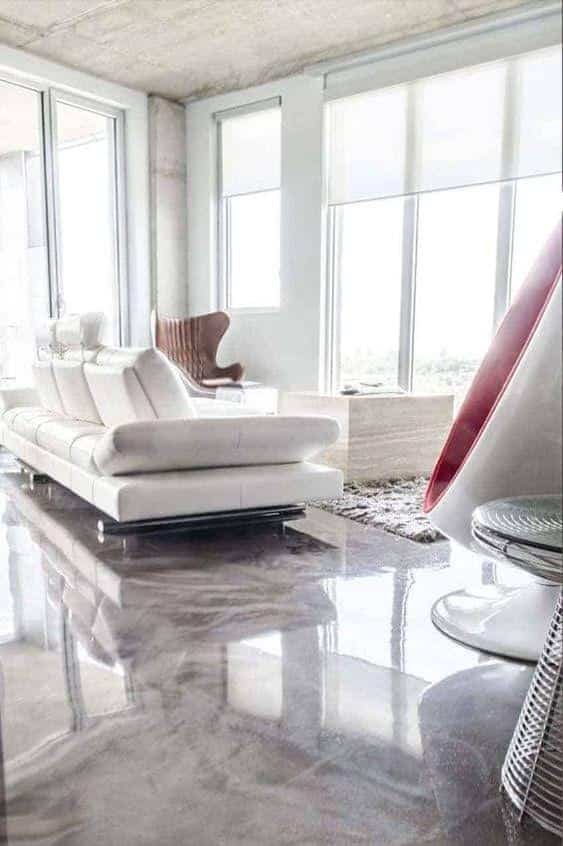
Choosing my epoxy design became an obsessive creative project that I thoroughly enjoyed. Unlike picking from limited flooring samples, epoxy offered unlimited possibilities through colors, flakes, metallics, and patterns. I spent weeks browsing installation photos, saving favorites, and identifying what resonated with my style. I created a Pinterest board with over 200 images, gradually narrowing down to the aesthetic that felt right for my space, a sophisticated metallic blend that would complement my modern-industrial decor.
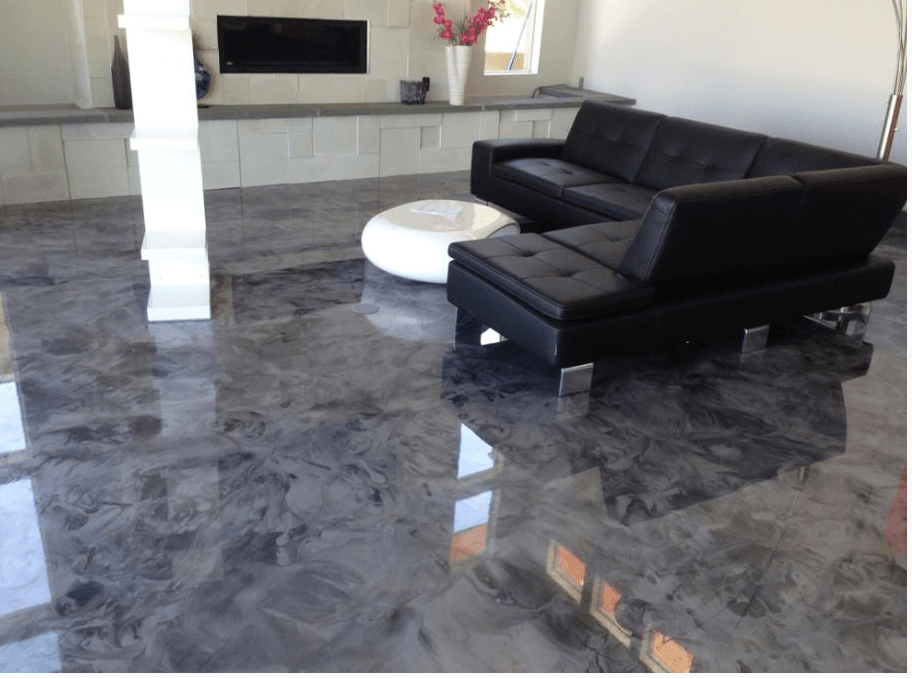
I ultimately selected a metallic epoxy system in deep charcoal with silver and copper undertones. The installer showed me sample boards, but I knew the organic, unrepeatable patterns created during application meant my floor would be unique. We did test patches in my garage first, experimenting with different metallic pigment ratios until we achieved the perfect balance. Seeing those samples in various lighting conditions throughout the day helped me confirm my choices before committing to my entire living room.
Color psychology played a bigger role than I expected. I initially considered bright white for a clean, gallery-like feel, but my installer cautioned that white shows every speck of dirt and can feel sterile in living spaces. Darker colors hide dirt better but can make rooms feel smaller. I landed on my charcoal-based metallic specifically because it offered practical dirt-hiding benefits while the metallic shimmer kept it from feeling heavy. The copper accents picked up warm tones from my furniture and created visual interest without overwhelming the space.

The Installation Process and What to Expect
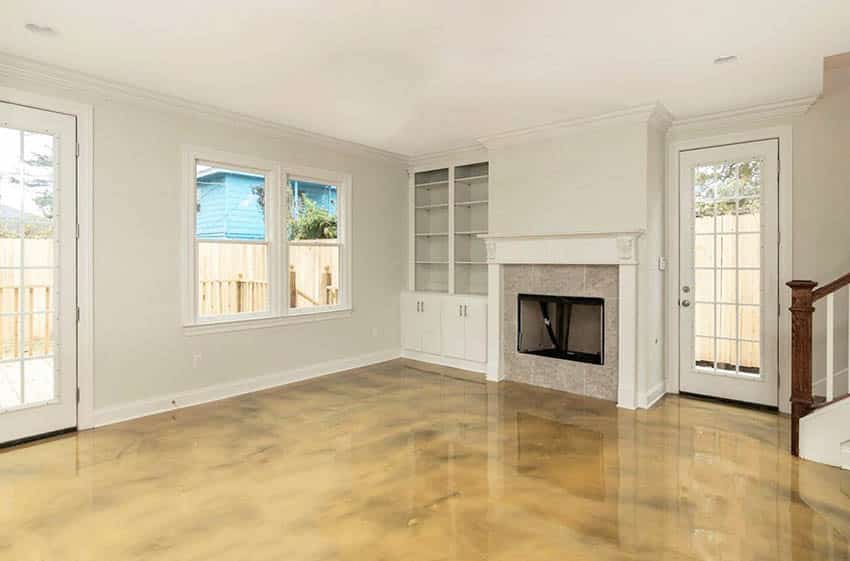
Preparation for my epoxy installation was far more involved than I anticipated. My installer spent the first full day just prepping the concrete subfloor after we removed the old hardwood. This involved grinding down high spots, filling cracks and divots, and thoroughly cleaning every trace of dust and debris. I learned that proper surface preparation makes or breaks an epoxy installation. Any contamination, moisture, or imperfection in the substrate telegraphs through the finished floor, so this tedious prep work proved essential.
The actual epoxy application happened over three intensive days. Day one involved applying a primer coat that sealed the concrete and provided a bonding surface. Day two brought the base coat in my chosen charcoal color, followed immediately by the metallic pigments that my installer manipulated with special tools to create flowing, organic patterns. Watching this artistic process fascinated me; the installer essentially painted my floor using trowels, rollers, and even air blowers to move the metallics. Each movement created unrepeatable effects.
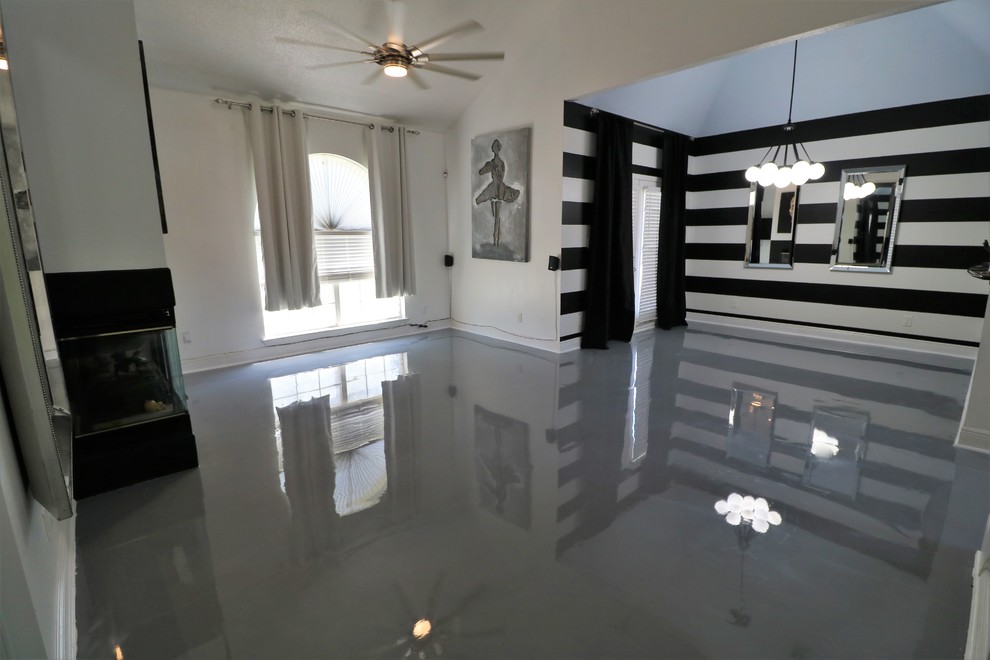
The final topcoat application on day three provided the protective layer and gorgeous glossy finish. My installer applied two coats of clear, high-gloss polyurethane epoxy, waiting six hours between coats. He explained that this topcoat provided UV protection, prevented yellowing, and created the glass-like surface I’d admired in photos. The entire process required me to stay out of the room for five days total, three for installation and two for complete curing. I camped in my bedroom during this time, but the disruption was worth it when I finally saw the stunning finished result.
Living With Epoxy: Daily Realities and Maintenance
My daily experience with epoxy flooring has been overwhelmingly positive, though it differed from traditional flooring in ways I needed to adapt to. The surface is incredibly hard, which means dropped items sometimes break more easily than on carpet or wood. I learned this the hard way when a favorite coffee mug shattered spectacularly. Now I’m more careful, and I’ve added area rugs in high-traffic zones both for comfort and to protect dishes and glassware from my occasional clumsiness.
Cleaning became ridiculously easy compared to my previous floors. I sweep or vacuum daily to remove dust and dog hair, which shows clearly on the glossy surface. For deeper cleaning, I simply mop with warm water and a pH-neutral cleaner. No special products, no worrying about water damage, no scrubbing grout lines. Spills wipe up instantly without staining, something I appreciate daily. My teenage daughter spilled an entire glass of red wine last month, and it cleaned up completely with paper towels; no trace remained.
The glossy surface does show dust and pet hair more than textured flooring, requiring more frequent sweeping than my old hardwood. I invested in a good robot vacuum that runs daily, which solved this minor annoyance. I also learned that the hard surface amplifies sound more than carpet or wood, creating more echo in my living room. I addressed this with acoustic panels on one wall and thick area rugs, which actually improved the overall aesthetic while solving the acoustics issue. These small adjustments let me fully enjoy the benefits without the drawbacks bothering me.
Addressing Common Concerns and Misconceptions
Before installation, I worried extensively about epoxy looking too industrial or cold in a residential living space. This concern vanished the moment I saw my finished floor. The metallic finish created depth and warmth that felt sophisticated rather than warehouse-like. Choosing residential-appropriate colors and finishes made all the difference. I’ve had numerous guests assume my floor is polished concrete or even marble, never guessing it’s epoxy until I tell them. The key is working with an installer experienced in residential applications who understands creating inviting spaces.
Temperature concerns initially worried me since I’d read that epoxy feels cold underfoot. In reality, epoxy conducts temperature similarly to tile or concrete. It feels cool in summer, which I actually enjoy, and room temperature in winter when my heating runs. I installed radiant floor heating beneath my epoxy during the installation, an option my installer recommended. This addition cost an extra $1,200 but transformed my floor into a warm, luxurious surface during cold months. Without radiant heat, area rugs provide warmth where people typically walk or sit barefoot.
The permanence of epoxy initially seemed daunting. Unlike flooring you can replace relatively easily, removing epoxy requires grinding it off, a messy, expensive process. However, two years in, I view this permanence as a benefit rather than a drawback. I’m not tempted to chase flooring trends or worry about wear patterns forcing premature replacement. The timeless look I chose still feels fresh and modern. If I ever tire of the appearance, I can apply a new epoxy layer over the existing one, essentially refinishing rather than replacing. This long-term thinking shifted my perspective from anxiety to appreciation.
Cost Breakdown and Long-Term Value
My total investment in epoxy flooring came to $4,000 for 400 square feet, averaging $10 per square foot. This included professional installation at $7 per square foot plus the radiant heating system upgrade at $3 per square foot. Materials alone would have cost about $2 per square foot if I’d done it myself, but I knew professional installation was essential for the quality finish I wanted. I paid slightly more than basic carpet or vinyl but significantly less than quality hardwood or tile, while getting superior durability.
Breaking down my costs further, the prep work represented about 30 percent of labor time and cost, the actual epoxy application another 40 percent, and finishing work, including topcoats, the remaining 30 percent. My installer itemized everything clearly, helping me understand where my money went. I declined some optional add-ons like decorative flakes or 3D effects that would have increased costs by $2 to $4 per square foot. My metallic system hit the sweet spot of impressive appearance without excessive expense.
Long-term value assessment makes epoxy even more attractive financially. After two years, my floor looks identical to installation day. Zero repairs, zero refinishing, minimal maintenance costs beyond basic cleaning supplies. I calculated that if this floor lasts even 15 years, my annual cost is just $267, or 67 cents per square foot yearly. Compare that to carpet replacement every 7 years at $2,000 or hardwood refinishing every 5 years at $1,500, and the value proposition becomes compelling. The durability and longevity transform the initial investment into genuine long-term savings.
Is epoxy flooring really practical for living spaces with kids and pets?
Absolutely, and that’s exactly why I chose it. My three dogs and two teenagers put my floor through serious abuse daily, and it shows zero wear after two years. The seamless surface means no grout lines to trap dirt or spaces for pet accidents to seep through. Scratches from dog nails don’t happen like they did on hardwood. Spills wipe up instantly. The durability exceeds any other flooring I’ve owned, making it ideal for active households.
Does epoxy flooring feel cold and uncomfortable in a living room?
The temperature is similar to tile, cool but not uncomfortable. I added radiant floor heating during installation, which keeps it warm in winter and was absolutely worth the extra cost. Without radiant heat, area rugs in seating zones provide warmth and comfort. Summer coolness actually feels refreshing. The hardness took minor adjustment. I wear slippers more than I used to, but the comfort level is fine for normal living room activities.
How difficult is it to maintain epoxy floors compared to other options?
Maintenance is incredibly easy; the easiest flooring I’ve ever had. Daily sweeping or vacuuming removes dust and pet hair. Weekly mopping with pH-neutral cleaner keeps it looking perfect. No special products needed, no worrying about water damage, no periodic refinishing. Spills wipe up without staining. The glossy surface does show dust more than textured floors, so I vacuum more frequently, but the trade-off for virtually maintenance-free performance is absolutely worth it.
Can you really get custom colors and designs, or are options limited?
The design possibilities are nearly unlimited, which I loved. I worked with my installer to create a custom metallic blend in charcoal with silver and copper accents. You can do solid colors, color blends, metallics, flakes, patterns, and even 3D effects. I created test samples to dial in exactly what I wanted. Every epoxy floor is unique because of how the materials interact during application. This customization was a huge advantage over choosing from limited pre-made flooring samples.

What happens if the epoxy gets damaged or I want to change it later?
Epoxy is incredibly durable, and I haven’t had any damage in two years despite heavy use. If damage occurs, professionals can repair sections by grinding and reapplying epoxy to blend with the existing floor. If I want to change the look eventually, new epoxy can be applied over the existing layer after proper prep. Removal requires grinding, which is messy and expensive, so I chose a timeless design I’d love long-term rather than trendy colors.
Is DIY epoxy installation realistic, or do you need professionals?
I strongly recommend professionals for living spaces. DIY epoxy kits exist, but achieving a flawless finish requires expertise, especially with metallics and decorative techniques. Surface preparation is critical and labor-intensive. Application timing is precise, and mistakes are difficult to fix. My installer’s experience ensured perfect results without the stress, bubbles, or uneven areas that plague DIY attempts. For garages, DIY might work, but for your living room, professional installation is worth every penny.
Epoxy Floor (Ultimate Design Guide) – Designing Idea
Related articles: