When I bought my beach house three years ago, I knew I needed flooring that could handle sandy feet, salty air, and the constant humidity that comes with coastal living. I researched countless options before landing on laminate flooring, and I haven’t regretted it for a second.
The right coastal laminate can give you that breezy, weathered look while standing up to the unique challenges of seaside homes. Let me walk you through everything I learned about choosing and living with laminate flooring in a coastal environment.
Understanding Moisture Resistance in Coastal Climates
Living near the ocean taught me that moisture isn’t just about spills; it’s in the air constantly. I chose laminate with a high AC rating and water-resistant core because regular laminate simply won’t cut it in humid environments. The moisture seeps into everything, and I needed flooring that wouldn’t warp or buckle when humidity levels spike during the summer months.
I specifically looked for laminate with sealed edges and a waterproof backing. My installer explained that the edges are where water typically penetrates, causing swelling and damage. The sealed-edge technology creates a barrier that’s been crucial for my entryway, where wet swimsuits and sandy towels are everyday occurrences.
What surprised me most was learning about vapor barriers. I had a moisture barrier installed underneath my laminate, which was essential given how close I am to the water. This extra layer prevents moisture from rising through the subfloor, something that’s particularly important in older coastal homes like mine, where the foundation might not be perfectly sealed.

Choosing the Right Coastal Color Palette
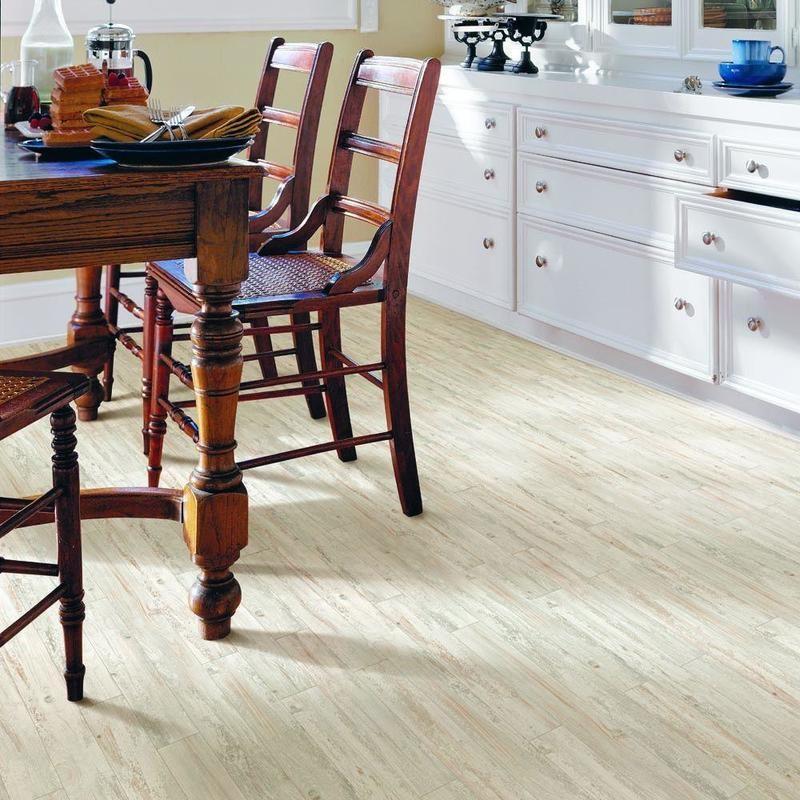
I went with a weathered driftwood gray laminate that perfectly captures that coastal aesthetic I was after. The beauty of laminate is how convincingly it mimics natural wood, especially the sun-bleached, salt-worn look that’s impossible to achieve with actual hardwood in this environment. My floors look like they’ve been seaside for decades, but they’re completely synthetic and durable.
The color choice was strategic, too. Light, whitewashed tones hide sand better than dark floors, which was a game-changer for me. Before I installed this flooring, every grain of sand showed up on my old tile. Now, the sandy residue blends in naturally, and I’m not constantly sweeping throughout the day when the kids track in beach debris.
I also considered how the flooring would look with natural light streaming through my large windows. The pale gray has beautiful variation in the planks, so it doesn’t look flat or artificial. When sunlight hits it, you can see subtle grain patterns and texture that create depth. This attention to realistic detail makes my laminate flooring look far more expensive than it actually was.

Installation Considerations for Beach Houses
I hired a professional installer even though laminate is considered DIY-friendly. In coastal areas, you need someone who understands acclimation and expansion gaps. My installer left the laminate planks in my home for 72 hours before installation, allowing them to adjust to the humidity levels. This step is crucial and often skipped, leading to problems down the line.
The expansion gaps around the perimeter were larger than standard installations, about half an inch instead of the typical quarter inch. Coastal homes experience more temperature and humidity fluctuations, so the flooring needs room to expand and contract. My baseboards hide these gaps perfectly, but knowing they’re there gives me peace of mind during humid summer months.
I also insisted on a floating floor installation rather than glue-down. This method allows the entire floor to move as one unit, which is ideal for the shifting conditions in beach houses. If moisture does get underneath somehow, a floating floor is much easier to address and repair. Three years in, I haven’t had a single issue with buckling or separation between planks.

Texture and Finish for Coastal Durability
I chose a hand-scraped texture that feels slightly rough underfoot, and this was one of my smartest decisions. The textured surface provides traction when floors get wet from dripping swimsuits or ocean spray. Smooth laminate would have been dangerous in my high-traffic areas near the beach entrance, but this texture prevents slipping while still being comfortable to walk on barefoot.
The finish I selected has a matte appearance rather than high-gloss. Glossy finishes show every scratch and water spot, which would drive me crazy given how much activity my floors see. The matte finish with a light sheen looks natural and hides the minor wear that comes with coastal living. It maintains that organic, driftwood appearance that makes my space feel relaxed and beachy.
I was also careful about the wear layer thickness. I went with a 12mm thick laminate with a robust wear layer because coastal homes see a lot of foot traffic, especially during summer when we have constant visitors. The thicker wear layer means better resistance to scratches from sand particles, which act like tiny abrasives every time someone walks across the floor.

Maintenance and Cleaning in Sandy Environments
My cleaning routine is simple but consistent. I sweep or vacuum daily because sand is abrasive and can scratch the wear layer over time if left to grind underfoot. I use a soft-bristle broom or a vacuum with a hard-floor setting, never anything that might scratch the surface. This five-minute daily habit has kept my floors looking new despite constant sandy invasions.
For deeper cleaning, I use a damp mop with laminate-specific cleaner once a week. I learned the hard way that excess water is laminate’s enemy, even with water-resistant varieties. My mop is barely damp, never soaking wet, and I make sure to dry any areas where water might pool. This careful approach has prevented any edge swelling or moisture damage.
I keep doormats at every entrance, especially the one leading from the beach. These mats catch most of the sand before it makes it onto my laminate floors. I shake them out daily and wash them weekly. I also have a basket by the door for flip-flops, encouraging everyone to remove sandy footwear before walking through the house. These small habits make a huge difference in floor longevity.

Long-Term Performance in Salt Air Environments
After three years of coastal living, my laminate floors still look fantastic. I was worried about the salt air causing degradation, but quality laminate is surprisingly resistant to corrosion. Unlike real wood or even some vinyl products, my laminate hasn’t shown any signs of salt damage or discoloration from the marine environment surrounding my home.
The biggest test came during hurricane season when humidity levels spiked to uncomfortable levels. My floors didn’t buckle, separate, or show any moisture damage. The investment in high-quality, moisture-resistant laminate and proper installation paid off completely. I’ve had neighbors with hardwood floors who weren’t as fortunate, dealing with warping and expensive repairs.
I do inspect my floors seasonally, checking the edges near exterior doors and any areas where moisture might accumulate. So far, everything remains tight and secure. The click-lock system has held up beautifully, with no gaps forming between planks. For anyone considering laminate in a coastal home, I can confidently say it’s a smart, durable choice that delivers both beauty and performance.

Can laminate flooring really handle the humidity in coastal areas?
Yes, but you need to choose the right product. I selected water-resistant laminate with sealed edges and a waterproof core. Standard laminate won’t work in high-humidity environments. Look for products specifically rated for moisture resistance, and don’t skip the vapor barrier during installation.
How does laminate compare to luxury vinyl for beach houses?
I considered both extensively. Laminate gave me a more authentic wood look and feel underfoot, which was important for my aesthetic. Vinyl is more waterproof, but quality laminate with proper moisture resistance has performed perfectly for me. The decision comes down to your specific needs and which look you prefer.

Is laminate slippery when wet from beach water?
Not if you choose textured laminate like I did. The hand-scraped surface provides excellent traction even when damp. Smooth laminate would definitely be slippery, so texture is crucial for coastal homes where wet floors are inevitable. I’ve never had any slipping incidents despite constant beach traffic.
How often do I need to replace laminate in a coastal home?
Quality laminate should last 15 to 25 years, even in coastal conditions. I’m three years i,n and my floors look brand new. The key is choosing durable laminate with a thick wear layer and maintaining it properly. Daily sweeping and careful cleaning will extend the life considerably.

Does sand really damage laminate flooring over time?
Sand can be abrasive if left to grind underfoot, but regular sweeping prevents damage. I sweep daily and use doormats at every entrance. After three years of beach living, my floors show no signs of scratching or wear. The thick wear layer on quality laminate handles sand better than I expected.
What’s the best way to transition from laminate to tile in bathrooms?
I used T-molding transition strips between my laminate and bathroom tile. These strips are specifically designed for this purpose and look seamless. Make sure there’s proper expansion space between the two flooring types. My installer handled this perfectly, and the transitions are barely noticeable while allowing for natural floor movement.

Coastal Pine 10 mm Thick x 4-7/8 in. Wide x 47-7/8 in

Pallet Lot of (13 Cases, 104 Total Pieces) of PERGO XP Coastal
Related articles: