When I remodeled my bathroom, I was torn between authentic ceramic tile and more practical flooring options that wouldn’t drain my budget or require professional installation. After researching for weeks, I discovered vinyl flooring that mimics real tile perfectly while offering incredible durability and waterproof protection. My decision to go with luxury vinyl tile transformed my perspective on what’s possible in a bathroom renovation, proving that you don’t need to choose between beauty and practicality.
Through the installation process, countless discussions with flooring specialists, and now living with my vinyl tile for three years, I’ve learned invaluable lessons about selecting, installing, and maintaining this underrated flooring option. I’m excited to share everything I’ve discovered to help you make the best choice for your bathroom.
Understanding Vinyl Flooring Types and Options
When I started investigating vinyl flooring options, I quickly discovered that “vinyl” encompasses several different products, each with distinct characteristics and performance levels. Luxury vinyl plank, luxury vinyl tile, and traditional vinyl sheet flooring all exist under the vinyl umbrella, but they differ significantly in appearance, durability, and installation requirements. I learned that luxury vinyl tile specifically mimics the look of real ceramic or stone tile remarkably well, making it my ideal choice for a bathroom that would look authentic while performing better than traditional tile.
I discovered that luxury vinyl tile comes in multiple construction styles, each offering different benefits. Rigid core vinyl has added stability and resists moisture penetration even better than standard LVT, making it exceptional for bathrooms. My flooring specialist explained that rigid core has a mineral-based core layer that provides superior waterproofing compared to traditional vinyl’s felt backing.
Click-together installation systems made the product even more appealing since they don’t require adhesive and allow for easier removal or replacement if needed. I spent considerable time comparing samples from different manufacturers, learning to evaluate thickness, wear layer quality, and overall construction.
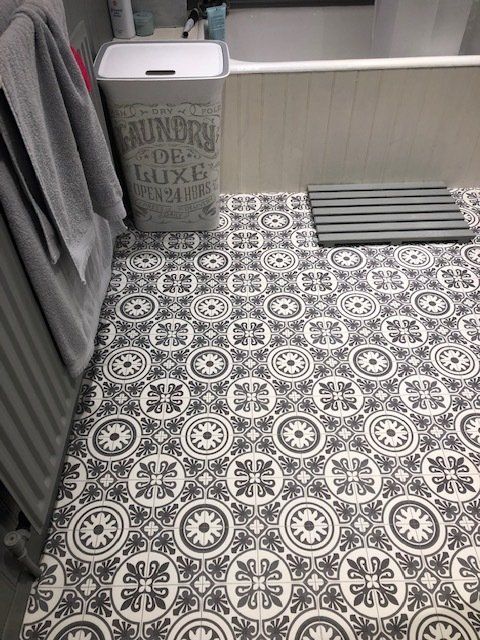
The aesthetic variety available in vinyl tile flooring astonished me. Manufacturers now produce vinyl that replicates everything from rustic slate to sophisticated marble, glossy porcelain to matte stone finishes. I examined dozens of samples in my actual bathroom lighting, discovering how dramatically light affects the appearance of each option.
I ultimately chose a luxury vinyl tile that resembled pale gray marble with subtle veining, providing sophistication without the maintenance headaches of actual marble. The realistic design made me genuinely excited about my bathroom floor, something I never expected to feel about flooring.
Measuring, Planning, and Preparing Your Bathroom Space
Before I could install my vinyl tile, I needed to carefully measure my bathroom and plan the layout to maximize visual appeal and minimize awkward partial tiles. I learned that vinyl flooring installation begins long before placing the first piece, requiring thoughtful preparation and planning. I mapped out my entire bathroom floor, determining where full tiles would look best and where partial tiles would be least noticeable. This planning prevented the common issue of ending up with thin strips of tile along walls that looked odd and awkward.
I discovered that my subfloor condition was crucial to successful vinyl installation. Unlike ceramic tile, which requires perfectly level surfaces, vinyl is more forgiving, but significant low spots or high spots still create problems. My flooring installer identified a few minor depressions in my original tile and used a self-leveling compound to create a smooth, even surface. The investment in proper subfloor preparation prevented future problems like buckling or gaps between tiles that would compromise the waterproof seal. I learned that rushing this step creates problems that haunt you for years.
I also needed to remove existing flooring and understand what was underneath. My original ceramic tile required professional removal, which I’m grateful I didn’t attempt myself, since I learned the process can be destructive to subfloors if done incorrectly. My contractor identified that the subfloor underneath was solid and suitable for vinyl installation with minimal preparation. Understanding my starting point allowed me to budget appropriately and avoid surprise complications during the installation process.

Installation Methods and DIY Versus Professional Options
When my flooring specialist discussed installation approaches, I realized that luxury vinyl tile with click-together systems actually allows for DIY installation in ways that ceramic or stone tile don’t. The click systems eliminate the need for mortar and grout, making it possible for homeowners to install vinyl themselves if they’re comfortable with precise measurement and cutting. I watched several instructional videos and consulted with my flooring supplier about whether attempting DIY installation made sense for my situation. Ultimately, I hired a professional, but not because I couldn’t do it myself, more because getting the perfect layout and ensuring waterproof sealing at transitions mattered to me.
My flooring installer demonstrated techniques that I realized would require practice and skill to execute perfectly. He used specialized tools to cut vinyl around fixtures, installed waterproof membranes at seams and under transitions, and took meticulous care with layout to ensure the finished floor looked professionally installed. Watching his process taught me that while vinyl installation is more forgiving than ceramic tile, professionals still deliver results that DIY often can’t match. The relatively modest additional cost for professional installation seemed worthwhile given the importance of proper waterproofing in a bathroom.
I learned that if I had attempted DIY installation, I should have invested in quality tools, including a vinyl cutter, spacers, and a roller for sealing seams properly. I would have also needed to understand waterproofing requirements, especially around the toilet base and shower are,a where moisture penetration could cause problems. Several friends who installed vinyl themselves reported success with careful attention to detail and preparation. The key difference between successful DIY and professional installation seems to be taking time to do things properly rather than rushing the process to save money.

Waterproofing and Moisture Protection Features
When I selected my luxury vinyl tile, I learned that waterproofing capability varied significantly between products and that bathroom-specific options exist for excellent reasons. My rigid core luxury vinyl tile included a built-in moisture barrier that prevents water penetration through the tile itself. However, I discovered that true waterproofing requires attention to seams, transitions, and areas around fixtures where water can penetrate even perfect tiles. My installer used waterproof membranes under the entire floor and sealed all seams with specialized waterproof caulking designed specifically for vinyl flooring.
I became deeply interested in understanding how water can damage vinyl flooring that appears waterproof on the surface. Water can penetrate under tiles through seams or transitions, saturating the subfloor and creating conditions for mold growth and structural damage. My installer explained that proper waterproofing involves creating a complete barrier system rather than relying solely on the vinyl’s surface resistance. He installed a waterproof membrane under my entire floor, sealed the seams with waterproof caulk, and ensured that water around the toilet and shower couldn’t penetrate underneath the vinyl.
This comprehensive waterproofing approach gives me confidence that my bathroom floor will remain protected even if I occasionally spill water or experience minor leaks. The vinyl’s own water resistance handles normal bathroom moisture exposure beautifully, but the professional waterproofing system handles scenarios where water contacts the floor in greater quantities. I learned that this distinction between a product’s inherent properties and a complete installation system explained why professional installation mattered so much in a bathroom environment where moisture is unavoidable.

Maintenance and Long-Term Care Strategies
Once my vinyl tile floor was installed, I discovered that maintenance is remarkably simple compared to other flooring options. Regular vacuuming removes dust and dirt, while occasional damp mopping with pH-neutral cleaner keeps the floor looking beautiful. I’ve avoided harsh chemicals and abrasive scrubbing pads, learning that vinyl responds best to gentle care despite being quite durable. The maintenance routine I established takes minimal effort while keeping my floor looking nearly as beautiful as the day it was installed, something I genuinely appreciate when life gets busy.
I learned to address spills and moisture promptly, wiping up standing water rather than allowing it to sit on the floor. While vinyl resists moisture far better than many materials, standing water can eventually seep into seams or transition areas, particularly if water sits there for extended periods. My habit of wiping up spills prevents problems and maintains the floor’s appearance. I also discovered that maintaining proper bathroom ventilation through an exhaust fan reduces humidity levels, protecting not just the floor but also the entire bathroom space from moisture-related issues.
Over three years, my vinyl floor has performed beautifully with essentially zero maintenance beyond regular cleaning. I’ve experienced no visible wear in high-traffic areas, no discoloration, and no water damage despite normal bathroom moisture exposure. The floor still looks so good that guests often express surprise when I tell them it’s vinyl rather than actual tile. This durability, combined with minimal maintenance effort, makes me genuinely happy with my choice. I’ve learned that investing in quality vinyl and professional installation creates a floor that truly lasts for years while looking fantastic the entire time.

Cost Comparison and Value Proposition
When I calculated the total cost of my vinyl flooring project, I was astonished by the value proposition compared to ceramic tile or natural stone alternatives. My luxury vinyl tile material cost approximately three dollars per square foot, and professional installation added another two to three dollars per square foot, depending on complexity. My total bathroom flooring project cost around twelve hundred dollars for a modest-sized space. In comparison, ceramic tile would have cost nearly double that amount, and natural stone would have been substantially more expensive while requiring greater maintenance.
I discovered that the cost difference extends beyond initial material and installation expenses. Ceramic tile requires grout sealing, ongoing grout maintenance, and eventual repairs when grout deteriorates. Natural stone demands regular sealing and specialized cleaning products. My vinyl floor requires none of this ongoing expense, saving me money throughout the years I own my home. I also learned that vinyl installation is faster than tile, which means labor costs are lower and the project is completed more quickly, minimizing disruption to my home.
Beyond financial considerations, I valued the durability and longevity of vinyl flooring as worthwhile investments. My floor has a wear layer rated for decades of use, and the rigid core construction resists dents and damage far better than I expected. I’ve had furniture moved across the floor without visible marks, and normal bathroom use hasn’t created any wear patterns. This durability means my floor will likely remain beautiful and functional for fifteen to twenty years or more, making the per-year cost remarkably reasonable when amortized over the floor’s lifespan.
Design Aesthetics and Style Versatility
One of my favorite discoveries about vinyl tile flooring is the incredible variety of design options available that allow for genuine creative expression. I spent weeks examining hundreds of samples, considering not just the style but how each option would interact with my bathroom’s lighting, wall color, and overall design scheme. I realized that vinyl tile’s affordability and visual quality meant I could choose exactly what I wanted aesthetically without compromise or fear of wasting money on an expensive choice I might later regret.
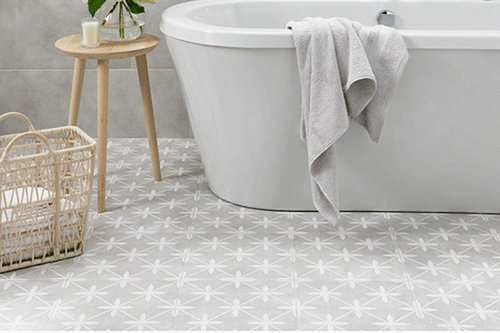
I selected my pale gray marble-look vinyl because it complemented my white subway tile walls and created a sophisticated, cohesive bathroom aesthetic. The realistic marble veining made the floor visually interesting without being distracting, and the neutral color made my bathroom feel larger and more serene. I discovered that I could have chosen rustic slate, classic black and white patterns, natural stone looks, or even bold contemporary patterns, depending on my design preferences. The vinyl market offers essentially every aesthetic imaginable, democratizing beautiful flooring design for anyone with a bathroom to renovate.
My choice to use realistic marble-look vinyl allows my bathroom to look like I invested significantly in authentic marble without the maintenance headaches, cost, or practical concerns. Guests compliment my flooring, assuming it’s real marble, until I reveal the secret. This ability to achieve a high-end aesthetic at moderate cost has transformed how I feel about my bathroom renovation. I learned that vinyl flooring allows creative expression and aesthetic satisfaction that shouldn’t be underestimated when deciding on bathroom finishes.
Victorian Tile Effect Sheet Vinyl Flooring Cushioned Kitchen

Vinyl flooring ideas vinyl flooring, flooring, vinyl sheet

Related articles: