When I started researching flooring options for my home renovation, I’ll admit I had outdated ideas about vinyl. I remembered the thin, cheap-looking sheets from my childhood that curled at the edges and showed every imperfection. Modern vinyl flooring completely changed my perspective.
After installing luxury vinyl plank in my kitchen, vinyl tile in my bathroom, and sheet vinyl in my laundry room, I’ve become a true believer in this versatile material. Let me share everything I learned about modern vinyl flooring, from understanding the different types to installation tips and long-term performance in real-world conditions.
Understanding Modern Luxury Vinyl Plank and Tile
My introduction to modern vinyl began when a friend showed me her new kitchen floor. I genuinely thought it was real hardwood until she told me otherwise. Luxury vinyl plank, or LVP as it’s commonly called, has evolved dramatically from the vinyl of decades past. These planks feature multiple layers, including a photographic layer that mimics wood grain with stunning realism, a wear layer that protects against scratches and stains, and a core layer that provides stability and sometimes waterproofing. The technology behind modern vinyl creates flooring that looks and feels remarkably like natural materials.
I spent weeks in flooring showrooms comparing different vinyl products and learning about the variations. Luxury vinyl tile, or LVT, offers the same technology in tile formats that replicate stone, ceramic, or concrete. The planks I chose for my kitchen measured 7 inches wide by 48 inches long, mimicking the proportions of real hardwood planks. Each plank had unique grain patterns and color variations, just like natural wood. Some even featured texture that felt like wood grain under my fingers. I was genuinely impressed by how far vinyl technology had advanced since my last encounter with this material.
The construction quality varies significantly across price points, which I learned through careful comparison. Budget vinyl under $2 per square foot often has thinner wear layers that won’t hold up long-term and less realistic printing. Mid-range options at $3-5 per square foot offer excellent value with adequate wear layers and convincing appearance. Premium vinyl at $6-8 per square foot features the thickest wear layers, most realistic visuals, and sometimes attached underlayment padding. I chose mid-range vinyl for most of my home, splurging on premium only in my high-traffic kitchen where durability mattered most.
Exploring Waterproof and Water-Resistant Options
The waterproof capability of modern vinyl absolutely sold me on the material. My previous kitchen had laminate flooring that swelled and buckled when my dishwasher leaked, requiring expensive replacement. I was determined not to repeat that mistake. I learned that not all vinyl is created equal when it comes to water resistance. Traditional vinyl and some basic LVP products are water-resistant, meaning they can handle surface moisture, but prolonged exposure to water can still cause problems, especially at seams and edges.
True waterproof vinyl features a core material that won’t absorb water or swell even with extended exposure. WPC, which stands for wood plastic composite, uses a combination of wood pulp and plastic that’s completely waterproof. SPC, or stone plastic composite, uses limestone and plastic for an even denser, more stable waterproof core. I chose SPC vinyl for my bathroom and kitchen because these rooms face significant moisture exposure. The sales associate explained that SPC’s rigid core also provides better dimensional stability, meaning planks won’t expand or contract with temperature changes.
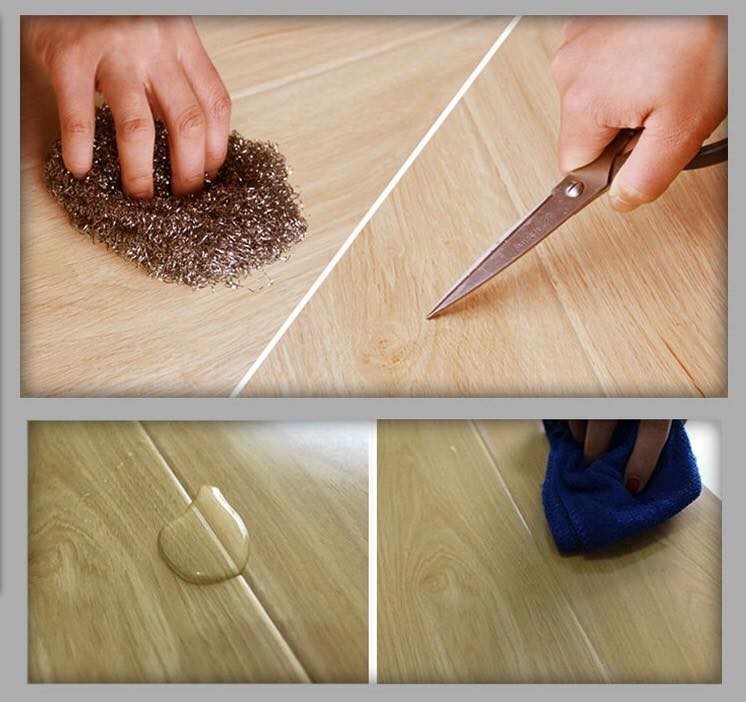
Installing waterproof vinyl in my bathroom was one of my smartest renovation decisions. I can mop freely without worrying about water seeping into seams. When my son overflowed the tub during bath time, water sat on the floor for 20 minutes before I discovered it. I panicked, remembering the laminate disaster, but the vinyl was completely fine. I simply wiped up the water and continued with my evening. That real-world test proved the waterproof claims weren’t just marketing. For anyone with kids, pets, or moisture-prone rooms, I can’t recommend waterproof vinyl strongly enough.

Comparing Installation Methods for Different Skill Levels
One major advantage of modern vinyl is the variety of installation methods available, accommodating different skill levels and budgets. I researched three main options: glue-down, loose-lay, and click-lock floating floors. Glue-down vinyl requires spreading adhesive on the subfloor and pressing planks into it, creating a permanent installation. This method works best for commercial applications or areas with heavy traffic, but it’s messy and requires more skill. I eliminated this option immediately because I wanted DIY-friendly installation.
Click-lock floating floors became my chosen method after watching installation videos and consulting with flooring experts. These planks have tongue-and-groove edges that click together without glue or nails. The entire floor floats above the subfloor with a thin underlayment beneath, providing cushion and sound dampening. I installed my kitchen floor myself over one weekend, and the click-lock system made the process surprisingly straightforward. Each plank locked into the previous one with a satisfying click that confirmed proper connection. The most challenging aspect was cutting planks to fit around cabinets and doorways.
Loose-lay vinyl offers another DIY-friendly option that I used in my small laundry room. These planks have a tacky backing that grips the subfloor through friction rather than mechanical clicks or adhesive. Installation is incredibly simple; you literally just lay planks down in a staggered pattern. However, loose-lay works best in smaller rooms where planks won’t shift during use. I wouldn’t recommend this method for large spaces or high-traffic areas. The installation took me about two hours for my 6×8 laundry room, making it perfect for quick weekend projects.

Selecting Styles That Match Your Design Aesthetic
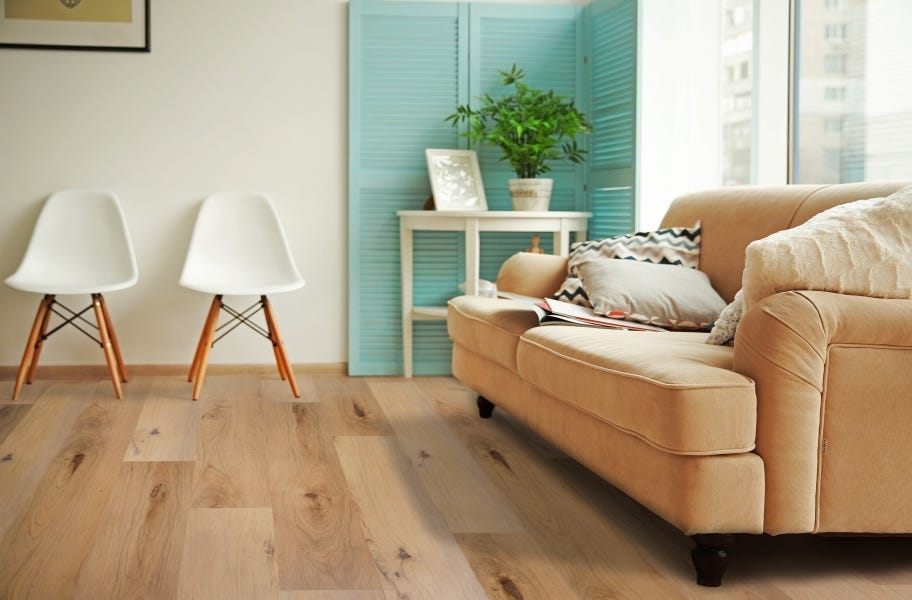
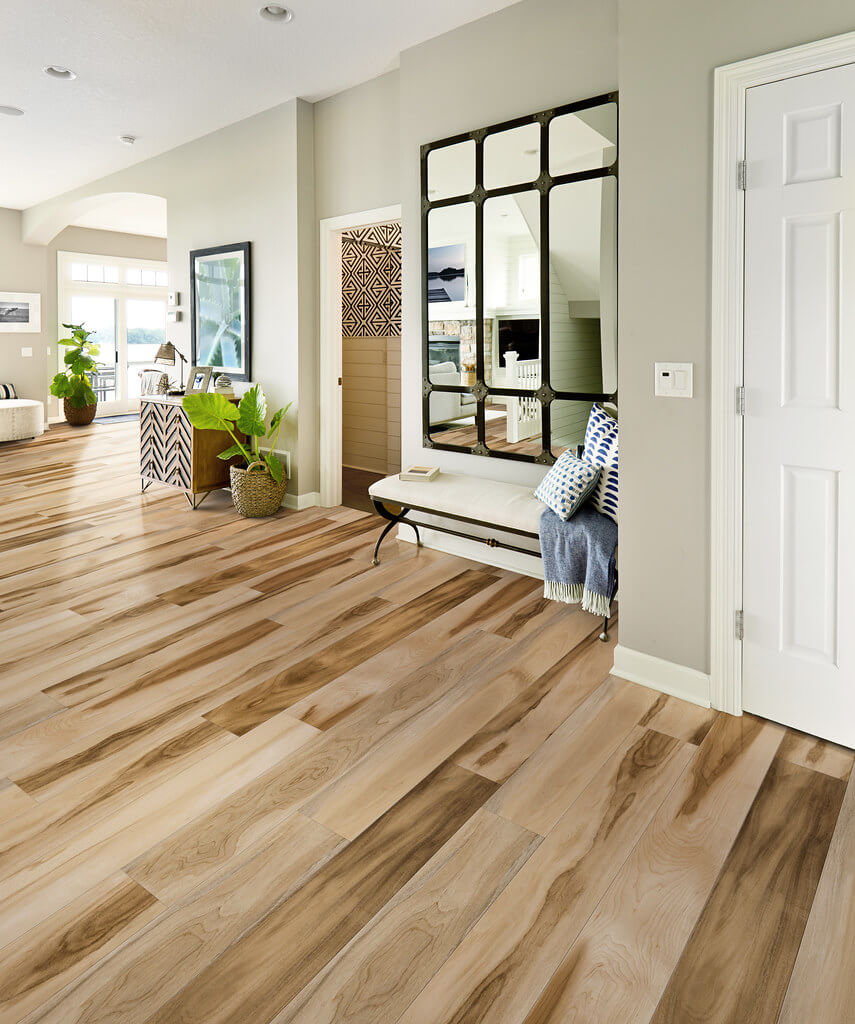
The style options in modern vinyl absolutely amazed me when I started shopping. I found realistic wood looks in every species imaginable, from light oak and maple to dark walnut and exotic bamboo. Stone tile options replicated marble, slate, travertine, and concrete. Some patterns featured geometric designs or artistic effects I’d never seen before. The variety meant I could achieve virtually any aesthetic without the cost and maintenance of natural materials. My biggest challenge became narrowing down options rather than finding something I liked.
I chose a weathered oak look in medium brown tones for my kitchen. The planks featured subtle color variation with lighter and darker streaks mimicking natural wood aging. The embossed texture followed the wood grain pattern, creating a realistic visual and tactile experience. I paired this warm wood-look floor with white cabinets and butcher block countertops, creating a modern farmhouse aesthetic I’d been envisioning. The vinyl delivered the look perfectly while offering practical benefits like waterproofing and easy maintenance that real hardwood couldn’t match.
For my bathroom, I selected vinyl tile that replicates Carrara marble. The white background with gray veining looks incredibly authentic, and the matte finish prevents the fake shiny appearance that cheaper vinyl sometimes has. Each tile has unique veining patterns, just like real marble. I saved thousands compared to actual marble while gaining waterproof properties and a warmer surface that’s more comfortable underfoot. My guests consistently compliment the floor, often surprised when I tell them it’s vinyl. The realistic appearance proves modern vinyl can absolutely hold its own in well-designed spaces.
Preparing Subfloors for Successful Installation
I learned through experience that proper subfloor preparation makes the difference between professional-looking results and disappointing outcomes. My first DIY vinyl installation in the laundry room went smoothly because the concrete subfloor was relatively level and smooth. However, my kitchen presented challenges with an old plywood subfloor that had seen better days. I spent an entire weekend preparing that subfloor before laying a single vinyl plank, and that preparation proved essential for the final result.
The subfloor must be clean, dry, level, and structurally sound for vinyl installation. I swept and vacuumed thoroughly, then checked for level using a long straightedge. Any high or low spots greater than 3/16 inch over 10 feet need correction. I used floor leveling compound to fill low areas and a belt sander to reduce high spots. This tedious work tested my patience, but I reminded myself that vinyl conforms to the subfloor beneath it. Any imperfections would telegraph through, creating visible ridges or valleys in the finished floor.
I also addressed a few soft spots where the plywood had water damage. I cut out the damaged sections and installed new plywood patches, securing them with construction adhesive and screws. I filled seams and screw holes with floor patch compound, creating a smooth, uniform surface. Finally, I installed 6-mil plastic sheeting as a moisture barrier over the entire subfloor, overlapping seams by 6 inches and taping them securely. This vapor barrier prevents moisture from below from reaching the vinyl, which could cause problems even with waterproof products. The preparation took longer than the actual vinyl installation, but it ensured professional results that have held up beautifully.

Maintaining and Protecting Your Vinyl Investment
Living with vinyl flooring for two years has taught me practical maintenance lessons that keep my floors looking new. Daily maintenance is remarkably simple compared to hardwood or tile. I sweep or vacuum regularly to remove dirt and grit that could scratch the surface. For my kitchen, I sweep after meal prep and before bed to prevent tracked-in debris from creating wear patterns. The low-maintenance nature of vinyl has saved me significant time compared to my previous hardwood floors that required special cleaners and regular refinishing.
Weekly cleaning involves damp mopping with a vinyl-specific cleaner or just warm water with a few drops of dish soap. I avoid harsh chemicals, abrasive scrubbers, and excessive water that might seep into seams over time. A microfiber mop works perfectly, leaving floors clean without excessive moisture. I learned the hard way not to use steam mops, which many vinyl manufacturers specifically warn against. The heat can damage the wear layer and potentially cause planks to separate. My neighbor ignored this advice and now has visible damage in her vinyl floor from steam cleaning.
Protection strategies have kept my vinyl looking pristine despite daily family life with kids and pets. I placed felt pads under all furniture legs to prevent scratches when moving chairs or tables. Entry mats at doors trap dirt before it gets tracked onto vinyl. I use area rugs in high-traffic zones and under my dining table to protect against concentrated wear. When we moved heavy appliances during a recent kitchen update, I laid cardboard paths to prevent damage. These simple protective measures cost almost nothing but have preserved my vinyl’s appearance far beyond my expectations. The floors still look nearly new despite constant use.

How much does modern vinyl flooring cost per square foot installed?
My costs varied by room and product quality. For materials, I paid $4.50 per square foot for premium SPC vinyl in my kitchen, $3.25 per square foot for mid-grade vinyl in my bathroom, and $2.75 per square foot for basic waterproof vinyl in my laundry room. Professional installation quotes ranged from $2-4 per square foot, depending on room complexity and installer experience. I installed everything myself except the kitchen, where I paid $3 per square foot for professional installation. Total costs, including underlayment and trim, averaged $6-8 per square foot for DIY and $8-12 per square foot professionally installed.
Is luxury vinyl plank durable enough for high-traffic areas and pets?
My vinyl has exceeded durability expectations despite two large dogs and heavy kitchen traffic. The key is selecting an adequate wear layer thickness. I chose a 20-mil wear layer for my kitchen, and it shows zero scratches after two years. My dogs’ nails click on the floor, but they haven’t caused any damage. The waterproof properties handle occasional accidents perfectly. I clean up spills immediately and haven’t experienced any staining. The vinyl resists denting from dropped items far better than my previous laminate. For high-traffic and pet households, I recommend a 12-mil minimum wear layer thickness, 20-mil for maximum durability.

Can vinyl flooring be installed over existing floors?
Sometimes, I successfully installed vinyl over old ceramic tile in my laundry room. The tile provided a stable, level surface that worked perfectly under vinyl. However, vinyl can’t go over carpet, loose tile, or damaged subfloors. The existing surface must be clean, dry, level, and structurally sound. I wouldn’t install over old vinyl unless it’s fully adhered without bubbles or tears. When in doubt, remove old flooring to ensure proper installation. My installer removed old linoleum from my kitchen before installing new vinyl, which added $200 to the project but ensured proper results.
How does vinyl flooring perform in basements with moisture issues?
Waterproof vinyl is excellent for basements, and I installed it in my partially below-grade family room. The waterproof core prevents moisture absorption from concrete subfloors, which is crucial in basements. I installed 6-mil plastic sheeting as a vapor barrier over the concrete before laying vinyl. The floor has performed perfectly for 18 months without any moisture-related problems. However, vinyl won’t solve existing moisture issues; you must address water intrusion problems before installing any flooring. If your basement has active water problems or standing water, fix those issues first. Properly installed waterproof vinyl over dry concrete works beautifully.

What’s the difference between vinyl and laminate flooring?
I’ve installed both, and they’re completely different materials. Laminate has a fiberboard core that’s not waterproof; it swells and is damaged if water penetrates the seams. Vinyl, especially waterproof types, handles water exposure without damage. Laminate typically feels harder underfoot and can be noisier, while vinyl has some give and dampens sound better. Laminate often looks slightly more realistic for wood patterns, but premium vinyl has nearly closed that gap. Vinyl wins for moisture-prone areas, homes with pets or kids, and anyone wanting worry-free maintenance. Laminate costs slightly less but lacks vinyl’s practical advantages.
How long will modern vinyl flooring last in a typical home?
Quality vinyl should last 15-20 years with proper care, according to manufacturers and my installer. My floors are only two years old, so I can’t personally verify longevity yet, but they show zero wear so far. The wear layer thickness directly impacts lifespan; thicker layers last longer. My 20-mil kitchen floor should outlast the 12-mil bathroom floor. I’ve seen 10-year-old vinyl in friends’ homes that still looks good with proper maintenance. Factors affecting lifespan include quality level, wear layer thickness, traffic levels, and maintenance practices. Professional installation and proper subfloor preparation also extend the lifespan significantly.
Vinyl Flooring Cambridge Trading Qatar

Grandismo® Rigid Core Click Vinyl Flooring 1m2 – LVT – Grey – 4mm

Flooring solutions Tarkett Qatar Tarkett
Related articles: