When I finally decided to tackle my dingy, oil-stained garage floor last summer, I knew I wanted a solution that looked professional but didn’t require hiring contractors or dealing with messy epoxy coatings. After researching countless options, I discovered interlocking garage floor tiles and honestly wished I’d known about them years earlier.
The transformation took just one weekend, cost less than I expected, and completely changed how I use my garage space. Now it’s not just a place to park cars, it’s a functional workshop, exercise area, and space I’m actually proud to show visitors. Let me walk you through everything I learned about selecting, installing, and living with interlocking garage floor tiles.
Understanding the Different Types of Interlocking Tiles
I started my research thinking all garage tiles were basically the same, but I quickly discovered significant differences in materials and performance. Rigid PVC tiles, often called hard plastic tiles, offer the most durable option for heavy vehicle traffic. These thick tiles resist hot tire pickup, where rubber from tires can stick to softer flooring materials. I chose rigid PVC tiles rated for 25,000 pounds per square inch, more than enough for my SUV and occasional motorcycle parking.
Flexible PVC tiles provide a softer, more comfortable surface that’s perfect if you spend time standing or working in your garage. My neighbor installed flexible tiles in his workshop area, and I noticed immediately how much easier they are on your feet and knees during extended projects. These tiles cost slightly less than rigid options, typically $3-5 per square foot compared to $4-7 for rigid tiles. However, they can show tire marks more easily and may not hold up as well under heavy rolling loads like floor jacks or toolboxes.
Polypropylene tiles represent the budget-friendly option that still delivers impressive performance. I considered these initially because they cost just $2-4 per square foot, making them attractive for covering large garage spaces economically. They’re lighter weight and easier to cut than PVC tiles, but they’re also more prone to cracking in extreme cold. Living in Minnesota, I ultimately chose PVC for better cold-weather performance, but polypropylene works beautifully in moderate climates and for lighter-duty applications like craft rooms or home gyms.

Selecting Colors, Patterns, and Design Options
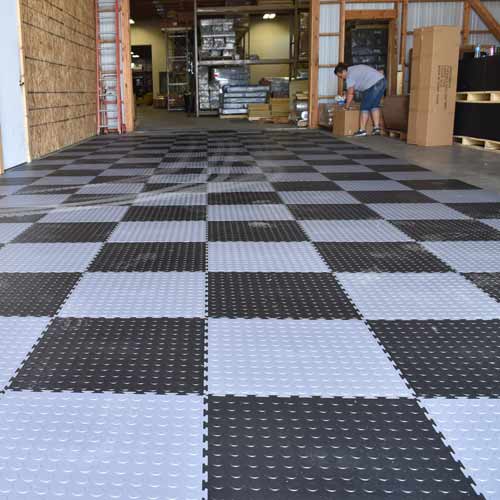
Color selection proved more fun than I anticipated. I initially planned on basic gray because it seemed practical and safe. However, when I saw the range of available colors, from bold racing stripes to subtle stone patterns, I got more creative. I chose a checkerboard pattern using charcoal gray and slate blue tiles that gives my garage a custom, high-end look. The pattern helps define different zones, with solid gray under my workbench and the checkerboard in the main parking area.
Coin-top versus diamond-plate textures was another decision I hadn’t expected to make. Coin-top tiles feature a raised circular pattern that provides excellent traction and hides dirt effectively. Diamond-plate tiles mimic metal tread plate and offer a more industrial aesthetic that I absolutely love. I went with diamond-plate because it coordinates beautifully with my metal tool cabinets and gives the space a professional garage workshop vibe. Both textures perform similarly, so this decision came down purely to aesthetic preference.
I learned that lighter colors show every oil drip and tire mark, while darker colors camouflage stains but show dust more obviously. My blue and gray combination strikes a nice balance, looking clean without requiring constant maintenance. Some manufacturers offer tiles with special topcoats that resist staining and make cleanup easier. I splurged an extra $0.50 per square foot for this coating on my parking area tiles, and it’s proven to be worth every penny. Spilled oil wipes away easily without leaving permanent marks on the surface.

Preparing Your Garage Floor for Installation
Floor preparation turned out to be more important than I realized. I assumed I could just snap tiles together over my existing concrete, but proper prep work ensures long-term success. I spent an entire Saturday cleaning my garage floor thoroughly, starting with sweeping, then using a concrete degreaser on oil stains, and finally scrubbing with a stiff brush. I rented a pressure washer for $50 to remove stubborn dirt and oil that had penetrated the concrete over the years of use.
Moisture testing proved essential before installation. I taped plastic squares to various spots on my garage floor and checked them after 24 hours. Condensation under the plastic indicates moisture issues that need addressing before installing tiles. My concrete showed no moisture problems, but if yours does, you’ll need to apply a concrete sealer or moisture barrier first. Skipping this step can lead to mold growth, tile lifting, or other problems down the road that are expensive and frustrating to fix.
I also had to address several cracks in my concrete floor. Small hairline cracks don’t matter much, but larger cracks wider than 1/4 inch should be filled to prevent the tiles from settling unevenly. I used concrete crack filler that cost $12 per tube and took about an hour to apply. Once everything dried, I checked the floor level using a long straight edge. My floor had a few low spots that I filled with self-leveling concrete compound. These preparations added a day to my project timeline but ensured my tiles would lay flat and perform optimally for years.

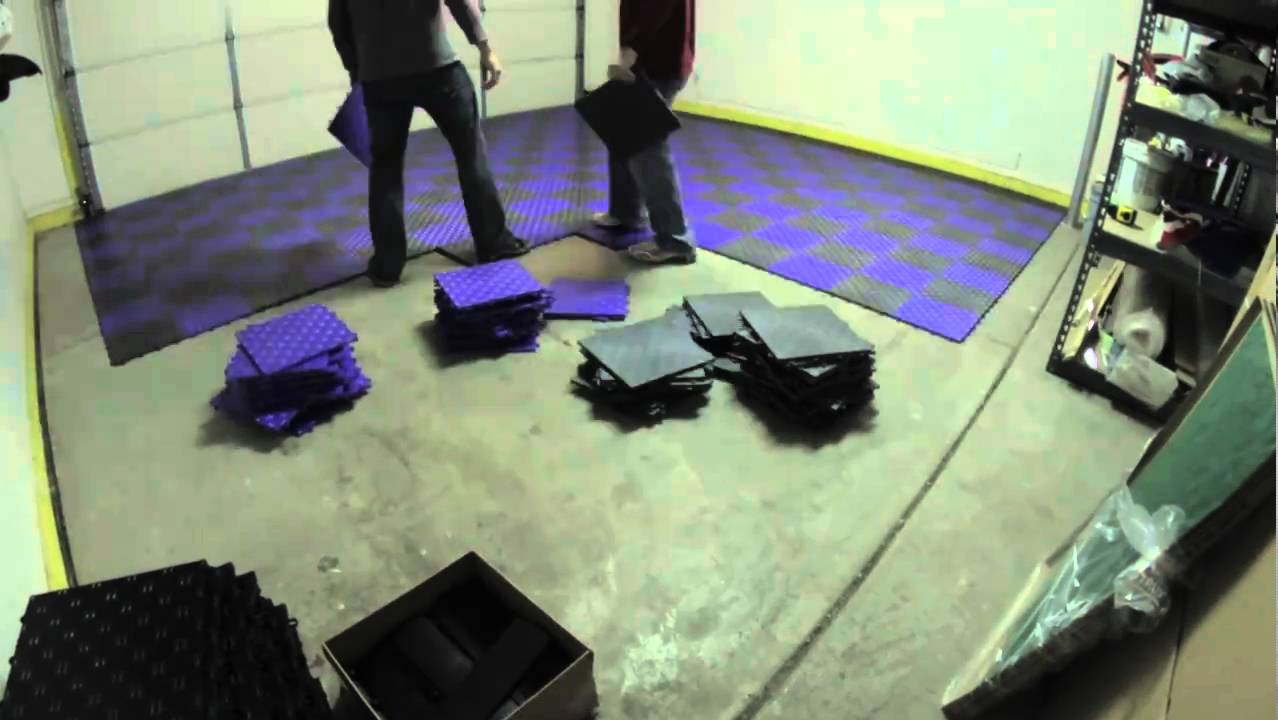
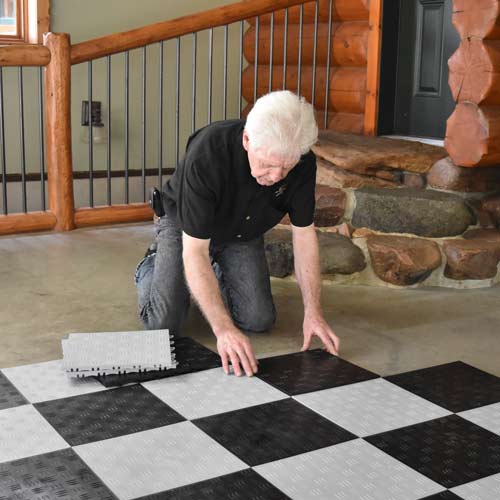
Installing Tiles: My Step-by-Step Experience
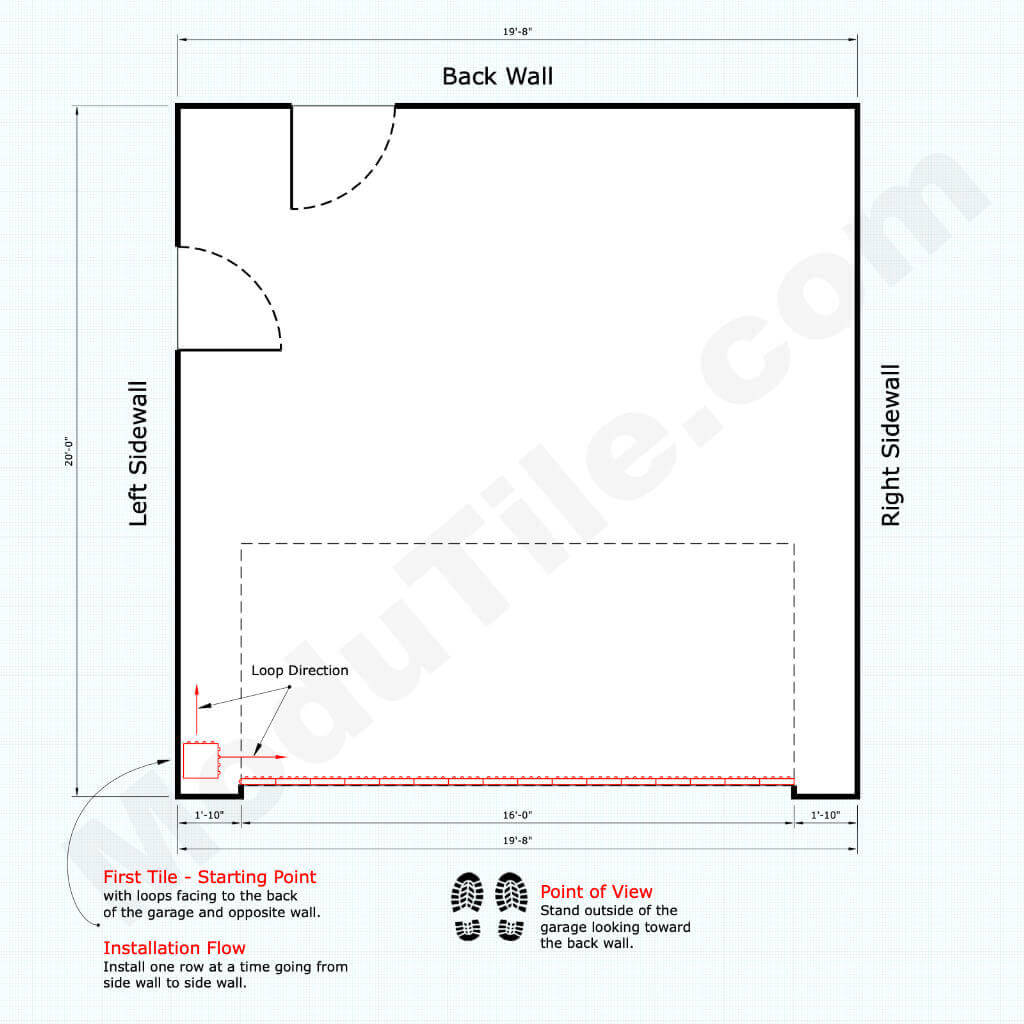
I started installation in one corner of my garage, which made the most sense for the interlocking system. The tiles snap together using connecting tabs that align along all four edges. My first row took forever because I was nervous about getting it straight, but I quickly developed a rhythm. I laid out the first row completely before moving to the second, using a chalk line to ensure everything stayed square to the garage walls. This initial setup proved crucial for the entire installation to look professional.
Cutting tiles around obstacles and edges required tools I already owned. I used a jigsaw with a fine-tooth blade for cutting around door frames and floor drains. A circular saw worked perfectly for straight cuts along wall edges. The tiles cut easily without cracking, and I learned to cut on the finished side to prevent chipping. I made cardboard templates for complex cuts around my water heater and electrical panel, which saved time and reduced mistakes. This careful measuring and cutting accounted for about 30% of my installation time.
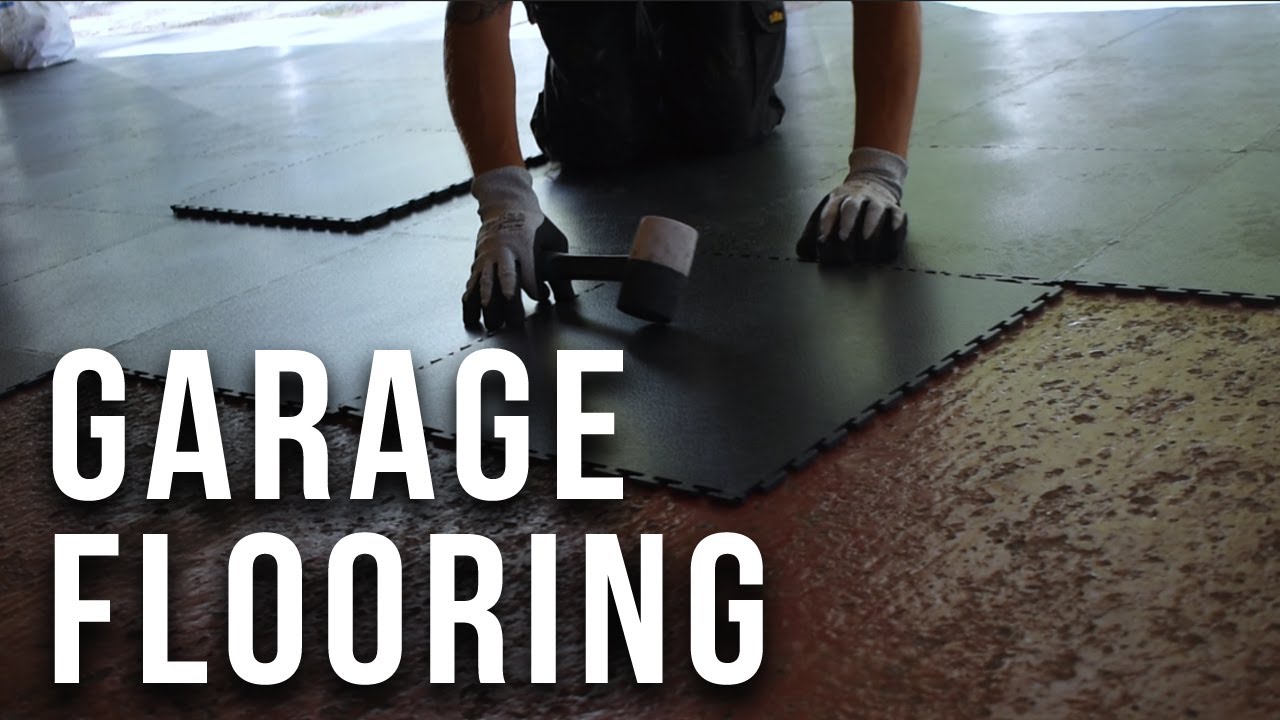
The actual tile installation went surprisingly fast once I got the hang of it. I completed my 400-square-foot two-car garage in about 8 hours of actual work spread over a weekend. I started each row by angling the tiles about 30 degrees and pressing down firmly to engage the locking tabs. I used a rubber mallet to tap tiles into place when needed, being careful not to crack them with excessive force. The satisfying click when tiles locked together properly became addictive, and I found myself racing to see how many I could install in an hour.
Maintaining and Cleaning Your New Garage Floor
Daily maintenance has been remarkably easy compared to my old stained concrete. I sweep the floor weekly using a regular push broom, which takes maybe five minutes. The tile surface doesn’t absorb dirt or stains like bare concrete, so debris sits on top until I sweep it away. I also use a shop vacuum for smaller messes, especially after woodworking projects that create sawdust. The textured surface traps some fine dust in the pattern, but a quick vacuum takes care of it completely.
Deep cleaning happens monthly in my garage, though you could do it less frequently if needed. I use a simple solution of dish soap and water with a deck brush to scrub the entire surface. For oil spots or tire marks, I use a degreaser spray and let it sit for a few minutes before scrubbing. The tiles clean up beautifully, looking almost new even after a year of use. I’ve spilled everything from motor oil to paint, and everything has cleaned up without leaving permanent stains or damage to the tile surface.
I learned that hot tires from summer driving can temporarily soften some tiles, leaving slight impressions that typically disappear as the tiles cool. To prevent this, I installed transition ramps at my garage entrance that give tires a few feet to cool before reaching the main tile area. These ramps cost about $100 but protect my investment and create a professional finished edge. I also apply a vinyl protectant twice yearly that helps maintain the tile finish and provides additional UV protection if sunlight reaches parts of my garage floor.
Maximizing Your Investment with Smart Layout Choices
I wish I’d planned better for future flexibility when I first installed my tiles. Because they’re interlocking and removable, I could have left access panels over my floor drain and electrical outlets for easy future maintenance. Instead, I cut around these permanently, which would make tile replacement more complicated if needed. Now I recommend planning your layout to maintain access to critical areas while creating a cohesive appearance throughout the space.
Creating defined zones using different colors transformed my garage functionality. I used darker tiles in the main parking area where oil drips might occur, and lighter tiles in my workshop area where I want better light reflection. I also installed a runner of red tiles leading from the garage door to my interior house door, which adds visual interest and helps track the main walking path. This zoning approach costs no extra money but dramatically improves both the aesthetics and the practical function of the space.
Border tiles and edge treatments finish the installation professionally. I installed tapered edge strips along my garage door opening, creating a smooth transition that prevents tripping and protects the tile edges from damage. These edge pieces snap onto the regular tiles just like the main floor tiles and cost about $3-5 per linear foot. I also used corner pieces for inside corners and outside corners where the tile meets my garage steps. These finishing touches only added about $150 to my total project cost but made a huge difference in the polished, professional appearance.
How long do interlocking garage tiles last?
Based on my research and experience so far, quality interlocking tiles should last 15-20 years with proper care. My tiles show minimal wear after 18 months of daily use, including parking two vehicles and regular workshop activities. The warranty on my tiles covers 15 years against manufacturing defects, which gave me confidence in their longevity. Individual damaged tiles can be replaced without redoing the entire floor, which extends the overall lifespan. Cheaper tiles might only last 5-10 years, so investing in quality materials pays off long-term.
Can I install interlocking tiles over cracked or damaged concrete?
Yes, within reason. I had several small cracks in my concrete that didn’t prevent installation. The tiles bridge minor imperfections and actually hide surface damage beautifully. However, severely damaged concrete with large cracks, major settling, or crumbling sections should be repaired first. I filled cracks wider than 1/4 inch and addressed any level differences greater than 1/8 inch over 10 feet. The tiles need a relatively stable, clean surface to perform properly. Moisture issues absolutely must be resolved before installing any garage flooring system.
Do the tiles work in cold climates or unheated garages?
I live in Minnesota where garage temperatures drop well below zero, and my PVC tiles have performed perfectly through two winters. Quality PVC tiles are rated for extreme temperatures from -40°F to 140°F. Cheaper polypropylene tiles can become brittle and crack in extreme cold. I noticed no issues with expansion, contraction, or tile separation despite dramatic temperature swings. The interlocking design actually accommodates minor expansion and contraction naturally. For unheated garages in cold climates, definitely invest in quality PVC tiles rather than budget polypropylene options.
How much do interlocking garage tiles cost for a typical two-car garage?
My 400-square-foot garage cost approximately $2,200 total for materials. I paid $4.50 per square foot for quality rigid PVC tiles ($1,800), plus edge strips ($150), cleaning supplies ($50), and concrete prep materials ($200). Budget tiles can reduce costs to $1,000-1,500 for similar square footage, while premium tiles with special coatings might run $2,500-3,500. Professional installation adds $2-3 per square foot if you don’t want to DIY. My self-installation saved about $1,000 in labor costs for one weekend of work.

Can I drive heavy vehicles or use floor jacks on interlocking tiles?
Absolutely, if you choose tiles rated for your weight requirements. My tiles are rated for 25,000 PSI, easily supporting my SUV and motorcycle. I regularly use a 3-ton floor jack and jack stands without any issues. The key is selecting rigid PVC tiles rather than flexible tiles for areas with heavy loads. I do place a thin piece of plywood under jack stands for extended periods to distribute weight over multiple tiles. Rolling toolboxes, motorcycles, and even my trailer have all moved across the tiles without causing damage or leaving marks.
What’s the best way to remove and replace damaged tiles?
I accidentally cracked one tile when I dropped a heavy wrench from my workbench. Removing it was surprisingly easy. I lifted the surrounding tiles in sequence, working backward from the damaged tile until I could remove it completely. I snapped a replacement tile into place and reinstalled the surrounding tiles in about 10 minutes. This modularity is one of the biggest advantages of interlocking tiles over permanent flooring. I keep five spare tiles in various colors stored in my attic for future repairs, which cost about $25 and provide peace of mind.

How to Install Garage Tiles
Home Garage Coin Top PVC 3/16 Gray Ever
How to Install Plastic Garage Flooring: Raised Tile Floor Guide
Related articles: