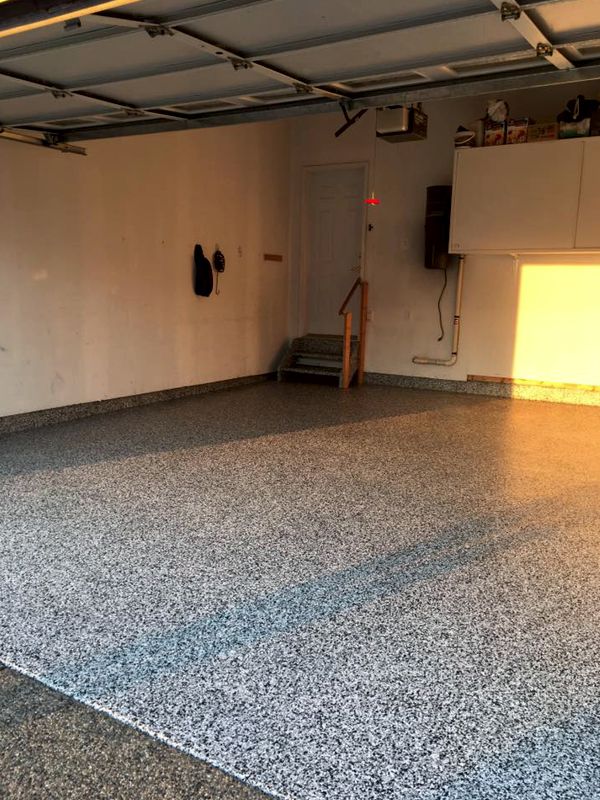
When I first looked at my garage floor three years ago, it was a cracked, stained concrete mess that made the entire space feel unfinished and unwelcoming. After researching different coating options and going through the application process myself, I can honestly say that coating my garage floor was one of the best home improvement decisions I’ve made.
The transformation was incredible, turning my garage from a space I avoided into one I actually enjoy spending time in. Whether you’re looking to protect your investment, improve functionality, or simply make your garage look amazing, choosing the right floor coating can make all the difference.
Understanding Different Types of Garage Floor Coatings
Epoxy coatings were the first option I explored, and they remain incredibly popular for good reason. After applying a two-part epoxy system in my garage, I discovered why so many homeowners choose this route. Epoxy creates a hard, glossy surface that’s incredibly durable and resistant to chemicals, oil stains, and general wear. The biggest advantage I found was how easy it makes cleaning, spills that used to soak into my concrete now wipe up effortlessly with just a damp cloth.
Polyurea coatings caught my attention when I was researching faster-curing options for a friend’s garage project. Unlike epoxy, which can take days to fully cure, polyurea sets incredibly quickly, often allowing you to walk on it within hours. I helped install a polyurea system and was amazed by its flexibility and UV resistance. This coating doesn’t yellow over time like some epoxies can, and it handles temperature fluctuations better, making it perfect for garages that aren’t climate-controlled.
Polyaspartic coatings represent the newest technology I’ve worked with, and they offer the best of both worlds. When I upgraded my workshop area with polyaspartic, I found it combined epoxy’s durability with polyurea’s quick cure time. These coatings are more expensive, but they offer superior performance and can often be applied as a single-day project. The clarity and gloss retention over time have been exceptional, and it’s held up beautifully under heavy use and hot tire pickup.

Preparing Your Concrete for Optimal Results
Surface preparation turned out to be the most critical step in my coating project, and it’s where many DIY attempts fail. I learned this the hard way when my first attempt at a small section failed because I didn’t properly clean and etch the concrete. Proper preparation starts with thoroughly degreasing the entire surface using industrial degreasers, paying special attention to areas where vehicles typically park. Oil stains need special treatment, and I found that multiple applications of degreaser followed by scrubbing were necessary.
Concrete etching became my next challenge, and I discovered that different coating systems require different preparation methods. For my epoxy project, I used muriatic acid to etch the surface, creating the microscopic texture needed for proper adhesion. The process was more involved than I expected, requiring multiple rinses and careful pH testing to ensure all acid residue was removed. Diamond grinding is another option I considered, especially for heavily stained or sealed concrete, though it requires renting specialized equipment.
Crack and hole repair proved essential for achieving professional-looking results. I spent considerable time filling cracks with concrete crack filler and patching holes with hydraulic cement. These repairs need to cure completely before coating application, so I factored this into my project timeline. I also learned that expansion joints should never be coated over; they need to remain flexible, so I masked them during application and later filled them with appropriate sealant.

DIY Installation vs Professional Application
Taking on the coating project myself was both rewarding and challenging. I chose the DIY route primarily for cost savings, but also because I wanted to understand the process completely. The preparation work was labor-intensive, requiring two full weekends just for cleaning, etching, and repairs. I found that having the right tools made a huge difference. I invested in quality rollers, brushes, and protective equipment that made the job much more manageable.
The actual coating application required careful timing and technique. I learned that working in sections and maintaining a wet edge prevents visible overlap marks. Temperature and humidity control became crucial factors; I had to wait for ideal conditions and work quickly once I started. My first attempt had some imperfections, but they were minor and actually added to the industrial character of the finish. The satisfaction of completing the project myself was worth the extra effort.
Professional installation offers advantages that became apparent when I had my neighbor’s garage done professionally. The crew completed in one day what took me several weekends, and their experience showed in the flawless finish. Professional applicators have access to commercial-grade equipment and can handle challenging conditions that might defeat DIY attempts. When I calculated my time investment, the professional option wasn’t as expensive as I initially thought, especially considering the guaranteed results.
Selecting Colors and Decorative Options
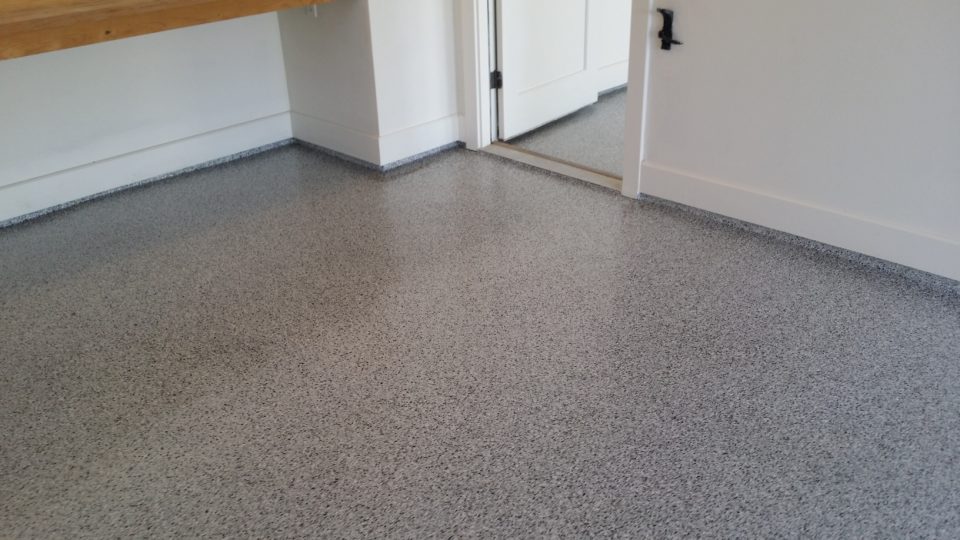
Color selection opened up possibilities I hadn’t initially considered. My garage had always been plain concrete gray, so adding color felt transformative. I chose a medium gray base with darker gray flakes for my main garage area, creating a sophisticated look that hides dirt and tire marks effectively. Light colors make spaces feel larger and brighter, but they show every speck of dirt, while darker colors are more forgiving but can make spaces feel smaller.
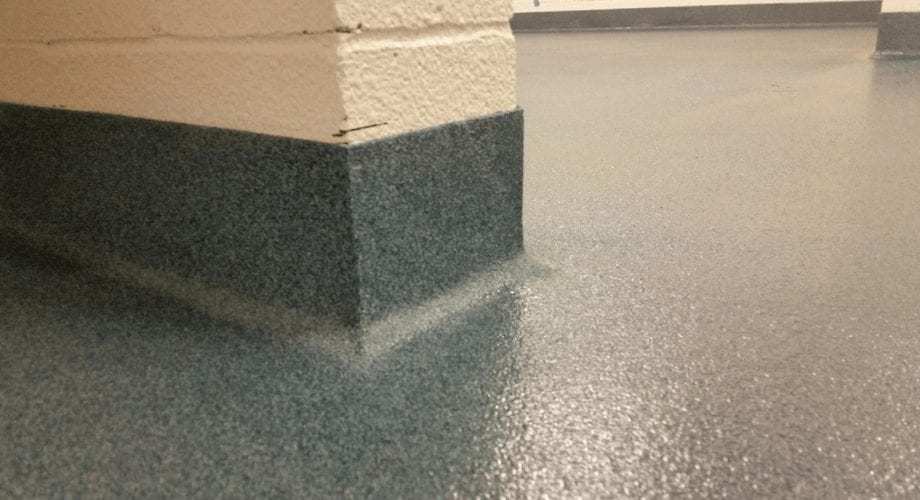
Decorative flakes became my favorite feature of the new floor. These vinyl chips come in countless color combinations and sizes, allowing you to customize the appearance completely. I used a full broadcast application, meaning I scattered flakes until they completely covered the wet coating, then sealed them in with a clear topcoat. The texture they provide improves traction, and they help hide minor imperfections in the base coat. The speckled appearance also does an excellent job of camouflaging typical garage dirt and debris.
Metallic coatings represent the most dramatic decorative option I’ve seen. When a friend chose a metallic system for his garage, the results were stunning. These coatings create depth and movement that mimics polished stone or metal surfaces. The application process is more complex, requiring special techniques to achieve the desired effects, but the results are truly unique. Metallic coatings work particularly well in garage spaces that double as workshops or entertainment areas.
Maintenance and Long-Term Durability
Daily maintenance of my coated floor is remarkably simple compared to bare concrete. Regular sweeping removes grit that could scratch the surface, and occasional mopping with mild detergent keeps it looking new. I use a microfiber mop for routine cleaning and reserve stronger cleaners for stubborn stains. The sealed surface prevents oil and other automotive fluids from penetrating, making cleanup quick and easy. Even battery acid spills, which would permanently stain concrete, wiped up easily from the coated surface.
Long-term care involves periodic inspection and minor touch-ups when necessary. After three years, my floor still looks excellent, but I’ve noticed some wear in high-traffic areas near the garage door. Small chips or scratches can be touched up with matching coating material, though finding exact color matches can be challenging with decorative systems. I keep leftover coating materials specifically for these touch-ups, storing them properly to maintain their effectiveness.
Durability expectations vary significantly between coating types and application quality. My epoxy coating has held up well to normal garage use, including hot tire pickup, chemical spills, and dropped tools. However, I’ve learned that even the best coatings aren’t indestructible. Sharp impacts can chip them, and dragging heavy objects can cause scratches. Understanding these limitations helped me set realistic expectations and take appropriate precautions to protect my investment.

Cost Analysis and Return on Investment
Breaking down the costs of my DIY project helped me understand the true investment involved. Materials for my 500-square-foot garage cost approximately $300, including primer, base coat, flakes, and topcoat. Tool purchases added another $150, though these can be used for future projects. Time investment was substantial, probably 40 hours total, including preparation, application, and cleanup. When I calculated my effective hourly rate, professional installation started looking more attractive.
Professional installation quotes for the same space ranged from $800 to $1,200, depending on the coating system and decorative options chosen. While this seemed expensive initially, the time savings and guaranteed results provided significant value. Professional installers also typically offer warranties, something DIY projects lack. For larger spaces or complex preparations, professional installation becomes even more cost-effective due to their efficiency and specialized equipment.
Return on investment goes beyond just monetary considerations. The improved functionality and appearance of my garage has made it a more useful space, effectively adding functional square footage to my home. Property value increases are difficult to quantify, but real estate agents consistently mention that well-maintained garages with quality flooring appeal to buyers. The personal satisfaction and pride in ownership have been worth the investment regardless of financial returns.

How long do garage floor coatings typically last?
In my experience, quality epoxy coatings last 5-10 years with proper maintenance and normal use. Polyurea and polyaspartic systems often last longer due to their superior durability and UV resistance. The key factors are proper surface preparation and application technique. I’ve seen poorly applied coatings fail within months, while professionally installed systems can look great for decades.
Can I apply coating over previously sealed or painted concrete?
This was a major concern during my preparation phase. Most coatings won’t adhere properly to sealed surfaces without mechanical preparation like grinding or shot blasting. I tested my concrete with water droplets; if water beads up, the surface is likely sealed and needs aggressive prep. Paint removal is usually necessary, though some specialized primers can bond to certain existing coatings.

What’s the best coating for a garage that sees heavy automotive use?
For heavy-use garages, I recommend polyaspartic or high-performance polyurea coatings. These handle hot tire pickup better than standard epoxy and resist chemicals more effectively. If budget is a concern, a high-quality epoxy with proper surface preparation performs well. The key is choosing coatings specifically designed for automotive environments rather than general-purpose floor paints.
How do I handle expansion joints in my garage floor?
Never coat over expansion joints; they need to remain flexible. I masked mine during application, then filled them with appropriate polyurethane sealant after the coating cured. Some installers use color-matched caulks to maintain appearance. Failing to address expansion joints properly can cause coating failure as the concrete moves with temperature changes.
![]()
Can garage floor coatings be applied in cold weather?
Temperature and humidity control are crucial for successful application. Most coatings require temperatures between 50-90°F and low humidity for proper curing. I learned to check both air and concrete temperatures; cold concrete can cause adhesion problems even if the air temperature is acceptable. Winter applications often require heating the space or waiting for better conditions.
What should I do if my coating starts peeling or failing?
Coating failure usually indicates inadequate surface preparation or application issues. Small areas can sometimes be spot-repaired, but extensive failure often requires complete removal and reapplication. I’ve found that mechanical removal works best, followed by proper preparation and recoating. Prevention through proper initial preparation is much easier than dealing with coating failure later.

Epoxy Garage Floor Installed – Austin, TX Garage Experts of

Epoxy Flooring Austin – Garage Floor Epoxy – AllStar Concrete Coatings
Related articles: