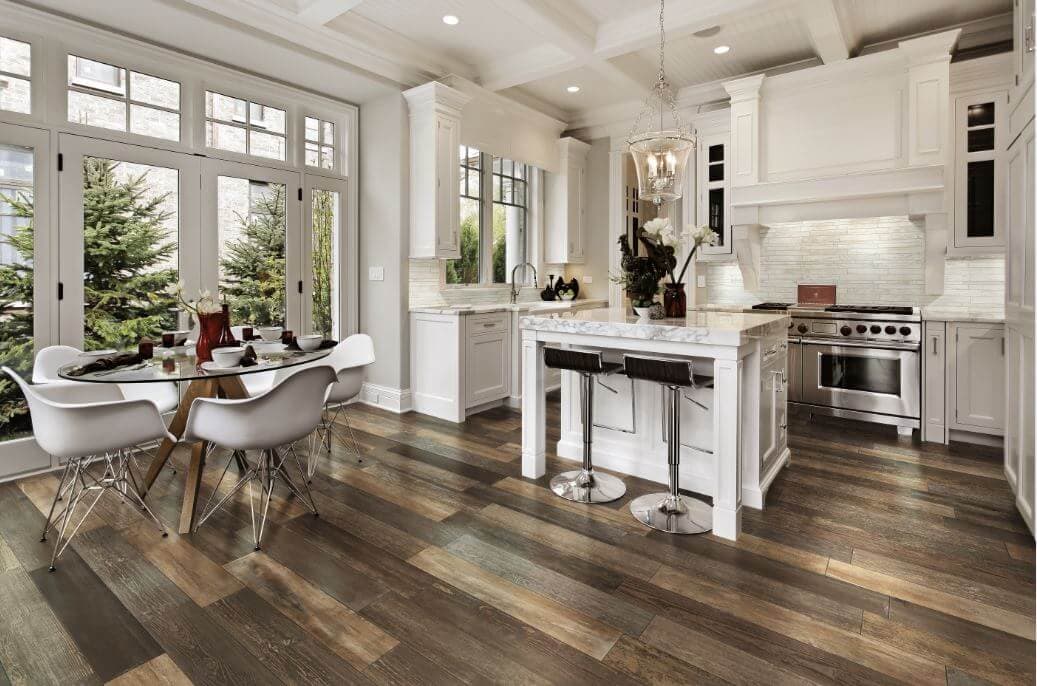
When I decided to replace the outdated linoleum in my kitchen, I fell head over heels for the look of reclaimed barn wood floors. But the reality of maintaining real wood in high-traffic, moisture-prone areas made me nervous. That’s when I discovered wood-look tile, specifically rustic styles that capture all the character of aged timber without the maintenance headaches.
After living with my rustic wood tile floors for two years now, I can honestly say it was one of the best renovation decisions I’ve made. The warmth and texture transformed my space while giving me the durability I needed for my busy household. Let me share everything I learned about choosing, installing, and living with these beautiful floors.
Understanding Porcelain Versus Ceramic Wood Tile Options
I spent weeks researching the difference between porcelain and ceramic before making my choice. Porcelain tile is denser and less porous because it’s fired at higher temperatures, making it incredibly durable and water-resistant. This matters tremendously for areas like kitchens, bathrooms, and entryways where moisture is constant. I chose porcelain for my kitchen and hallway, and it’s held up flawlessly against spills, tracked-in snow, and my dog’s water bowl mishaps.
Ceramic tile offered a more budget-friendly option that I considered seriously. It’s lighter and easier to cut during installation, which would have simplified my DIY approach. However, ceramic absorbs more water and chips more easily than porcelain. For low-traffic bedrooms or living spaces, ceramic wood-look tile would work beautifully. I ultimately decided the durability difference justified porcelain’s higher cost since I was installing it in my home’s busiest areas.
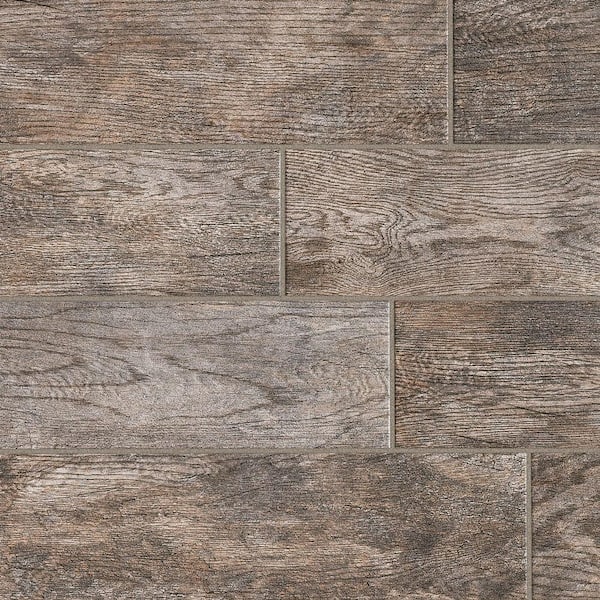
The quality differences within each category surprised me during my shopping process. Not all porcelain tiles are created equal, I learned. Some manufacturers produce tiles with through-body color that looks consistent even if chipped, while others use printed surfaces over different-colored bases. I invested in higher-quality porcelain with realistic texture and through-body construction. Feeling samples in person helped me distinguish between cheap-looking imitations and tiles that truly fooled the eye into seeing real wood.
Selecting the Perfect Rustic Wood Style and Color
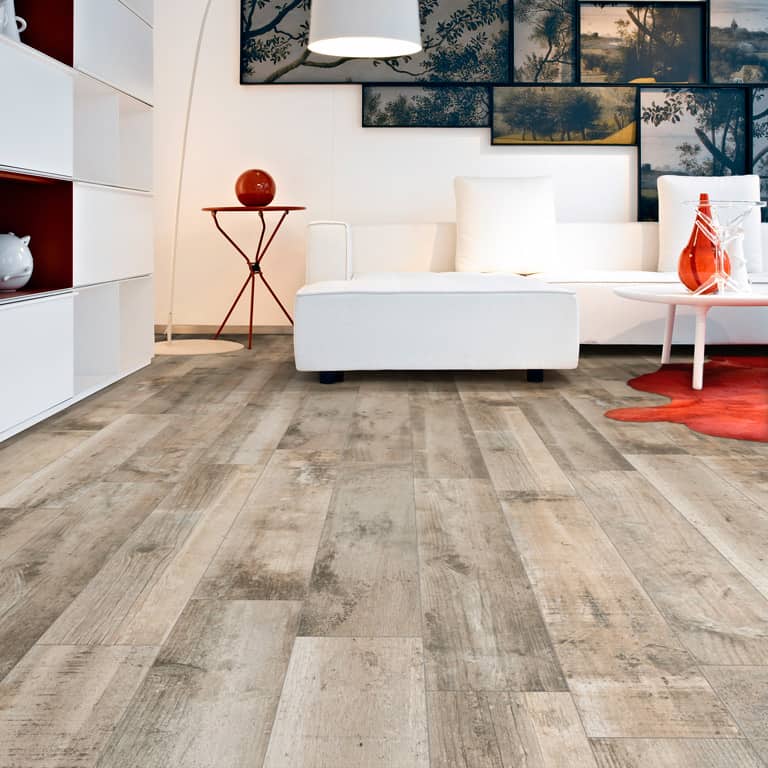
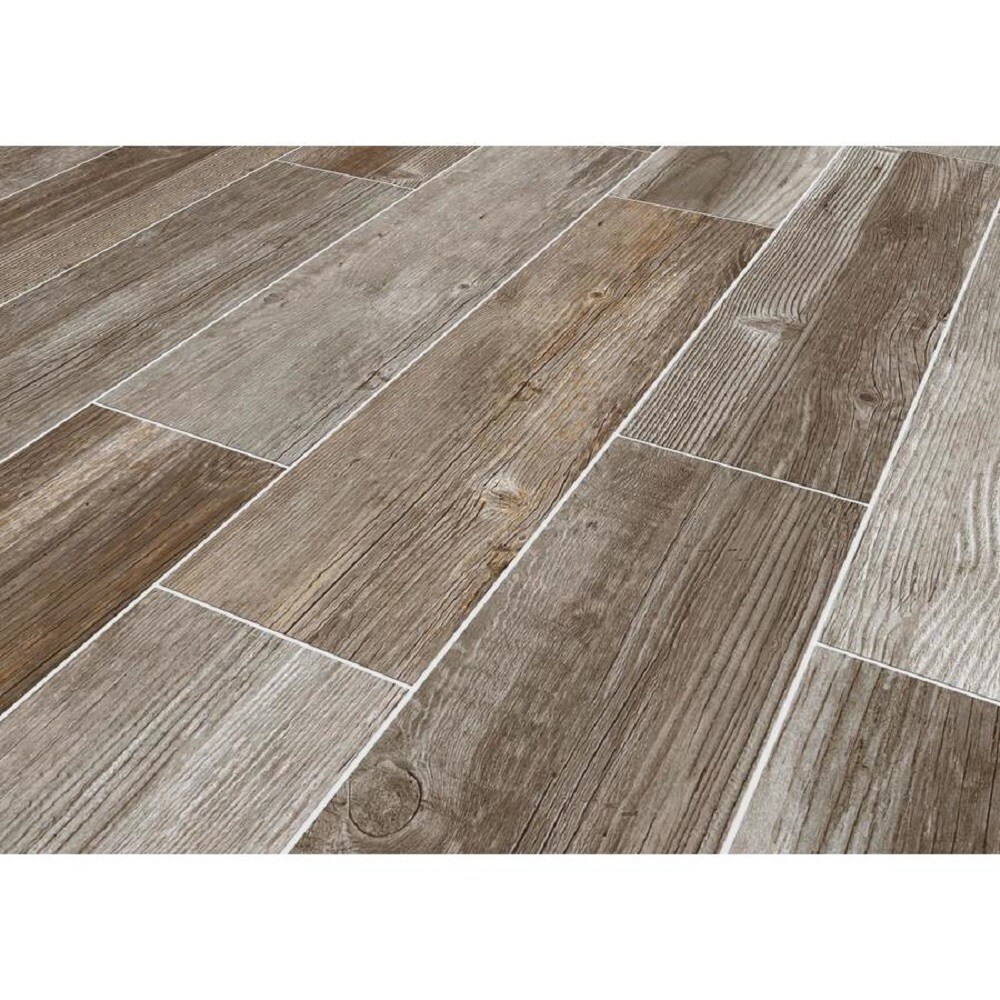
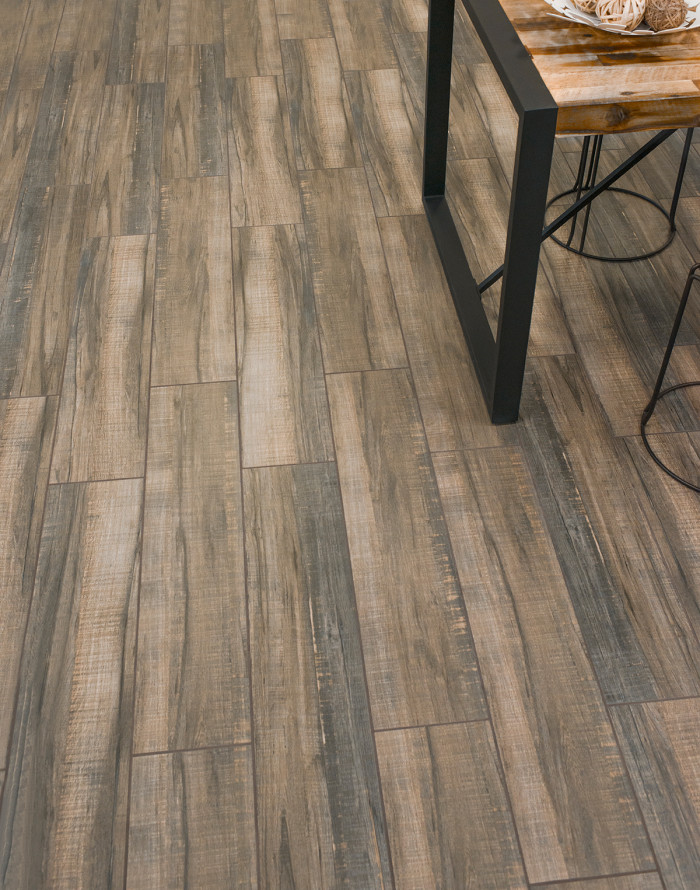
Choosing the right rustic style felt overwhelming with so many options available. I gravitated toward weathered gray tones that mimicked reclaimed barn wood, with visible knots, grain variations, and even simulated saw marks. These distressed finishes hide scratches and wear better than smooth, uniform tiles. The character built into the design means my floors look intentionally aged rather than damaged as they accumulate the normal wear of daily life.
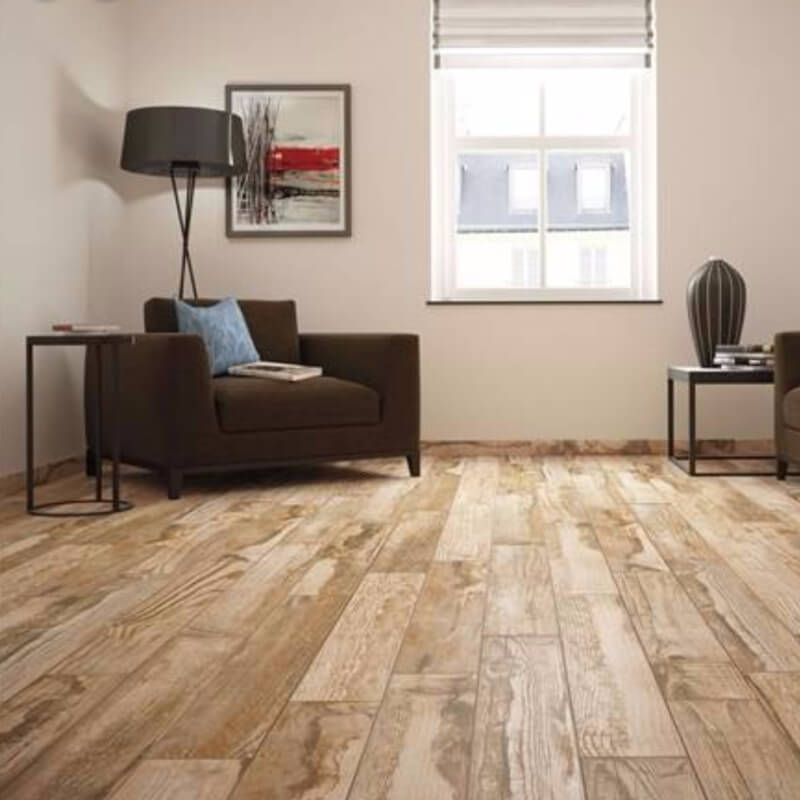
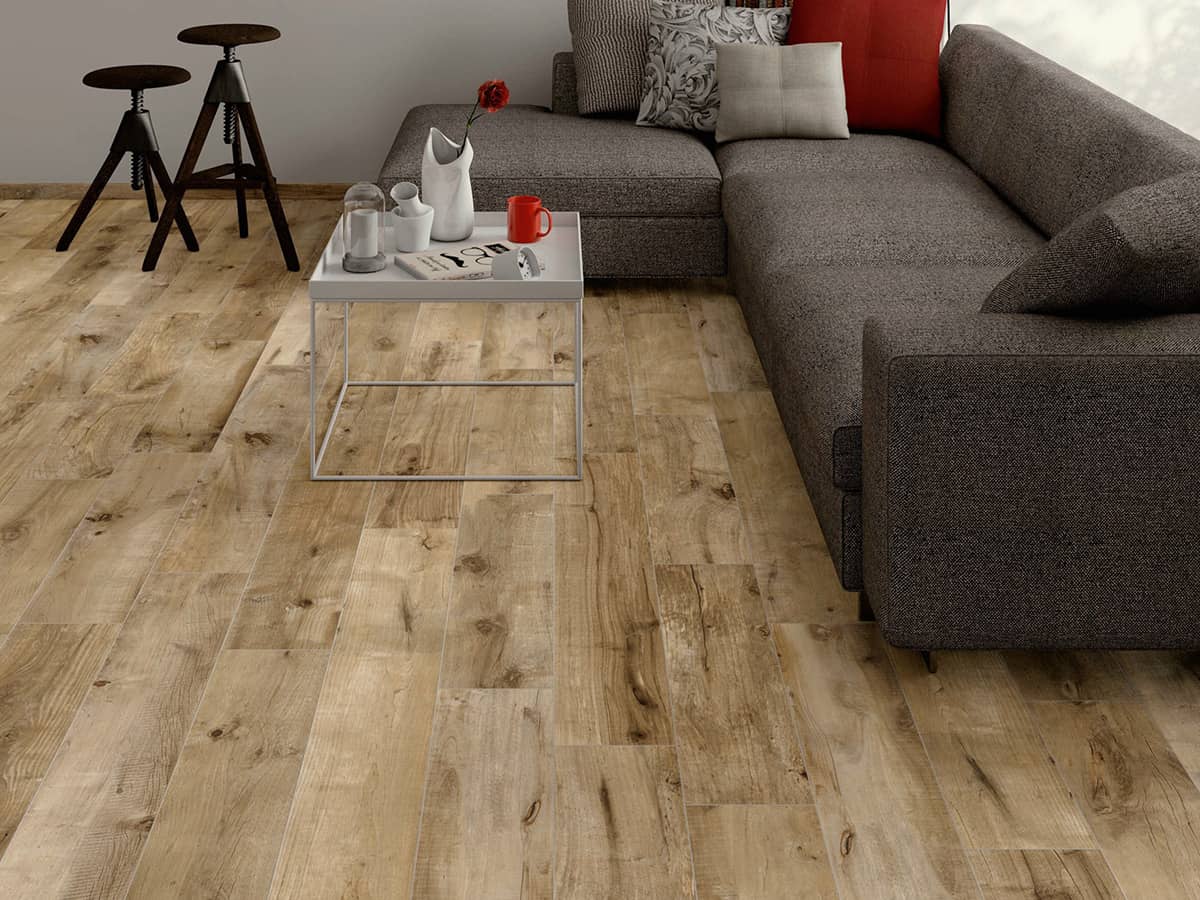
I considered warmer brown tones that replicate hand-scraped hickory or distressed oak. These honey and caramel shades create incredible coziness and pair beautifully with farmhouse or traditional decor. I saw installations that mixed multiple brown tones in random patterns, creating depth and authenticity that single-shade floors can’t achieve. I almost went this direction, but worried the warm tones would limit my decorating flexibility compared to the neutral grays I chose.
Plank length and width significantly impacted the rustic aesthetic I wanted. Longer planks, 36 to 48 inches, create a more authentic wood floor appearance with fewer grout lines interrupting the visual flow. I selected 8-inch-wide planks because narrower boards felt too busy for my space, while wider planks risked looking less like traditional wood flooring. The combination of long, moderately wide planks with varied wood grain patterns achieved the rustic, reclaimed look I’d envisioned from the beginning.

Deciding on Texture and Finish for Authentic Appeal
The texture options amazed me when I started feeling samples at showrooms. Smooth, glossy tiles looked fake and cheap to my eye, nothing like real wood. I needed texture that mimicked actual wood grain, with ridges, valleys, and variations you could feel under your hands and feet. The embossed texture on my chosen tiles follows the printed grain pattern exactly, creating remarkable realism that holds up even under close inspection.
Matte finishes proved essential for achieving an authentic rustic character. Glossy tiles scream “fake” no matter how realistic the printed pattern might be. The matte surface on my tiles absorbs light naturally, like real wood rather than reflecting it artificially. This subtle difference transforms the entire appearance, making guests actually question whether I installed real wood. The low-sheen finish also hides dust and water spots better than glossy surfaces, requiring less frequent cleaning to look good.
I discovered that heavily textured tiles, while beautiful, presented practical challenges. Deep grooves and pronounced texture trap dirt and make cleaning more difficult. I balanced my desire for realism with maintenance reality by choosing moderate texture, enough to feel authentic without creating cleaning nightmares. Walking barefoot on my floors feels pleasantly textured but not rough or uncomfortable. Finding this middle ground between authentic appearance and livable practicality took testing multiple samples.

Planning Layout Patterns for Maximum Visual Impact
The layout pattern dramatically affected how rustic and authentic my floors appeared. I chose a random offset pattern where each plank starts at different intervals, mimicking how real wood floors are installed. This required buying tiles in multiple lengths or cutting them to varied sizes. The effort was worth it because uniform brick patterns with every tile offset by exactly half look too repetitive and manufactured. Random patterns create the organic, collected-over-time look that defines rustic styling.
I considered a herringbone pattern that would have been stunning but ultimately too formal for my rustic aesthetic. Herringbone works beautifully with wood-look tile and creates incredible visual interest. However, it reads more elegant than rugged, better suited to traditional or transitional styles than the farmhouse-industrial vibe I wanted. The complex installation would have increased labor costs significantly. I saved herringbone for my future bathroom renovation, where sophistication suits the space better.
Mixing plank widths in random patterns offered another option I explored. Using both 6-inch and 8-inch wide tiles together creates even more authenticity and visual texture. I saw this done beautifully in a showroom, but I worried about the additional planning and cutting required during installation. For DIYers or those on tight budgets, sticking with one size simplifies the process considerably. I compromised by using single-width planks in varied lengths, achieving rustic character without complicating installation excessively.
Navigating Installation Challenges and Best Practices
I debated DIYing my installation versus hiring professionals for weeks. Wood-look tile is more forgiving than traditional tile patterns because slight imperfections disappear within the rustic aesthetic. Grout lines don’t need to be perfectly uniform when you’re mimicking aged wood floors. I watched countless YouTube tutorials and felt confident enough to tackle my kitchen. However, I hired professionals for the more visible hallway because I wanted flawless execution in that high-visibility area.
Subfloor preparation became more critical than I’d anticipated during planning. My installer stressed that any flexing or movement in the subfloor would crack tiles over time. We added cement backer board over my plywood subfloor to create a stable, crack-resistant foundation. This step added cost and time but proved essential for long-term durability. Skipping proper subfloor prep is the biggest mistake DIYers make, causing failures that manifest months or years after installation.
Grout selection required careful consideration to enhance rather than detract from the rustic wood appearance. I chose a gray-brown grout that blends with my tile color, making grout lines nearly invisible from standing height. Some people prefer contrasting grout to emphasize the plank pattern, but I wanted the seamless look of real wood flooring. Narrow grout lines, around 1/8 inch, also helped maintain the illusion. I sealed my grout after installation to prevent staining and make cleaning easier long-term.

Maintaining and Protecting Your Wood Tile Investment
Daily maintenance proved remarkably simple compared to real wood floors. I sweep or vacuum regularly to prevent dirt from scratching the surface, then damp mop weekly with tile cleaner. No special wood treatments, no worrying about water damage, and no refinishing every few years. Spills wipe up without penetrating or staining. After years of maintaining real hardwood in my previous home, the carefree nature of tile, while keeping wood’s aesthetic, feels almost too good to be true.
I learned that harsh chemicals can dull the finish over time. I avoid bleach and ammonia-based cleaners, sticking with pH-neutral tile cleaners or simple vinegar-water solutions. The matte finish hides minor wear beautifully, but I still protect high-traffic areas with rugs to extend the pristine appearance. Entry rugs catch dirt and moisture before they reach the tile. I use furniture pads under chair and table legs to prevent scratching when items get dragged across the floor.
Addressing chips or cracks requires keeping extra tiles from installation. I stored several boxes in my basement, and I’m glad I did. A dropped cast-iron pan chipped one tile corner last year. Having matching extras meant replacing just that tile rather than living with damage or replacing large sections. The repair was straightforward since porcelain tiles don’t change color over time like wood, which darkens with age. My repaired area blends perfectly with the surrounding floor.

How does wood-look tile pricing compare to real hardwood?
Quality porcelain wood tile costs $3-$8 per square foot for materials, while real hardwood costs $5-$15 per square foot. Installation costs are comparable at $5-$10 per square foot for both. My total project, including materials and professional installation, ran about $12 per square foot. The long-term value comes from the tile’s durability and zero maintenance costs compared to hardwood refinishing every 7-10 years.
Can you install radiant floor heating under wood tile?
Yes, and I did exactly this in my bathroom. Tile conducts heat beautifully, making radiant heating incredibly effective and luxurious. The warmth eliminates the one downside of tile, that cold feeling underfoot in winter. Ensure your heating system is compatible with tile installation and follow manufacturer guidelines for maximum temperature settings. The combination of warm floors and rustic wood aesthetics creates the ultimate cozy experience.

Will the printed pattern wear off over time?
The pattern on quality porcelain tile is incredibly durable because it’s printed through multiple layers and protected by the glazed surface. I’ve had mine for two years in high-traffic areas with zero fading or wearing. Cheap tiles might show wear, so invest in reputable brands. Through-body porcelain, where color extends through the entire tile thickness, offers maximum durability if a tile ever chips.
How realistic does wood tile actually look?
Modern manufacturing creates remarkably realistic wood tile that fools most people. The combination of high-resolution printing, embossed texture that matches grain patterns, varied plank designs, and matte finishes achieves impressive authenticity. Guests regularly ask if my floors are real wood. The illusion works best with quality tiles, proper installation, and appropriate grout selection. Budget tiles with glossy finishes and repetitive patterns look obviously fake.

Is wood tile slippery when wet?
Textured, matte-finish wood tile provides good traction even when wet, much better than glossy ceramic tile. My kitchen floor handles spills safely, and I’ve never felt slipping was a concern. For bathrooms or areas with frequent water exposure, look for tiles with higher slip-resistance ratings. The rustic, textured finishes I chose naturally provide more grip than smooth surfaces, adding to both safety and authenticity.
Can I use wood tile throughout my entire home?
Absolutely, and many people do exactly this for a cohesive look. Wood tile works in every room, including bathrooms, basements, and laundries, where real wood would fail from moisture. I used it in my kitchen and hallway, then transitioned to carpet in bedrooms for warmth and sound absorption. The versatility means you can create consistent flooring throughout main living areas while adapting to specific room needs with different materials.

Wood Look Tile: Distressed, Rustic, Modern Ideas
Marazzi Montagna Rustic Bay 6 in. x 24 in. Glazed Porcelain Floor
Rustic Tile floors that look like wood #rustic #tile #wood

Farmhouse/Rustic Tile at Lowes.com
Wood Look Tile: 17 Distressed, Rustic, Modern Ideas
Favorite Wood-look Porcelain Tiles Bedrosians Tile & Stone
Related articles: