Tiles will last for years in case they are taken care of, moreover practically do not use out. In the event the floor is dry, remove all of the spacers between the flooring. After you are done, you can today start enjoying the benefits of getting ceramic tile flooring. Sponges and spotless dried up rags will come in handy for washing and wiping off extra mortar materials and grout lining out of your newly-finished ceramic tiling floor. You will see the grout becoming even and pushed into almost all empty spaces.
Images Related to Tile Floor Shower Installation
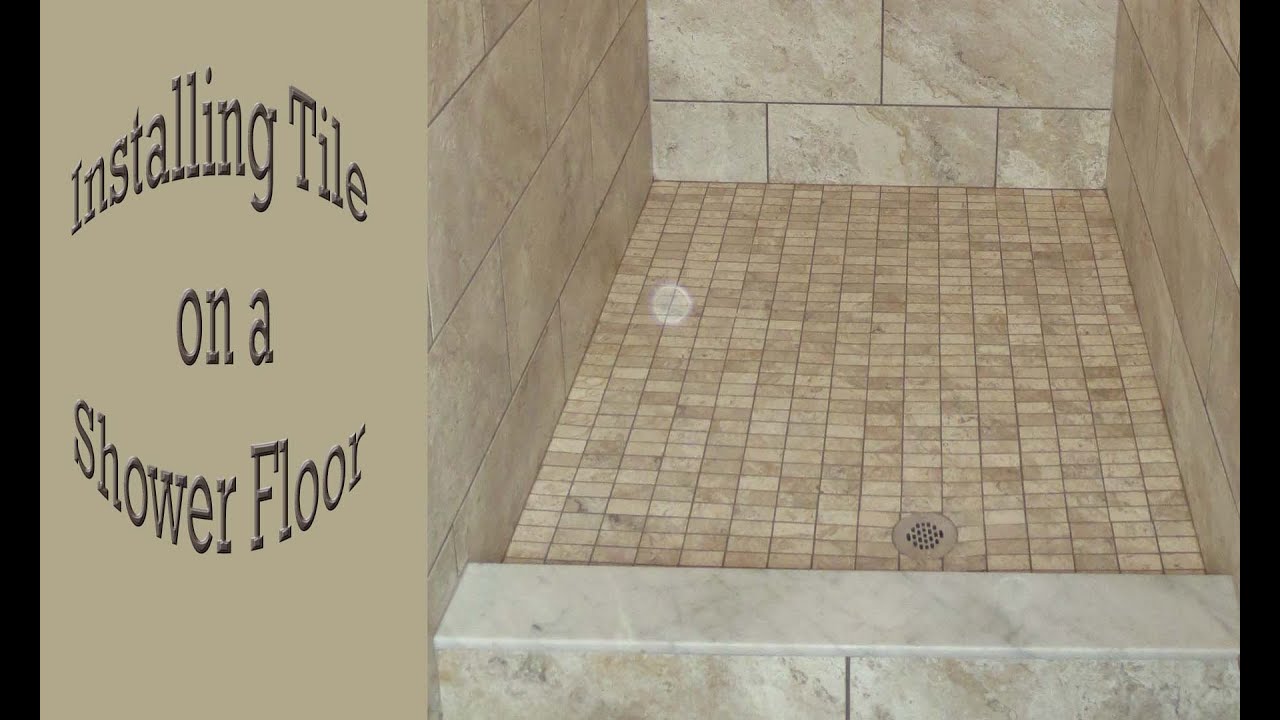
Tile Floor Shower Installation

Several of the more durable tile floors available on the market are the linoleum ones. You are able to put in a floor mat but this particular won't be so easy to clean or even keep in the long run. 99 percent of the most dangerous pathogens from tiled floors. A through wash of the tiles with a few warm water plus cleaner will ensure a great gloss. Larger tiles can also be worn in bigger spaces. Always wear safety goggles when you are using tiles.
HEREu0027S HOW: Install a new shower stall with a tile floor
You can go with one form of tile once you would like flooring that's durable and beautiful. Glass tiles are commonly available in the market with so many colors as well as designs along with textures. Use a scraper at a forty five % angle to drive the grout down. One reason for this particular versatility is that tiles are available in many styles and sizes.
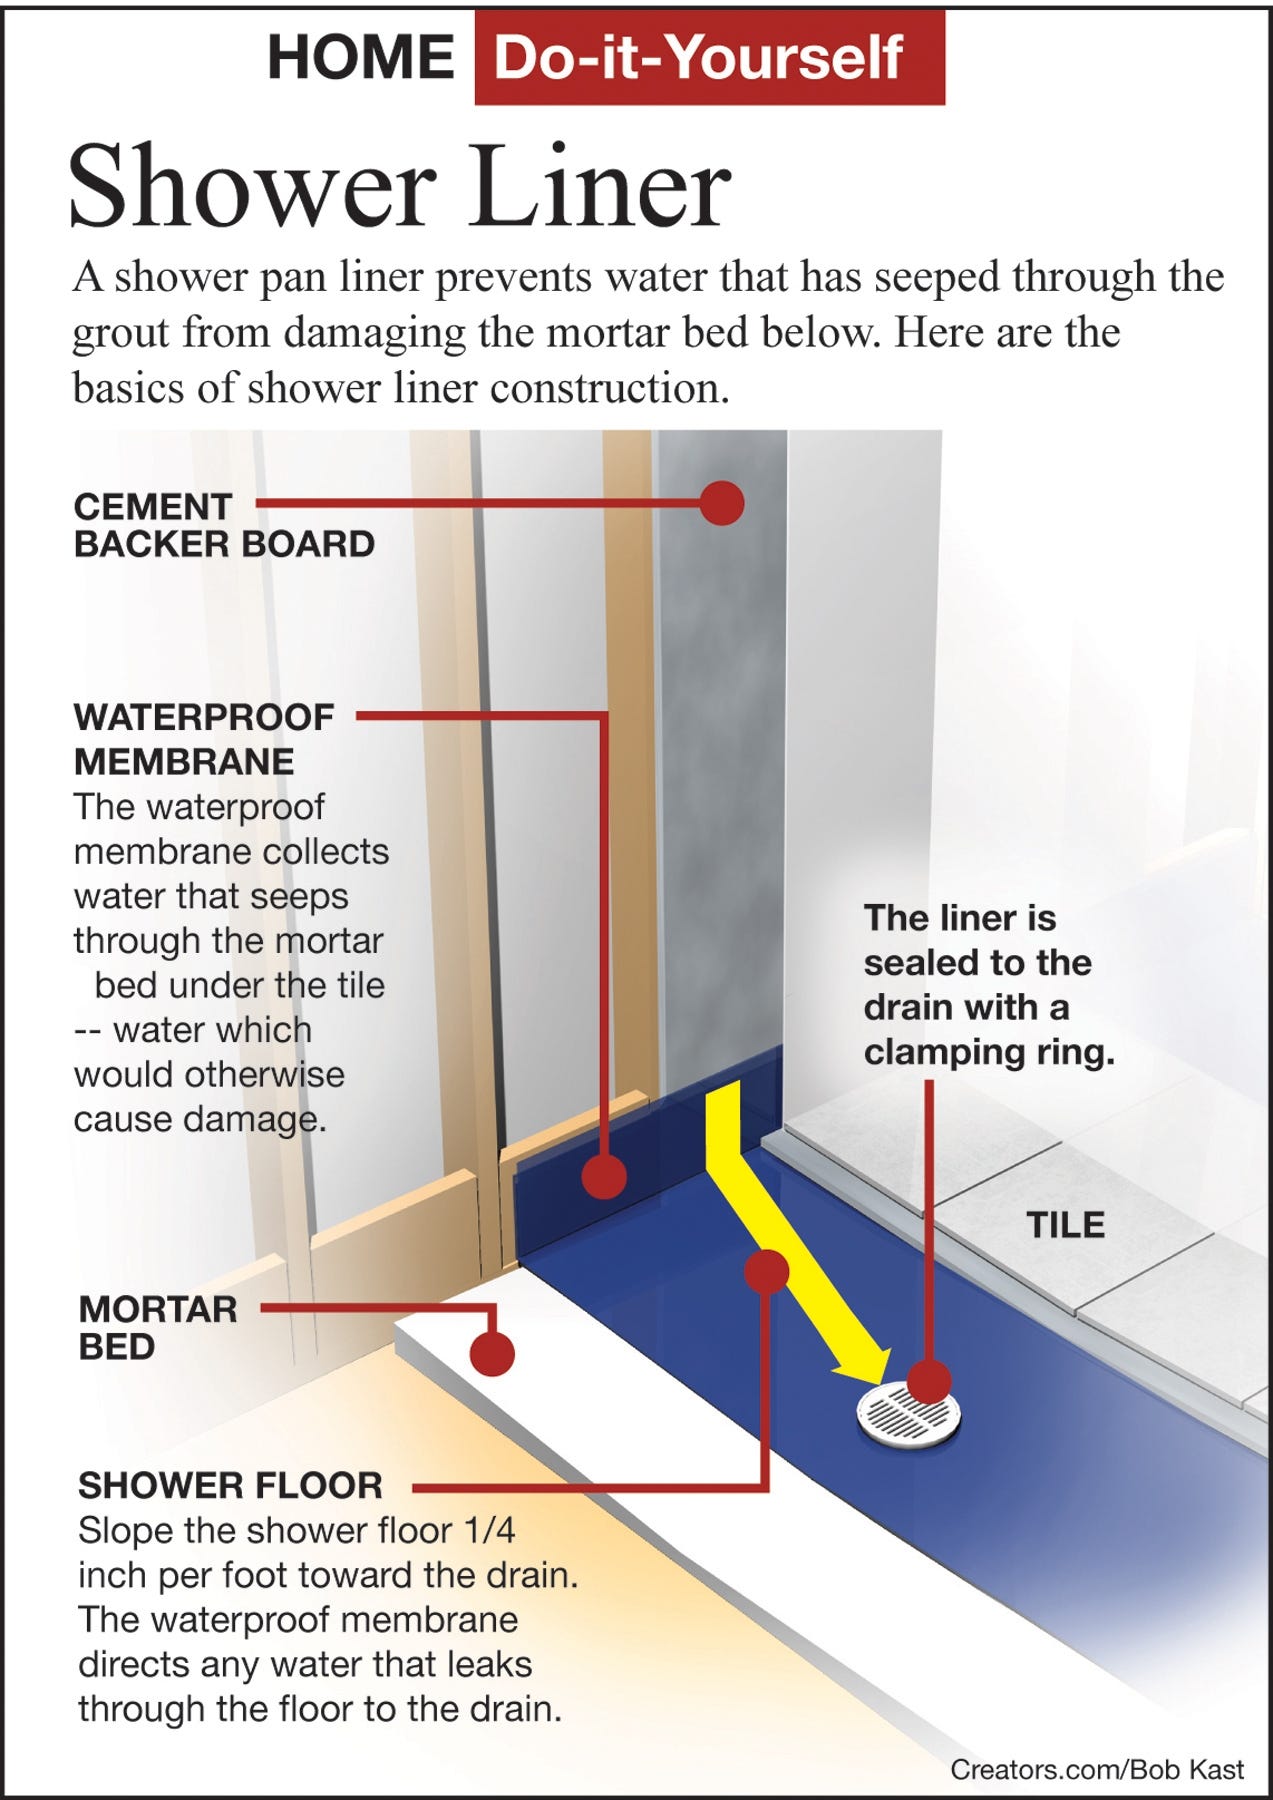
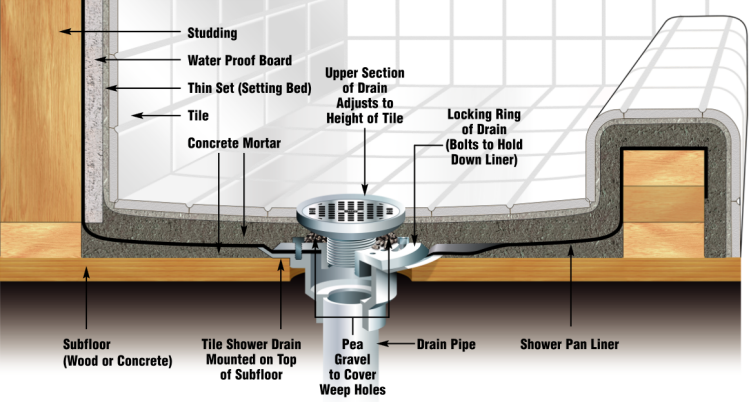
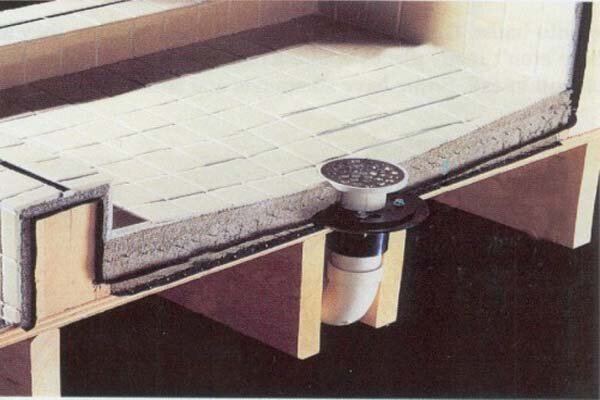
How to Build a Tile Shower Floor – Shower Pan Liner and Drain DIY
3 Shower-Pan Choices for a Solid Tile Floor Installation – Fine

Part “4” How to tile shower Floor – Shower Pan mud bed u0026 preparation DIY

How to install a mosaic tile on a shower floor.
Floor Warming for Shower Floors schluter.com

How to Build a Tile Shower Floor – Shower Pan Liner and Drain DIY

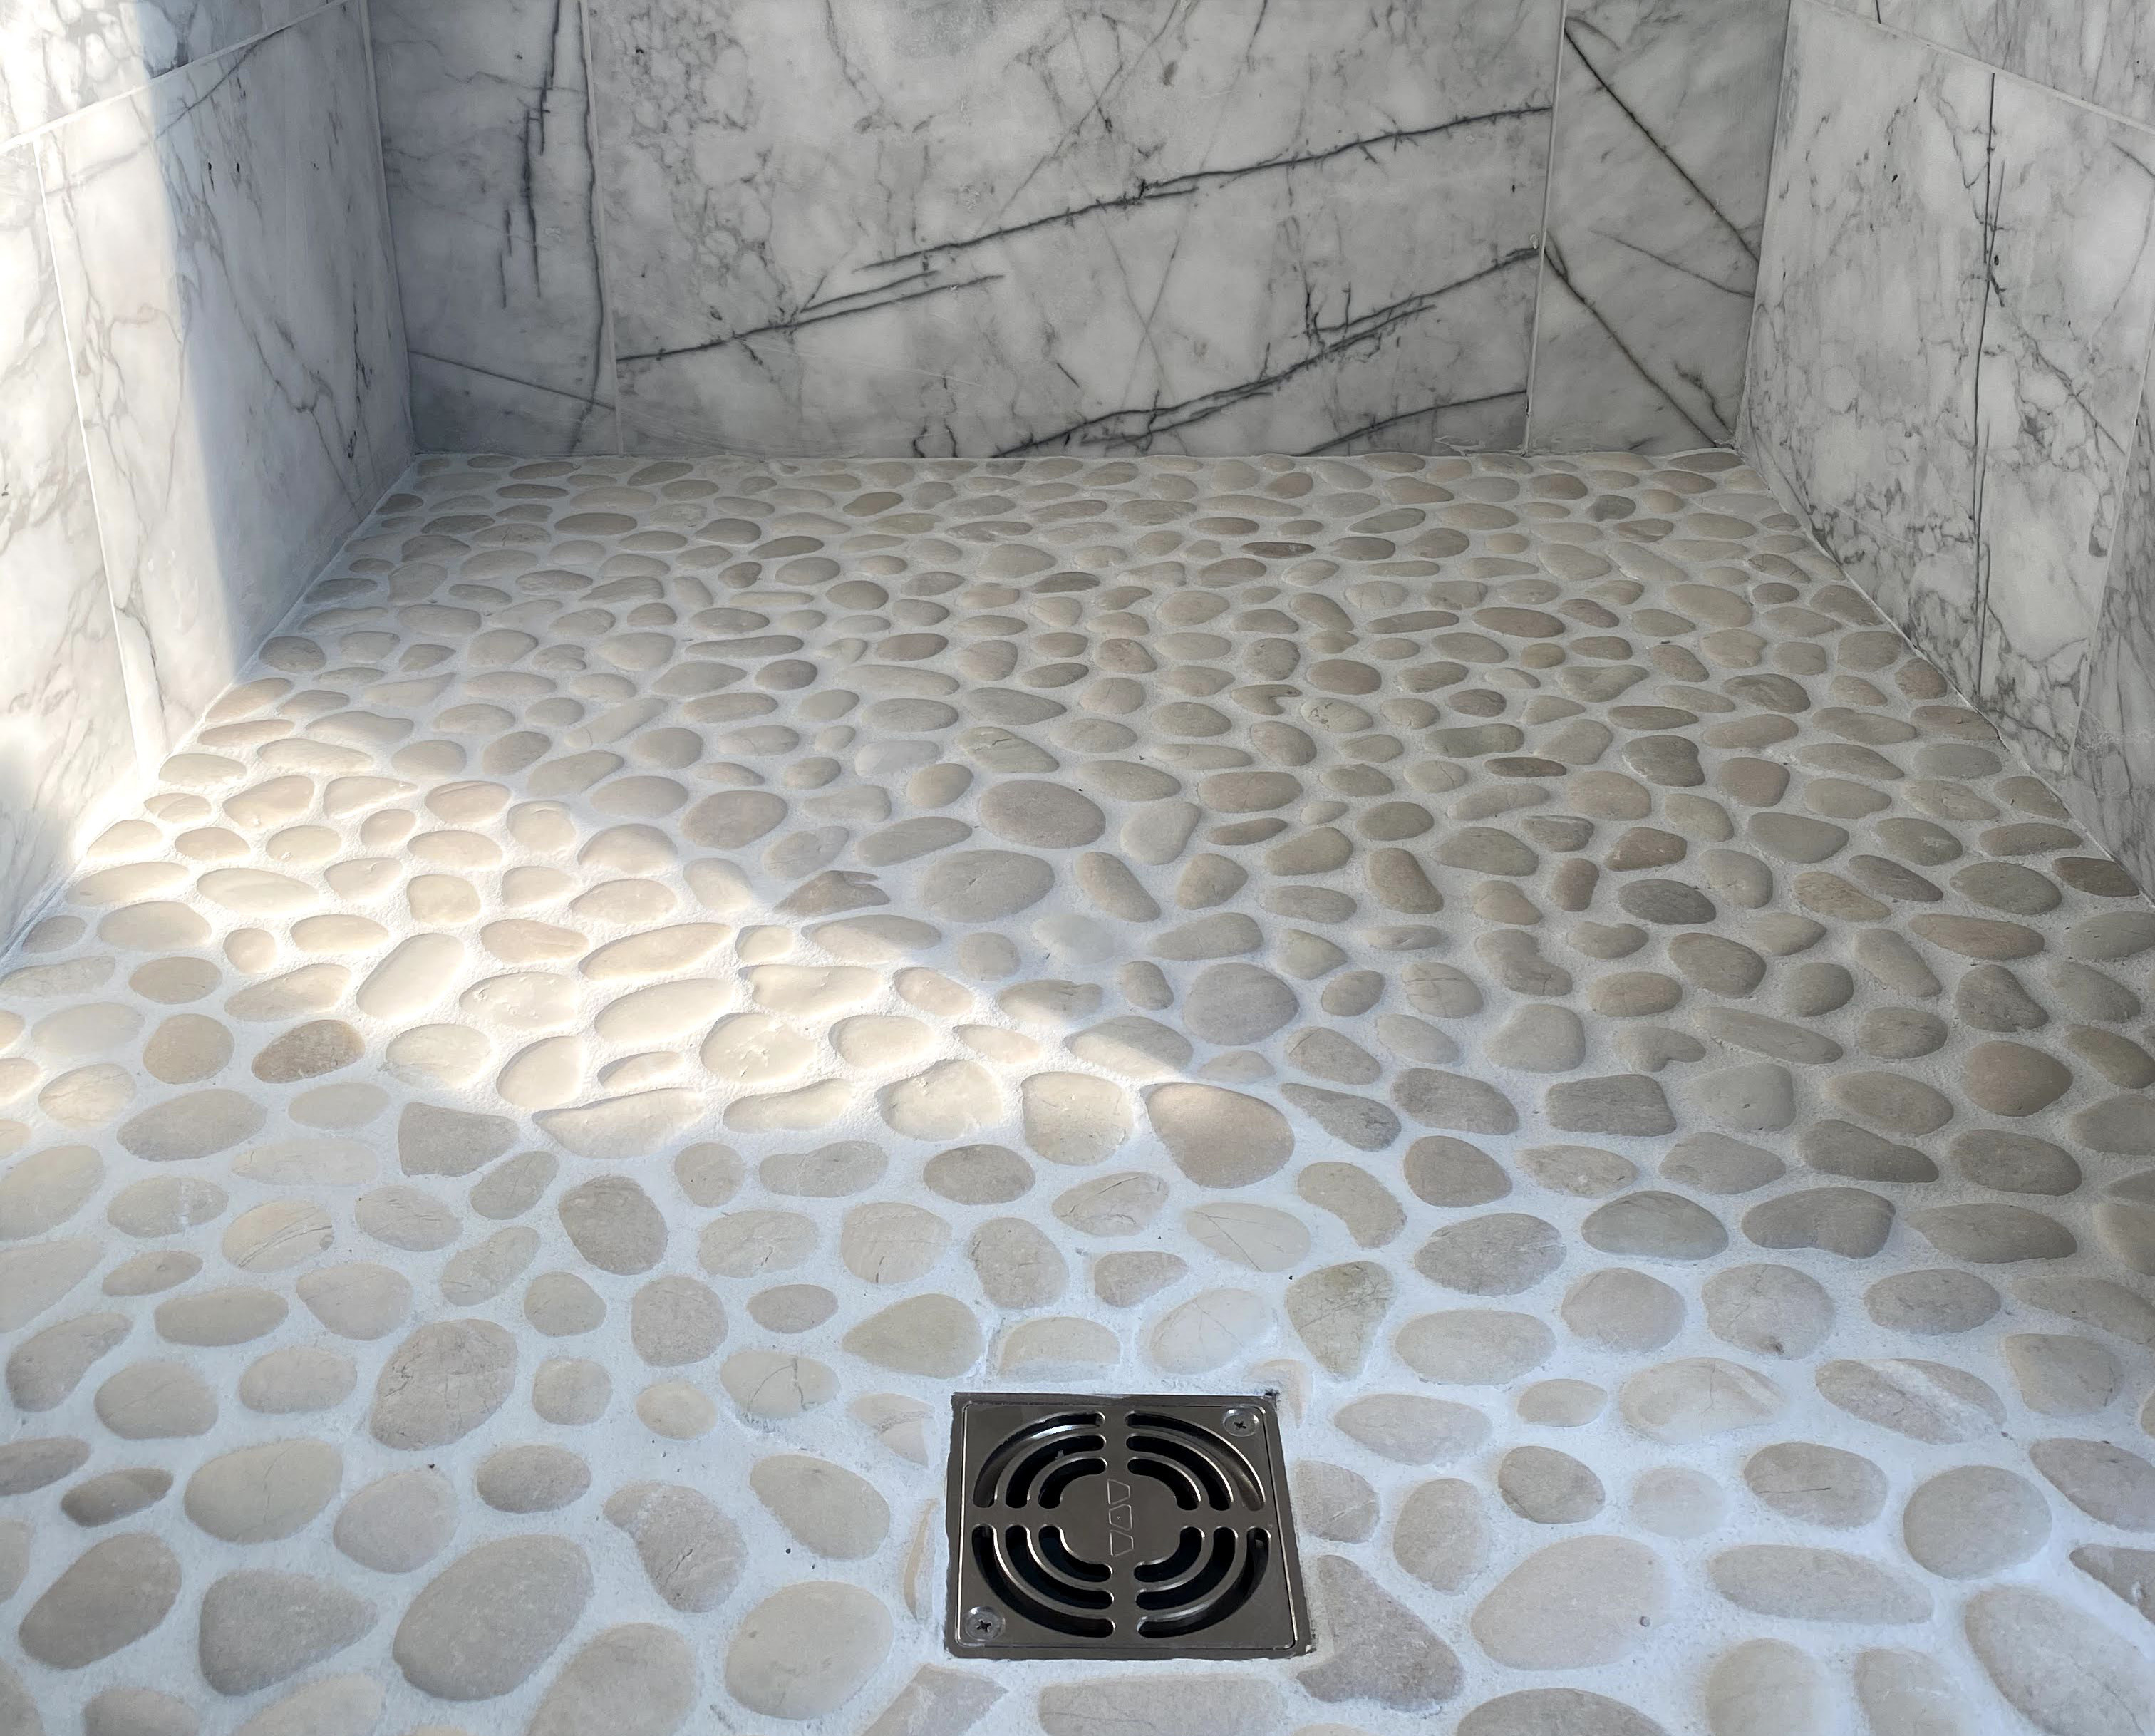
Tips for installing and cleaning a pebble-stone shower floor – The
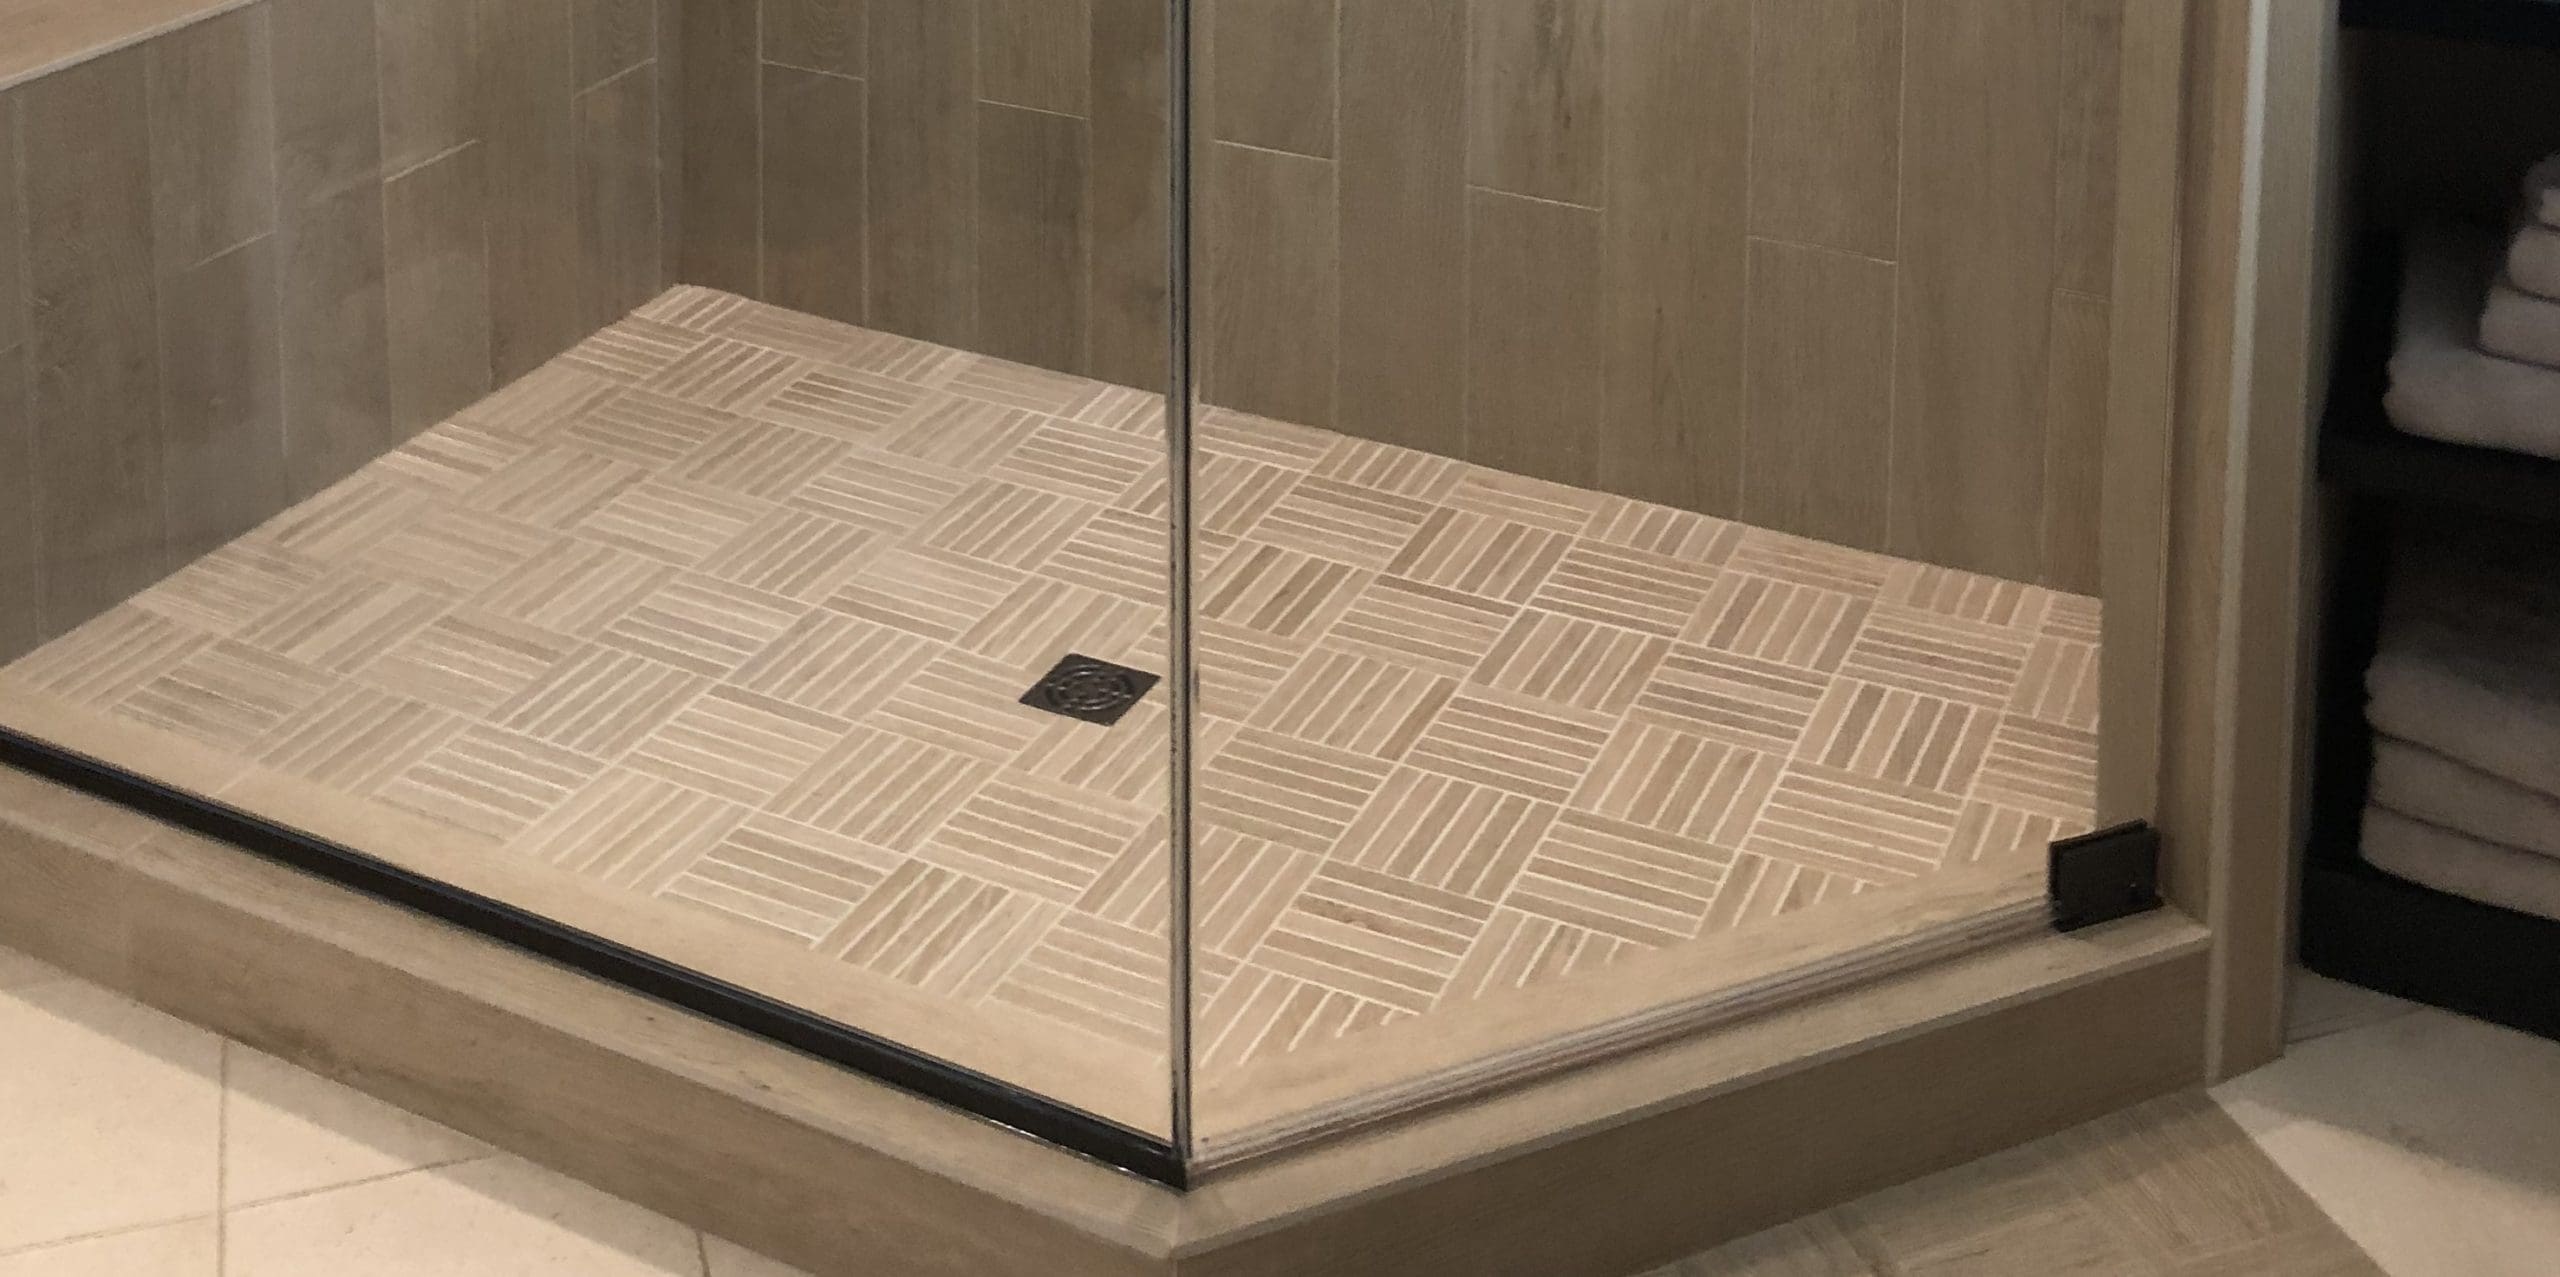
Using Big Tiles on Your Shower Pan u2014 Tile Lines
How to Lay Tile Over an Existing Shower Floor – Dengarden
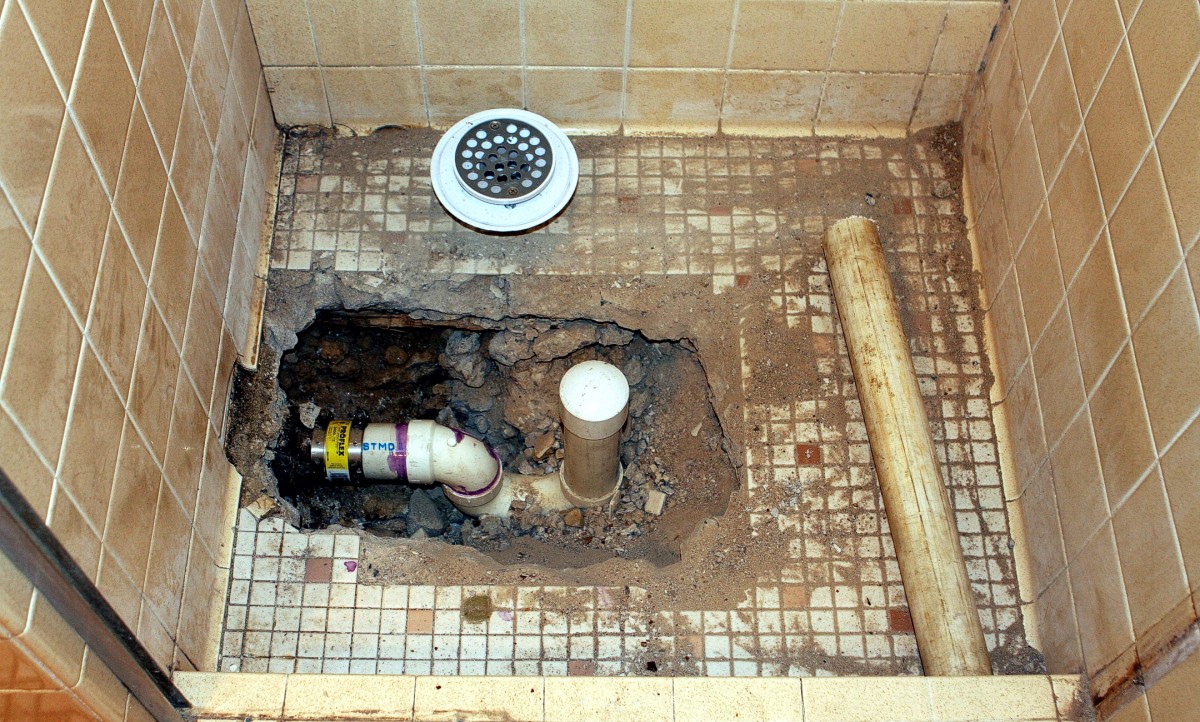
How to Build Shower Pans (DIY) Family Handyman

Shower Pans – Tile vs Solid Surface – Select Kitchen And Bath
Bathroom Shower Floor – Tile Showers Installed – Marietta, GA

Related articles:
- Vintage Bathroom Floor Tile Patterns
- Bathroom Floor Tile DIY
- Limestone Bathroom Floor Tiles
- Bathroom Floor Porcelain Tile
- Concrete Bathroom Floor Ideas
- White Bathroom Ceramic Tiles
- Bathroom Floor Baseboard
- Rustic Bathroom Flooring Ideas
- Bathroom Flooring Options
- Bamboo Bathroom Flooring Ideas
Installing a tile floor shower can be a great way to bring beauty and sophistication to any bathroom. Whether you’re replacing an old shower or starting from scratch, tile showers provide the perfect opportunity to create a unique, personalized look in your bathroom. However, there are many considerations that go into the installation process and it’s important to understand the basics before you get started. This article will provide a comprehensive guide to installing a tile floor shower.
What Tools are Needed for Installing Tile Floor Showers?
Creating a tile floor shower requires more than just tile. In order to successfully install a tile floor shower, you will need the following tools:
-A wet saw
-A drill
-A jigsaw
-Tile spacers
-Tile nippers
-A trowel
-A grout float
-Grout sealer
-Caulk
-Tile adhesive
How Should I Prepare My Shower Area?
Before you begin installing a tile floor shower, it’s important to prepare the area properly. This includes cleaning the space, making sure the walls are level, and installing waterproof membranes.
Start by ensuring that the walls of the shower area are clean and level. If any of the walls are not level, use a level and shims to make them even. Then, use a damp cloth to remove any dirt or debris from the walls.
Next, install a waterproof membrane on the walls and floor of the shower area. This will help protect your tile from moisture and damage. Finally, lay down a bed of thinset mortar before laying down your tiles. This will ensure that your tiles stay in place and don’t crack or become loose over time.
How Do I Lay Tile for My Shower?
Once your shower is properly prepared, it’s time to start laying down tile! Start by measuring out your first row of tiles and marking their location with a pencil or chalk line. Then, use your wet saw to cut each tile to size. It’s important to make sure that each tile is cut perfectly so that they fit together snugly. Once each tile is cut, apply adhesive to the back of each one and lay them in place on the mortar bed. Make sure to leave enough space between each tile for grout (usually about 1/8″). Finally, insert spacers between each tile and press them firmly into place.
Continue laying tiles in this manner until you have covered the entire floor of your shower area. Once you have laid all of your tiles, let them sit for 24 hours so that the adhesive can dry properly before grouting.
How Do I Grout My Tile Floor Shower?
Once your tiles have set for 24 hours, it’s time to start grouting! Begin by mixing up your grout according to package instructions and then spread it over your tiles using a grout float. Make sure to fill all of the cracks and spaces between each tile completely before pressing down firmly with the float. Once all of your tiles are grouted, let them sit for 24 hours so that the grout can dry completely before applying sealer.
Once your grout has dried completely, it’s time to apply sealer! Use a paintbrush or roller to apply two coats of sealer over the entire tiled area. This will help protect your tile from moisture and dirt buildup over time. Finally, use caulk around the edges of your shower area where tiles meet walls or fixtures in order to provide an extra layer of protection against water seepage.
Conclusion:
Installing a tile floor shower is an excellent way to bring beauty and sophistication into any bathroom space. While it may seem like a daunting task at first, following these steps will ensure that your new shower is installed correctly and looks beautiful for years to come!