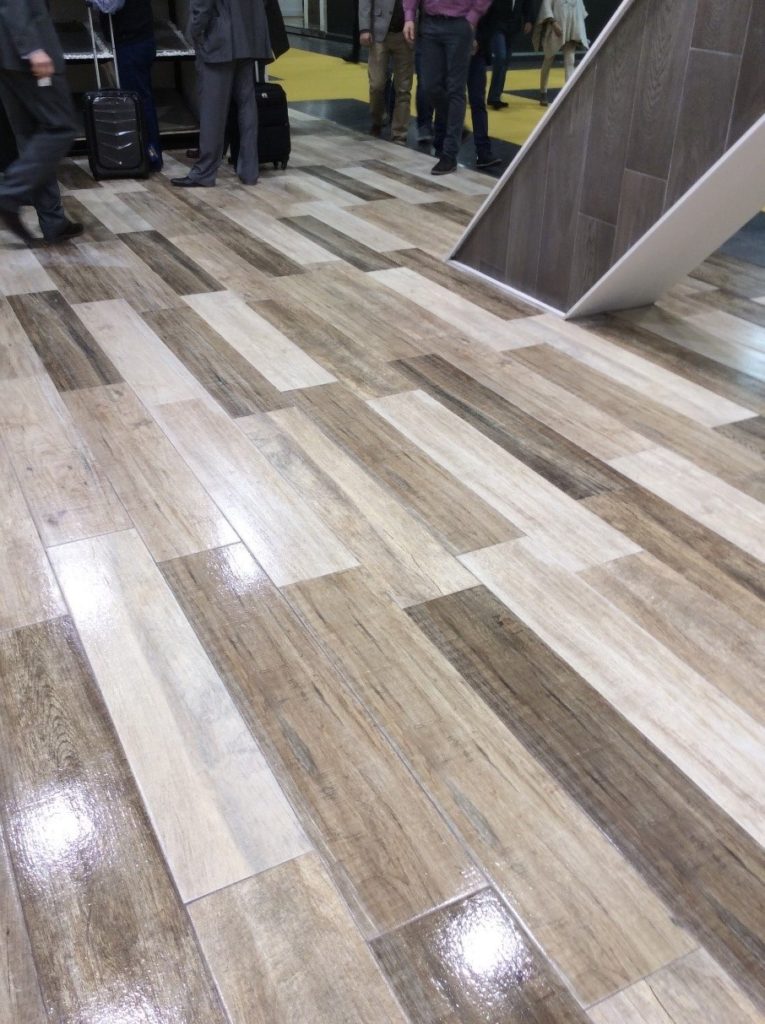
Wood Tile Floor Layout
Tiles are easier to install though the protection offered to concrete can easily be accomplished by painting also. Creating the own tile pattern of yours and publishing an accessory tile allows you to decorate the floor in the own way of yours. They’re durable and long lasting – and this is precisely why ceramic tile flooring has become used in bathrooms and kitchens with amazing success.
Images Related to Wood Tile Floor Layout
Wood Tile Floor Layout
One of the most important varieties is the stone flooring utilized in castles as well as other buildings. In many cases they do the set up, unpolluted up, and also removal of all of the old flooring and debris for a low price. You are able to even find tile flooring on patios and barbeque parts. And then, have up the wood best floor and present the subfloor.
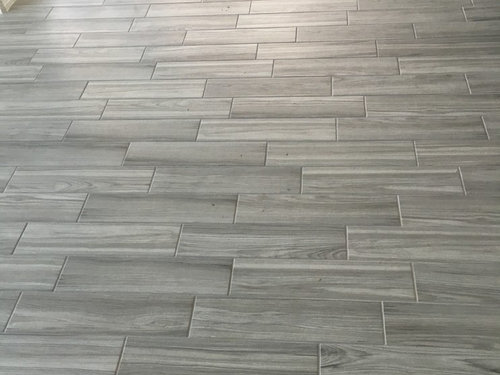
Porcelain wood look tile pattern?
You then must discover the mid points of the wideness as well as the length of the floor you wish to carry out your ceramic tile for the floor flooring installation process on; connect these midpoints to develop a plus throughout the floor area. If you set the tile, just a light pressure is needed. Instead, it cracks, first in the grout then within the body of the tile.
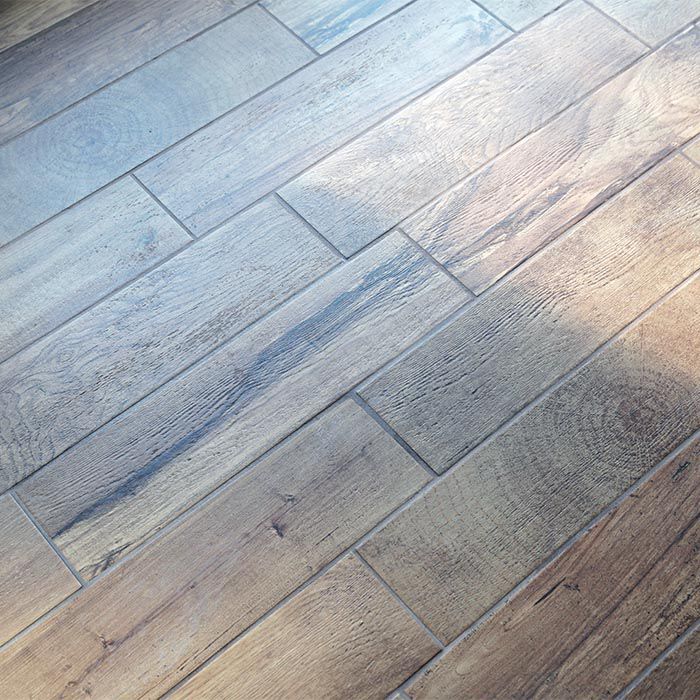
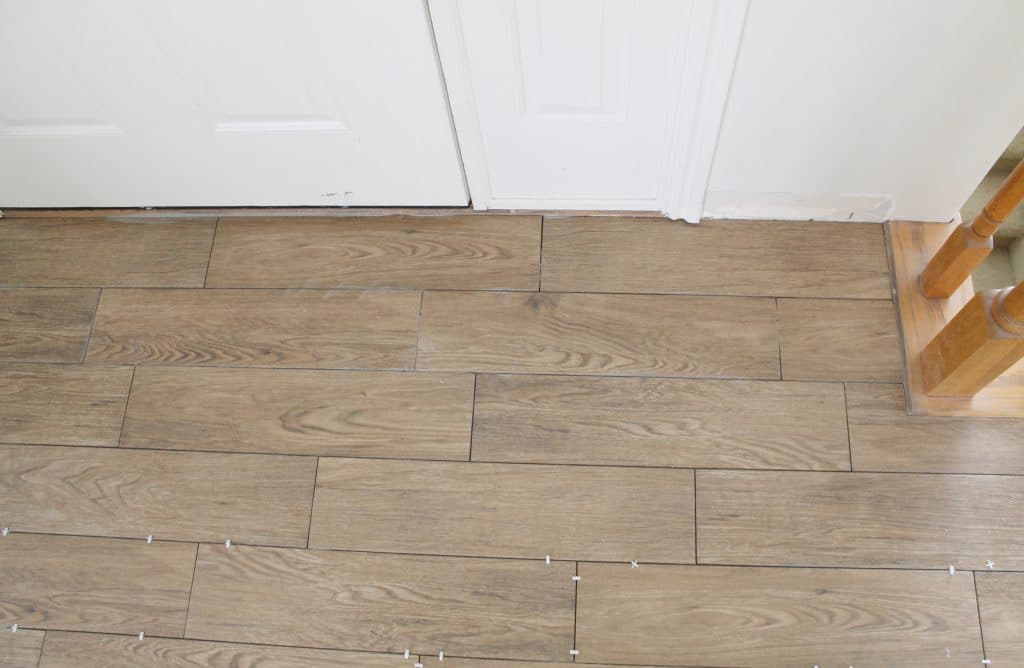
More tips for installing wood look tile flooring DIYTileGuy
A Guide To Parquet Wood Floor Patterns Wood floor pattern

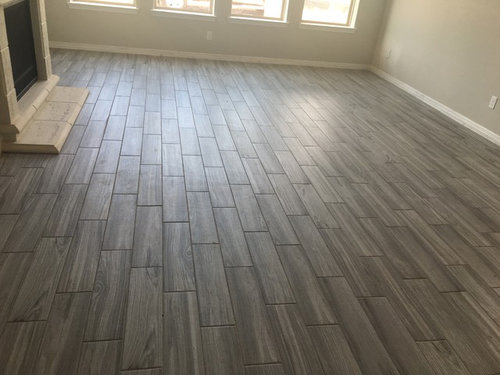
Wood-look Tile Flooring: How to Lay Tile That Looks like Wood
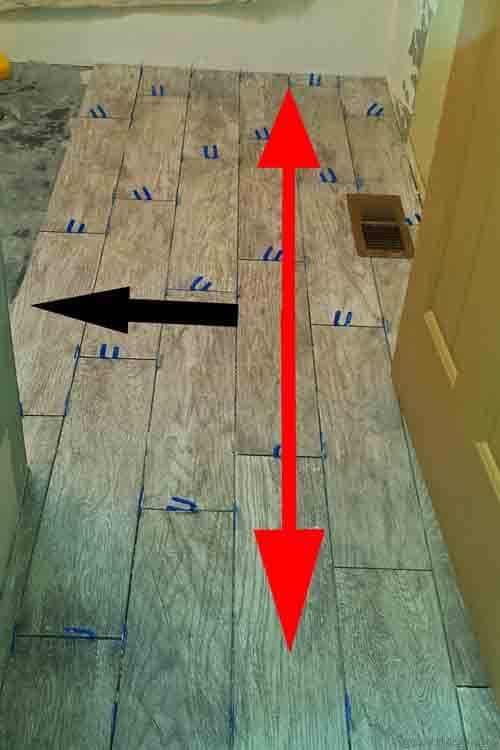
When installing wood grain tiles, stagger them like wood planks

Porcelain wood look tile pattern?

Kateu0027s Wood Plank Tile Floor and Wall Guide – Tile Outlets of America
Porcelain wood look tile pattern?
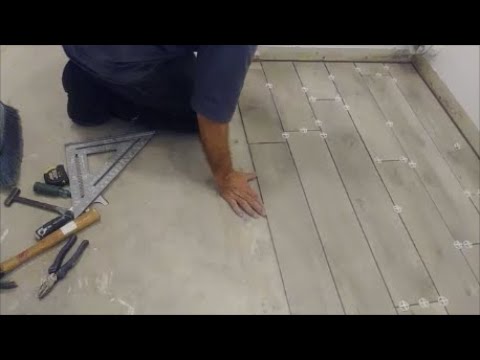
How to Install Wood-Look Floor Tile
How to Randomly Install Wood Look Porcelain Tile – Set Tile In A Random Pattern
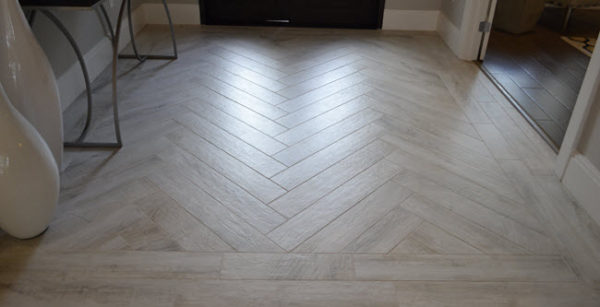
China Living Room Floor Layout Patterns Herringbone Wood Grain

Tips for Achieving Realistic Faux Wood Tile – Chris Loves Julia
Tile Patterns and Layout Ideas u2014 Tile Lines

Related articles:
- Vintage Bathroom Floor Tile Patterns
- Bathroom Floor Tile DIY
- Limestone Bathroom Floor Tiles
- Bathroom Floor Porcelain Tile
- Concrete Bathroom Floor Ideas
- White Bathroom Ceramic Tiles
- Bathroom Floor Baseboard
- Rustic Bathroom Flooring Ideas
- Bathroom Flooring Options
- Bamboo Bathroom Flooring Ideas
Wood Tile Floor Layout: The Basics of Design and Installation
Wood tiles are the perfect way to bring warmth and beauty into any home. With a wide variety of colors, finishes, and sizes, it’s easy to find the perfect tile to fit any design style. But when it comes to wood tile floor layout, there’s more than meets the eye. Read on for the basics of how to lay out wood tiles for an eye-catching yet practical design.
Choosing Your Tiles
When selecting wood tiles, consider the overall look you want to achieve. Do you want a classic, rustic look? Or do you prefer a modern, polished look? Wood tiles come in a variety of colors, finishes, and sizes, and knowing your vision can help you narrow down your choices.
Preparing Your Floor
Before laying out your wood tile floor, it’s important to make sure your surface is ready for tile installation. The subfloor should be level and all old flooring materials should be removed. If there are any existing cracks or holes in the subfloor, they should be filled in with mortar or self-leveling compound before laying out the tiles.
Layout Basics
When laying out wood tile flooring, it’s important to start with a plan. Using graph paper or a computer program can help you visualize the pattern you want to create. It’s also important to take into account any obstacles like doors or cabinets that may affect the layout of your tiles. For best results, use a chalk line or grid tape to create a guideline for where the tiles should be placed. This will help ensure that your tile patterns are symmetrical and even.
Installation Tips
Once you have your layout laid out, it’s time to start installing the wood tile flooring. You should use a quality trowel with appropriate notches for the size of tile you’re working with. Make sure to leave a gap between each tile and use spacers if necessary to ensure even grout lines. To secure each tile in place, use a good quality adhesive such as mastic or thinset mortar. Once all of the tiles are in place, let them dry for 24 hours before grouting.
Caring for Your Floor
It’s important to take proper care of your wood tile floor to keep it looking its best for years to come. Vacuum regularly and use a damp mop when cleaning up spills or dirt. Avoid using harsh cleaners or abrasives that could scratch or dull the finish on your tiles. For deeper cleaning jobs, use an approved hardwood floor cleaner and follow manufacturer instructions for best results.
Common Questions & Answers
Q: How do I know which type of adhesive to use?
A: Most manufacturers will recommend a specific adhesive for their products; make sure to follow their instructions for best results.
Q: What type of grout should I use?
A: Make sure to choose a grout that is designed specifically for use with wood tile floors; this will help ensure the grout lines stay clean and free of dirt and debris over time.
Q: How often should I reseal my wood tiles?
A: Depending on the finish of your tiles, they may need to be resealed every few years in order to maintain their original appearance. Always follow manufacturer instructions when resealing wood tile floors.