What previously you select among the floor tiles makes sure the platform can help support the floor tiles you will use because floor tiles are quite heavy particularly marble floors. Just like with the thin set, wipe off the extra grout and after that let it set for no less than ten days before you decide to seal the tiles completely. They could be easy to look at but the clean lines of theirs bring a complex appearance to a space.
Images Related to Tile Floor Subfloor
Tile Floor Subfloor
:no_upscale()/cdn.vox-cdn.com/uploads/chorus_asset/file/19496947/color_gutters_illo_web_1.jpg)
Ceramic tiles are quite easy to maintain. When you're getting prepared to set up the tile flooring you are going to need to get the ceramic or perhaps porcelain flooring, cement backer board, tile for the floor nippers, sponges, tape level, knee pads, floor tile cutter or perhaps floor tile saw, grout, square, man-made materials float, chalk type, lots of water, eye protection, thin set, buckets, hammer, notched trowel, along with nails.
Install a ceramic tile floor Siouxland Homes siouxcityjournal.com
The furnishings legs of yours must have felt pads on them to avoid scratching the tiles. While many consumers have shifted towards carpeting and wood flooring, type flooring continue to eclipses the majority in popularity. When the floor is fitted by a skilled installer, they will warrant the tile and work that they have done. Which you utilize depends on the thickness of your ceramic tile flooring.
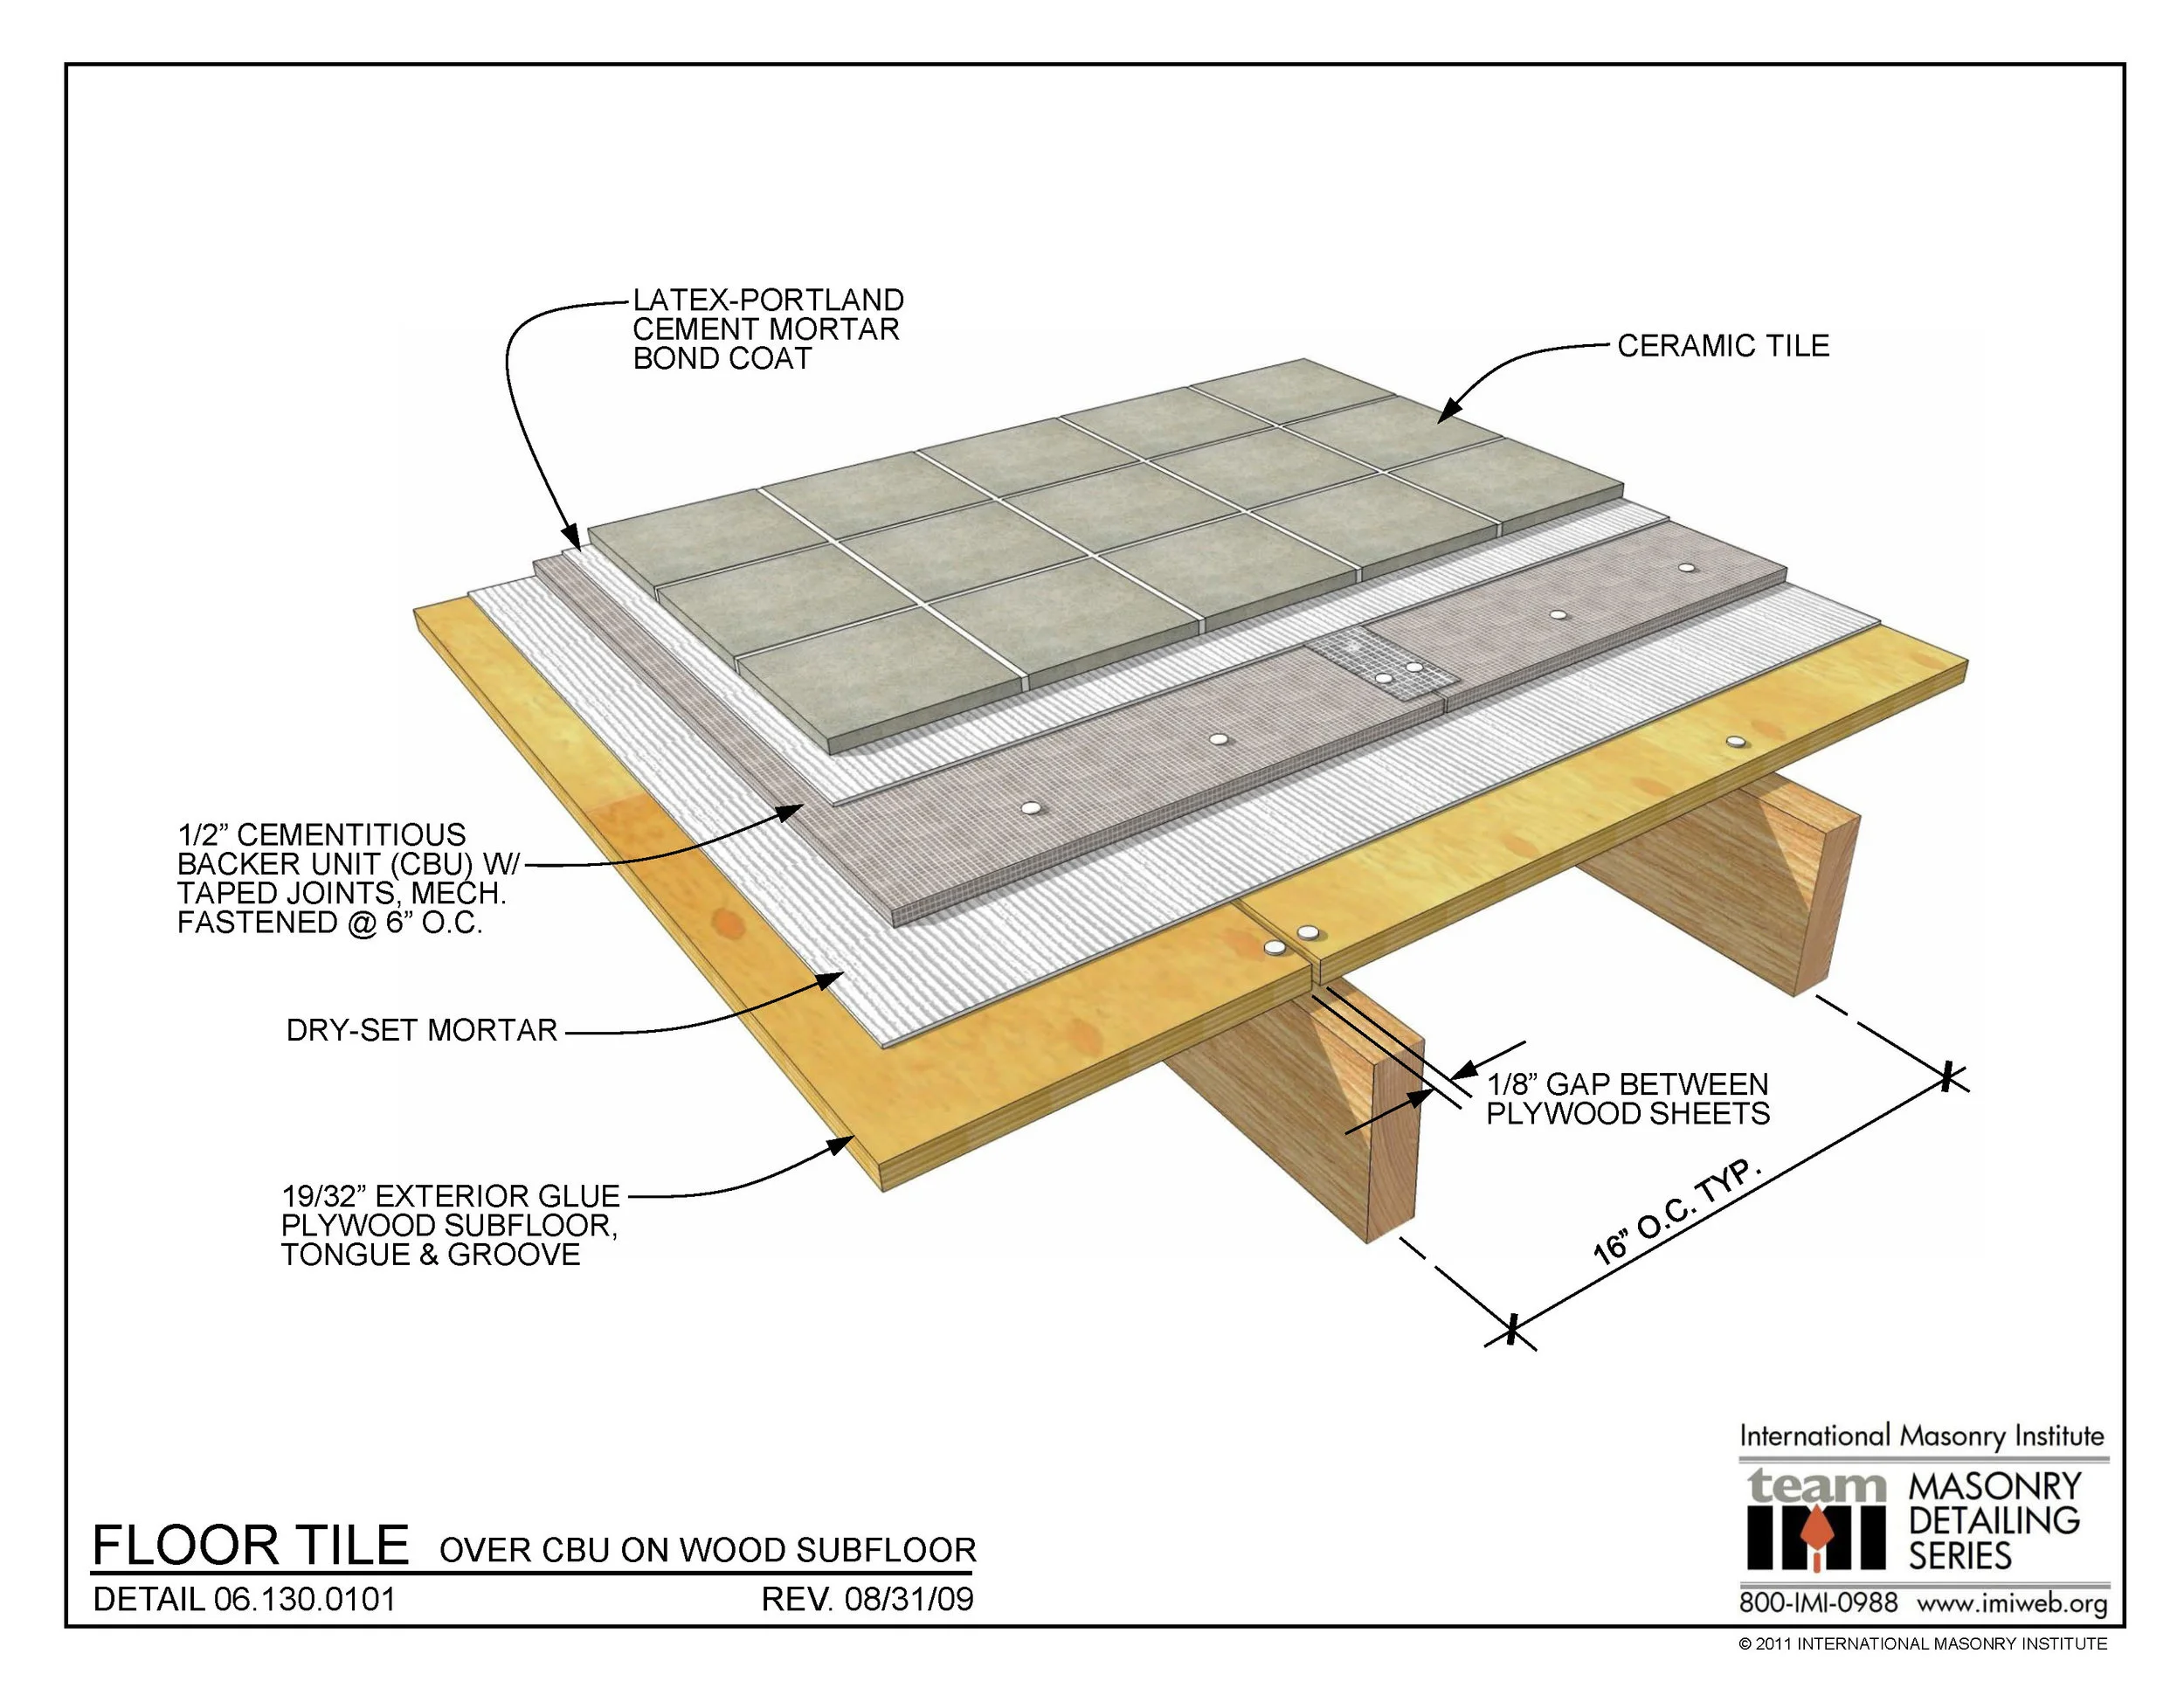
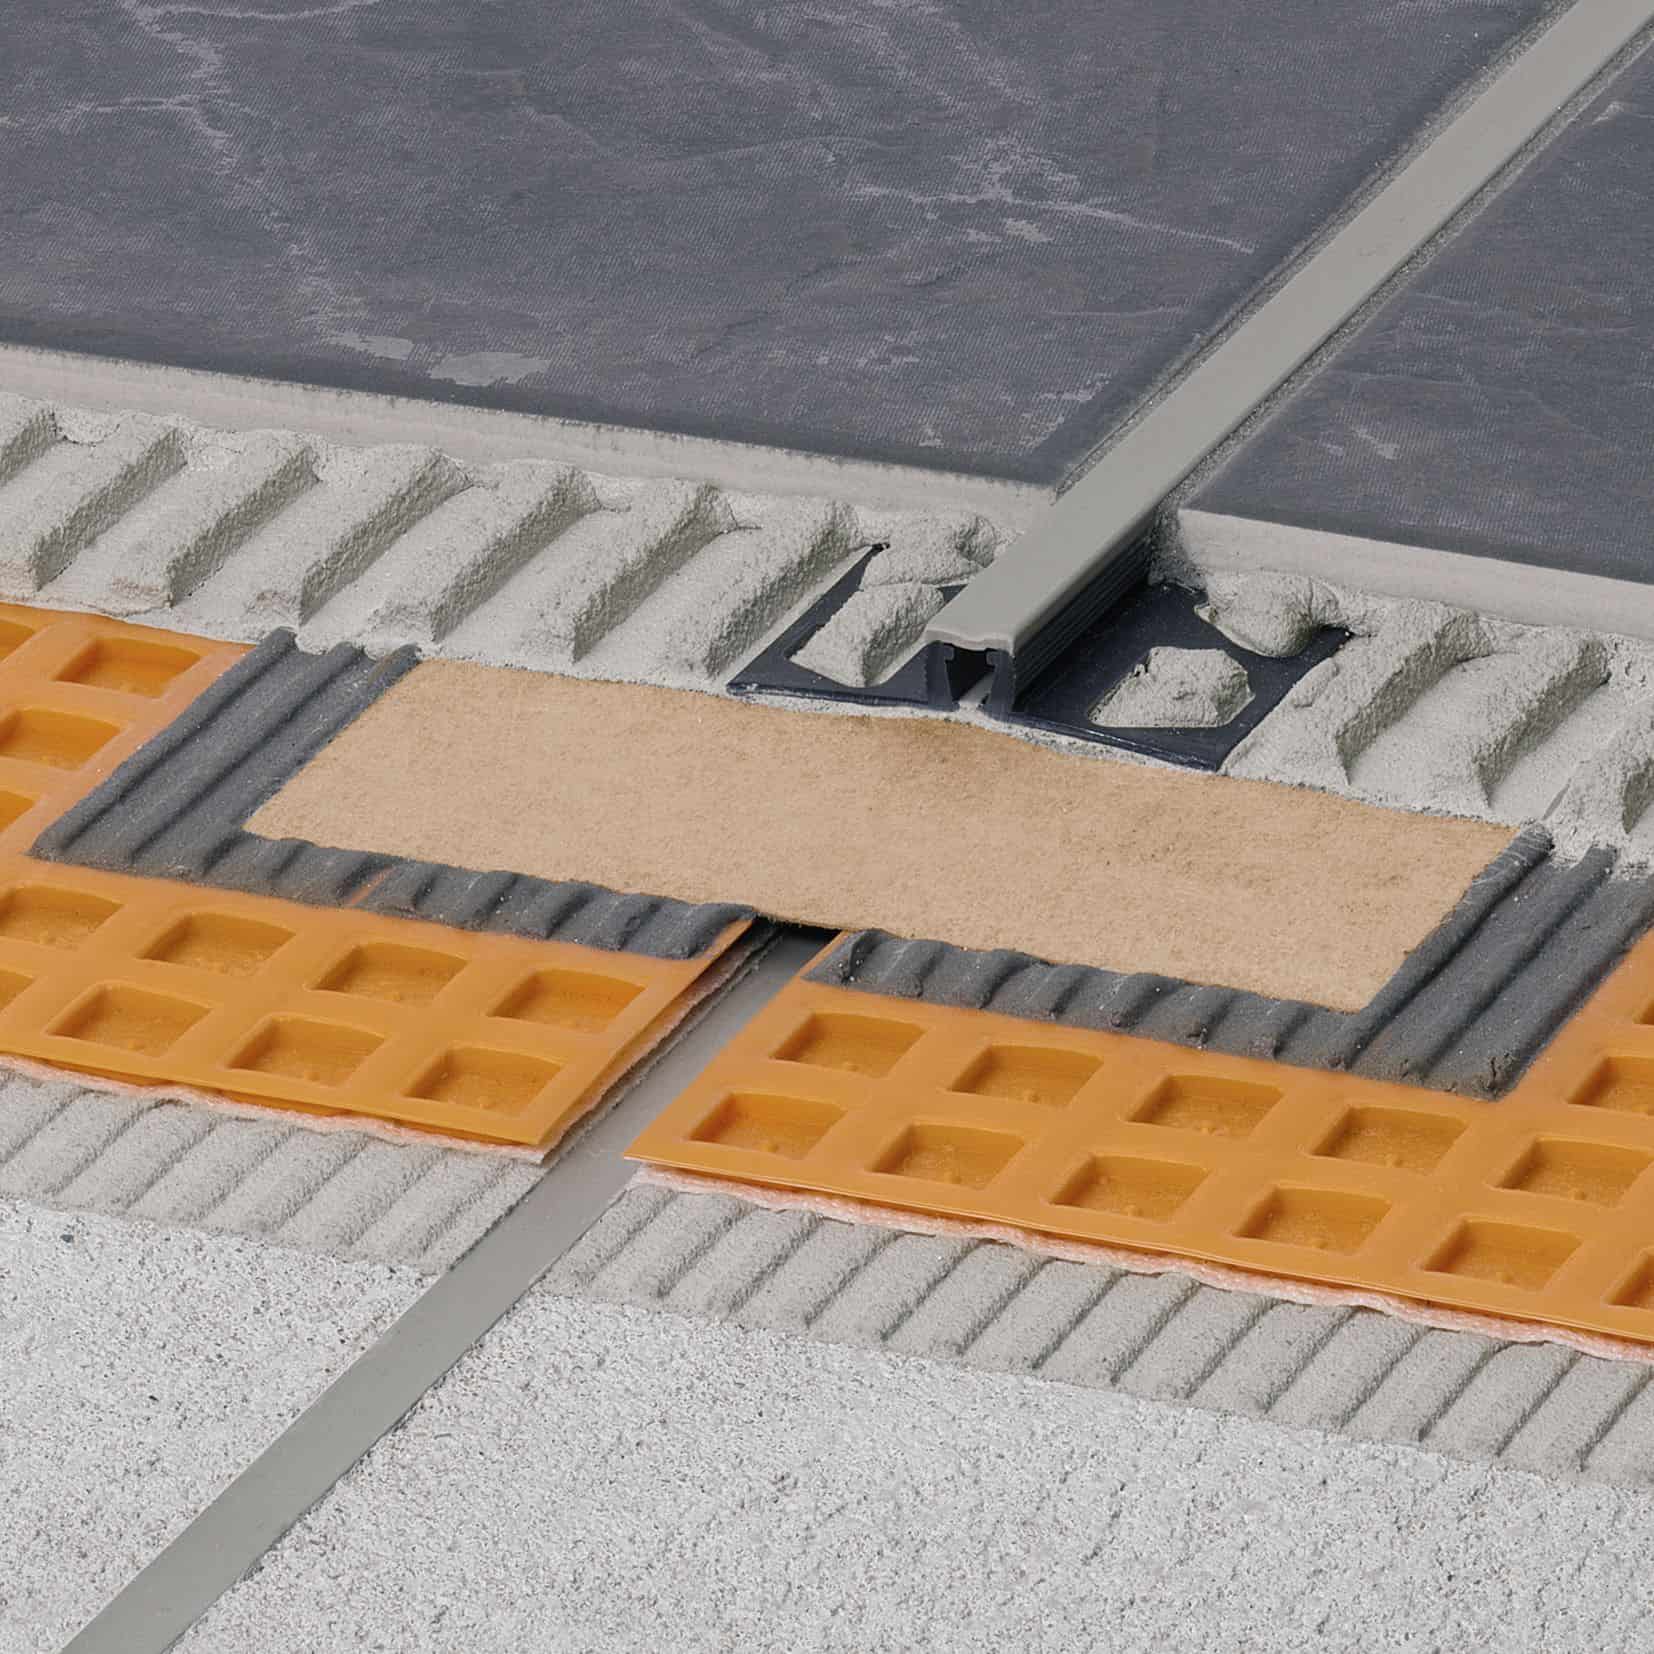
Subfloors and Underlayment for Ceramic Tile Floors
:max_bytes(150000):strip_icc()/best-subfloors-to-use-for-laying-tile-1822586-02-631a13bfdb954ff5a1f80ff1690500f0.jpg)
Prep a Subfloor for Tile – Fine Homebuilding

Tile Floor Underlayment Options – HomeTips
How to Prepare a Subfloor for Tile Installation
How to Install Tile Backer Board on a Wood Subfloor (DIY)
Cement Board Installation u2014 Cabinet Painting – Kitchen Remodeling
How to Prepare a Subfloor for Tile Installation
Preparing Subfloor for Tile The Home Depot

Understand Tile Underlayment Principles before Floor Installation
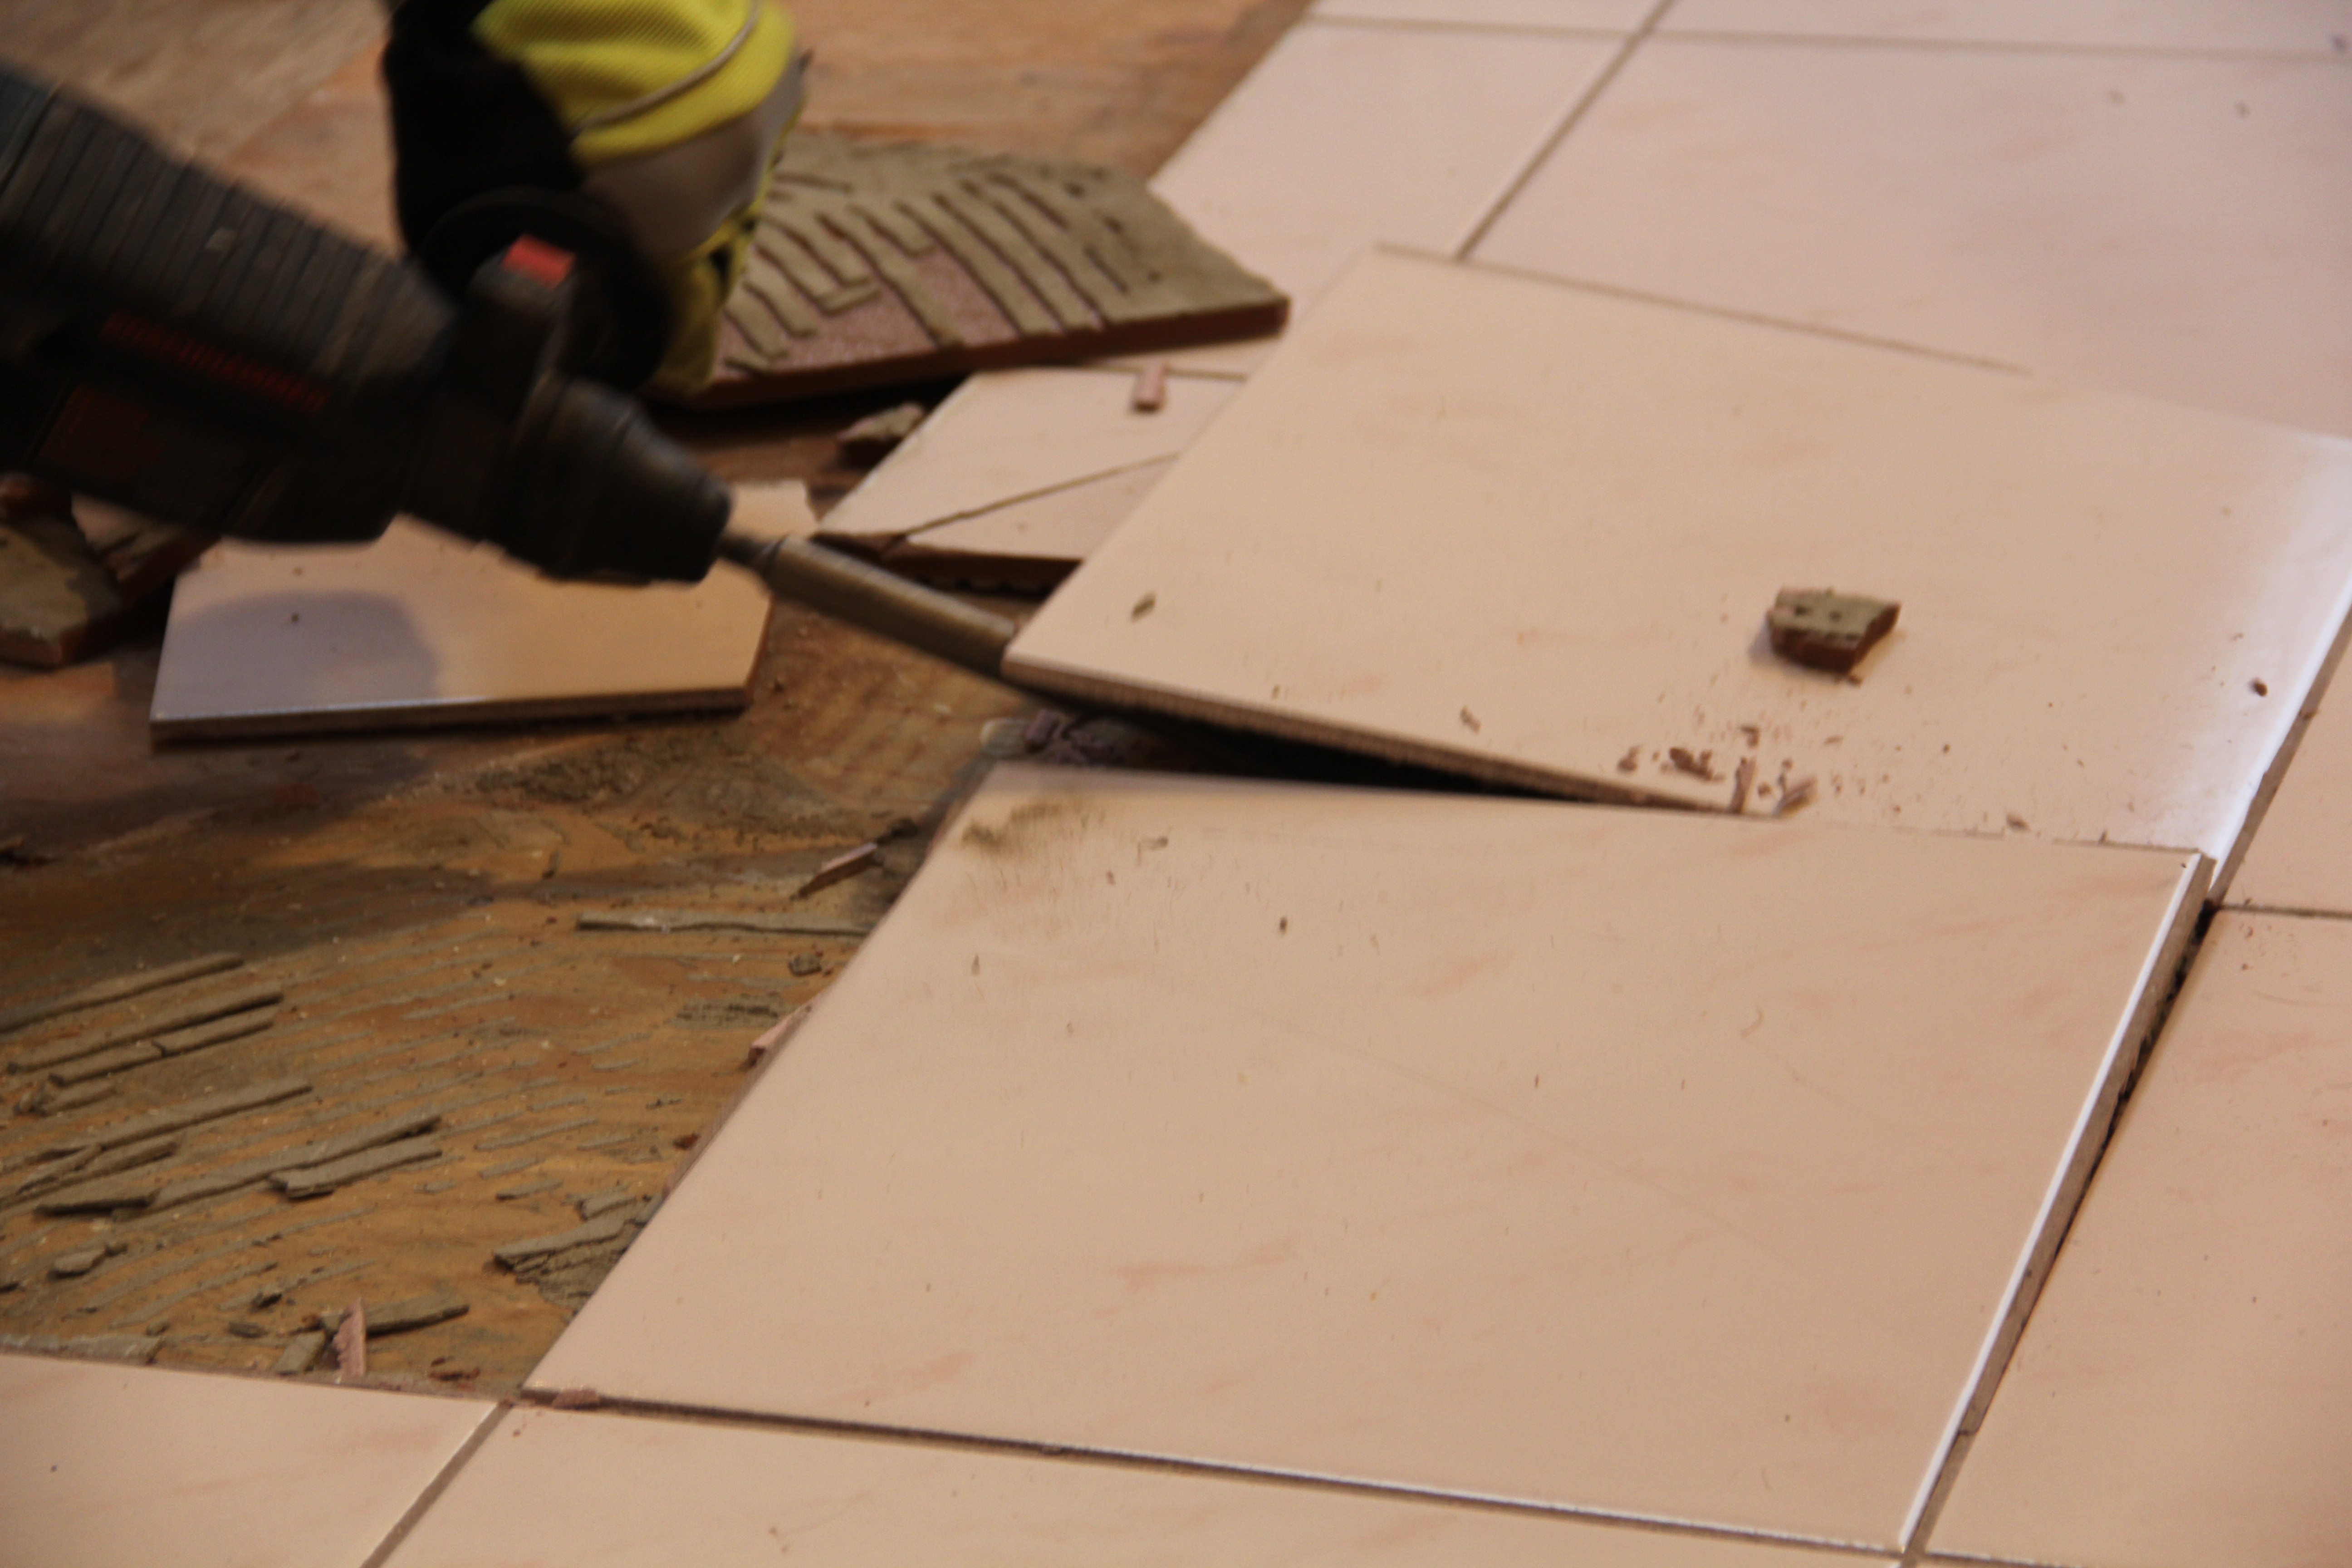
How To Remove A Tile Floor and Underlayment – Concord Carpenter
Soundproofing Tile Floors Soundproofing Company

Best Subfloor For Ceramic Tile

Related articles:
- Vintage Bathroom Floor Tile Patterns
- Bathroom Floor Tile DIY
- Limestone Bathroom Floor Tiles
- Bathroom Floor Porcelain Tile
- Concrete Bathroom Floor Ideas
- White Bathroom Ceramic Tiles
- Bathroom Floor Baseboard
- Rustic Bathroom Flooring Ideas
- Bathroom Flooring Options
- Bamboo Bathroom Flooring Ideas
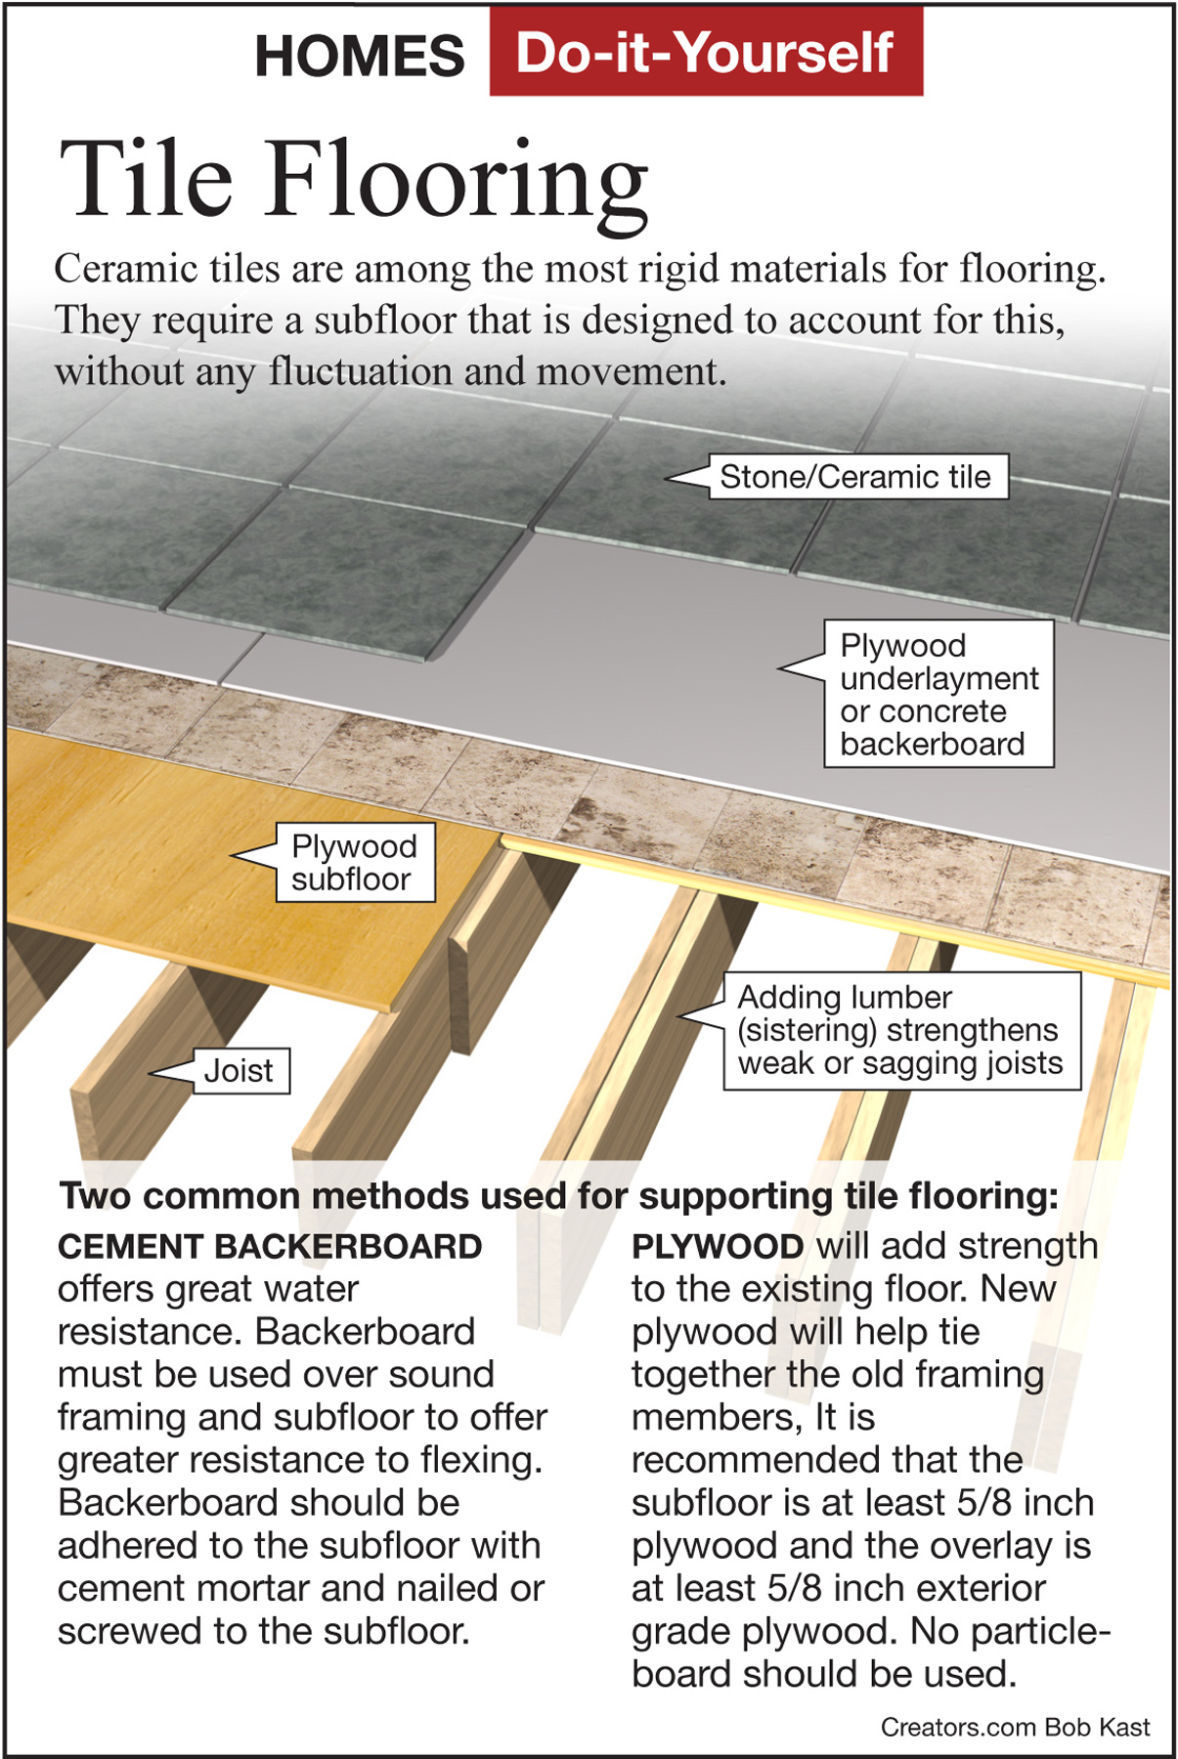
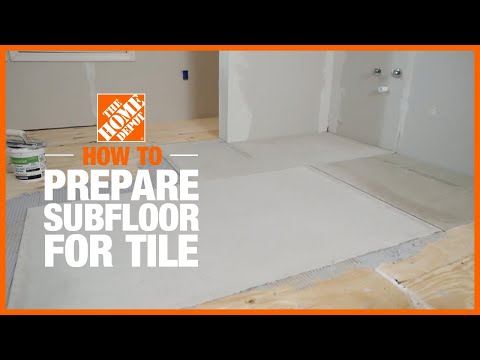
When it comes to installing a tile floor, having a strong and reliable subfloor is essential. A subfloor serves as the base for your tile flooring and provides the necessary support for the tiles. Without a solid foundation, your tile flooring will not last as long and could even become unstable. To ensure that your tile floor holds up for years to come, you need to make sure that the subfloor is properly installed and maintained.
In this article, we’ll explore everything you need to know about installing a tile floor subfloor. We’ll discuss the materials you’ll need, the steps involved in installation, and some tips on how to ensure your subfloor lasts for years to come.
What Materials Do I Need for Installing a Tile Floor Subfloor?
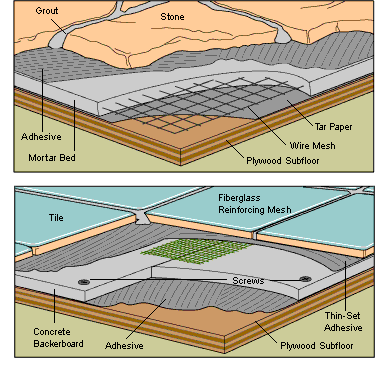
The materials you’ll need for installing a tile floor subfloor depend on the type of subfloor you’re using. Generally speaking, though, you’ll need plywood or cement backer board, thinset mortar, screws or nails, and grout sealer.
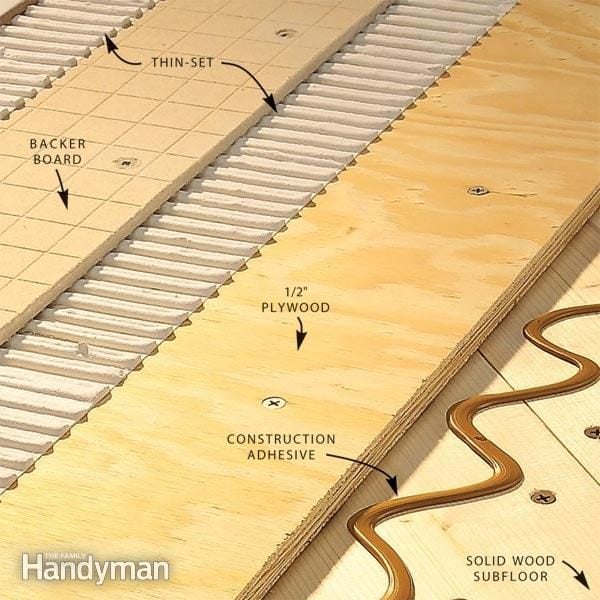
Plywood or cement backer board: Plywood or cement backer board serves as the base for your tiles. It provides an even surface for the tiles to adhere to and helps distribute the weight of the tiles more evenly throughout the floor.
Thinset mortar: Thinset mortar is an adhesive used to securely attach the tiles to the subfloor. It should be applied evenly and generously to ensure a strong bond between the tiles and the subfloor.
Screws or nails: Screws or nails are used to secure the plywood or cement backer board to the joists of your flooring. They should be placed at least 6 inches apart in order to provide adequate support for your subfloor.
Grout sealer: Grout sealer helps protect your grout from staining and damage over time. It should be applied after installation is complete in order to ensure that your grout stays looking its best.
Step-by-Step Guide to Installing a Tile Floor Subfloor
Installing a tile floor subfloor may seem like an intimidating task, but it doesn’t have to be! With a few simple steps, you can have your subfloor ready in no time. Here’s what you need to do:
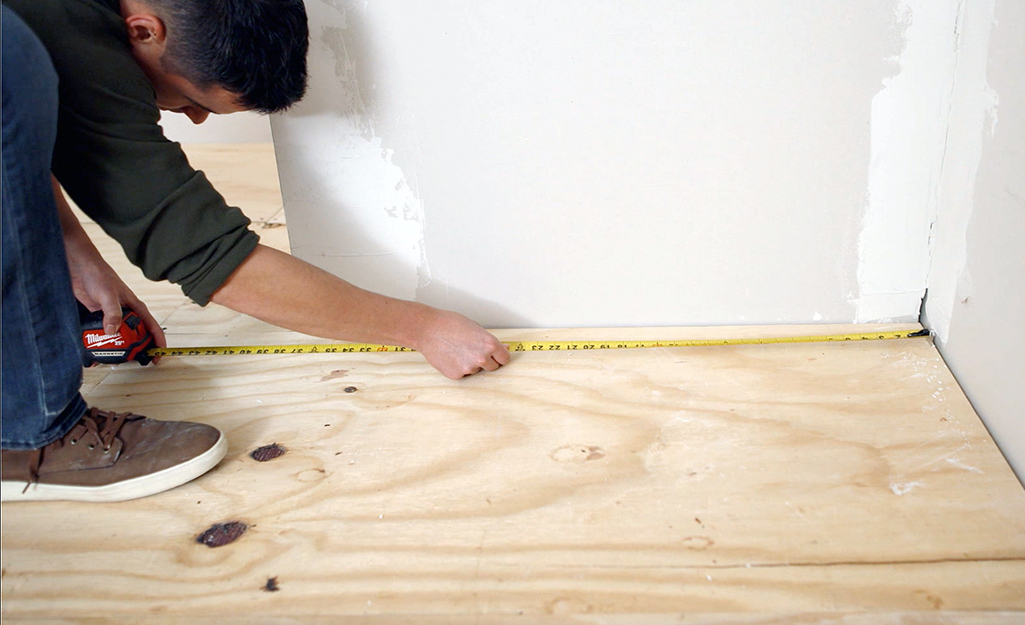
1. Prepare the area: Before beginning installation, make sure that the area is clean and free of debris. Remove any existing flooring and make sure that the surface is level and free of bumps.
2. Install plywood or cement backer board: Secure your plywood or cement backer board onto the joists with screws or nails spaced at least 6 inches apart. Make sure that all edges are flush with each other before moving on to the next step.
3. Apply thinset mortar: Mix up your thinset mortar according to package instructions and spread it over your subfloor using a notched trowel. Make sure that it is applied evenly and generously in order to ensure a strong bond between the tiles and the subfloor.
4. Install tiles: Once the thinset mortar has had time to dry (usually 2-3 hours), you can start laying down your tiles one by one using spacers as needed in order to keep them even with each other. Make sure that each tile is firmly pressed into place before moving on to the next one.
5. Grout: Once all of your tiles are laid down, it’s time to grout them into place using a grout float and grout sealer. Spread grout over each tile with a grout float, making sure that all joints are filled in completely with grout sealer applied after installation is complete in order to protect against staining and damage over time.
6. Allow time for curing: After installation is complete, it’s important to give your tile floor time for curing before walking on it or allowing furniture back onto it (usually 24-48 hours). This will help ensure that your tiles stay firmly in place for years to come!
Tips for Ensuring Your Subfloor Lasts Longer
Installing a tile floor