A wood floor has to be impeccably installed to be able to stand a possibility in the bathroom, where moisture as well as standing water is able to kill it quickly flat. The appropriate choices end up being an investment that will improve the cost of the when, if, and house you decide to sell the house of yours. Here again, you've a few options.
Here are Images about Installing A Tile Floor In Bathroom
Installing A Tile Floor In Bathroom

Nevertheless, vinyl could be worn in innovative methods to give your bathroom great looks and style. No matter if you're considering luxury bath room designs or perhaps a simpler one, you need to take note that the flooring material depends on the amount of water spillage which happens, the period of time you are able to devote for cleansing, along with the durability of the material.
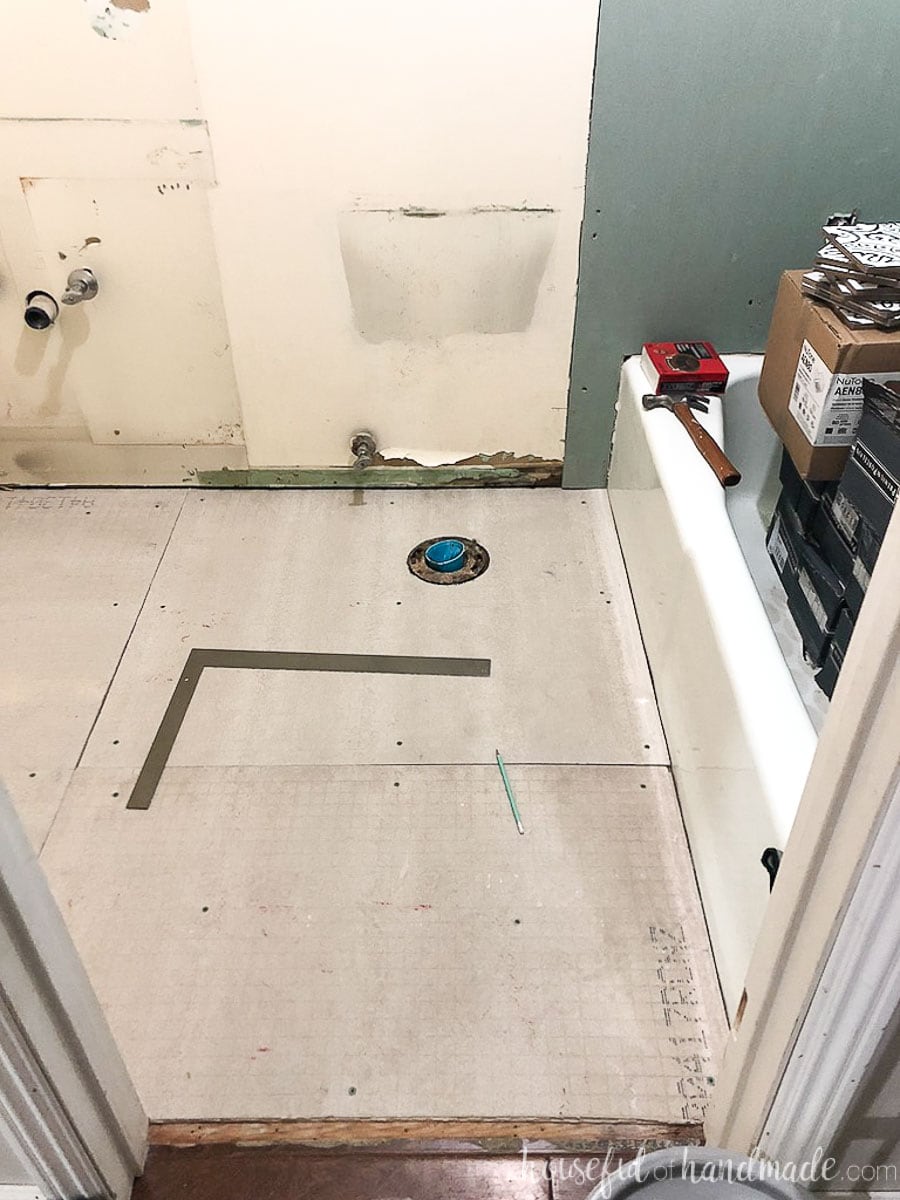
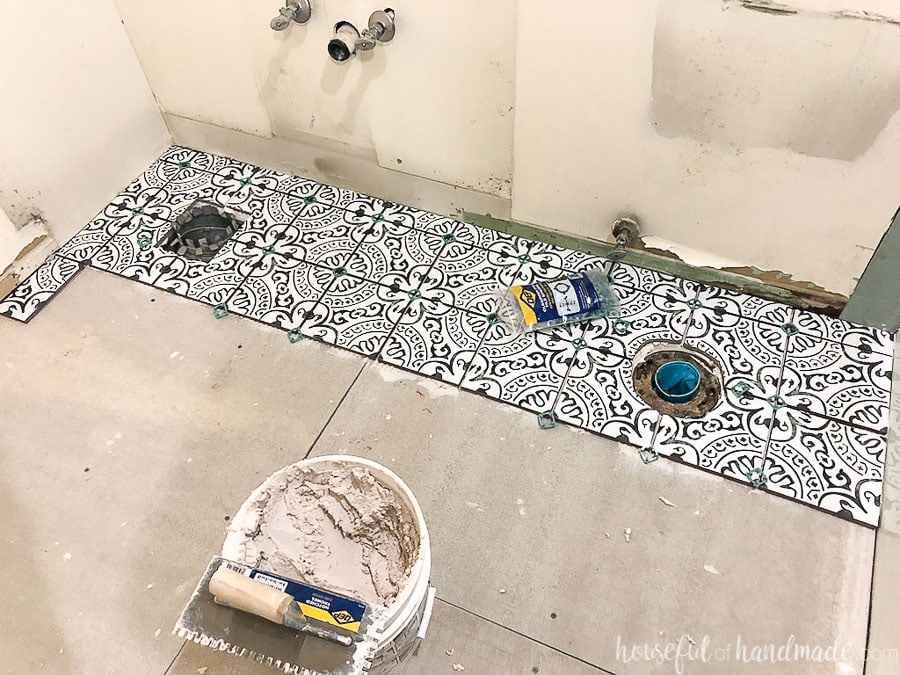
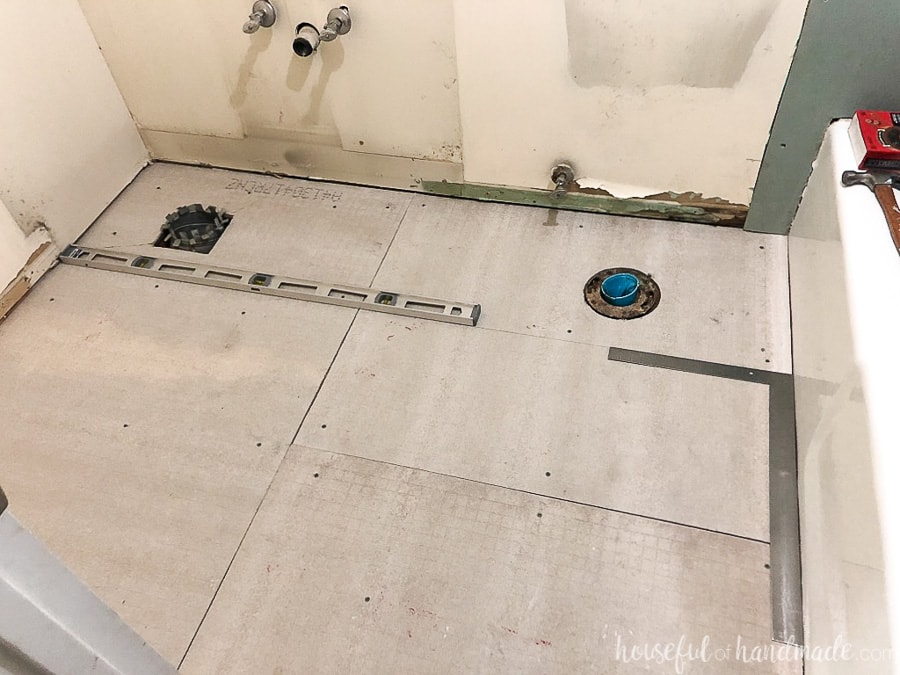
Laying Floor Tiles in a Small Bathroom – Houseful of Handmade
You do not need to promote yourself short when it comes to choosing a floor for your bath room. In case you're in doubt about the sort of flooring you would like for the bath room of yours, take a minute to look with the present fashion. Having an attractive and clean bathroom is really important in any home.
Images Related to Installing A Tile Floor In Bathroom
How to Lay a Tile Floor HGTV

Laying Floor Tiles in a Small Bathroom – Houseful of Handmade
How To Update Your Bathroom Floor Tiles – 6 DIY ideas

How to Lay a Tile Floor HGTV
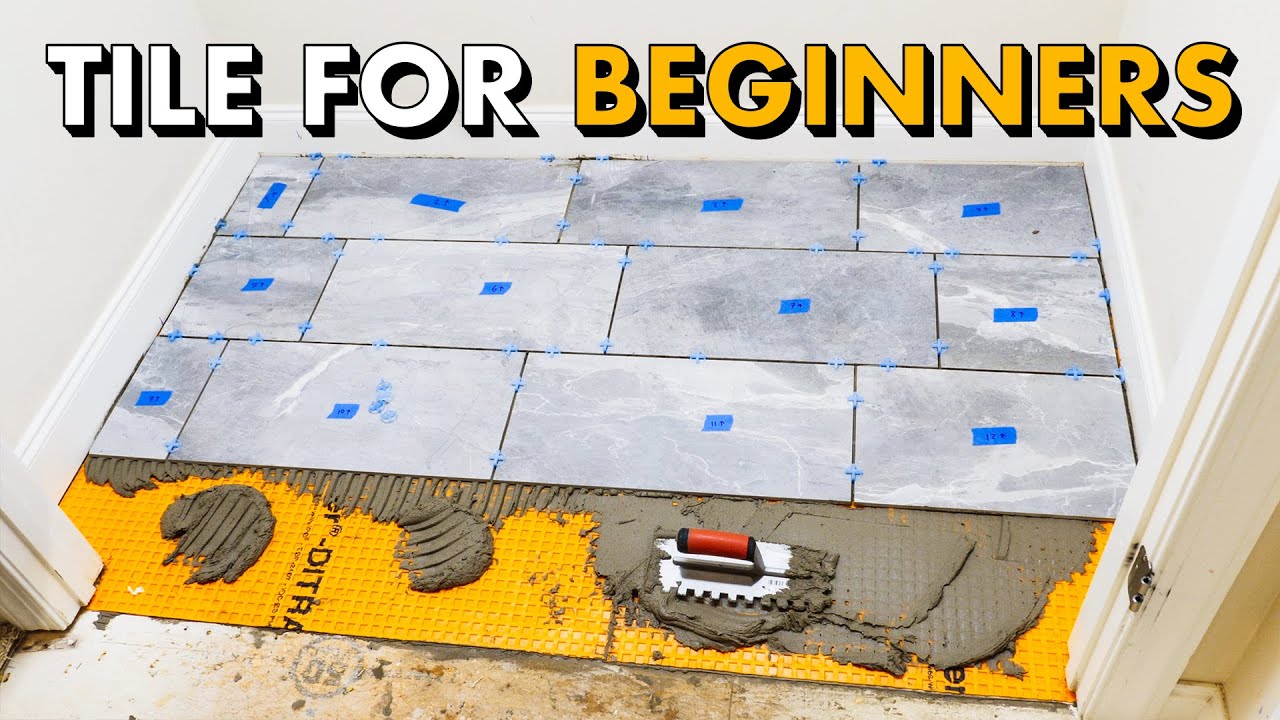
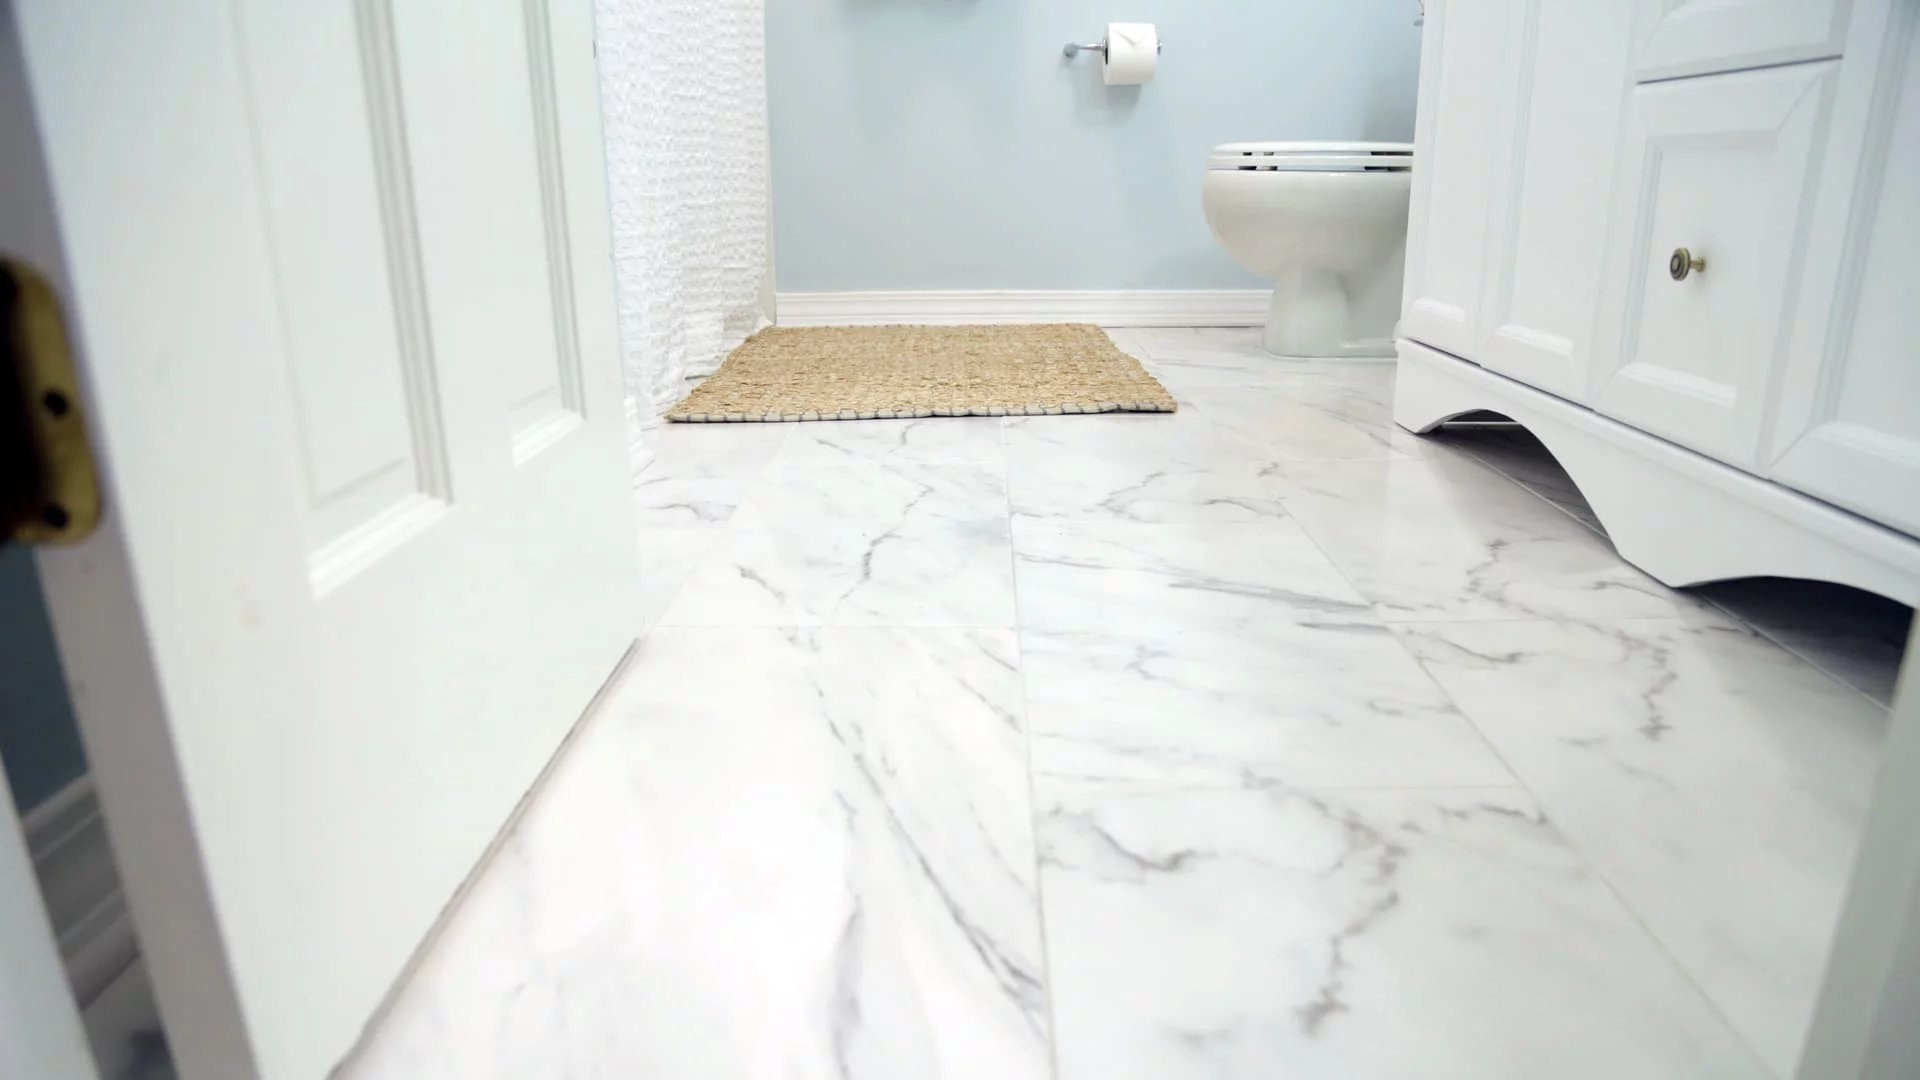
Installing TILE FLOOR for the FIRST TIME 🛠 How To Lay Tile Floor
How to Install Tile on a Bathroom Floor Bathroom flooring

How to Install Ceramic Tile Flooring in 9 Steps – This Old House
:no_upscale()/cdn.vox-cdn.com/uploads/chorus_asset/file/19496947/color_gutters_illo_web_1.jpg)
How to Install Ceramic Tile Flooring in 9 Steps – This Old House
:no_upscale()/cdn.vox-cdn.com/uploads/chorus_asset/file/19496978/howto_tile_01.jpg)
Laying Floor Tiles in a Small Bathroom – Houseful of Handmade
How To Tile a Bathroom Floor The Home Depot

How to Install Ceramic Tile on a Tile Floor
How To Update Your Bathroom Floor Tiles – 6 DIY ideas

Related articles:
- Vintage Bathroom Floor Tile Patterns
- Bathroom Floor Tile DIY
- Limestone Bathroom Floor Tiles
- Bathroom Floor Porcelain Tile
- Concrete Bathroom Floor Ideas
- White Bathroom Ceramic Tiles
- Bathroom Floor Baseboard
- Rustic Bathroom Flooring Ideas
- Bathroom Flooring Options
- Bamboo Bathroom Flooring Ideas
Installing A Tile Floor In Bathroom
A tile floor can be a beautiful and durable addition to any bathroom. Whether you’re renovating an existing bathroom or building a new one, installing a tile floor is a great way to enhance the overall look and functionality of the space. However, the process of installing a tile floor can be complex and time-consuming if not done correctly. In this article, we will guide you through the step-by-step process of installing a tile floor in a bathroom, along with some frequently asked questions to help you along the way.
1. Planning and Preparation
Before diving into the actual installation process, it’s crucial to spend some time planning and preparing for the project. This will ensure that you have all the necessary materials and tools on hand, saving you time and frustration later on. Here are some steps to consider during the planning phase:
a) Measure and Calculate: Start by measuring the dimensions of your bathroom accurately. This will help you determine how much tile you’ll need to purchase. Remember to account for any cuts or wastage during installation.
b) Choose Your Tile: Selecting the right tile for your bathroom is essential both in terms of aesthetics and functionality. Consider factors such as size, color, texture, and durability when making your choice.
c) Gather Materials: In addition to tiles, you’ll need various other materials such as adhesive, grout, spacers, trowels, sponges, and sealant. Make a list of everything you’ll need beforehand to avoid delays during installation.
FAQs:
Q: How do I measure my bathroom accurately?
A: To measure your bathroom accurately, start by measuring the length and width of each individual wall. Multiply these measurements together to calculate the area of each wall. Add up the areas of all walls to get your total square footage.
Q: How do I select the right tile for my bathroom?
A: When choosing tile for your bathroom, consider the style and color scheme of your existing or planned design. Porcelain or ceramic tiles are popular choices due to their durability and water resistance.
2. Preparing the Subfloor
Once you have all the necessary materials, it’s time to prepare the subfloor. The subfloor should be clean, level, and free from any cracks or imperfections. Follow these steps to ensure a solid foundation for your tile floor:
a) Remove Existing Flooring: If there is already flooring in your bathroom, such as vinyl or laminate, it will need to be removed before installing the tile. Use a pry bar or scraper to carefully lift the old flooring.
b) Repair Any Damage: Inspect the subfloor for any damage or unevenness. Fill in any cracks or holes with a suitable patching compound and sand down any high spots to create a smooth surface.
c) Clean Thoroughly: Sweep and vacuum the subfloor to remove any dust or debris. Wipe it down with a damp cloth to ensure it’s clean and ready for tile installation.
FAQs:
Q: Can I install tile over an existing floor?
A: It is generally not recommended to install tile directly over an existing floor. Removing the old flooring allows you to address any potential issues with the subfloor and ensures a proper installation.
Q: How do I repair a cracked subfloor?
A: To repair a cracked subfloor, you can use a latex-based patching compound. Apply the compound to the crack using a putty knife, then smooth it out And allow it to dry according to the manufacturer’s instructions. Sand down any rough areas and ensure the surface is level before proceeding with tile installation. 3. Installing the Tile
Now that your subfloor is prepared, it’s time to start installing the tile in your bathroom. Follow these steps for a successful installation:
a) Plan the Layout: Before applying adhesive, plan out the layout of your tiles. Consider starting from the center of the room and working your way outwards for a balanced look. Use spacers to ensure even spacing between tiles.
b) Apply Adhesive: Using a trowel, apply adhesive to a small section of the subfloor. Use the notched side of the trowel to create ridges in the adhesive, which will help with tile adhesion.
c) Lay the Tiles: Place each tile firmly into the adhesive, pressing down and wiggling it slightly to ensure good adhesion. Continue laying tiles in small sections, applying adhesive as needed.
d) Cut Tiles if Necessary: Use a tile cutter or wet saw to cut tiles to fit around edges, corners, or fixtures. Measure carefully and make precise cuts for a professional finish.
e) Allow Adhesive to Dry: Once all tiles are laid, allow the adhesive to dry completely according to the manufacturer’s instructions. This usually takes 24-48 hours.
f) Apply Grout: After the adhesive has dried, remove spacers and mix grout according to package instructions. Use a grout float to spread grout over the tiles, pressing it into the gaps between them.
g) Clean Excess Grout: After applying grout, use a damp sponge or cloth to wipe away excess grout from the surface of the tiles. Rinse the sponge frequently to keep it clean.
h) Seal the Grout: Once the grout has dried for a few days, apply a grout sealer to protect it from stains and moisture. Follow the manufacturer’s instructions for application.
FAQs:
Q: How long does tile adhesive take to dry?
A: The drying time for tile adhesive can vary depending on factors such as temperature and humidity. It typically takes 24-48 hours for the adhesive to fully dry.
Q: How do I cut tiles without cracking them?
A: To cut tiles without cracking them, use a wet saw or tile cutter specifically designed for this purpose. Score the tile with a cutter or mark it with a pencil, then carefully make the cut along the marked line using the appropriate tool.
4. Finishing Touches
Once your tiles are installed and grouted, there are a few final steps to complete your bathroom tile project:
a) Clean the Tiles: After grouting, clean the tiles again with a damp sponge or cloth to remove any remaining grout residue or haze. This will leave your tiles looking clean and polished.
b) Apply Caulk: Use caulk to seal any gaps between tiles and fixtures, such as around the bathtub or sink. This will prevent water from seeping behind the tiles and causing damage.
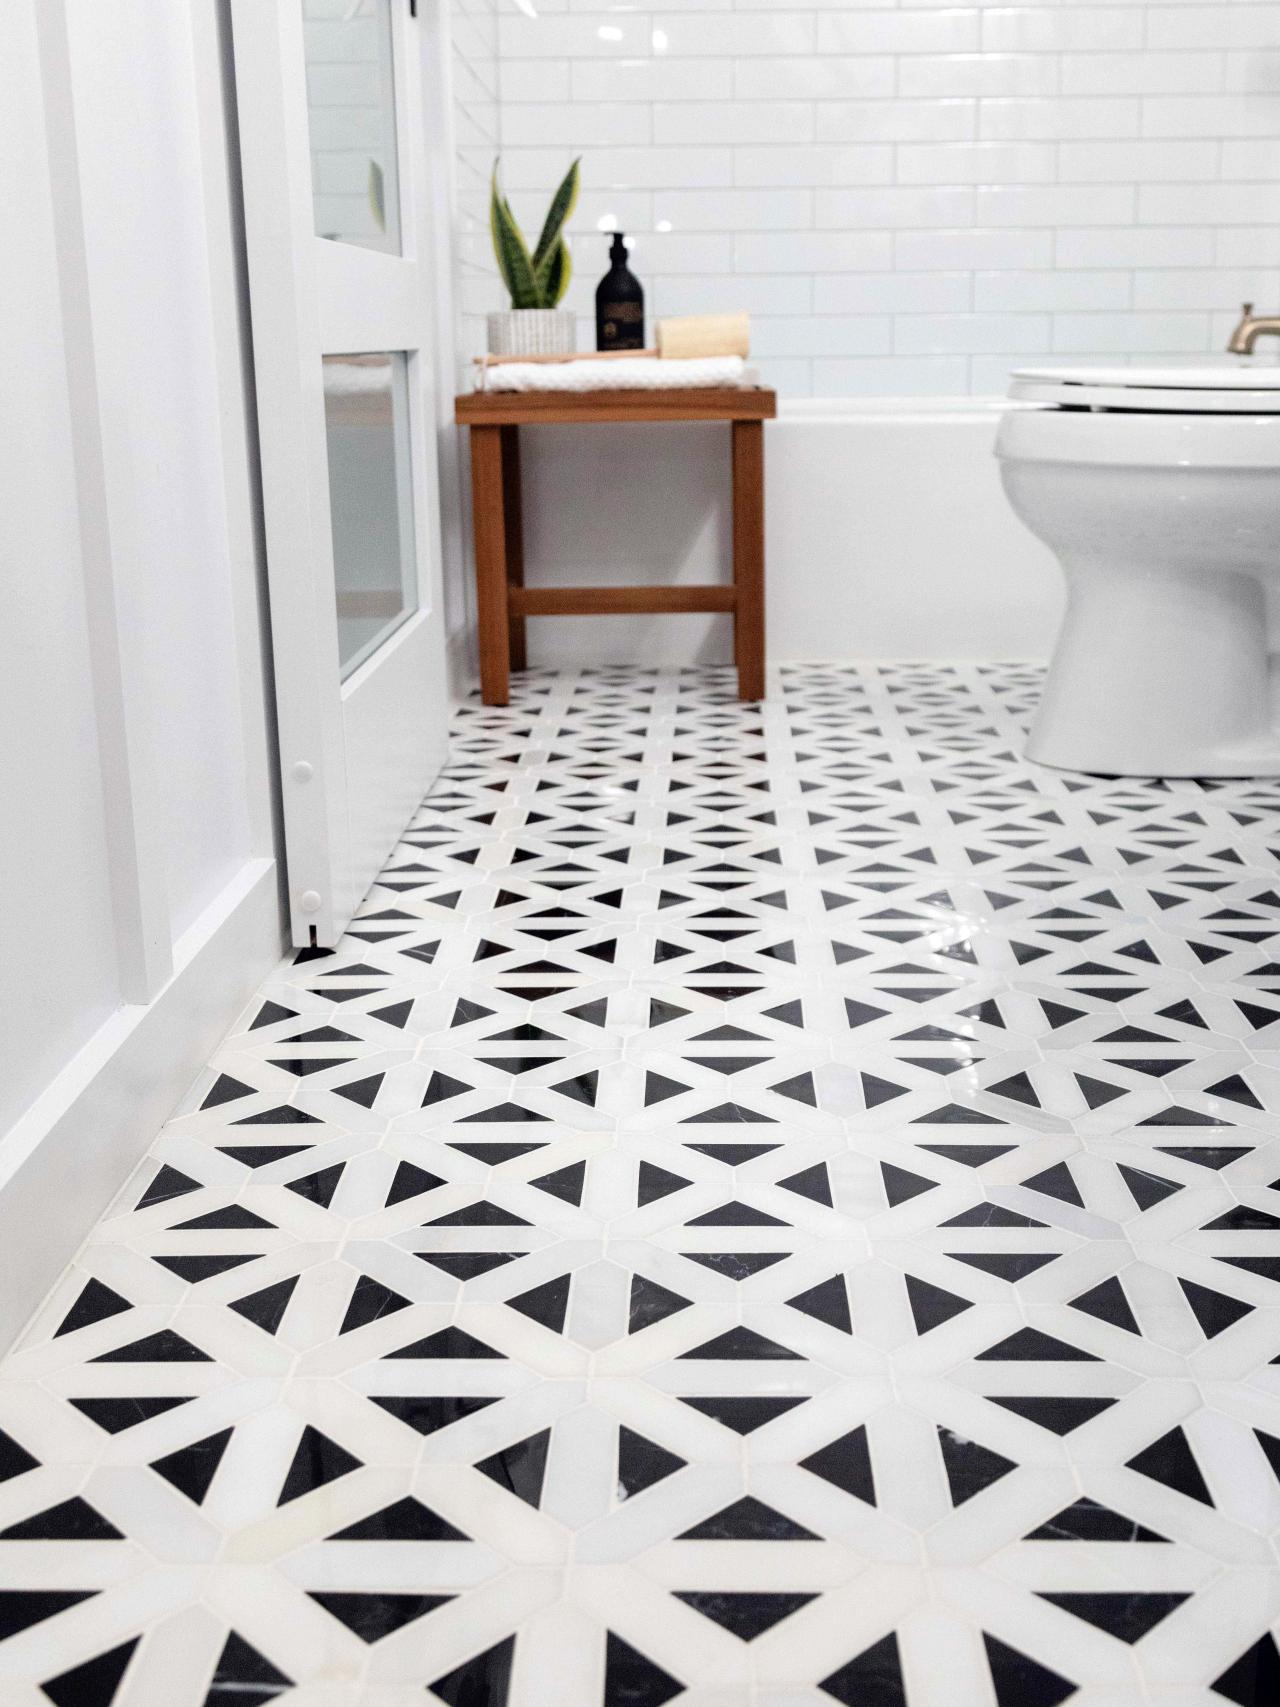
c) Enjoy Your New Bathroom Tile: Once all finishing touches are done, step back and admire your newly tiled bathroom! Take care of your tiles by regularly cleaning them and addressing any issues or repairs as needed.
FAQs:
Q: How do I clean and maintain my bathroom tiles?
A: Regularly clean your bathroom tiles with a mild, non-abrasive cleaner and a soft sponge or cloth. Avoid using harsh chemicals or abrasive materials that can damage the tiles. Additionally, address any stains or damaged grout promptly to prevent further issues.
Q: How often should I reseal the grout?
A: The frequency of resealing grout depends on various factors such as usage and exposure to moisture. As a general guideline, it’s recommended to reseal grout every 1-2 years to maintain its appearance and protect it from stains.