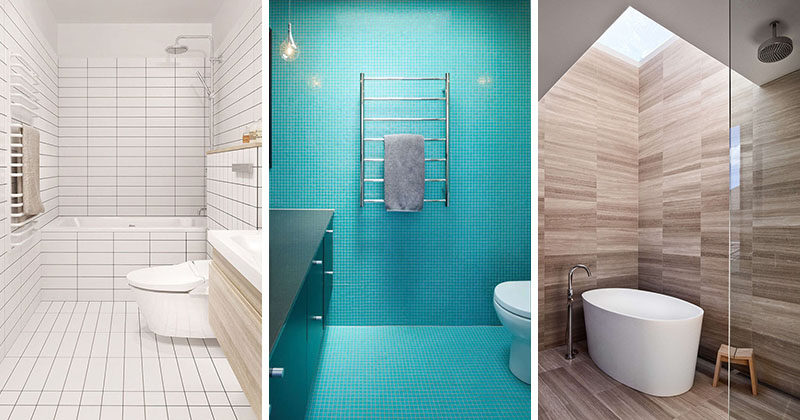
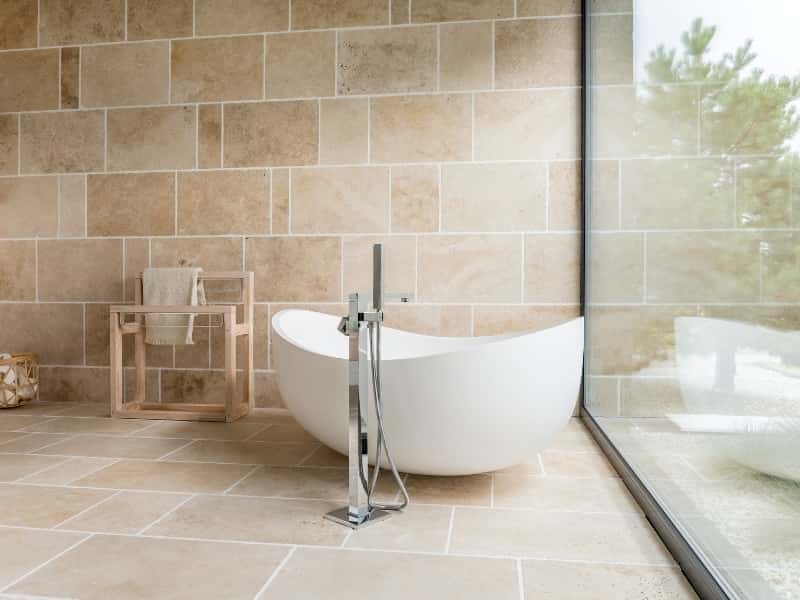
Bathroom floors tiles seem to build up dirt, grime and moisture so they have to be easy to clean and shouldn't be slippery. Nonetheless, if you have used hardwood floors with the rest of the home, you may be interested using it in the bathroom too. Ceramic tiles with various kinds of printed pages are also offered.
Here are Images about How To Tile Bathroom Walls And Floor
How To Tile Bathroom Walls And Floor
Vinyl as well as laminate tiles are furthermore a good choice since they are affordable and easy to maintain. This gives them a shiny and smooth look and also shields the tiles from damage. This will give the bathroom of yours a modern feel. Vinyl tiles are usually coated with enhanced urethane or urethane. They are easy to maintain as well as remains warm while in winter.
Can You Put Wall Tiles on the Floor? BuildDirect® Blog

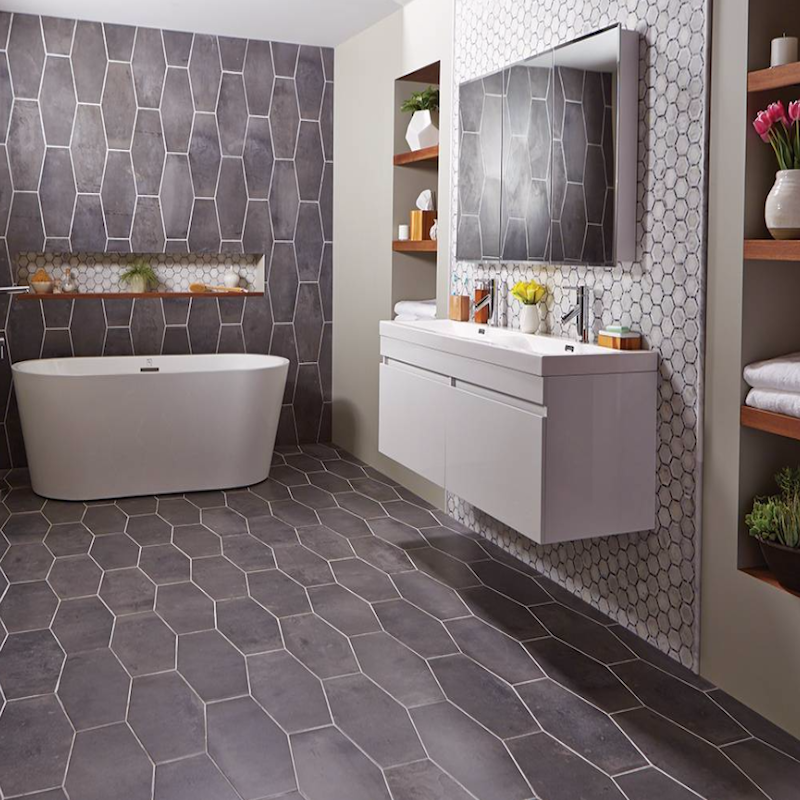
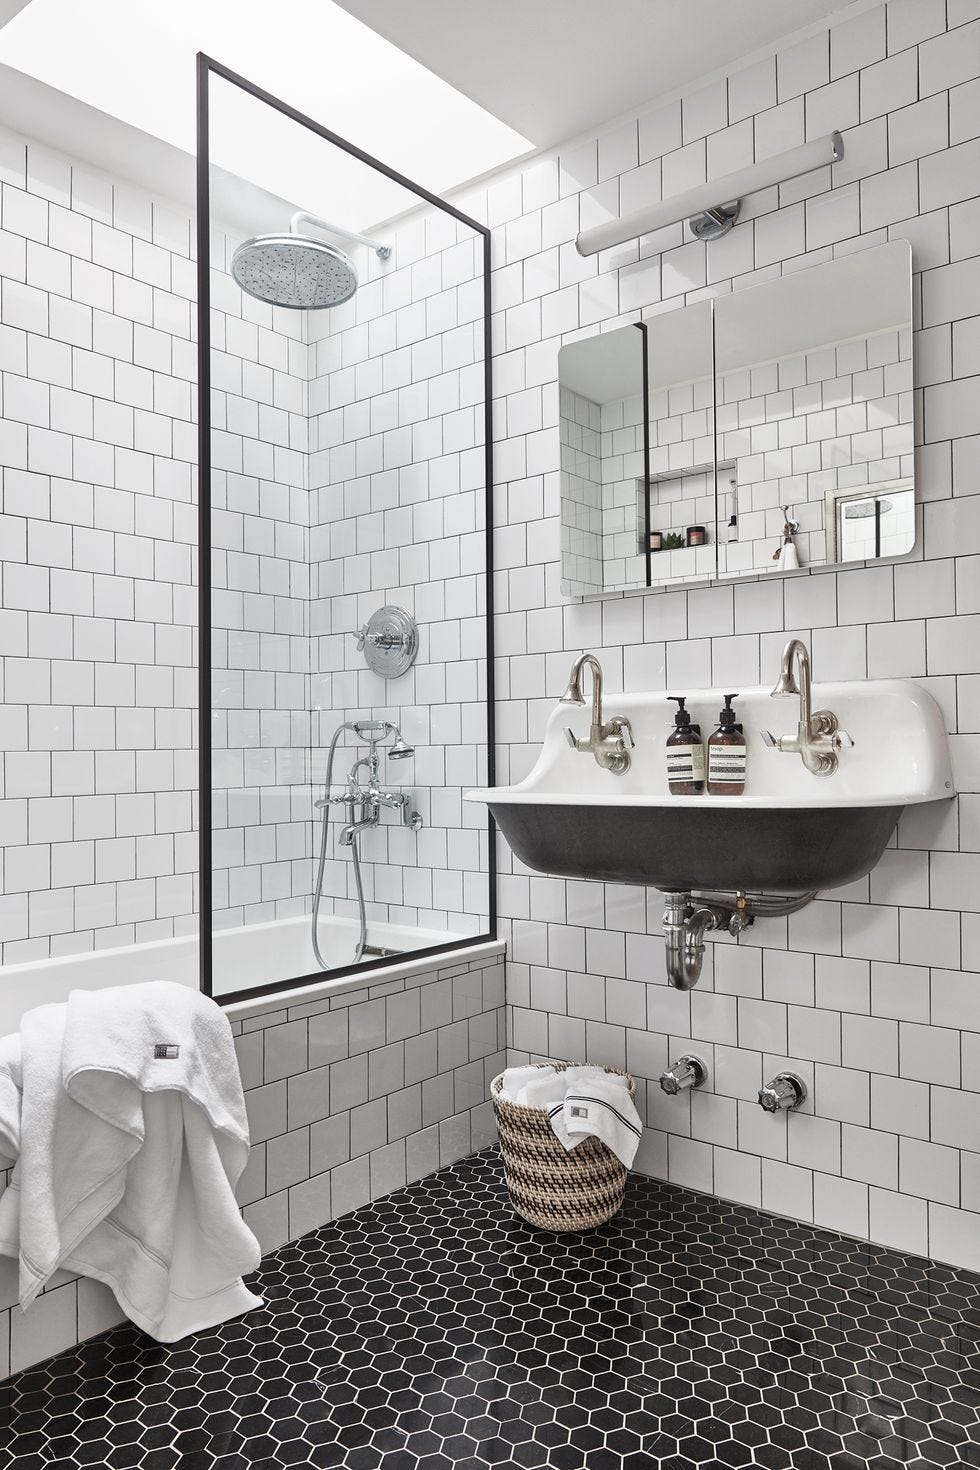
Bathroom floors tile shapes can be squares, rectangles, hexagons and octagons while accent pieces can be narrow as well as small diamond-shaped. Room is also another factor to take into account as certain kinds of flooring can leave an already small bathroom wanting much more cramped while many others are able to add a part of room to a small bathroom.
Images Related to How To Tile Bathroom Walls And Floor
The Difference Between Floor Tile and Wall Tile
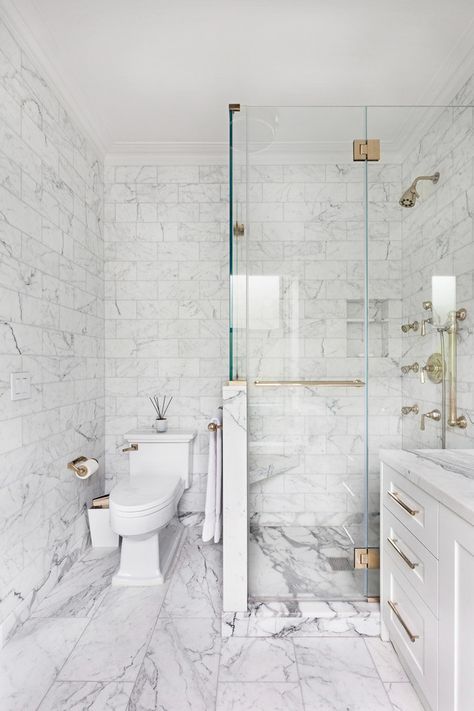
Bathroom Tile Idea u2013 Use Large Tiles On The Floor And Walls (18

Creative Bathroom Tile Design Ideas – Tiles for Floor, Showers and
Should Bathroom Wall Tiles Match Floor Tiles? (Answered)
Matching Tile Floors and Walls in the Bathroom Apartment Therapy

How to Properly Tile a Wall in Your Home
/HexagonalFloorTile-f4d2c3e5b58243679c1137bf3986dc67.jpg)
40 bathroom tile ideas to upgrade every surface of your space

59 Simply Chic Bathroom Tile Ideas For Floor, Shower, And Wall Design

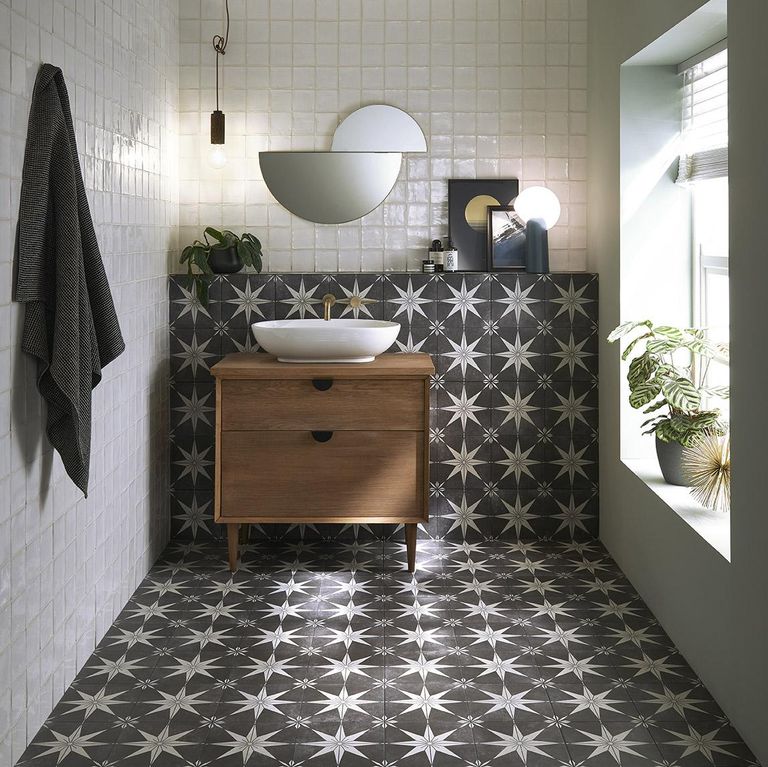
25 Ways To Mix And Match Tiles In Bathrooms – DigsDigs
How to clean grout on floor and wall tile Real Homes
6 Mistakes to Avoid with Shower Tile Daltile

How to Tile a Bathroom Floor with Wickes

Related articles:
- Vintage Bathroom Floor Tile Patterns
- Bathroom Floor Tile DIY
- Limestone Bathroom Floor Tiles
- Bathroom Floor Porcelain Tile
- Concrete Bathroom Floor Ideas
- White Bathroom Ceramic Tiles
- Bathroom Floor Baseboard
- Rustic Bathroom Flooring Ideas
- Bathroom Flooring Options
- Bamboo Bathroom Flooring Ideas
Title: Mastering the Art of Tiling: Step-by-Step Guide to Tile Bathroom Walls and Floors
Introduction:
Tiling is a fantastic way to transform your bathroom into a stunning oasis. Whether you’re looking to enhance the visual appeal, increase functionality, or simply refresh the space, knowing how to tile bathroom walls and floors can be an invaluable skill. In this comprehensive guide, we will take you through each step of the tiling process, ensuring that you achieve professional-looking results.
I. Preparing Your Bathroom for Tiling
Before diving into the tiling process, proper preparation is crucial. Here’s what you need to do:
1. Gather Materials and Tools:
To begin, gather all the necessary materials and tools. These typically include tiles, adhesive, grout, tile spacers, a notched trowel, a rubber grout float, a tile cutter, a tape measure, a spirit level, safety goggles, gloves, and a sponge.
FAQ 1: Can I use any type of tile for my bathroom?
Answer: While you have various options available such as ceramic, porcelain, glass or natural stone tiles; it’s important to choose one that is suitable for bathroom use due to its exposure to moisture and humidity. Porcelain tiles are highly recommended for their durability and resistance to water damage.
2. Measure and Plan:
Measure the dimensions of your bathroom walls and floors accurately to determine the amount of tiles you’ll need. Make sure to account for any obstructions like windows or outlets. Create a layout plan by marking where each tile will go to ensure symmetry and balance in your design.
FAQ 2: Should I leave any gaps between tiles?
Answer: Yes! It is essential to leave small gaps known as grout lines between each tile. These spaces allow for expansion and contraction due to temperature changes and help prevent cracking.
II. Tiling Your Bathroom Walls
Now that you’re ready to begin tiling, let’s dive into the process of tiling your bathroom walls:
1. Prepare the Walls:
Ensure your walls are clean, dry, and smooth before tiling. Remove any old wallpaper or loose paint. Fill in any cracks or imperfections with a wall filler and sand it down for a seamless surface.
2. Apply Adhesive:
Starting from the bottom, use a notched trowel to apply adhesive to a small section of the wall. Hold the trowel at a 45-degree angle and spread the adhesive evenly. Work in small areas to prevent the adhesive from drying out before you lay the tiles.
3. Lay Tiles:
Place your first tile in the bottom corner of the wall, pressing gently but firmly into the adhesive. Insert tile spacers between each tile to maintain consistent gaps. Continue adding tiles row by row, using a spirit level to ensure they are straight and level.
FAQ 3: How long should I wait before removing tile spacers?
Answer: It is recommended to leave the tile spacers in place until the adhesive has fully dried. Refer to the manufacturer’s instructions for specific drying times, usually around 24-48 hours.
4. Cut Tiles for Corners and Edges:
As you approach corners and edges, you will likely need to cut tiles to fit properly. Measure and mark where cuts are needed, then use a tile cutter or wet saw to make precise cuts. Always wear protective goggles when cutting tiles.
5. Grouting:
Once all tiles are in place and adhesive has Dried, it’s time to grout your bathroom walls:
1. Mix the Grout:
Follow the manufacturer’s instructions to mix the grout to a thick, paste-like consistency. Use a grout float to apply the grout onto the tiles at a 45-degree angle, pressing it into the gaps between tiles.
2. Clean Excess Grout:
After applying the grout, use a damp sponge to wipe away any excess grout from the surface of the tiles. Rinse the sponge frequently and continue wiping until the tiles are clean and smooth.
3. Cure and Seal:
Allow the grout to cure for the recommended time specified by the manufacturer. Once cured, apply a grout sealer to protect against stains and moisture.
FAQ 4: How long does it take for grout to cure?
Answer: The curing time for grout can vary depending on factors such as temperature and humidity. Generally, it takes around 24-48 hours for grout to fully cure.
Congratulations! You have successfully tiled your bathroom walls. Remember to clean and maintain your tiles regularly to keep them looking their best. Here is a step-by-step guide on how to tile your bathroom walls:
1. Prepare the Surface: Remove any old wallpaper or loose paint. Fill in any cracks or imperfections with a wall filler and sand it down for a seamless surface.
2. Apply Adhesive: Starting from the bottom, use a notched trowel to apply adhesive to a small section of the wall. Hold the trowel at a 45-degree angle and spread the adhesive evenly. Work in small areas to prevent the adhesive from drying out before you lay the tiles.
3. Lay Tiles: Place your first tile in the bottom corner of the wall, pressing gently but firmly into the adhesive. Insert tile spacers between each tile to maintain consistent gaps. Continue adding tiles row by row, using a spirit level to ensure they are straight and level.
FAQ 3: How long should I wait before removing tile spacers?
Answer: It is recommended to leave the tile spacers in place until the adhesive has fully dried. Refer to the manufacturer’s instructions for specific drying times, usually around 24-48 hours.
4. Cut Tiles for Corners and Edges: As you approach corners and edges, you will likely need to cut tiles to fit properly. Measure and mark where cuts are needed, then use a tile cutter or wet saw to make precise cuts. Always wear protective goggles when cutting tiles.
5. Grouting: Once all tiles are in place and adhesive has dried, it’s time to grout your bathroom walls:
1. Mix the Grout: Follow the manufacturer’s instructions to mix the grout to a thick, paste-like consistency. Use a grout float to apply the grout onto the tiles at a 45-degree angle, pressing it into the gaps between tiles.
2. Clean Excess Grout: After applying the grout, use a damp sponge to wipe away any excess grout from the surface of the tiles. Rinse the sponge frequently and continue wiping until the tiles are clean and smooth.
3. Cure and Seal: Allow the grout to cure for the recommended time specified by the manufacturer. Once cured, apply a grout sealer to protect against stains and moisture.
FAQ 4: How long does it take for grout to cure?
Answer: The curing time for grout can vary depending on factors such as temperature and humidity. Generally, it takes around 24-48 hours for grout to fully cure.
Congratulations! You have successfully tiled your bathroom walls. Remember to clean and maintain your tiles regularly to keep them looking their best. 1. Clean and Maintain: Regularly clean your tiles with a mild detergent to remove any dirt or grime. Avoid using abrasive cleaners or tools that could damage the tiles. Additionally, check for any cracks or loose tiles and repair them promptly to prevent further damage.
2. Use a Grout Cleaner: Over time, grout can become discolored or stained. Use a grout cleaner specifically designed for your type of grout to keep it looking fresh and clean. Follow the instructions on the cleaner and use a brush or sponge to scrub the grout lines.
3. Seal the Grout: Apply a grout sealer every 6-12 months to protect the grout from stains and moisture. The sealer creates a barrier that prevents liquids from penetrating the grout, making it easier to clean and maintain.
4. Avoid Harsh Chemicals: When cleaning your bathroom tiles, avoid using harsh chemicals or acidic cleaners as they can damage the tiles or grout. Stick to mild detergents or natural cleaners that are safe for use on tile surfaces.
5. Prevent Mold and Mildew: To prevent mold and mildew growth in your bathroom, ensure proper ventilation by using exhaust fans or opening windows during and after showers. Wipe down wet surfaces regularly and address any moisture issues promptly.
By following these steps and maintaining your bathroom tiles regularly, you can keep them looking their best for years to come.