You can't perhaps expect your bathroom flooring to be a porous materials or perhaps one that's susceptible to damage due to water. All these flooring materials are extremely susceptible to damage owing to moisture. There is often the option of high-end laminate bathroom flooring that's made to resemble ceramic floor tile but at a lot of lower price point as well as safer material.
Here are Images about How To Regrout A Bathroom Floor
How To Regrout A Bathroom Floor

Has your bathroom flooring seen better days? Mosaic tiles are created by using glass, used tiles, pebbles etc and add color and texture to the bathroom. You will find many contemporary options – like laminate floors and engineered wood floors – that help you enjoy the appearance of classic substances without all of the issues.
Regrouting A Bathroom Floor
So we've started that the bathroom of yours floor should find a way to be cleaned thoroughly as well as routinely also as be cozy under feet and with this in mind I would suggest a tile flooring for your bath room. Another promising choice is carpet, which must be reluctant to drinking water, stain, and also mildew in order to last for a long time.
Images Related to How To Regrout A Bathroom Floor
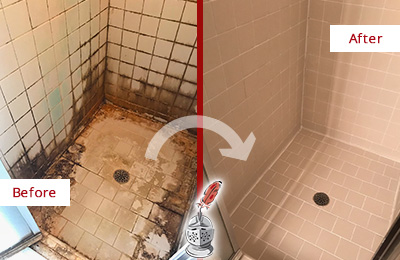
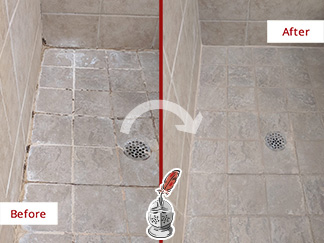
How do I know if I need to regrout my shower? The Grout Medic

How to Regrout Ceramic Tile
:max_bytes(150000):strip_icc()/How_to_Regrout_Ceramic_Tile_64434_04-7d62a1243b314b628e8125818455cb67.jpg)
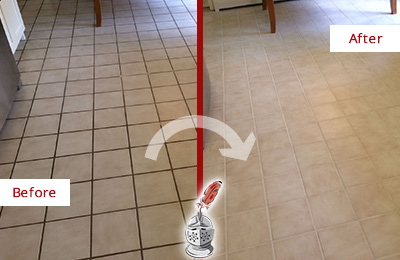
Regrouting Tile, Tile Regrout – Sir Grout
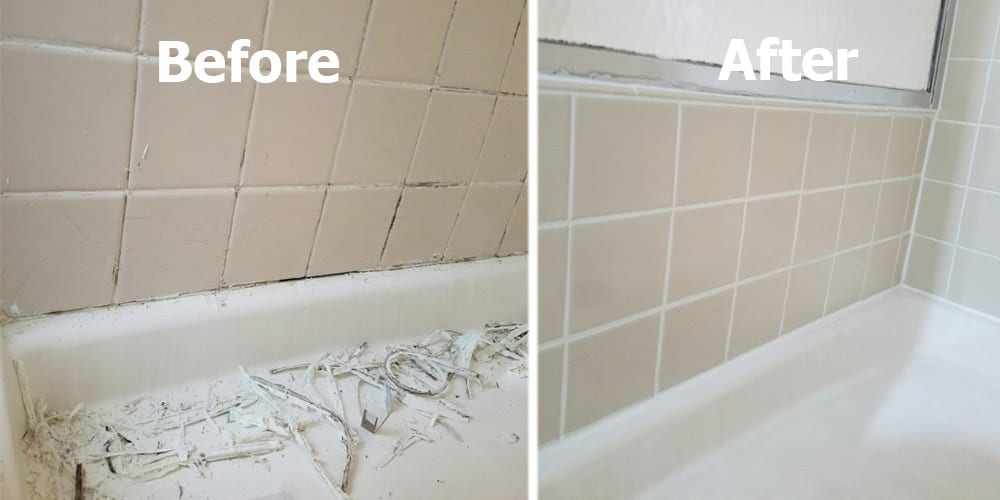
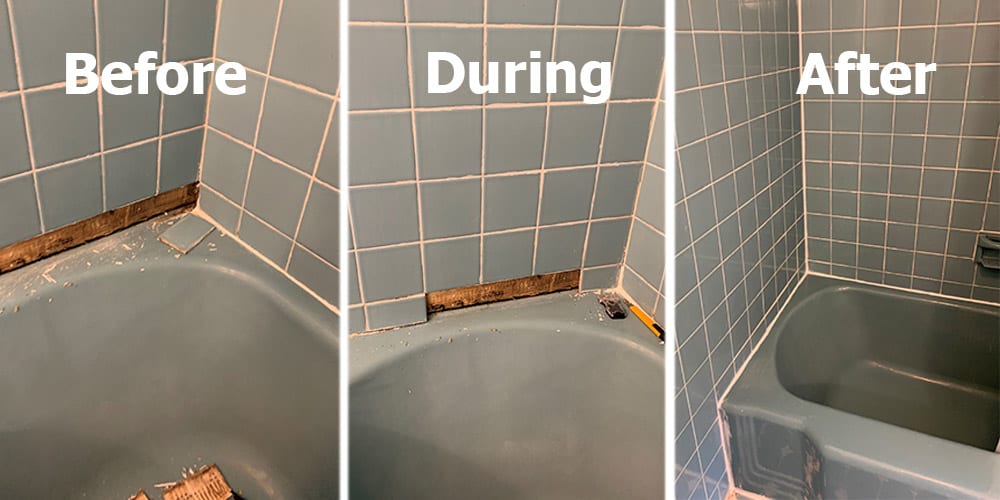
How To Regrout A Shower: Steps u0026 Cost Of Regrouting Bathroom Floor

Regrouting Tile, Tile Regrout – Sir Grout
How to Regrout Ceramic Tile
/How_to_Regrout_Ceramic_Tile_64434_05-2cdada80f2de43bc90f919d8876160d2.jpg)
How to Regrout Tile: 13 Steps (with Pictures) – wikiHow

Can I put new grout over my old grout? The Grout Medic
Why Hire a Professional to Regrout Your Tile?
How to Regrout Ceramic Tile
/How_to_Regrout_Ceramic_Tile_64434_09-4a88b50ca576408fa6b52012ba5e9c3f.jpg)
Tile Regrouting Services Perfected The Grout Medic
How to Regrout Bathroom Tile: 5 Easy Steps True Value

Related articles:
- Vintage Bathroom Floor Tile Patterns
- Bathroom Floor Tile DIY
- Limestone Bathroom Floor Tiles
- Bathroom Floor Porcelain Tile
- Concrete Bathroom Floor Ideas
- White Bathroom Ceramic Tiles
- Bathroom Floor Baseboard
- Rustic Bathroom Flooring Ideas
- Bathroom Flooring Options
- Bamboo Bathroom Flooring Ideas
How To Regrout A Bathroom Floor: A Comprehensive Guide
Introduction:
A bathroom floor is subjected to constant wear and tear, resulting in the deterioration of grout over time. Cracked or discolored grout not only ruins the aesthetic appeal of your bathroom but also poses potential damage to the flooring beneath. Regrouting your bathroom floor is an effective solution to revitalize its appearance and prevent further damage. In this comprehensive guide, we will walk you through the step-by-step process of regrouting a bathroom floor, along with valuable insights and FAQs to ensure a successful project.
I. Understanding the Importance of Regrouting:
Before delving into the process, it’s crucial to understand why regrouting is essential for maintaining a healthy and visually appealing bathroom floor. Over time, grout can degrade due to moisture absorption, foot traffic, and cleaning agents. When cracks or gaps appear in the grout lines, water seepage can occur, leading to potential damage to the subflooring and even causing mold and mildew growth. Regrouting helps seal these gaps, providing a protective barrier against moisture infiltration.
FAQs:
1. How often should I regrout my bathroom floor?
The frequency of regrouting depends on several factors such as the quality of initial installation, usage patterns, and maintenance practices. As a general guideline, it is recommended to regrout your bathroom floor every 5-10 years or when you notice signs of degradation.
2. Can I do small touch-ups instead of regrouting the entire floor?
While small touch-ups may temporarily fix minor issues, they are not a long-term solution. It is advisable to regrout the entire floor as it ensures uniformity in color and prevents further deterioration in other areas.
II. Gathering Supplies:
Before starting the regrouting process, make sure you have all the necessary tools and materials at hand. Here is a list of items you will need:
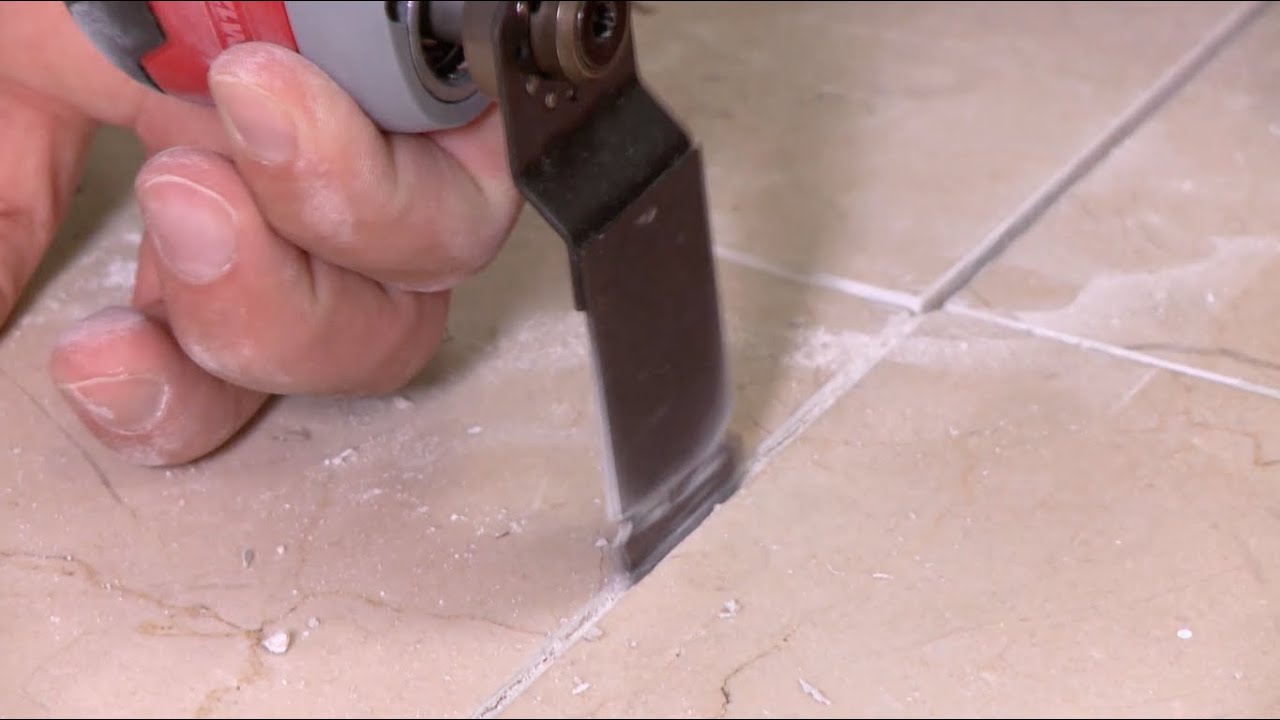
1. Grout removal tool: A grout saw or an oscillating multitool with a grout removal blade can be used to remove the old grout.
2. Grout: Choose a high-quality grout that is suitable for your bathroom floor, considering factors such as color, type (sanded or unsanded), and water resistance.
3. Grout float: This tool helps apply the new grout evenly and efficiently.
4. Sponge and bucket: Use a clean sponge and a bucket filled with water for wiping off excess grout during the application process.
5. Safety equipment: Wear safety goggles and gloves to protect yourself from any potential hazards during the regrouting process.
FAQs:
1. Can I use regular tile adhesive instead of grout?
No, regular tile adhesive cannot be used as a substitute for grout. Grout is specifically designed to fill the gaps between tiles, providing stability, protection, and aesthetic appeal.
2. How do I choose the right color of grout?
When selecting the grout color, consider the overall design scheme of your bathroom. If you desire a seamless look, choose a grout color that closely matches the tile color. Alternatively, if you want to highlight the tile pattern or create contrast, opt for a contrasting grout color.
III. Preparing the Bathroom Floor:
Preparation is key to achieving optimal results when regrouting your bathroom floor. Follow these steps to ensure a smooth and successful project:
1. Clean the existing tiles: Thoroughly clean The existing tiles using a tile cleaner or a mixture of vinegar and water. Remove any dirt, grime, or soap scum from the surface. Allow the tiles to dry completely before proceeding.
2. Remove the old grout: Use a grout removal tool to carefully scrape out the old grout from between the tiles. Be gentle to avoid damaging the tiles themselves. Vacuum or sweep up any loose debris after removing the old grout.
3. Inspect for damage: Take this opportunity to inspect the tiles and subflooring for any signs of damage or deterioration. Repair or replace any damaged tiles before proceeding with regrouting.
4. Clean the gaps: Use a brush or an old toothbrush to clean out any remaining debris from the gaps between the tiles. Make sure the gaps are free of dust and loose particles.
5. Seal any cracks or gaps: If there are any cracks or gaps in the subflooring, fill them with a suitable sealant to prevent moisture infiltration.
FAQs:
1. Can I regrout over existing grout?
It is generally recommended to remove the old grout before applying new grout. Applying new grout over existing grout may result in unevenness and decreased adhesion.
2. How do I know if my subflooring is damaged?
Inspect your subflooring for signs of water damage, such as discoloration, softness, or warping. If you notice any of these signs, it is advisable to consult a professional for further evaluation and repair.
IV. Applying New Grout:
Now that the preparation is complete, you can proceed with applying the new grout to your bathroom floor:
1. Mix the grout: Follow the manufacturer’s instructions to mix the grout to the desired consistency. Ensure that there are no lumps or dry patches in the mixture.
2. Apply the grout: Using a grout float, spread the grout over the tiles, pressing it into the gaps. Work in small sections at a time to prevent the grout from drying out before you have a chance to smooth it.
3. Remove excess grout: Use a clean sponge and water to wipe off any excess grout from the tiles’ surface. Rinse the sponge frequently to avoid smearing excess grout over clean areas.
4. Let it dry: Allow the grout to dry for the recommended amount of time specified by the manufacturer. Avoid walking on the newly regrouted floor until it has fully dried.
5. Seal the grout: Once the grout is completely dry, apply a grout sealer according to the manufacturer’s instructions. This will help protect your newly regrouted floor from moisture and stains.
FAQs:
1. How long does it take for grout to dry?
The drying time for grout varies depending on factors such as humidity levels and temperature. It typically takes 24-48 hours for grout to fully dry.
2. Do I need to seal my newly regrouted floor?
Sealing your newly regrouted floor is recommended as it helps increase its longevity and resistance to moisture and stains. Follow the manufacturer’s instructions for the proper application of the grout sealer.
What tools and materials are needed to regrout a bathroom floor?
To regrout a bathroom floor, you will need the following tools and materials:1. Grout removal tool: This can be a grout saw, grout scraper, or oscillating tool with a grout removal attachment. It is used to remove the old grout.
2. Grout float: A rubber float used to apply new grout onto the floor.
3. Grout sponge: A large sponge used to wipe away excess grout and clean the surface.
4. Grout mixture: Choose a grout color that matches your existing grout or opt for a different color if desired. It is available in powder form that needs to be mixed with water or pre-mixed ready-to-use containers.
5. Caulk gun: If there are any gaps or cracks in the bathroom floor tiles, you may need to use caulk to seal them. A caulk gun helps in applying the caulk smoothly.
6. Utility knife: Used for cutting and shaping the grout lines.
7. Safety goggles and gloves: To protect your eyes and hands during the process.
8. Bucket of water: For rinsing the sponge and cleaning tools.
9. Plastic sheeting or drop cloths: To protect surrounding areas from debris and splatter.
10. Dust mask: Optional but recommended to avoid breathing in dust particles while removing old grout.
11. Grout sealer: After the new grout has dried, you may want to apply a grout sealer to help protect it from stains and moisture.
12. Cleaning solution: A mild cleanser or vinegar diluted with water can be used to clean the tiles before regrouting.
These are general tools and materials required for regrouting a bathroom floor, but specific requirements may vary depending on the size of the project and individual preferences.