Tiles are easier to install although the protection furnished to concrete can be done by painting also. Creating your own tile pattern and including an accessory tile allows you to decorate the floor in your own way. They are durable and long lasting – and this is the reason why ceramic tile flooring has become used in kitchens and bathrooms with great success.
Images Related to How To Layout Tile Floor Patterns
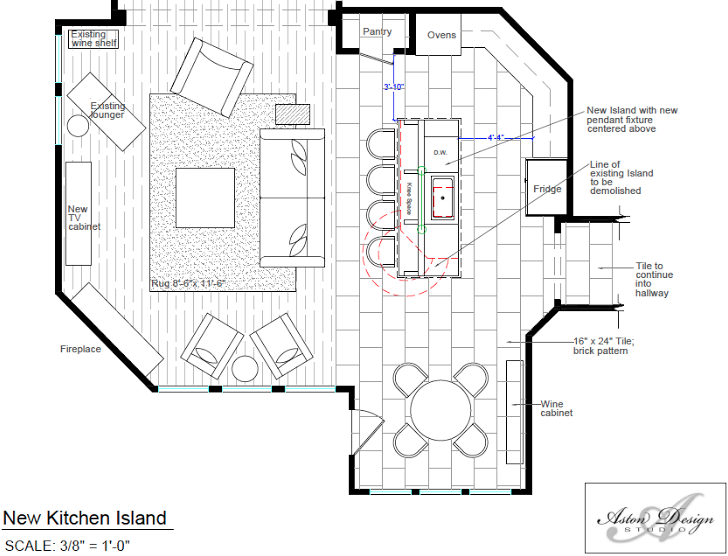
How To Layout Tile Floor Patterns

The men and women that work in the product sales departments have extremely extensive knowledge regarding the products they promote, and what's required to be able to do it yourself with results which are good. The greater rigid the substrate, the better chance the tile has of remaining crack totally free during the life of its. You are able to use a wet ceramic saw or perhaps a utility knife to carry out the cutting.
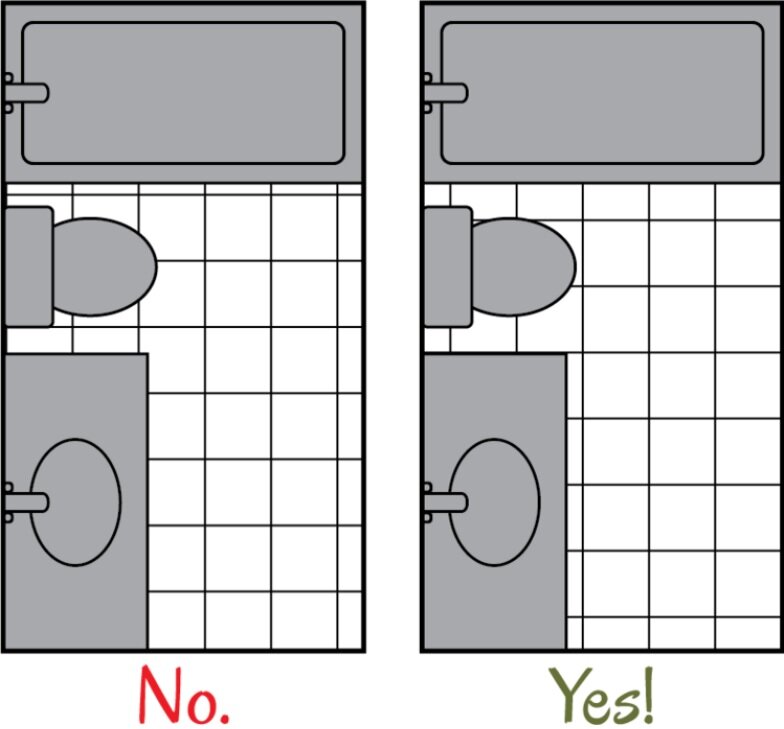
Which Direction Should You Run Your Tile Flooring? Well

Tiles however are far simpler to set up but garage area tile floors does come with the own pros of its positives and negatives as we shall see going forward. And then, wipe the slim excess off the flooring and wait no less than 24 hours to them to set. Mosaic tile flooring is one of the most loved variations because of the high degree of creativity that you are able to use in having them in your house.
9 Types of Floor Tile Patterns To Consider in Tallahassee
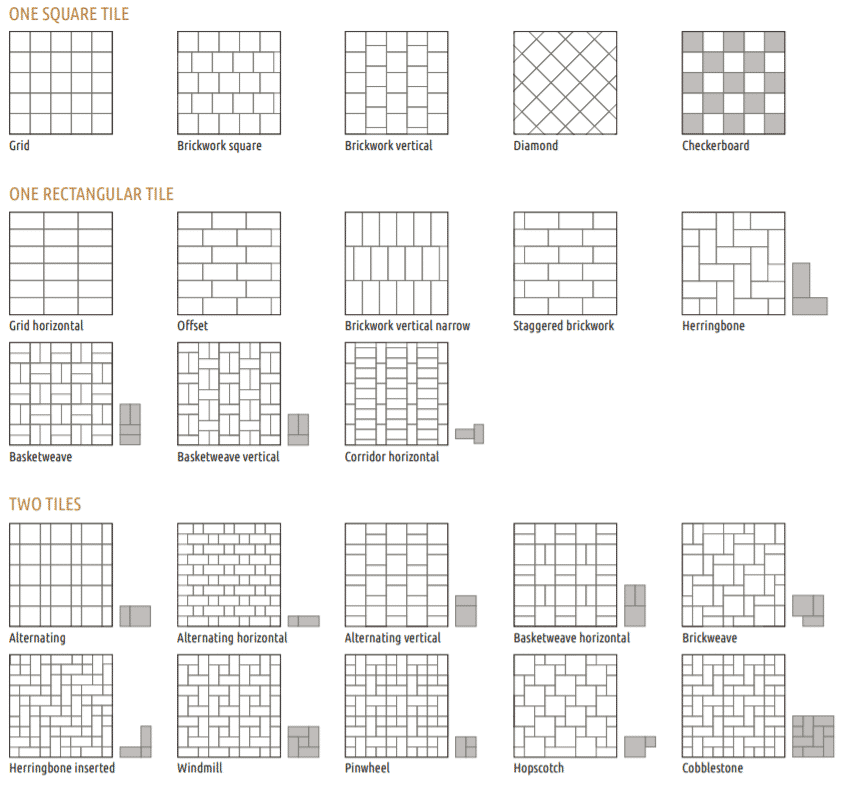
15 Tile Installation Patterns for Your Tile Design Project – Tile
Tile Patterns and Layout Ideas u2014 Tile Lines
These Diagrams Are Everything You Need To Decorate Your Home

Floor tile layouts
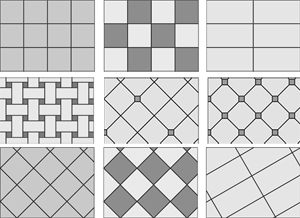
Top 7 Tile Patterns You Need To Know Popular Tile Layouts

5 Top Tips For Designing Your Floor Tile Layout

Which Direction Should You Run Your Tile Flooring? Well u2014 DESIGNED
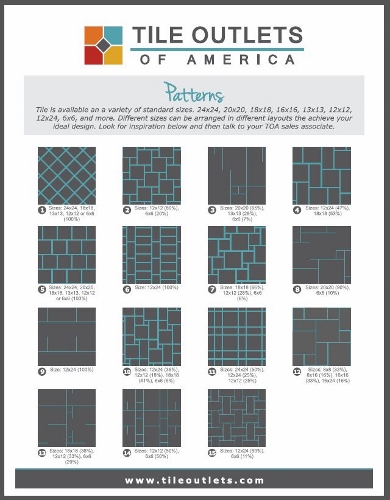
Tile pattern layout for 12×24 tiled
Top 7 Tile Patterns You Need To Know Popular Tile Layouts

Tile pattern 33% stagger (floor, tiles, door, lighting) – Home

5 Top Tips For Designing Your Floor Tile Layout

Related articles:
- Vintage Bathroom Floor Tile Patterns
- Bathroom Floor Tile DIY
- Limestone Bathroom Floor Tiles
- Bathroom Floor Porcelain Tile
- Concrete Bathroom Floor Ideas
- White Bathroom Ceramic Tiles
- Bathroom Floor Baseboard
- Rustic Bathroom Flooring Ideas
- Bathroom Flooring Options
- Bamboo Bathroom Flooring Ideas
Adding a tile floor pattern to your home is a great way to bring texture and visual interest to any room. Whether you’re looking for a classic checkered pattern or a more intricate design, there are a few steps that you can take to ensure your design comes out perfectly. Here’s how to layout tile floor patterns like an expert.
Planning Your Design
Before you start laying down your tiles, you need to plan out the look and feel of your design. Consider the size and shape of the room and factor in any preexisting features such as pillars or doorways. You should also decide on a pattern that will complement the existing decor of the space. Once you have an idea of what you want to achieve, it’s time to start drawing up a plan.
Using a ruler and pencil, measure the room and sketch out a basic outline of the area you plan to tile. Be sure to include any obstacles or curves in your design. This will help you visualize how the finished pattern will look and ensure that you don’t miss any spots.
Getting Started
Once you have your plan laid out, it’s time to begin laying down your tiles. Start in one corner of the room and make sure that all of the tiles are laid in one direction. This will help ensure that the pattern is symmetrical and that there aren’t any gaps or misalignments when it’s finished.
For larger patterns such as checkerboard or diamond shapes, use a chalk line or construction adhesive lines to keep your tiles straight. This will help keep everything aligned as you lay down each individual piece.
Creating Complex Patterns
If you plan on creating more complex patterns, it’s important to be precise with each measurement and cut. For intricate designs with multiple shapes, use paper templates to determine where each piece should go before cutting them out of the tile material. This will help reduce waste and give you a better idea of how everything will fit together when complete.
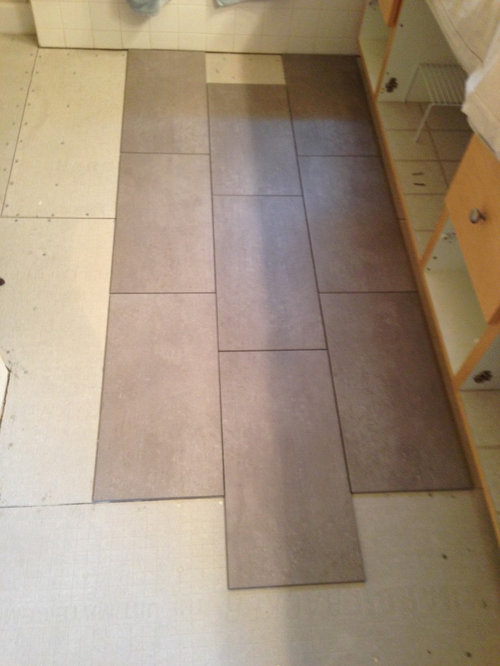
When laying out complex patterns, it’s important to leave at least 1/8 inch between each tile for grout lines. This will help prevent any shifting over time and create a clean, finished look.
Finishing Up
Once all of the tiles are laid down, it’s time to apply grout between each piece. Make sure to follow all manufacturer instructions when mixing and applying grout, as different types may require different techniques. For example, sanded grout requires more water than non-sanded grout and may need to be mixed for longer periods of time.
After the grout has been applied, let it dry completely before adding sealant or other finishes to your tile floor pattern. With these tips in mind, you’ll be able to create beautiful tile floor patterns with ease!
FAQs About Tiling Patterns
Q: What is the best way to ensure that my tile pattern is symmetrical?
A: The best way to ensure that your tile pattern is symmetrical is to lay all of the tiles in one direction before beginning the pattern. This will help keep everything aligned when it’s complete.
Q: What is the best way to measure complex patterns?
A: For complex patterns with multiple shapes, use paper templates to determine where each piece should go before cutting them out of the tile material. This will help give you an idea of how everything will fit together when complete.