There are numerous advantages of acquiring the epoxy surface coating with the concrete surfaces as when compared to the traditional home floors. Epoxy flooring additionally comes with one major benefit as it can be modified to provide your floor the desired finish. Here are some things you might or even might not yet know about one of the most crucial covering components in existence.
Here are Images about Epoxy Flooring Equipment
Epoxy Flooring Equipment

With good surface preparation, industrial epoxy floor covering applications work with a high chance of success. It lays well on countless kinds of surfaces like metal, concrete, tile and wood and is reluctant to most strong chemicals making for a durable and some color and long-lasting surface may actually be extra to the epoxy for a bit of flare. Epoxy concrete paints are extremely durable and can stand up to high pressure.
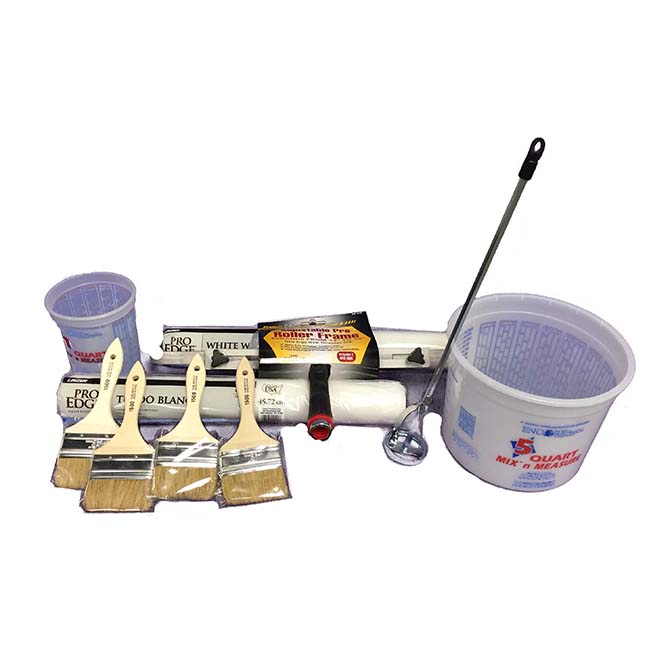
Epoxy Flooring AppEpoxy Rollers, Brushes u0026 Equipment licator Pack
The efficiency of your epoxy flooring will be immediately affected by the way you cook the surface area. Epoxy flooring is obviously getting more popular every single day. One is that an epoxy flooring is going to repel any, chemicals, dust, dirt, and water other kind of stain that carpet will soak within. Epoxy flooring for businesses has many advantages.
Images Related to Epoxy Flooring Equipment
Single Installation Kit
Floor Coating u0026 Painter Application Tools Rollers Paint Brushes

Epoxy Equipment: What is needed to apply an epoxy floor
Epoxy Flooring Supplies u0026 Materials List Thermal-Chem

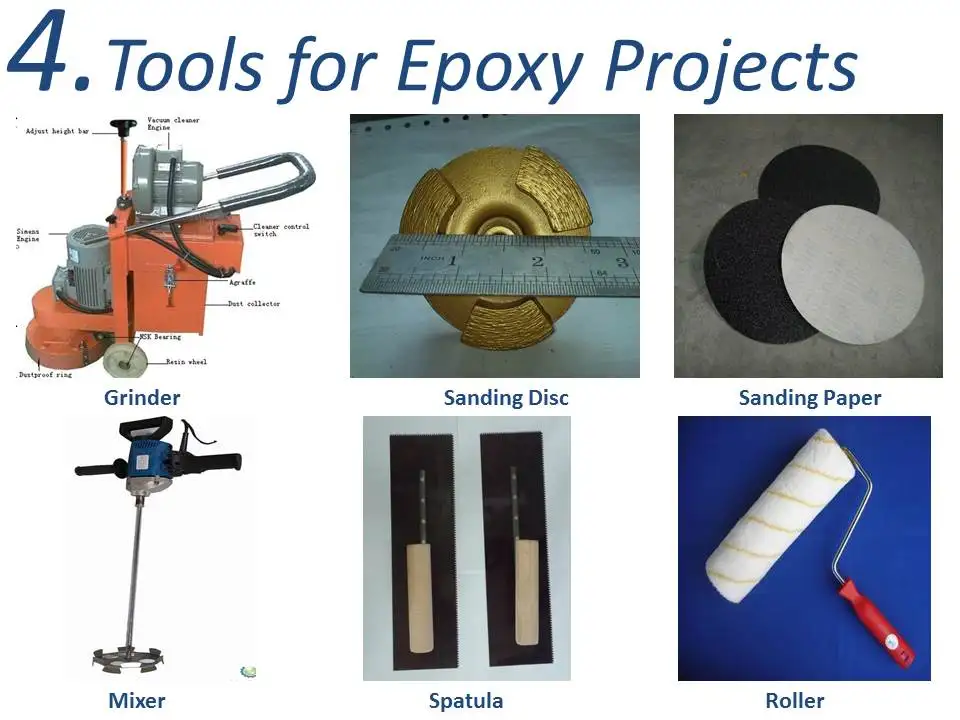
Maydos Epoxy Flooring Tools(trowel/roller/mixer/grinder) – Buy
Self Leveling Cement Spike Roller Epoxy Roller Flooring Tools Remove Bubbles Y eBay
Industrial Flooring Concrete Coatings Best Epoxy – Concrete Tools
Nashville Epoxy Flooring What Wikipedia Canu0027t Tell You

Epoxy Flooring Tools at Rs 350/piece Shahdara Delhi ID

planetary type epoxy flooring tools concrete floor portable marble

Tools Only an Epoxy Flooring Installer Could Love – Florock

Epoxy Flooring Orlando: The Value of Epoxy Flooring for New

Related articles:
- Epoxy Flooring Living Room
- 3D Epoxy Flooring
- Epoxy Flooring Ideas
- Residential Epoxy Flooring
- Epoxy Flooring Waterproof
- Epoxy Floor Coating Tips
- Metallic Epoxy Floor Designs
- Epoxy Flooring Contractors
- Epoxy Floor Coating Material
- Epoxy Floor Coating With Flakes
Epoxy Flooring Equipment: A Comprehensive Guide
Introduction:
Epoxy flooring has gained immense popularity in recent years due to its durability, versatility, and aesthetic appeal. Whether it is for commercial or residential purposes, epoxy flooring offers a long-lasting solution that can withstand heavy foot traffic, chemicals, and other harsh conditions. However, achieving a flawless epoxy floor requires the right equipment and tools. In this article, we will delve into the world of epoxy flooring equipment, exploring the various types of tools needed for surface preparation, mixing and application of epoxy coatings, and finishing touches.
I. Surface Preparation Equipment:
Surface preparation is crucial for ensuring proper adhesion of the epoxy coating to the substrate. Without adequate surface preparation, the longevity and performance of the epoxy floor can be compromised. Here are some essential surface preparation equipment:
1. Shot Blasters:
Shot blasters are powerful machines that use centrifugal force to propel steel shot at high speed onto the concrete surface. This process removes dirt, old coatings, contaminants, and creates a textured profile for optimal epoxy adhesion.
FAQs:
Q1: Can shot blasting be used on all types of concrete surfaces?
A1: Shot blasting is suitable for most concrete surfaces, but it may not be recommended for extremely damaged or deteriorated substrates.
Q2: How much does shot blasting cost?
A2: The cost of shot blasting varies depending on the size of the area to be prepared and the extent of surface damage. It is best to consult with a professional contractor to get an accurate estimate.
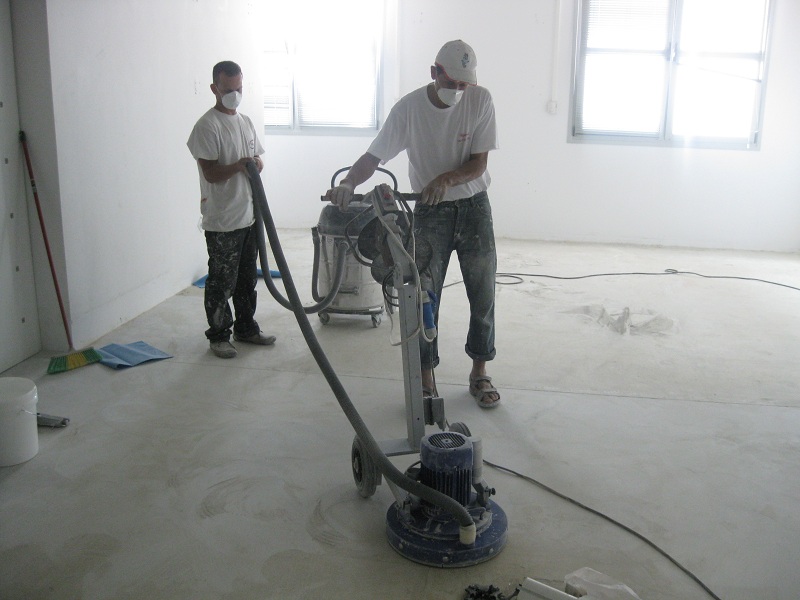
2. Diamond Grinders:
Diamond grinders are versatile machines equipped with diamond-embedded grinding discs. They are perfect for grinding down uneven surfaces, removing coatings or adhesives, and achieving a smooth finish before applying epoxy coatings.
FAQs:
Q1: Are diamond grinders suitable for all types of floors?
A1: Diamond grinders can be used on various surfaces such as concrete, terrazzo, and stone. However, they may not be appropriate for wooden or delicate surfaces.
Q2: Can diamond grinders create excessive dust?
A2: While diamond grinders generate some dust during the grinding process, modern equipment is designed with dust collection systems to minimize airborne particles. It is crucial to use proper personal protective equipment (PPE) and follow safety guidelines.
II. Mixing and Application Equipment:
Once the surface preparation is complete, it’s time to mix and apply the epoxy coating. Proper mixing and application ensure a consistent, smooth finish that adheres well to the prepared substrate. Let’s explore the essential equipment needed for this stage:
1. Epoxy Mixers:
Epoxy mixers are specifically designed to combine epoxy resin and hardener in the correct proportions. These mixers come in various sizes, from handheld models for small-scale projects to larger machines suitable for industrial applications.
FAQs:
Q1: Can I mix epoxy manually without using a mixer?
A1: While it is possible to mix epoxy manually using a stir stick or paddle, it can be challenging to achieve thorough and consistent mixing, especially for larger volumes. Using an epoxy mixer ensures proper homogeneity and reduces the risk of uncured or unevenly cured patches.
Q2: How long does it take for epoxy to cure after mixing?
A2: The curing time of epoxy varies depending on factors such as temperature, humidity, and the specific product used. Generally, epoxy takes anywhere from 24 to 72 hours to fully cure.
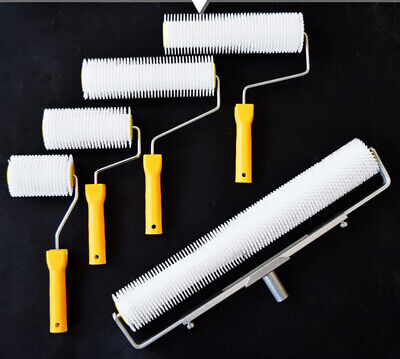
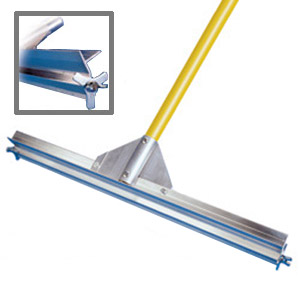
2 . Epoxy Applicators:
Epoxy applicators are tools used to apply the mixed epoxy onto the prepared surface. They come in various forms, including brushes, rollers, and squeegees, allowing for different application techniques and finishes.
FAQs:
Q1: Which type of epoxy applicator is best for my project?
A1: The choice of epoxy applicator depends on factors such as the size of the area, desired finish, and personal preference. Brushes are suitable for small areas or detailed work, while rollers are more efficient for larger surfaces. Squeegees are often used for applying thick epoxy coatings.
Q2: How many coats of epoxy should I apply?
A2: The number of epoxy coats required depends on factors such as the desired thickness and level of protection. In general, it is recommended to apply at least two coats to ensure proper coverage and durability.
III. Curing and Maintenance:
After applying the epoxy coating, it is crucial to allow sufficient time for curing before subjecting the surface to normal use. Additionally, proper maintenance practices can help extend the lifespan and appearance of the epoxy finish. Let’s look at some key considerations:
1. Curing Time:
The curing time of epoxy refers to the period it takes for the coating to fully harden and reach its maximum strength. This process involves a chemical reaction between the resin and hardener components. It is important to follow the manufacturer’s instructions regarding curing time and conditions.
FAQs:
Q1: Can I shorten the curing time of epoxy?
A1: It is not recommended to try to speed up the curing time of epoxy by applying heat or other methods. Altering the curing process can negatively affect the final properties and performance of the coating. It is best to allow the epoxy to cure naturally within the recommended timeframe.
Q2: How long should I wait before subjecting the epoxy-coated surface to normal use?
A2: The waiting time before normal use varies depending on factors such as temperature, humidity, and the specific epoxy product used. Generally, it is advisable to wait at least 24 to 48 hours before subjecting the surface to light foot traffic, and longer for heavy loads or chemical exposure.
2. Maintenance Tips:
To maintain the appearance and durability of an epoxy-coated surface, regular cleaning and proper maintenance are essential. Here are some tips to keep in mind:
– Clean spills promptly to prevent staining or damage.
– Use mild, non-abrasive cleaners for routine cleaning.
– Avoid using harsh chemicals or abrasive scrubbing pads that can degrade the epoxy finish.
– Apply a protective wax or sealer periodically to enhance shine and protect against wear.
FAQs:
Q1: Can I use bleach or ammonia-based cleaners on epoxy surfaces?
A1: It is best to avoid using bleach or ammonia-based cleaners on epoxy surfaces as they can cause discoloration or damage. Opt for mild, pH-neutral cleaners specifically formulated for use on epoxy coatings.
Q2: How often should I reapply a protective wax or sealer?
A2: The frequency of reapplying a protective wax or sealer depends on factors such as level of foot traffic and use. In general, it is recommended to reapply every 6 to 12 months or as needed to maintain the desired level of protection and appearance.
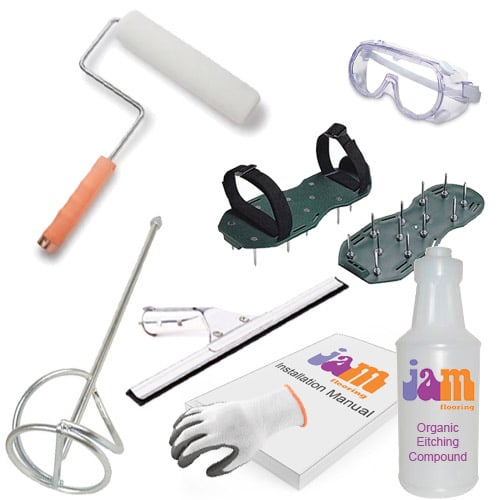
“What are the essential tools and equipment needed for installing epoxy flooring?”
The essential tools and equipment needed for installing epoxy flooring include:1. Protective Gear: Safety glasses, gloves, and a respirator to protect against fumes and chemicals.
2. Concrete Grinder: Used to prepare the surface by removing any existing coatings, dirt, or imperfections on the concrete.
3. Shot Blaster: Alternatively used to prepare the surface by blasting it with small steel shots, creating a rough texture for better adhesion.
4. Power Washer: Used to clean the concrete surface thoroughly before applying epoxy.
5. Mixing Tools: A power drill with a mixing attachment or paddle mixer to properly mix the epoxy components.
6. Epoxy Resin and Hardener: The main components of epoxy flooring that need to be mixed together according to manufacturer’s instructions.
7. Roller Frames and Covers: Use heavy-duty roller frames with covers suitable for epoxy application on floors.
8. Squeegee or Trowel: Used for spreading and leveling the epoxy mixture over the floor.
9. Spike Shoes or Spiked Rollers: To remove air bubbles trapped in the epoxy during application.
10. Crack Repair Materials: Epoxy crack fillers or patching compounds to fix any cracks or imperfections before applying the epoxy coating.
11. Paint Brushes or Trim Rollers: For cutting in edges around walls and other detailed areas.
12. Moisture Meter: To check for moisture levels in the concrete before applying epoxy, as excessive moisture can cause adhesion issues.
13. Duct Tape or Masking Tape: Used for creating clean lines and protecting adjacent surfaces from accidental spills or splatters.
14. Non-Slip Additives: Optional additives like aluminum oxide or silica sand can be mixed into the topcoat for increased traction on the finished floor.
It’s important to note that specific tools and equipment may vary depending on the size of the project, manufacturer recommendations, and individual preferences. It is always advisable to refer to the manufacturer’s instructions and safety guidelines for the specific epoxy product being used.