To make cutting the vinyl easier, you might as well invest a few additional dollars by leasing a vinyl tile cutter rather than making do with your older razor knife. This is primarily due to its durability, the low cost of its and it is ease of maintenance. Luxury vinyl flooring is all of the rage now – whether for homes, shops or offices. Vinyl flooring is additionally increasingly well known because it's value that is good for cash.
Images Related to Grey Self Adhesive Vinyl Floor Tiles
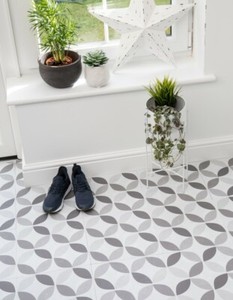
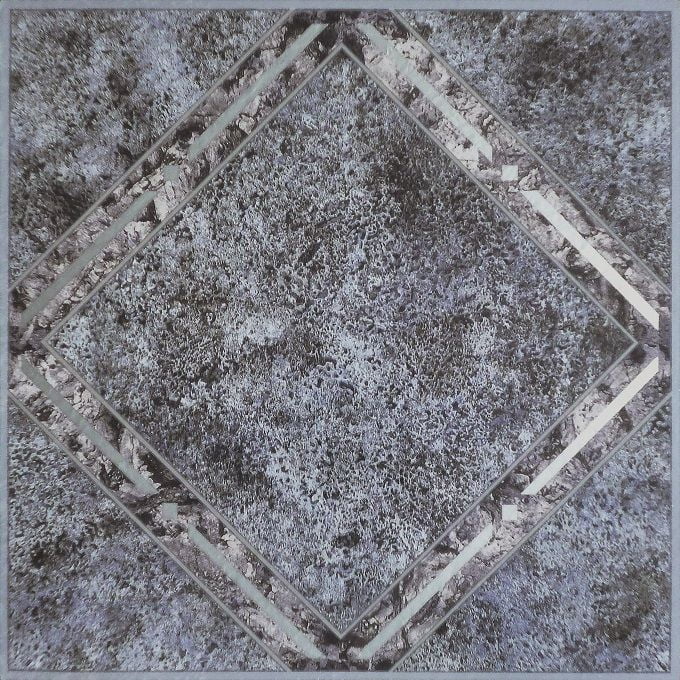
Grey Self Adhesive Vinyl Floor Tiles

With vinyl you can get the appearance of hardwood, but not stress about splashes of water from the tub ruining it. Usually, resilient vinyl and flooring flooring are two terms which are interchangeable. You may check your local phone directory for lists of shops that sell vinyl flooring at regular or discounted price. This blend gives you the ability to keep the floor free from germs.
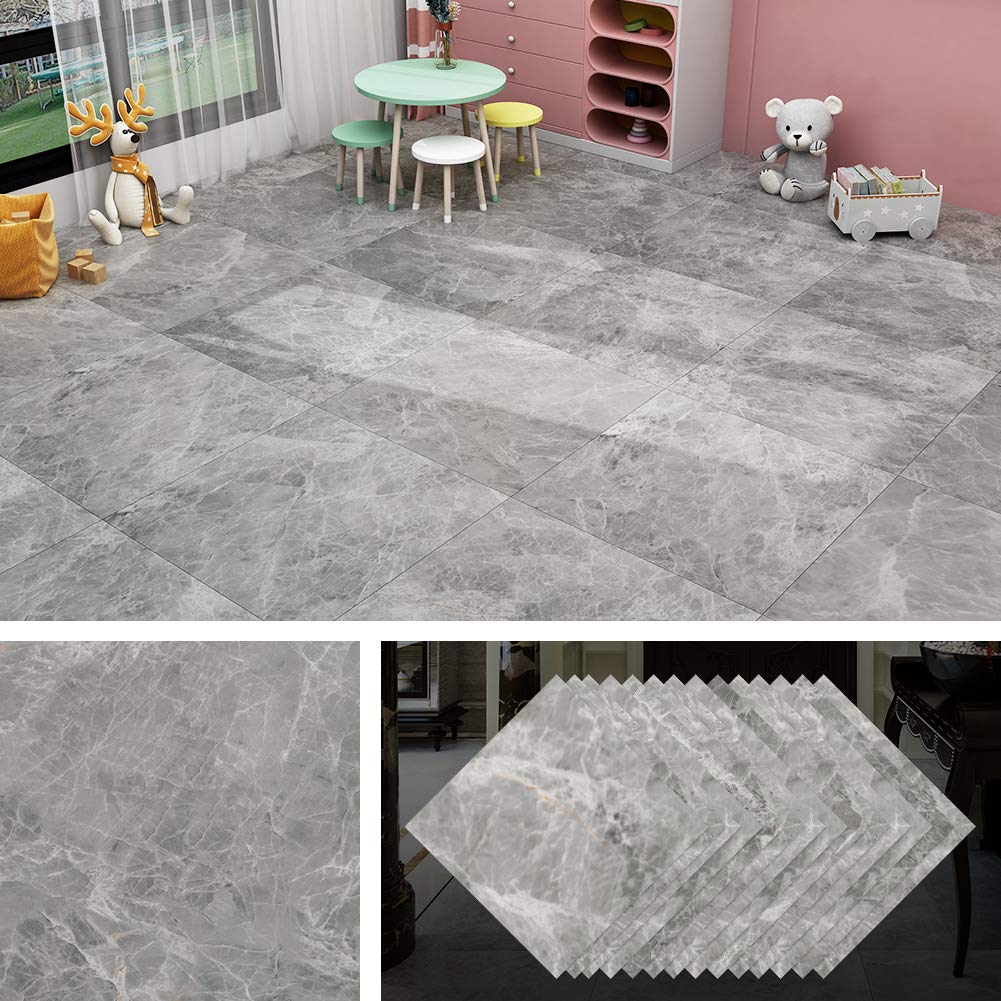
Livelynine Concrete Grey Peel and Stick Floor Tile 12X12 Inch 16 Pack Vinyl Flooring Peel and Stick Waterproof Self Adhesive Floor Tiles for Bathroom
There are distinct advantages to using vinyl for the floor of yours. Luxury vinyl flooring is usually now made to be very tough wearing and whilst it is able to be a huge investment, it might keep going for many months particularly if regular maintenance is implemented using the manufacturers highly recommended products. If you've kids that are little at home, then simply vinyl flooring is meant simply for you.
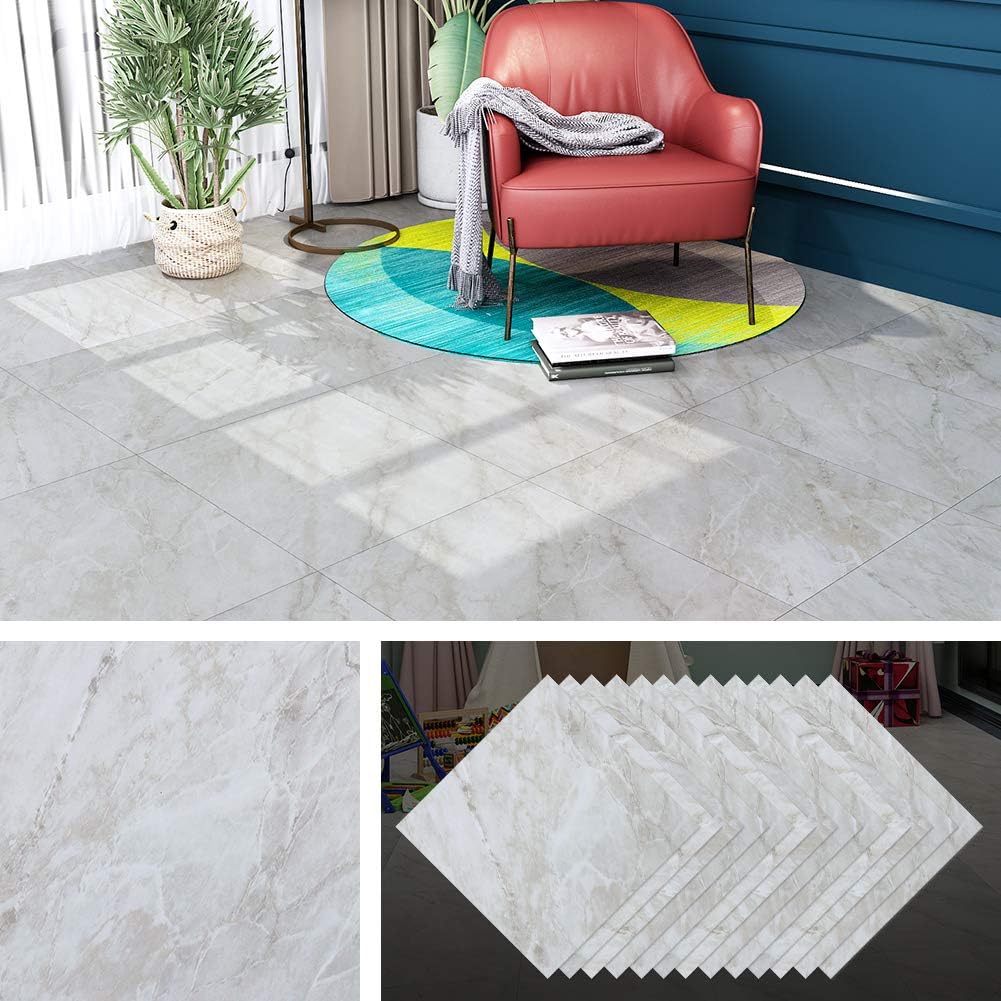
Livelynine Waterproof Peel and Stick Floor Tile 12X12 Inch 16 Pack Light Grey Vinyl Flooring Peel and Stick Tiles for Kitchen Bedroom Self Adhesive
Achim Nexus Ash Grey Wood 12×12 Self Adhesive Vinyl Floor Tile

Achim Home Furnishings FTVWD23120 Nexus Self Adhesive 20 Vinyl Floor Tiles, 12″ x 12

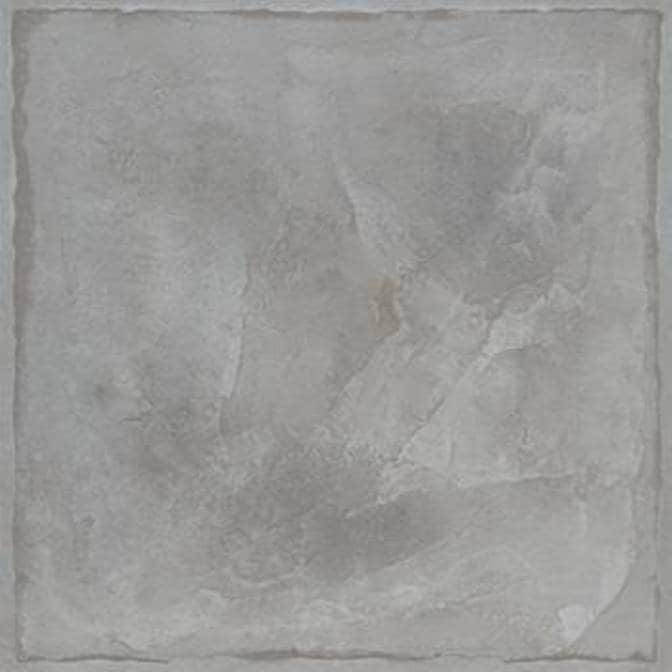
Self-Adhesive Slate Gray Vinyl Floor Tiles (12 x 12) 60 Square Feet
Armstrong® Flooring Edgewater 12 x 24 Self-Adhesive Vinyl Tile at

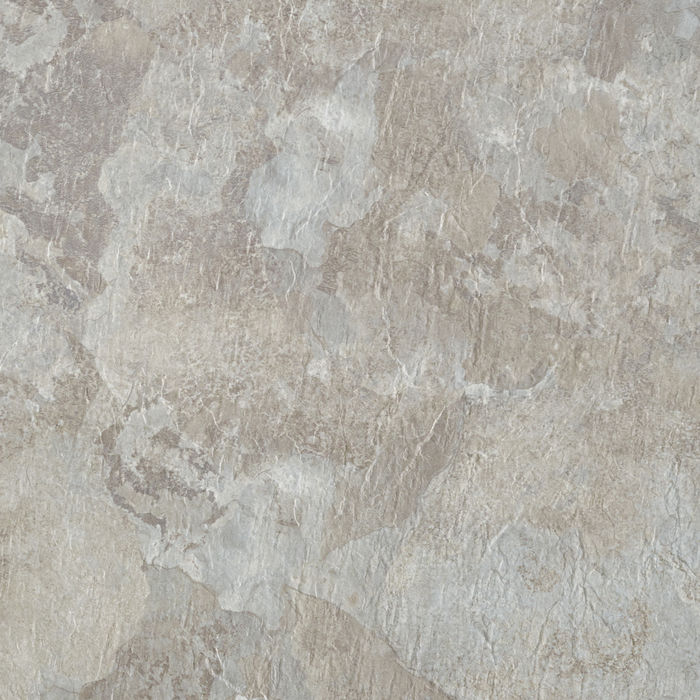
Majestic Vinyl 18×18 Floor Tile- Light Gray Slate
11 TILES 1 SQUARE METER DARK SLATE GREY SELF ADHESIVE VINYL FLOOR TILES DC FLOOR eBay

11 TILES 1 SQUARE METER GREY WOOD SELF ADHESIVE VINYL FLOOR TILES DC FLOOR eBay

11 TILES 1 SQUARE METER GEOMETRIC GREY DC FLOOR SELF ADHESIVE VINYL FLOOR TILES eBay
Achim Nexus Self Adhesive Vinyl Floor Tile – 20 Tiles/20 Sq. ft., 12 x 12, Metallic Marble Diamond
Details about 4 Self Adhesive Vinyl Floor Tiles Grey Wood Effect Wooden Bathroom Kitchen Lino

Floor Planks Tiles Self Adhesive Vinyl Dark Grey Wood Flooring Kitchen Bathroom eBay

Related articles:
- Vinyl Flooring Bathroom Tile
- Modern Vinyl Flooring
- Funky Vinyl Flooring
- Vinyl Flooring For Kitchen
- Vintage Look Vinyl Flooring
- Kitchen Vinyl Floor Tiles Ideas
- Vinyl Flooring With Wood Look
- Waterproof Vinyl Flooring
- Vinyl Flooring For Cheap
- How To Remove Vinyl Flooring
Grey Self Adhesive Vinyl Floor Tiles: The Perfect Flooring Solution for a Modern Home
Introduction:
When it comes to home design and renovation, flooring plays a crucial role in creating the desired ambiance and style. One of the most popular flooring options in recent years is grey self adhesive vinyl floor tiles. This innovative flooring solution offers many advantages, including easy installation, durability, affordability, and a wide range of design options. In this article, we will explore why grey self adhesive vinyl floor tiles are an excellent choice for modern homes and provide detailed information on their features, installation process, maintenance requirements, and frequently asked questions.
I. Features of Grey Self Adhesive Vinyl Floor Tiles:
Grey self adhesive vinyl floor tiles come with a myriad of features that make them stand out from other flooring options. Here are some key features:
1. Easy Installation:
One of the primary advantages of grey self adhesive vinyl floor tiles is their simple installation process. Unlike traditional tile or hardwood flooring, these vinyl tiles can be easily applied directly onto the existing subfloor without the need for adhesives or professional help. The self-adhesive backing ensures a secure bond between the tile and the subfloor.
2. Durability:
Vinyl flooring is known for its durability, and grey self adhesive vinyl floor tiles are no exception. They are resistant to wear and tear, scratches, stains, and moisture damage. This makes them an ideal choice for high-traffic areas such as kitchens, bathrooms, and entryways.
3. Affordability:
Compared to other flooring options like hardwood or ceramic tiles, grey self adhesive vinyl floor tiles offer excellent value for money. They are more affordable to purchase and install while still providing an attractive and durable flooring solution.
4. Design Options:
Grey self adhesive vinyl floor tiles come in a wide variety of designs and patterns to suit different interior styles. Whether you prefer a sleek modern look or a rustic aesthetic, there is a design to match your taste. From realistic wood and stone patterns to abstract geometric motifs, the options are endless.
5. Comfort and Sound Insulation:
Vinyl flooring provides a comfortable underfoot feel, making it pleasant to walk on for extended periods. Additionally, the cushioning properties of vinyl help absorb sound, reducing noise transmission between floors.
II. Installation Process:
Installing grey self adhesive vinyl floor tiles is a straightforward process that can be done by homeowners with minimal DIY skills. Here is a step-by-step guide:
1. Preparation:
Before installing the tiles, ensure that the subfloor is clean, dry, and free from any debris or imperfections. If there are any uneven spots or cracks, it’s recommended to level or repair them before proceeding.
2. Acclimatization:
Allow the tiles to acclimate to the room’s temperature and humidity for at least 48 hours before installation. This ensures that the tiles adjust to the environment and minimizes the risk of expansion or contraction after installation.
3. Layout Planning:
Plan the tile layout by measuring and marking the center of the room. Start laying the tiles from the center outward to create a balanced and symmetrical look. It’s advisable to dry-fit the tiles first to determine their placement and make any necessary adjustments.
4. Peel-and-Stick Application:
Remove the protective backing from one tile and carefully place it in position, aligning it with your layout marks. Press firmly on all edges and ensure proper adhesion to the subfloor. Repeat this process until all tiles are installed, leaving a Small gap between each tile for expansion. Use a roller or a clean towel to firmly press down on the tiles and ensure they are securely adhered to the subfloor.
5. Finishing Touches:
Once all the tiles are installed, trim any excess material along the edges using a utility knife or scissors. Install any necessary transition strips or molding to provide a finished look and to cover any gaps or transitions between different flooring surfaces.
6. Maintenance:
To maintain the appearance and longevity of grey self adhesive vinyl floor tiles, it’s important to follow proper maintenance practices. Regularly sweep or vacuum the floor to remove dirt and debris, and use a damp mop with mild soap or vinyl floor cleaner for deeper cleaning when needed. Avoid using abrasive cleaners or tools that can damage the surface of the tiles.
In conclusion, grey self adhesive vinyl floor tiles offer many benefits such as easy installation, durability, affordability, design options, comfort, and sound insulation. By following the proper installation process and maintenance routine, homeowners can enjoy a beautiful and long-lasting flooring solution in their homes. Overall, the installation process for grey self adhesive vinyl floor tiles is relatively simple and can be done by homeowners with minimal DIY skills. Here are the steps to follow:
1. Preparation: Ensure that the subfloor is clean, dry, and free from any debris or imperfections. Level or repair any uneven spots or cracks.
2. Acclimatization: Allow the tiles to acclimate to the room’s temperature and humidity for at least 48 hours before installation.
3. Layout Planning: Measure and mark the center of the room and start laying the tiles from the center outward for a balanced and symmetrical look. Dry-fit the tiles first to determine their placement.
4. Peel-and-Stick Application: Remove the protective backing from one tile and carefully place it in position, aligning it with your layout marks. Press firmly on all edges and ensure proper adhesion to the subfloor. Repeat this process for all tiles, leaving a small gap between each tile for expansion. Use a roller or clean towel to firmly press down on the tiles.
5. Finishing Touches: Trim any excess material along the edges using a utility knife or scissors. Install transition strips or molding to provide a finished look and cover any gaps or transitions between different flooring surfaces.
6. Maintenance: Regularly sweep or vacuum the floor to remove dirt and debris. Use a damp mop with mild soap or vinyl floor cleaner for deeper cleaning when needed. Avoid using abrasive cleaners or tools that can damage the surface of the tiles.
By following these steps, homeowners can easily install grey self adhesive vinyl floor tiles and enjoy their benefits of easy installation, durability, affordability, design options, comfort, and sound insulation. Grey self adhesive vinyl floor tiles offer numerous benefits, including easy installation, durability, affordability, design options, comfort, and sound insulation. By following a simple installation process and proper maintenance routine, homeowners can enjoy a beautiful and long-lasting flooring solution. Here are the steps to install grey self adhesive vinyl floor tiles:
1. Preparation: Ensure the subfloor is clean, dry, and free from debris or imperfections. Level or repair any uneven spots or cracks.
2. Acclimatization: Allow the tiles to acclimate to the room’s temperature and humidity for at least 48 hours before installation.
3. Layout Planning: Measure and mark the center of the room and start laying the tiles from the center outward for a balanced and symmetrical look. Dry-fit the tiles first to determine their placement.
4. Peel-and-Stick Application: Remove the protective backing from one tile and carefully place it in position, aligning it with your layout marks. Press firmly on all edges to ensure proper adhesion to the subfloor. Repeat this process for all tiles, leaving a small gap between each tile for expansion. Use a roller or clean towel to firmly press down on the tiles.
5. Finishing Touches: Trim any excess material along the edges using a utility knife or scissors. Install transition strips or molding to cover gaps or transitions between different flooring surfaces.
6. Maintenance: Regularly sweep or vacuum the floor to remove dirt and debris. Use a damp mop with mild soap or vinyl floor cleaner for deeper cleaning when needed. Avoid using abrasive cleaners or tools that can damage the surface of the tiles.
By following these steps, homeowners can easily install grey self adhesive vinyl floor tiles and enjoy their benefits in terms of easy installation, durability, affordability, design options, comfort, and sound insulation.