Basement Ceramic Tiles
A Durable and Stylish Flooring Solution
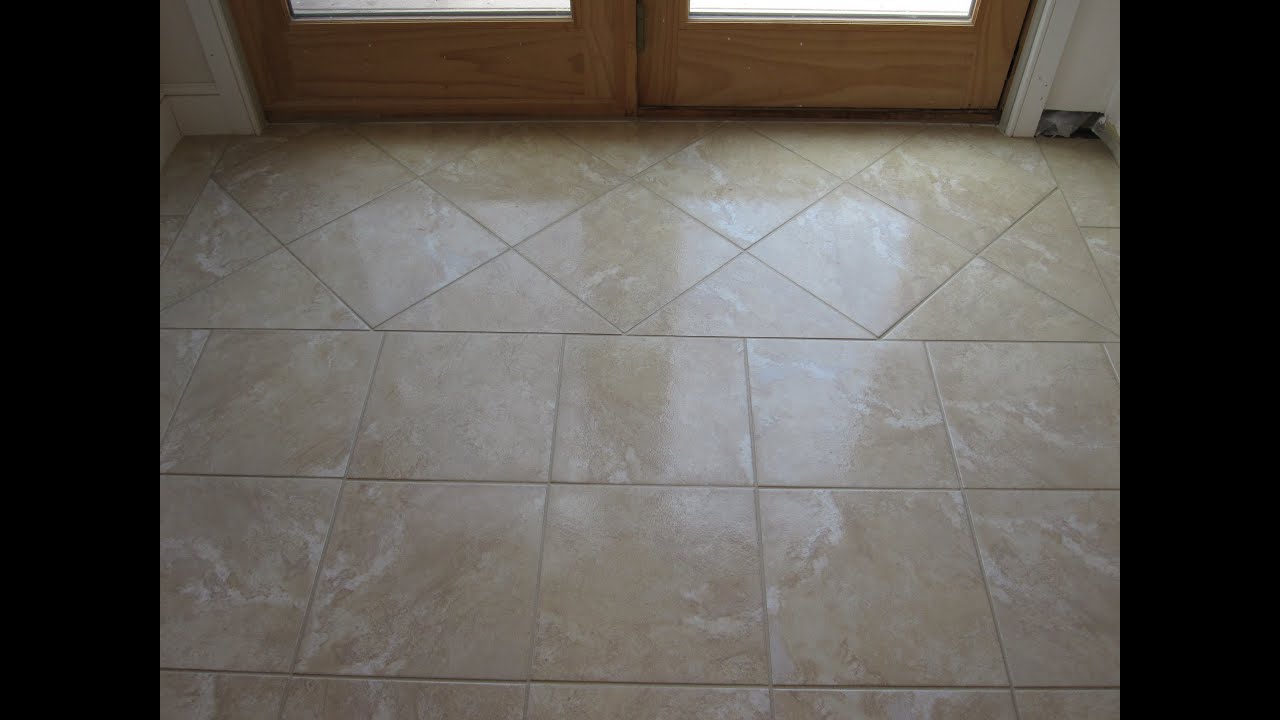
When I chose to remodel my basement, one of the first considerations I had to make was to select the appropriate flooring. I wanted something that could withstand wetness, wear and tear, and yet look good. After researching several possibilities, I chose ceramic tiles and couldn’t be happier with the outcome. Ceramic tiles have changed my basement into a useful and elegant room where I like spending time. Today we will discuss my experiences with basement ceramic tiles, including their benefits, installation process, design alternatives, and maintenance suggestions.
Why Did I Choose Ceramic Tiles for My Basement?
One of the primary reasons I chose ceramic tiles for my basement was their endurance. Basements are prone to wetness, temperature variations, and heavy foot traffic, so I needed a flooring solution that could resist these conditions. Ceramic tiles are water resistant, making them perfect for locations where moisture or spills may occur.
Another consideration was ease of maintenance. Ceramic tiles are extremely easy to clean and require no extra treatments or supplies. A quick sweep and the occasional mopping is all it takes to keep them looking good. This low-maintenance component was a major selling factor for me, as I sought a flooring option that would not add to my already hectic schedule.
I really liked the adaptability of ceramic tiles. They come in a variety of colors, patterns, and textures, so I could select a design that matched my concept for the basement. Whether I wanted a slick, modern style or a comfortable, rustic atmosphere, there was a ceramic tile option to suit.
Cost was another factor to consider. Ceramic tiles are not the cheapest flooring option, but they provide exceptional value for money due to their lifetime and resilience. I saw them as a long-term investment that would help me save money on future repairs and replacements.
Finally, I liked the concept of DIY installation. While I did hire a professional for some aspects of the job, I enjoyed that ceramic tiles are a viable alternative for individuals who enjoy hands-on home repair tasks. This versatility made them an even more tempting option.

Preparing the Basement for Ceramic Tiles
Before I could install the ceramic tiles, I needed to prepare the basement floor. The first step was to thoroughly clean the surface, removing any dirt, dust, and debris. I used a vacuum and a damp mop to make sure the floor was clean.
Next, I tested the floor’s levelness. Uneven surfaces can lead tiles to fracture or lift over time, so I used a leveling agent to fill up any low spots or cracks. This procedure was critical to ensuring a nice and solid surface for the tiles.
I also added a vapor barrier to protect the tiles from dampness. Basements are infamous for humidity, and I did not want moisture to leak in and damage the tiles or the adhesive. The vapor barrier served as a protective layer, providing me piece of mind.
After cleaning, leveling, and protecting the floor, I used chalk lines to indicate the tile plan. This allowed me to visualize the layout and create a balanced, symmetrical design. Taking the time to prepare the layout helped me avoid making mistakes during installation.
Finally, I gathered all of the required tools and materials, which included tile spacers, a notched trowel, a tile cutter, and grout. Everything was ready before the installation began, which made the procedure go more smoothly and efficiently.

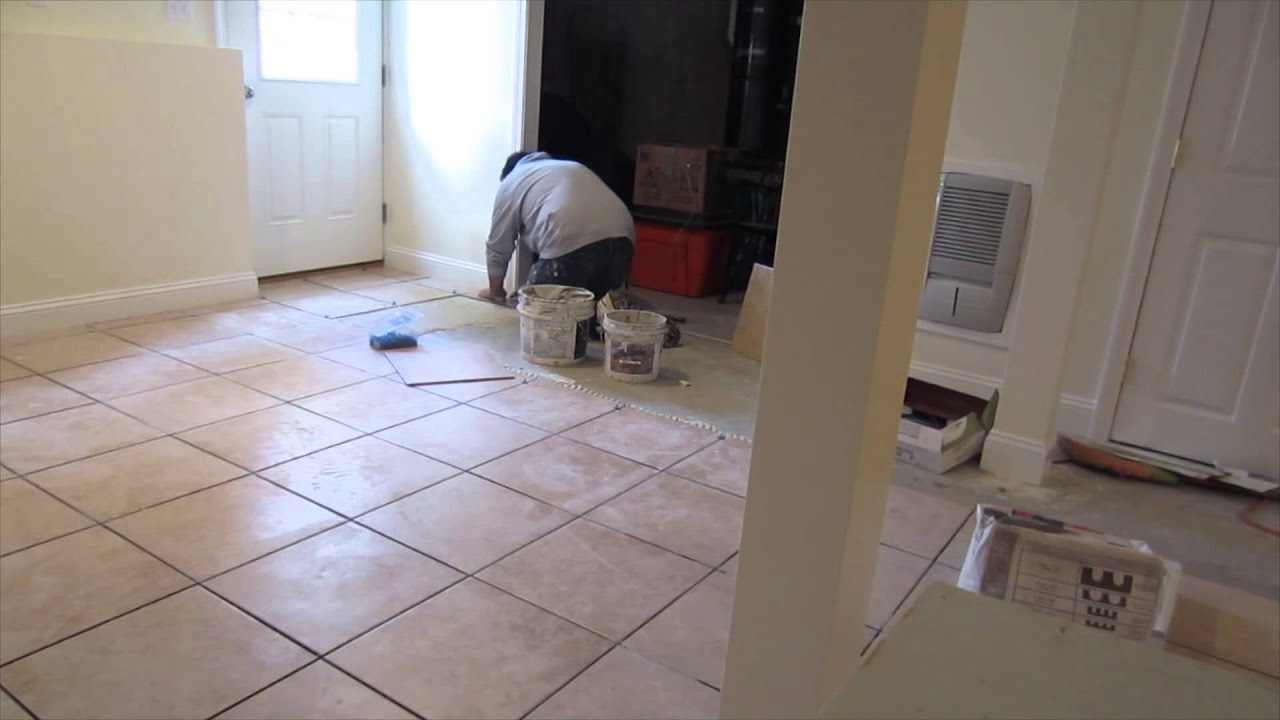
Installing Ceramic Tiles
I began the installation by applying thin-set mortar to a small area of the floor using a notched trowel. The ridges generated by the trowel contributed to even coverage and a solid adhesion between the tiles and the floor.
I set the first tile in the corner of the room and firmly pressed it into the mortar. Using tile spacers, I kept consistent gaps between the tiles for grout lines. I continued to place tiles in small pieces, working my way across the room and checking to ensure they were level.
Cutting tiles to fit around edges, corners, and obstructions was one of the most difficult parts of the installation. I used a tile cutter for straight cuts and a tile nipper for more complex forms. Taking my time with these cuts resulted in a clean, professional appearance.
After laying all of the tiles, I let the mortar cure for 24 hours before applying the grout. I prepared the grout according to the manufacturer’s directions and applied it to the tiles with a rubber float. I pressed the grout hard into the gaps to get a solid, even finish.
After applying the grout, I used a damp sponge to remove any excess and smooth the grout lines. I let the grout cure for the specified period before adding a grout sealant to protect it from stains and moisture. This final procedure provided the floor a glossy and finished appearance.
Maintaining My Basement’s Ceramic Tiles
Maintaining my basement ceramic tiles has been surprisingly simple. I clean or vacuum on a regular basis to eliminate dirt and debris that may scratch the surface. A moist mop and a light detergent are usually sufficient for deep cleaning.
To protect the tiles from scratches, I place furniture pads beneath the legs of chairs, tables, and other heavy items. I also use rugs or mats in high-traffic areas, such as entryways and hallways, to decrease wear.
If I see any stains or discoloration in the grout, I use a grout cleaning to restore the original color. For harder stains, a baking soda and water solution works great. Regular care keeps the grout looking good and prevents mold and mildew from growing there.
I periodically check the tiles for signs of damage, such as cracks or loose pieces. Addressing minor difficulties as soon as possible can help to avoid larger problems later on. With careful maintenance, my ceramic tiles will be both attractive and functional for many years to come.
Finally, I make care to mop up spills very away to avoid stains or water damage. Although ceramic tiles are water-resistant, extended exposure to moisture can erode the grout or adhesive. By performing regular maintenance, I can ensure that my basement ceramic tiles continue to enrich the room.
Basement Floor Tiles That Provide The Best Insulation
Ceramic tile Basement Floor
Related articles: