Plus there are a multitude of basic epoxy chemicals which may be utilized in order to produce epoxy flooring. news that is Good is, you are able to constantly customize your floor according to the preferences of yours. An epoxy flooring is produced when an appropriate resin is applied over the top of a current concrete slab. Including colored silica can make the floor attractive.
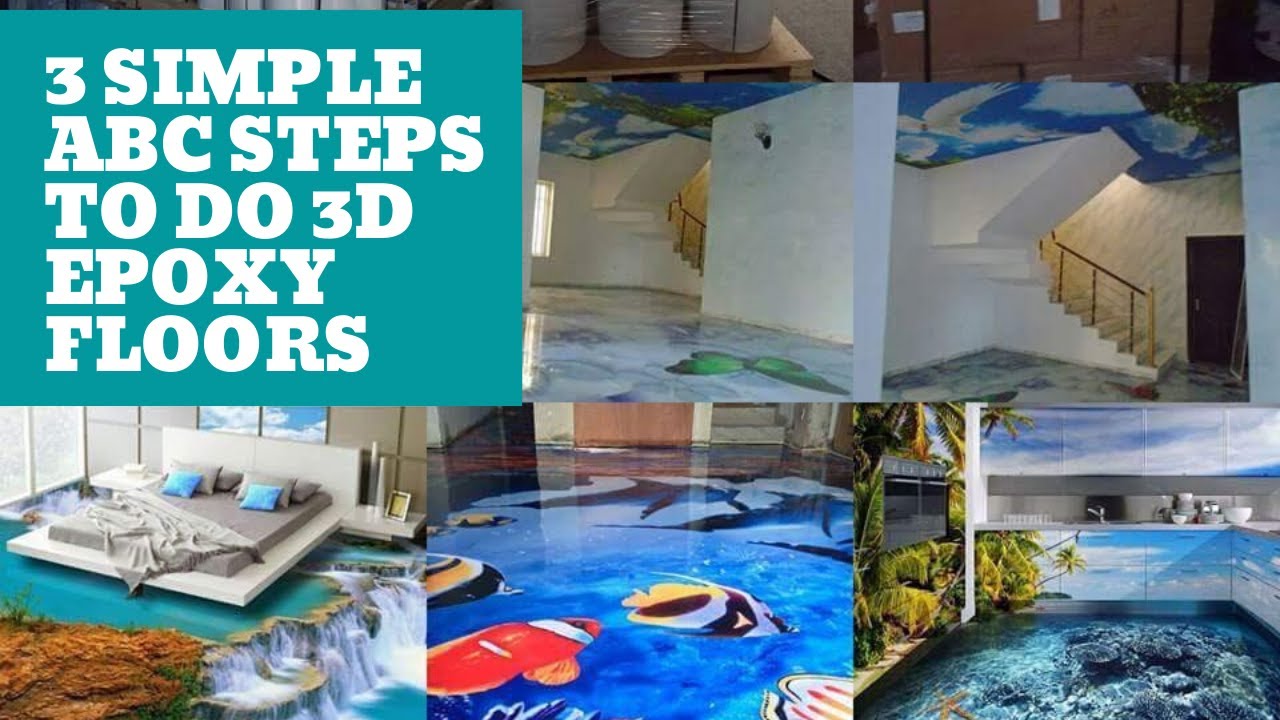
Here are Images about 3d Epoxy Flooring DIY
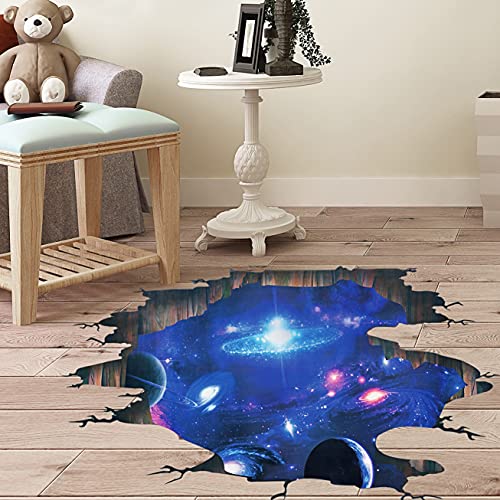
3d Epoxy Flooring DIY
By applying an epoxy coating on the concrete, the concrete is protecting. Marble is beautiful, but a lot more costly compared to decorated concrete. Epoxy floor coatings, particularly, are widely used in floor applications. Epoxies are used to develop durable, clean, and sparkling flooring. Also, you must not use epoxy layer if your flooring was applied with concrete sealer. Epoxy floor color makes areas look even more professional.
3D Epoxy Flooring – How to Make 3D Floor Art With Epoxy Resin

The great thing about the majority of sorts of epoxy flooring is that they’re strong and therefore are in a position to ignore all household chemicals as well as being unwilling to mechanical shocks along with being scratched etc. With the epoxy concrete color you can readily alter the complete surfacing pattern of your home or maybe your workplace with the changing trends.
Images Related to 3d Epoxy Flooring DIY
Epoxy 3D Floor u2013 Everything You Need to Know – Advance Industrial
Epoxy 3D Floor u2013 Everything You Need to Know – Advance Industrial

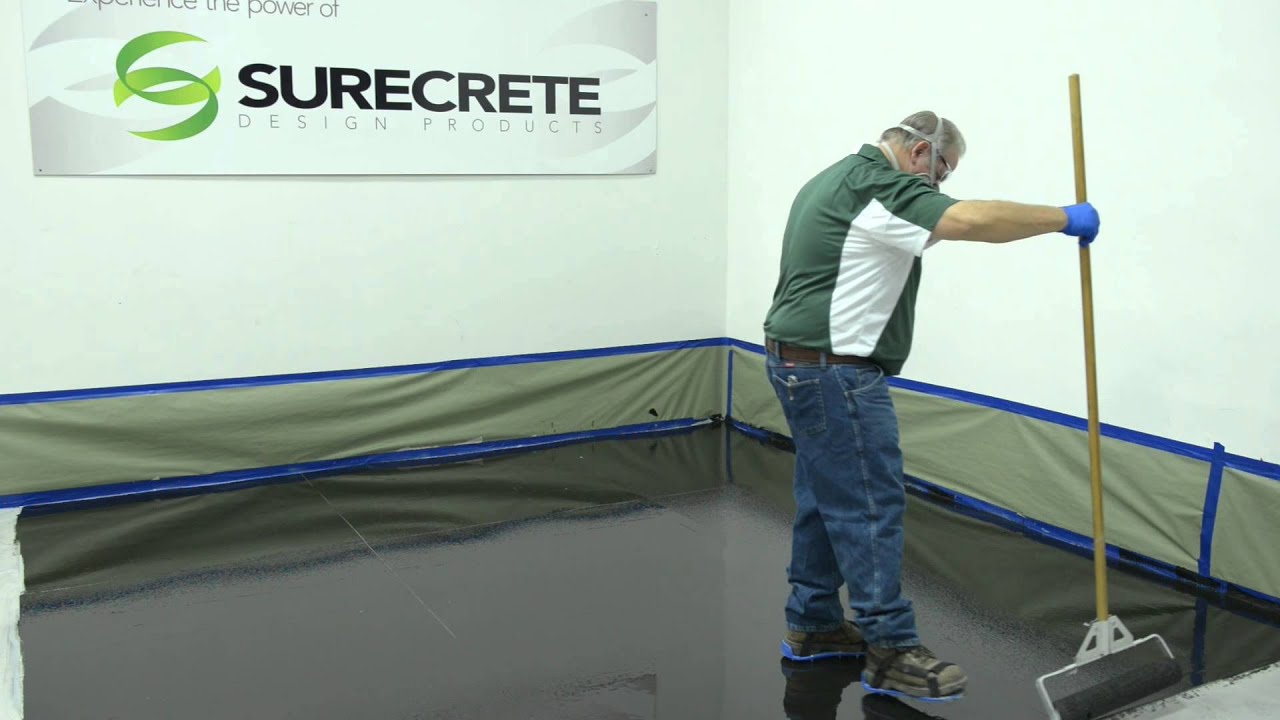
How to Make a 3D Metallic Floor – System by Surecrete
Step by step to install 3d epoxy flooring and how to make 3d floor

Epoxy 3D Floor u2013 Everything You Need to Know – Advance Industrial

3D Epoxy flooring for an exquisite floor design in your home (DIY

3D Epoxy Flooring u2013 How to Make 3D Floor Art
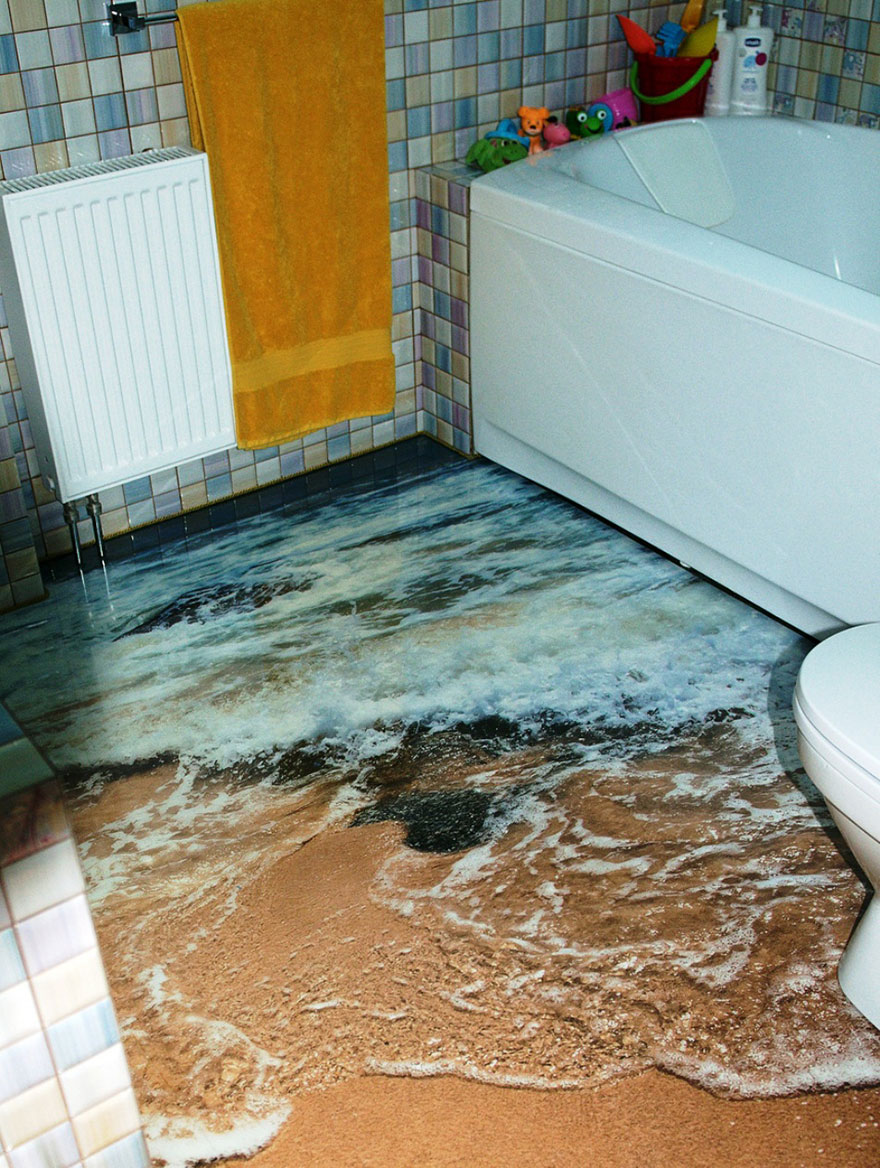
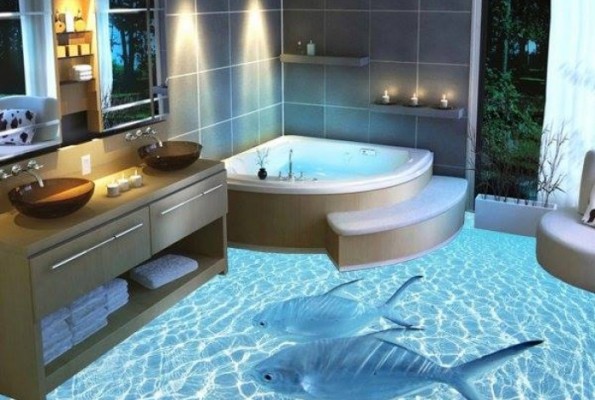
3D Epoxy Flooring: Stunning Work of Art For Your Bathroom

35 Really Beautiful 3d Epoxy Flooring That You Can Do For Less

China 3D Epoxy Flooring Resin 3D Floor DIY Home Office Floor

3D Epoxy Flooring – How to Make 3D Floor Art With Epoxy Resin
A complete guide to 3D flooring installation
Related articles:
- Epoxy Flooring Living Room
- 3D Epoxy Flooring
- Epoxy Flooring Ideas
- Residential Epoxy Flooring
- Epoxy Flooring Waterproof
- Epoxy Floor Coating Tips
- Metallic Epoxy Floor Designs
- Epoxy Flooring Contractors
- Epoxy Floor Coating Material
- Epoxy Floor Coating With Flakes
3D Epoxy Flooring DIY: A Comprehensive Guide
Are you looking to give your home a unique and eye-catching update? 3D epoxy flooring is a great way to transform any room with an artistic and stylish look. But what is 3D epoxy flooring, and how do you install it yourself? Read on to learn more about 3D epoxy flooring DIY and create a stunning, personalized look for your space.
What is 3D Epoxy Flooring?
3D epoxy flooring is a type of decorative concrete that uses a combination of resins, hardeners, and pigments to create a one-of-a-kind design. The epoxy is poured into a mold or onto the floor and then left to dry. Once it’s cured, the epoxy will create a glossy, three-dimensional look that can be customized with different colors and patterns.
Benefits of 3D Epoxy Flooring
The benefits of 3D epoxy flooring are numerous. Not only does it create an eye-catching design, but it’s also highly durable and low maintenance. The surface will resist staining, scuffing, and cracking and will last for years without needing to be replaced. It’s also easy to clean and can be disinfected to prevent the spread of germs.
DIY 3D Epoxy Flooring Installation
Installing 3D epoxy flooring yourself is relatively simple with the right materials and tools. Here’s what you’ll need:
• Epoxy resin
• Hardener
• Pigment powder
• Mixing buckets
• Trowel
• Plastic sheeting
• Sandpaper
• Squeegee or roller
• Measuring cup
• Mold (optional)
Once you have all the necessary materials and tools, you’re ready to start the installation process. Begin by preparing the surface. Clean the area thoroughly, removing any traces of dirt or debris. Then, use sandpaper to smooth out any uneven spots or ridges in the floor. Next, lay down plastic sheeting to protect the area from spills.
Once the surface is ready, it’s time to mix your epoxy resin. Use a measuring cup to measure out equal parts of resin and hardener, then combine them in one of the mixing buckets. If you’re using pigment powder for color, add it to the mixture as well. Mix everything together until it forms a thick liquid that is free of lumps or bumps.
If you plan on creating a patterned design, now is the time to pour your mixture into molds or onto the floor in whichever pattern you choose. Otherwise, spread it evenly over the plastic sheeting with a trowel or squeegee. Allow it to dry completely before walking on it or moving furniture over it.
Finally, peel up the plastic sheeting once the epoxy has finished curing. You should now have a glossy three-dimensional floor design that will last for years with minimal maintenance!
Common Questions About 3D Epoxy Flooring DIY
Q: How long does installation take?
A: The installation process should take about 4-5 hours depending on the size of your space and complexity of your design. Allow 24 hours for the epoxy to fully cure before walking on it or moving furniture over it.
Q: How long does 3D epoxy flooring last?
A: With proper care and maintenance, 3D epoxy flooring can last for 10 years or more.
Q: Is 3D epoxy flooring resistant to water damage?
A: Yes! The epoxy resin creates a waterproof seal that prevents water from seeping into the surface and causing damage.
Q: Can I add color to my 3D epoxy floor?
A: Yes! You can add pigment powder when mixing your epoxy resin for an added splash of color.