We personally do not take care of prefinished flooring thanks to installation problems connected with it, thus our product usually requires site applied finish. Vinyl wood floors fills the void between the most inexpensive hardwood floors as well as the need for affordable substitute flooring that's both cost effective, simple to set up with rugged durability for effective families with small pets and kids.
Images Related to Solid Wood Flooring Clips
Solid Wood Flooring Clips

The choices of wood species is likewise amazing, therefore it could be a difficult choice, however, it will be a choice the homeowner is going to be thrilled to enjoy for years to come. Having your wood floor lacquered will protect it and make it go longer although some people prefer to have a more organic look to their wood floors and as such decide not to lacquer the floors of theirs.
Easiklip Floating Hardwood Floor Installation With Floor Clips

The trend seems to be for homeowners to buy wood flooring with a factory applied finish. If you're a do-it-yourselfer, you may well enjoy setting up a reclaimed floor on your to promote, as it no harder to set up than a traditional wood floor. Appropriate maintenance by the consumer is also important. Wood flooring styles in addition rely on the room type. You may want to check out some samples before you are taking on a new wood flooring project.
Oak Flooring (Natural) – 5″ Wide Solid White Oak u2013 Easiklip Floors

clip up system is long overdue in flooring mecc interiors

KTL Multi Sport Clip – KTL FLOORS

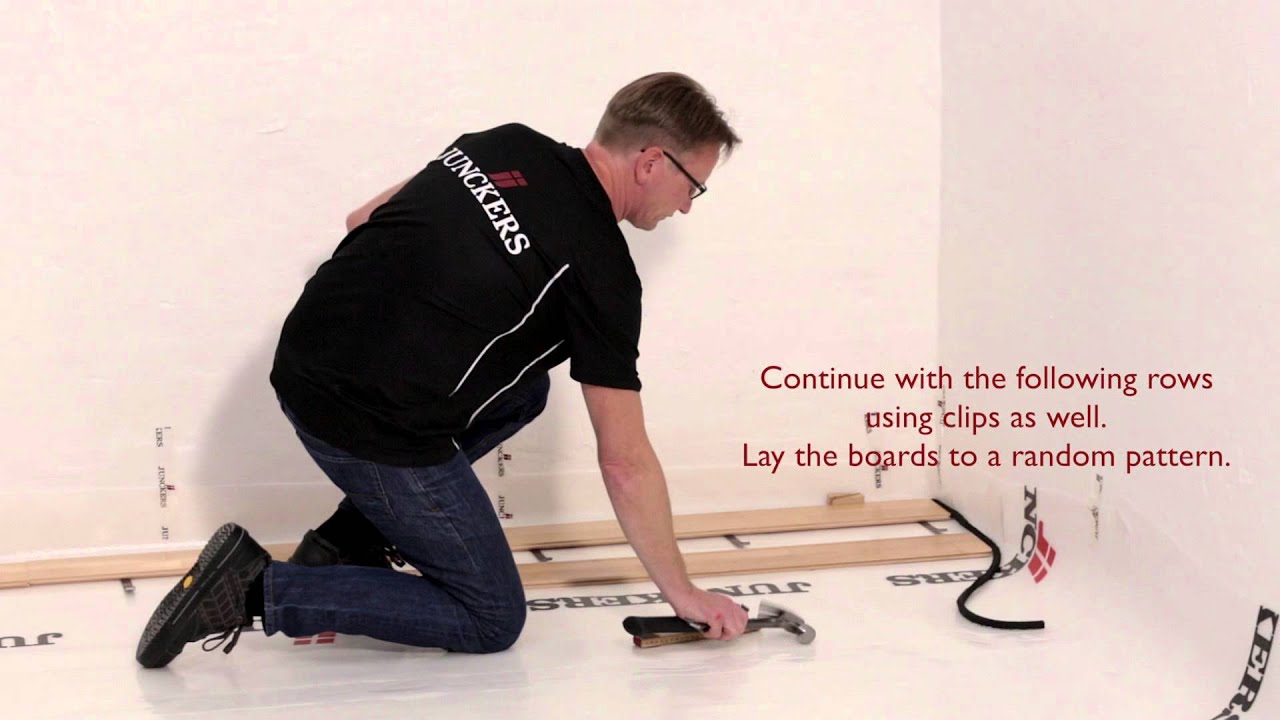
Junckers Clip system For hardwood floors
clip up system is long overdue in flooring mecc interiors

HardWood Clip® – Növlek
Greywash / 5″ / White Oak / Solid Hardwood u2013 Easiklip Floors

Hardwood flooring with clips
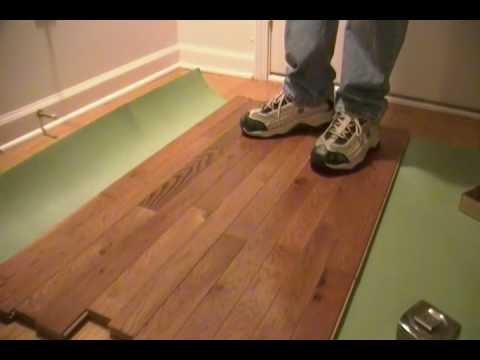
Floating Floors Pros and Cons
/what-is-a-floating-floor-1821740-hero-00e6b7fe102e4fafa8ba3f926944bcb7.jpg)
DIY Solid Hardwood Clip On Flooring u2013 Easiklip Floors

How To Install Click Lock Engineered Hardwood Flooring
Engineered parquet floor – MOLDAVA – Ribadao Wood Boutique – clip

Related articles:
- Black Walnut Wood Flooring
- Wood Flooring Designs
- Wood Flooring Options For Kitchens
- Contemporary Wood Flooring Ideas
- Dark Wood Floor Bedroom Ideas
- Real Wood Flooring For Kitchens
- Natural Wood Floor Stain
- Oak Wood Flooring
- Birch Wood Flooring Reviews
- Wood Floor Damage Repair
Solid Wood Flooring Clips: The Secret to Easy Installation and Longevity
Introduction:
When it comes to choosing the perfect flooring for your home, solid wood is a timeless and elegant option that adds warmth and character to any space. However, the installation process can often be a daunting task, requiring specialized tools and skills. That’s where solid wood flooring clips come into play. These innovative devices not only simplify the installation process but also ensure the longevity and stability of your wood flooring. In this article, we will delve into the world of solid wood flooring clips, exploring their benefits, usage tips, and frequently asked questions.
1. What are Solid Wood Flooring Clips?
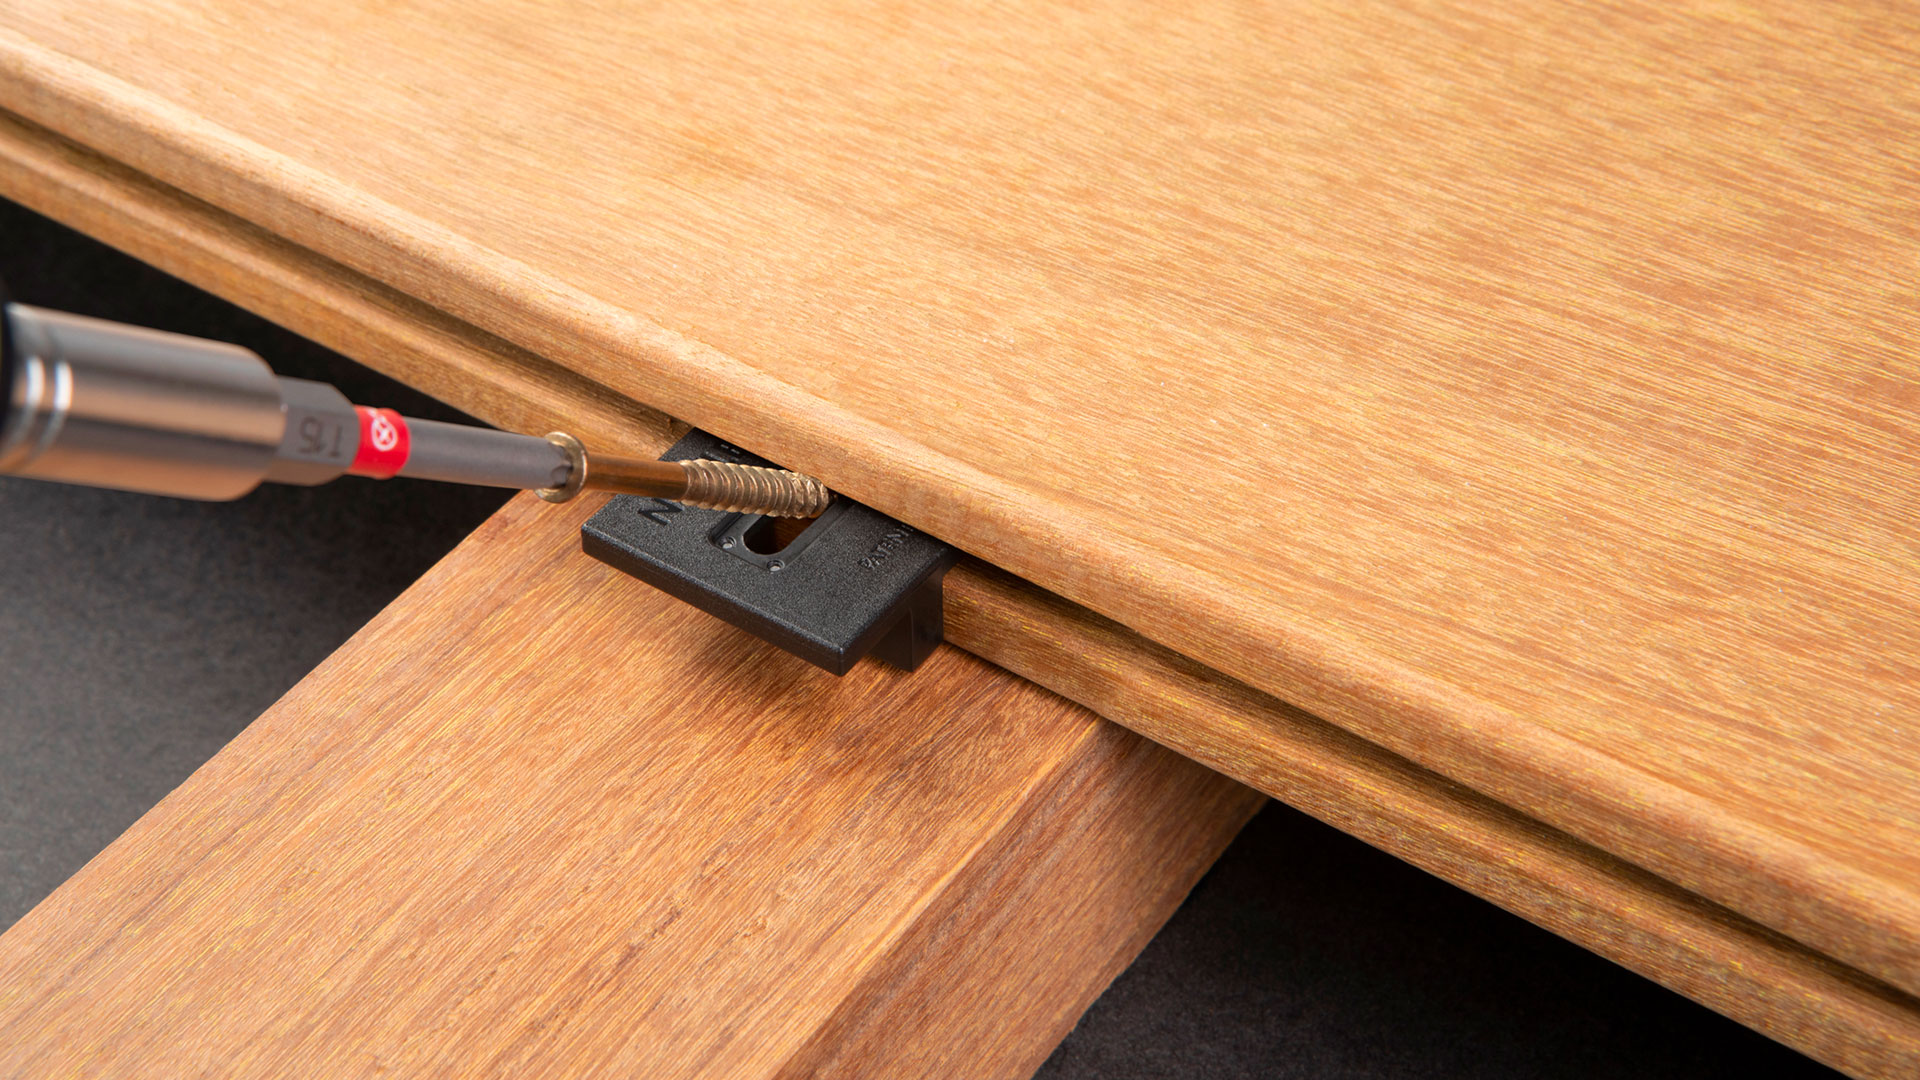
Solid wood flooring clips are small metal or plastic devices designed to interlock and secure individual planks of solid wood flooring together. They are typically installed between two adjacent boards and provide a tight connection that prevents movement, reducing the risk of gaps or creaking over time.
These clips are available in various designs to accommodate different installation methods, including tongue-and-groove, click-lock, or floating floors. Regardless of the specific type of installation, solid wood flooring clips offer a convenient and efficient solution for DIY enthusiasts and professional installers alike.
2. The Benefits of Solid Wood Flooring Clips:
a) Easy Installation: One of the primary advantages of using solid wood flooring clips is their simplicity during installation. Unlike traditional methods that require nails or glue, these clips eliminate the need for additional tools or adhesives. Simply slide them into place between two planks until they lock securely, creating a seamless connection.
b) Time-Saving: By streamlining the installation process, solid wood flooring clips save considerable time compared to conventional methods. With no waiting for glue to dry or nailing each board individually, you can complete your project more efficiently and move on to enjoying your new floor sooner.
c) Versatile Application: Solid wood flooring clips are compatible with various types of solid wood flooring, including oak, maple, bamboo, and more. Whether you opt for a traditional tongue-and-groove installation or a modern click-lock system, there are clips available to suit your specific needs.
d) Enhanced Stability: One common concern with solid wood flooring is the potential for movement or gaps between boards over time due to changes in temperature and humidity. Solid wood flooring clips provide added stability by firmly holding each plank in place, minimizing the risk of unsightly gaps or creaking.
e) Disassembly and Reusability: In the event that a section of your floor requires repair or replacement, solid wood flooring clips can be easily disassembled without damaging the surrounding boards. This allows for individual planks to be removed and replaced without having to dismantle the entire floor. Additionally, these clips are reusable, making them a cost-effective solution for future renovations or modifications.
3. How to Install Solid Wood Flooring Clips:
Installing solid wood flooring clips is a straightforward process that can be accomplished by following these steps:
Step 1: Prepare Your Subfloor – Ensure that your subfloor is clean, level, and free from any debris that may hinder the installation process.
Step 2: Acclimate Your Wood Flooring – Allow your solid wood flooring to acclimate to the room’s temperature and humidity for a minimum of 48 hours before installation. This will prevent any potential warping or shrinking after installation.
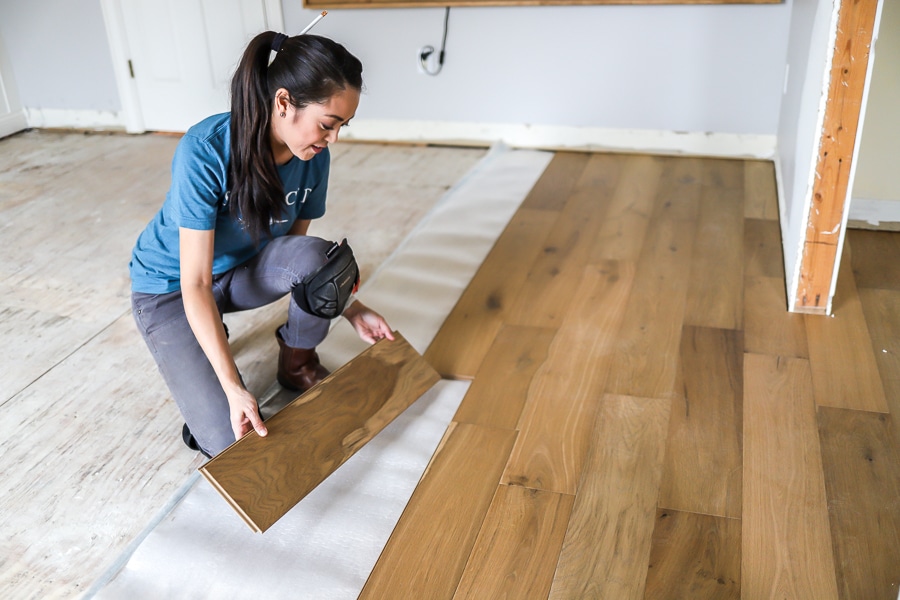
Step 3: Lay the First Row – Begin by laying the first row of planks along one wall, ensuring they are snugly fitted Together. Use spacers to maintain a consistent gap between the planks and the wall, typically around 1/4 inch.
Step 4: Install the Clips – Slide the solid wood flooring clips into the groove on the side of each plank in the first row. Make sure they are properly aligned and secure.
Step 5: Lay the Second Row – Fit the second row of planks into the groove of the first row, using a tapping block and mallet to ensure a tight fit. Continue this process for subsequent rows until your entire floor is installed.
Step 6: Check for Gaps or Misalignment – After installing each row, check for any gaps or misalignment between the planks. Adjust as necessary by tapping them gently into place with a mallet.
Step 7: Complete the Installation – Once all rows have been installed, remove the spacers and apply any necessary finishing touches, such as baseboards or trim. Clean up any excess adhesive or debris from the installation process.
In conclusion, solid wood flooring clips offer a convenient and efficient solution for installing solid wood flooring. Their easy installation process, time-saving benefits, versatile application, enhanced stability, and disassembly/reusability make them an excellent choice for both DIY enthusiasts and professional installers. By following these simple steps, you can successfully install your solid wood flooring using clips and enjoy a beautiful, durable floor for years to come. – Solid wood flooring clips are a cost-effective solution for repairing or replacing individual planks without having to dismantle the entire floor.
– The clips can be easily disassembled without damaging the surrounding boards, allowing for easy removal and replacement of planks.
– These clips are also reusable, making them a cost-effective solution for future renovations or modifications.
– Installing solid wood flooring clips involves preparing the subfloor, acclimating the wood flooring, laying the first row of planks, installing the clips into the groove on each plank, laying subsequent rows, checking for gaps or misalignment, and completing the installation by removing spacers and applying finishing touches.
– Solid wood flooring clips offer a convenient and efficient solution for installing solid wood flooring, with benefits such as easy installation, time-saving benefits, versatile application, enhanced stability, and disassembly/reusability. – The use of spacers helps maintain a consistent gap between the planks and the wall, which is typically around 1/4 inch.
– The solid wood flooring clips are slid into the groove on the side of each plank in the first row to ensure proper alignment and secure installation.
– The second row of planks is fitted into the groove of the first row using a tapping block and mallet to ensure a tight fit.
– After each row is installed, it is important to check for any gaps or misalignment between the planks and adjust them as necessary by tapping them gently into place with a mallet.
– Once all rows have been installed, the spacers can be removed and any necessary finishing touches, such as baseboards or trim, can be applied.
– It is also important to clean up any excess adhesive or debris from the installation process.
Overall, solid wood flooring clips offer a convenient and efficient solution for installing solid wood flooring. They save time, provide stability, and can be easily disassembled and reused. By following these simple steps, you can successfully install your solid wood flooring using clips and enjoy a beautiful and durable floor for years to come.