In cases where you have to replace a percentage of your floors, there will not be a requirement suitable for you to rip up the entire site if you're making use of laminates. If perhaps you love the appearance along with the classic look of hardwood floors although not desire the scratches, dents and vanish marks that can come with it compared to laminate floors is a good choice for you.
Images Related to Fitting Laminate Flooring Around Toilet
Fitting Laminate Flooring Around Toilet
No 2 boards of solid hardwoods will be precisely the same because of the natural graining and flaws in the wood, but the patterns inside laminates are repeated over and over. Many house owners pick laminate because it is one of the most durable kinds of flooring readily available currently available. Also, Pergo has today become the leading seller of flooring in the world, so you know it's trusted worldwide.
Easy Way To Cut Flooring Around A Toilet

You will need to utilize a putty blade for the prep work and a floor scraper to take out the whole previous residue from the floor. Why? Because, just like other flooring, their laminates are almost resistant from fading. Installing laminate floors is a very good do-it-yourself project that may be done by virtually everyone in any home setting. As it is becoming more popular, the price tag of laminate floors has started to drop.
How to Install Vinyl Plank Flooring in a Bathroom FixThisBuildThat
🔥 🚽 Install Vinyl Plank Floor Around Toilet 🚽🔥
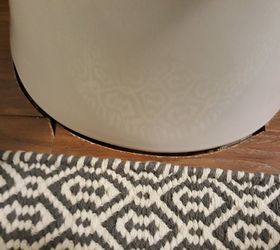
bathroom – Large gap around new toilet due to improper floor

How to Install Laminate Floors Part 7
Do You Have To Remove A Toilet To Install Laminate Flooring? (+

How to Install Vinyl Plank Flooring in a Bathroom FixThisBuildThat
Contractor mis-cut the floor when he put in the toilet Hometalk
Toilet on Laminate Floor. Пол ламинат под унитазом

How to Install Vinyl Plank Flooring in a Bathroom FixThisBuildThat
How to Lay Laminate Flooring Hunker Laminate flooring bathroom

Installation of Laminate Flooring in the Bathroom

How to easily install vinyl flooring around a toilet
Related articles:
- Coastal Laminate Flooring
- Commercial Laminate Flooring
- Slate Laminate Flooring
- Laminate Flooring Types
- Laminate Flooring Design
- Commercial Quality Laminate Flooring
- Black Laminate Flooring
- Tigerwood Laminate Flooring
- Royal Cherry Laminate Flooring
- Laminate Flooring Thickness For Basement
Fitting Laminate Flooring Around Toilet
When it comes to renovating your bathroom, choosing the right flooring is essential. Laminate flooring has become a popular choice due to its affordability, durability, and easy installation process. However, fitting laminate flooring around a toilet can be a bit tricky. In this article, we will guide you through the step-by-step process of fitting laminate flooring around a toilet, along with some frequently asked questions and their detailed answers.
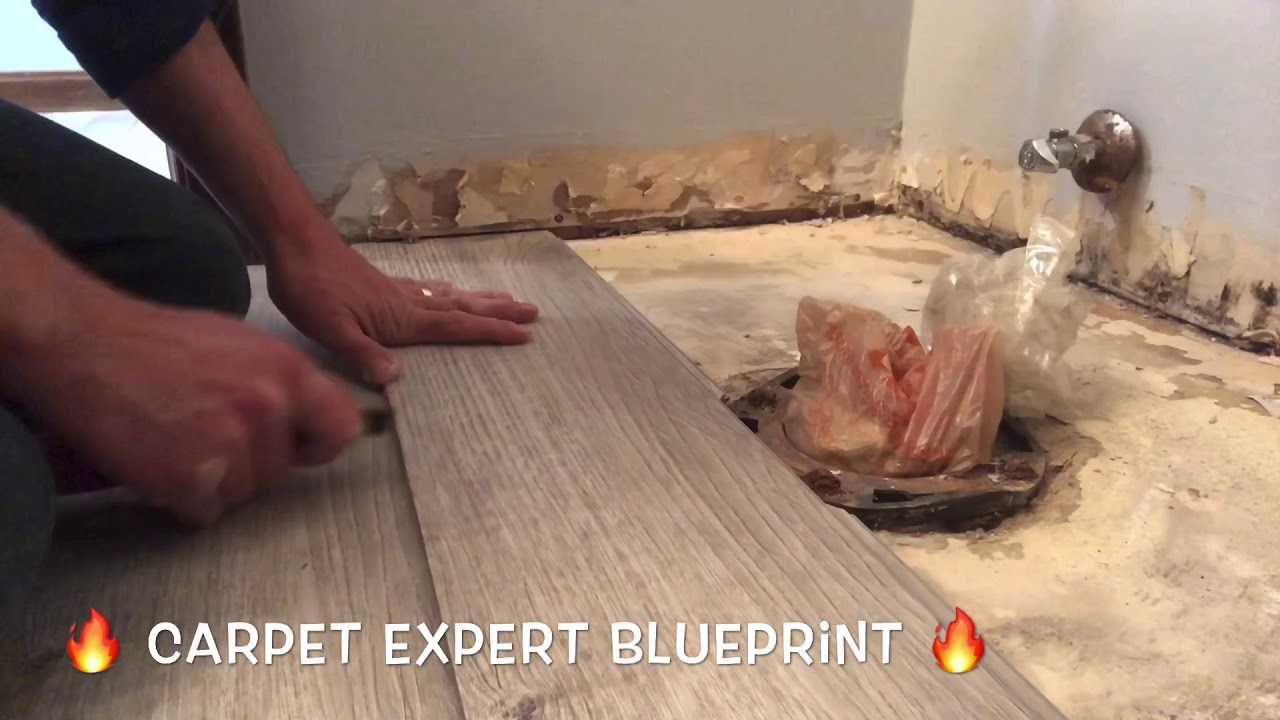
1. Preparing the area: Before you begin fitting laminate flooring around a toilet, you need to make sure the area is properly prepared. Start by removing the existing toilet and disconnecting the water supply. Once the toilet is out of the way, thoroughly clean the subfloor to ensure a smooth and even surface for installation.
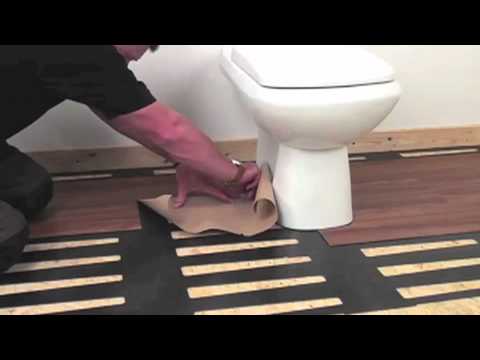
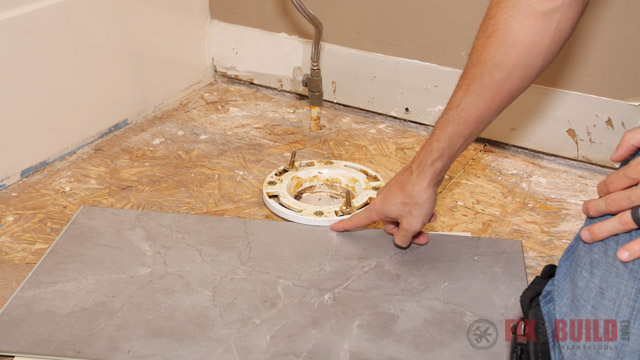
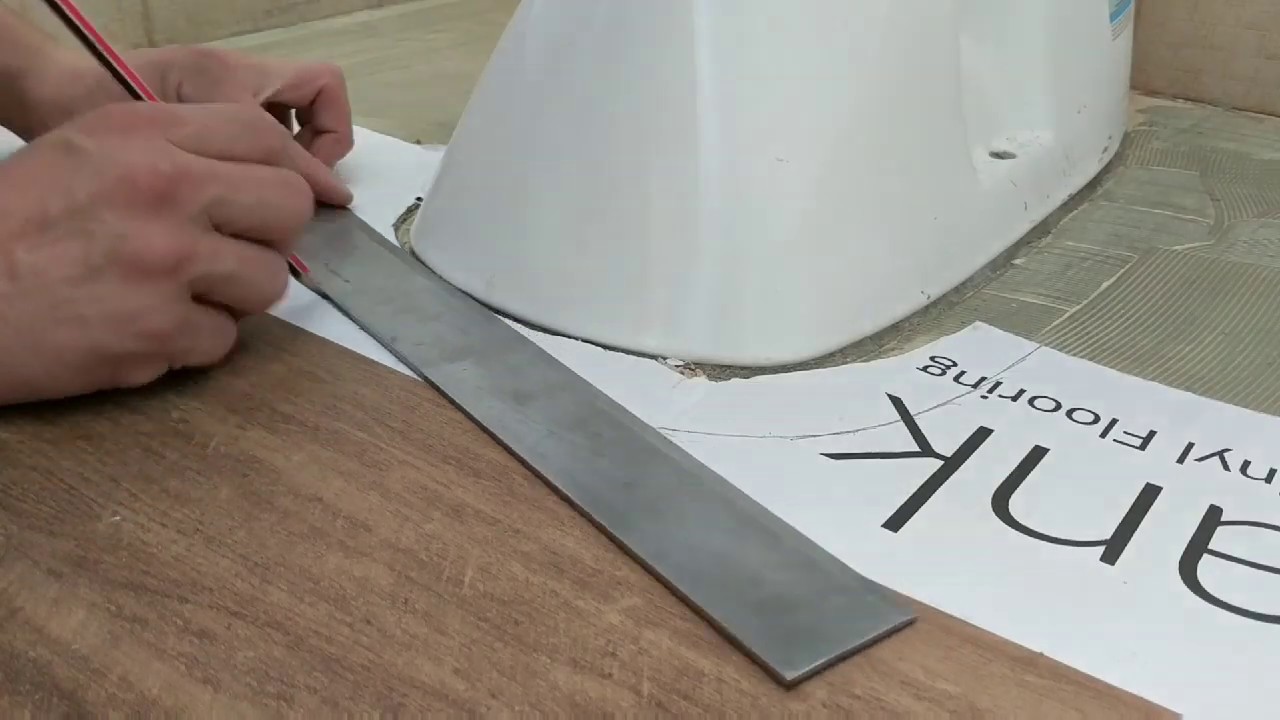
2. Measuring and cutting: To fit laminate flooring around a toilet, accurate measurements are crucial. Measure the distance from the wall to the center of the toilet flange, as well as the dimensions of the flange itself. Use these measurements to mark and cut out a hole in your laminate flooring. It’s important to leave enough space for expansion, so make sure your hole is slightly larger than the flange.
FAQ: Can I install laminate flooring directly over vinyl or linoleum?
Answer: Yes, you can install laminate flooring over vinyl or linoleum as long as they are in good condition and properly adhered to the subfloor. Ensure that there are no loose edges or bubbles in the existing flooring before proceeding with installation.
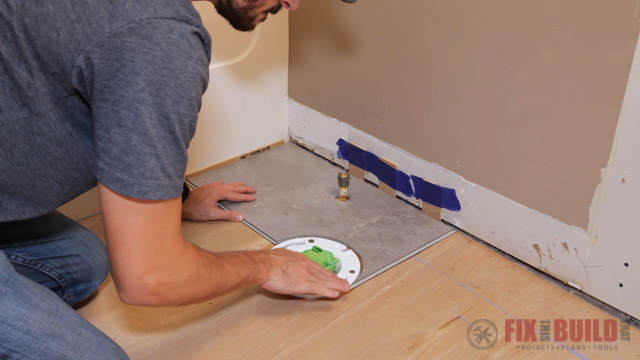
3. Installing underlayment: Underlayment is an important component of any laminate flooring installation as it provides support, moisture protection, and sound insulation. Lay down a layer of underlayment on top of your clean subfloor before installing the laminate planks. Make sure to trim it around the toilet hole using a utility knife for a precise fit.
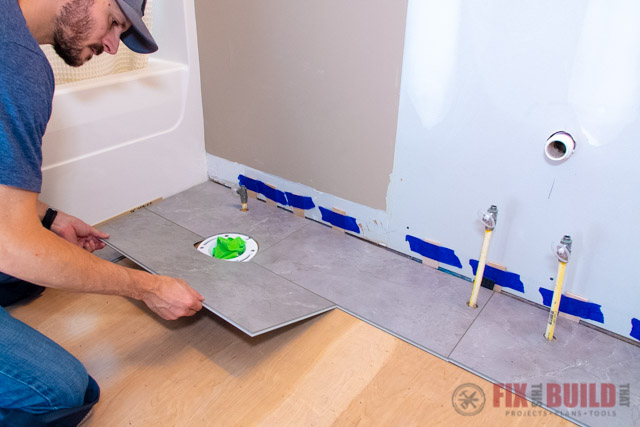
4. Laying the first row: Start by laying the first row of laminate planks along the longest wall in your bathroom, leaving a 1/4-inch gap between the planks and the wall for expansion. Use spacers to maintain this gap throughout the installation process. When you reach the toilet area, cut the last plank in the row to fit around the hole using a jigsaw or a laminate cutter.
FAQ: Can I install laminate flooring in a full bathroom?
Answer: While laminate flooring is water-resistant, it is not waterproof. Therefore, it is not recommended to install laminate flooring in full bathrooms where water exposure is frequent. However, it can be installed in half bathrooms or powder rooms with minimal moisture.
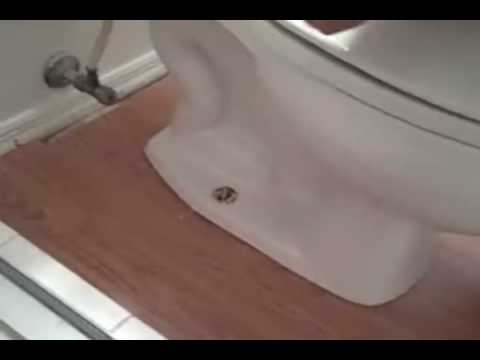
5. Fitting laminate around the toilet: Once you have laid down the first row, continue installing the remaining planks, making sure to cut and fit them around the toilet hole as needed. To achieve a neat and professional finish, consider using a laminate trim or molding to cover any gaps between the flooring and the toilet flange.
FAQ: Can I reinstall the toilet after fitting laminate flooring?
Answer: Yes, you can reinstall the toilet after fitting laminate flooring around it. However, it’s important to ensure that there are no leaks or damages to the flange during installation. Use a wax ring to create a watertight seal between the toilet base and the flange before securing it firmly to prevent any potential leaks.
6. Finishing touches: Once all the laminate planks are installed, remove the spacers and apply baseboards or quarter-round molding around the edges of The bathroom to cover any expansion gaps and give the flooring a finished look. Use a miter saw or a coping saw to cut the molding to the desired lengths and angles. Secure the molding to the wall using finishing nails or adhesive.
7. Cleaning and maintenance: To keep your laminate flooring looking its best, regularly sweep or vacuum the surface to remove dirt and debris. Avoid using excessive water when cleaning, as it can seep into the seams and cause damage. Instead, use a damp mop with a mild laminate floor cleaner. Wipe up any spills or standing water immediately to prevent moisture damage.
8. Additional tips:
– When cutting laminate planks, make sure to measure twice and cut once to avoid waste.
– Consider using a tapping block and a rubber mallet when installing the planks to ensure a tight fit.
– Allow the laminate flooring to acclimate to the room’s temperature and humidity for at least 48 hours before installation.
– Follow the manufacturer’s instructions for specific installation guidelines and recommendations.
By following these steps and taking proper precautions, you can successfully install laminate flooring in your bathroom and enjoy its durability and aesthetic appeal. Installing laminate flooring in a bathroom requires careful planning and attention to detail. Here is a step-by-step guide to help you successfully install laminate flooring in your bathroom:
1. Prepare the subfloor: Ensure that the subfloor is clean, dry, and level. Remove any existing flooring, adhesive residue, or debris. Repair any damaged areas or unevenness in the subfloor.
2. Measure and cut the underlayment: Install a moisture barrier or underlayment according to the manufacturer’s instructions. Measure and cut it to fit the bathroom floor, leaving a 1/4 inch gap around the edges for expansion.
3. Start laying the first row: Begin installing the laminate planks along one wall, with the tongue side facing away from the wall. Use spacers to maintain a consistent expansion gap between the planks and the wall.
4. Continue laying the planks: Lay subsequent rows of planks by connecting them using their tongue and groove edges. Stagger the end joints of each plank for added stability and aesthetics.
5. Reach the toilet area: When you reach the toilet area, cut the last plank in the row to fit around the hole using a jigsaw or a laminate cutter. Leave a small gap around the toilet flange for easy installation of a wax ring later.
6. Fit laminate around the toilet: Once you have laid down the first row, continue installing the remaining planks, making sure to cut and fit them around the toilet hole as needed. Consider using a laminate trim or molding to cover any gaps between the flooring and the toilet flange for a professional finish.
7. Reinstalling the toilet: After fitting laminate flooring around it, you can reinstall the toilet. Ensure there are no leaks or damages to the flange during installation. Use a wax ring to create a watertight seal between the toilet base and flange before securing it firmly.
8. Finishing touches: Remove the spacers and apply baseboards or quarter-round molding around the edges of the bathroom to cover any expansion gaps and give the flooring a finished look. Cut the molding to desired lengths and angles using a miter saw or coping saw, then secure it to the wall using finishing nails or adhesive.
9. Cleaning and maintenance: Regularly sweep or vacuum the laminate flooring to remove dirt and debris. Use a damp mop with a mild laminate floor cleaner for cleaning, avoiding excessive water. Wipe up spills or standing water immediately to prevent moisture damage.
10. Additional tips: Measure twice and cut once when cutting laminate planks to avoid waste. Use a tapping block and rubber mallet for a tight fit during installation. Allow the laminate flooring to acclimate to room temperature and humidity for at least 48 hours before installation. Follow the manufacturer’s instructions for specific guidelines and recommendations.
By following these steps and taking proper precautions, you can successfully install laminate flooring in your bathroom, enjoying its durability and aesthetic appeal.