You will find 4 distinct styles which resemble the planks you'd normally find on genuine wood flooring. When Starting off never fail to begin on the most time squarest wall laying three rows together to provide you with a foundation, using wedges to give you the 10mm needed development gap. You will find so many distinct choices for instance oak, birch, maple, steamed beech, hornbeam, walnut, acacia, alder, cherry, elm, beech and also ash.
Images Related to Engineered Wood Flooring Stair Nose
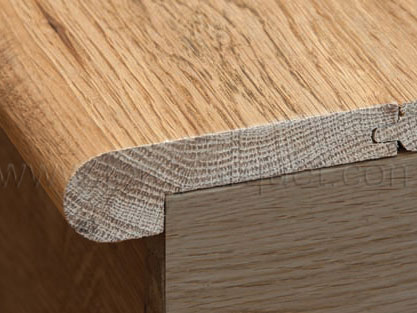
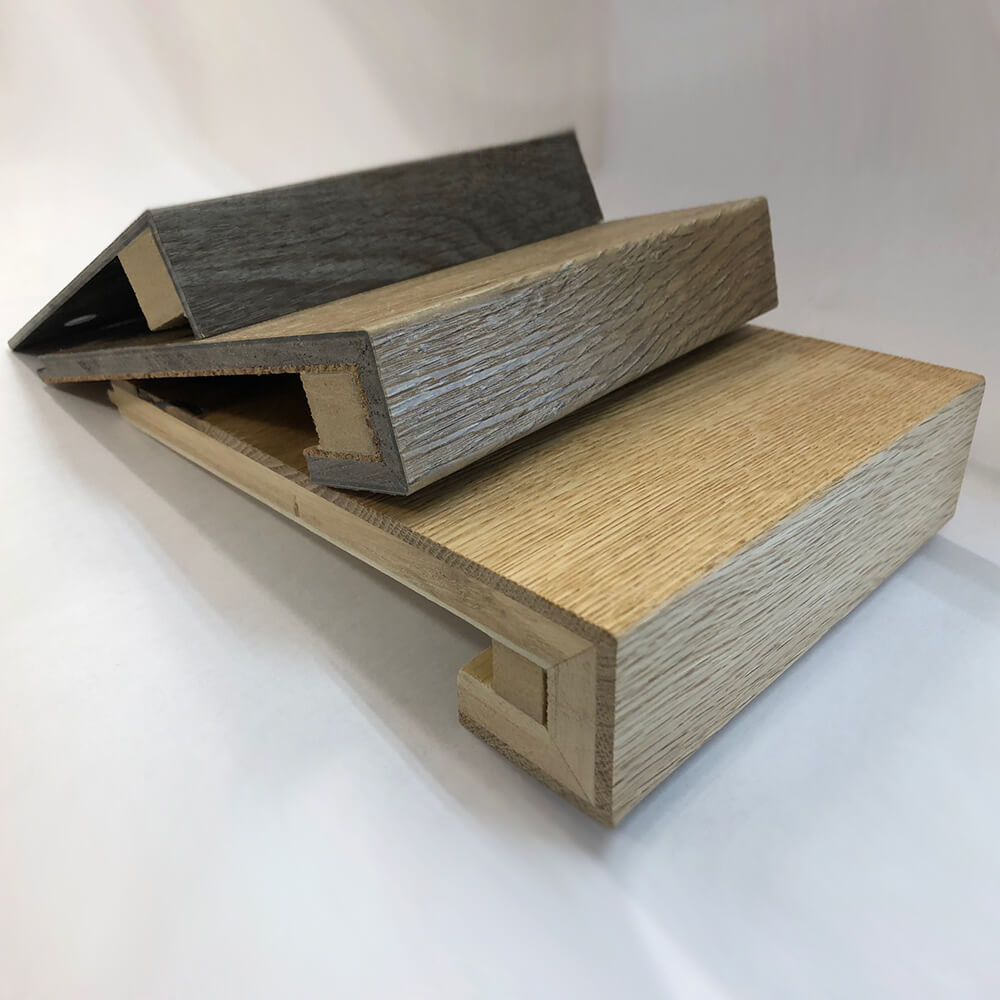
Engineered Wood Flooring Stair Nose
Lighter wood colors are ideal for proper living rooms and dining rooms, while darker colors are good for kitchens as well as family rooms. From domestic to exotic hardwoods, the variety of antique woods reclaimed from generations of long ago delivers endless beauty and charm that has taken more than 500 years to create. The colour of the fire wood you select will rely on the interior design of yours as well as personal preferences.
Engineered Wood Flooring: Up Close with Mikasa Staircase Solution

To conclude, reclaimed wood flooring surfaces are becoming more popular then ever as a result of several consumer' interest in historic preservation as well as in addition to advance the environmentally friendly building design. Therefore, the engineered floor is without a doubt most likely the most cost-effective option. Expectations are extremely important with enormous purchase items like flooring. Engineered is still all wood but is made with many layers that happen to be laminated for greater stability and dimensional accuracy.
Walnut stairs u0026 stair nosing London Property – Case Study u2013 The

Custom Stair Nosing – Elegantly Wooden
BuildDirect wood floor stairnose moldings
3.125-in x 84-in Whisper Falls Oak Solid Wood Floor Stair Nose in
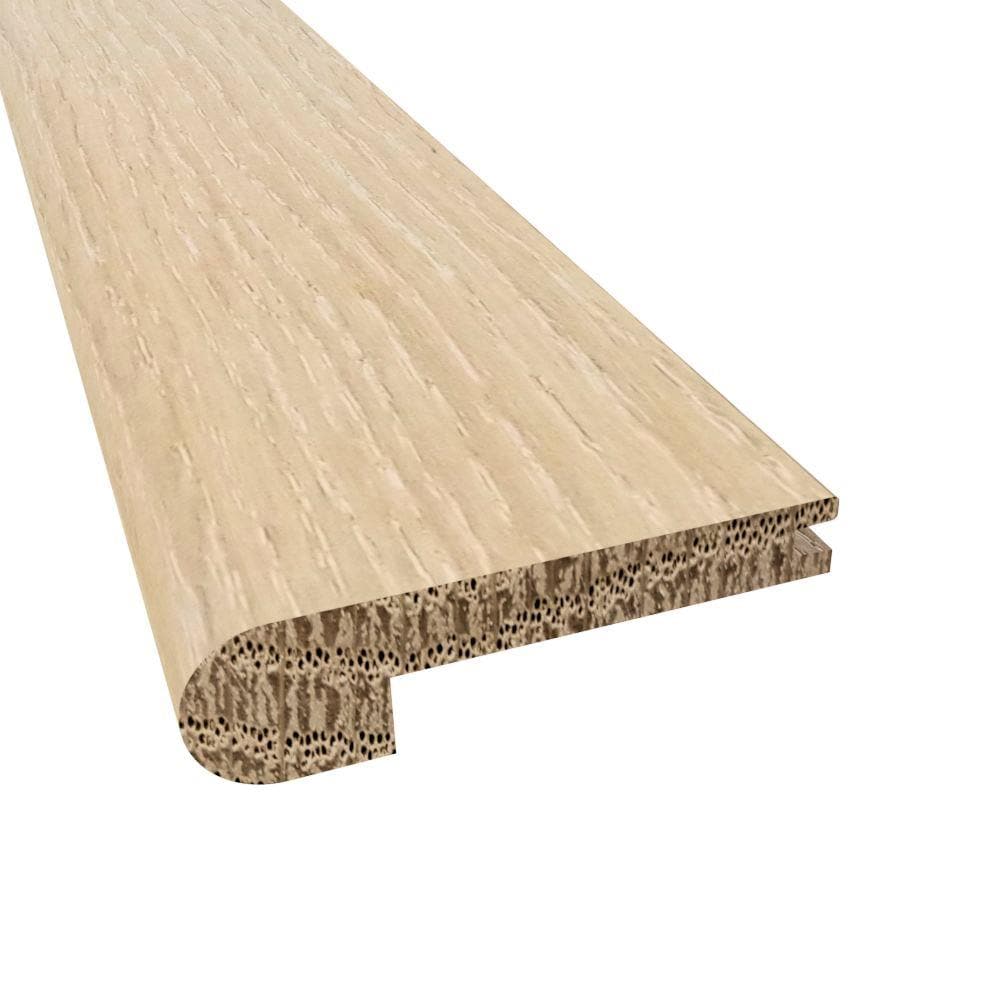
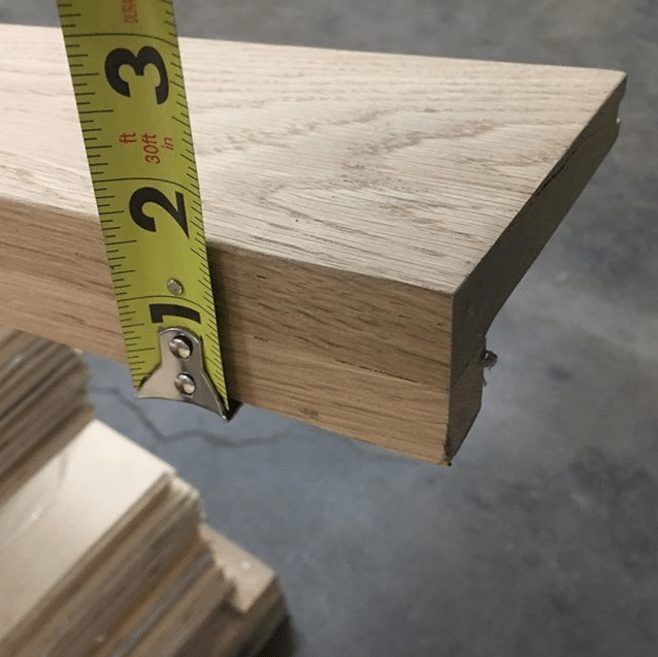
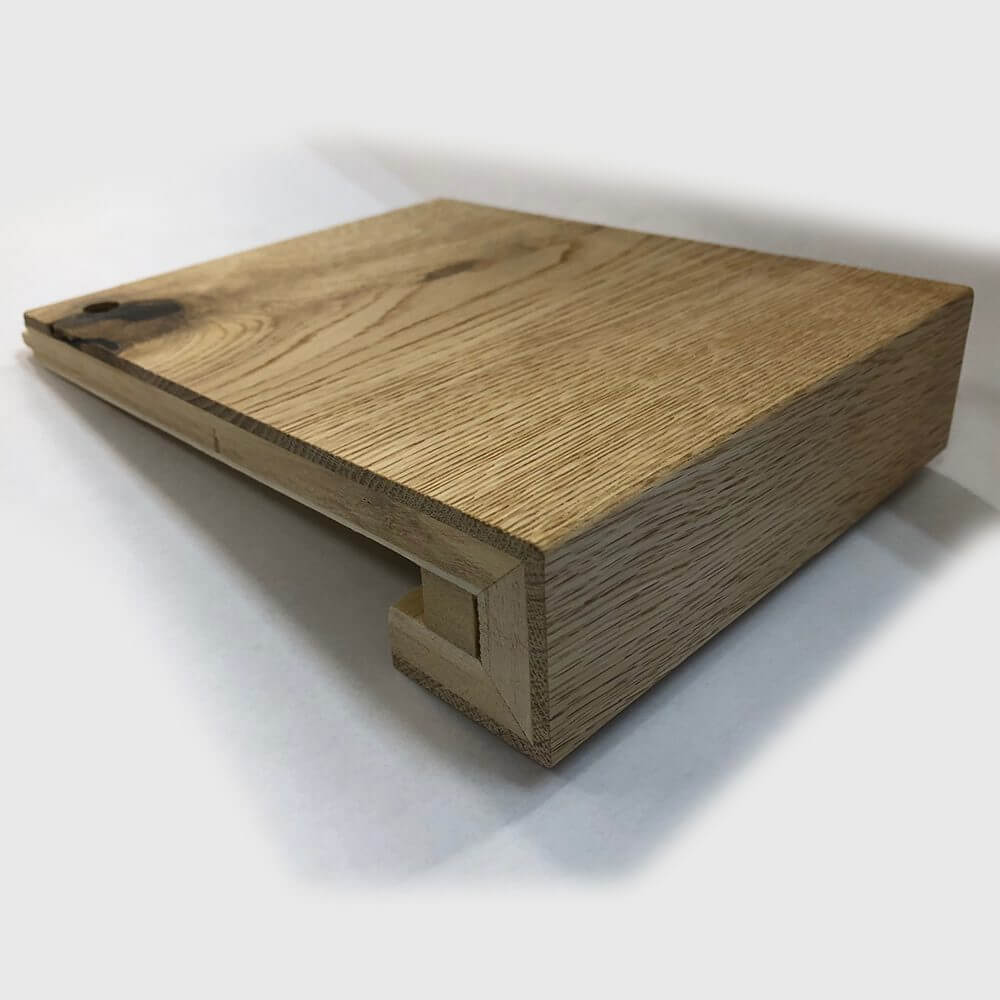
5/8″ x 5 1/2 White Oak Stair Nosing Unfinished Bullnose

Stair Nose Flush Mount Unique Wood Floors

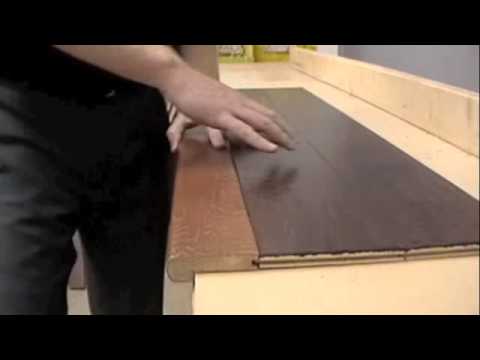
Installing Engineered Hardwood on Stairs u2013 The How To Home

QNose Stair Trim for Residential Stairs TAS Flooring
Luxury Vinyl Stairs Nosing Production Exact Match With Your Floors

Top-Of-The-Line Precision in Engineered Hardwood Flooring Manufacture
Custom Stair Nosing – Elegantly Wooden
Engineered Wood Floor Install on Stair Platform
Related articles:
- Black Walnut Wood Flooring
- Wood Flooring Designs
- Wood Flooring Options For Kitchens
- Contemporary Wood Flooring Ideas
- Dark Wood Floor Bedroom Ideas
- Real Wood Flooring For Kitchens
- Natural Wood Floor Stain
- Oak Wood Flooring
- Birch Wood Flooring Reviews
- Wood Floor Damage Repair
Engineered Wood Flooring Stair Nose: The Perfect Finishing Touch for Your Stairs
When it comes to enhancing the overall aesthetics and functionality of your home, every detail matters. This is especially true when it comes to stairs, as they are often a focal point in many homes. One crucial element in creating stunning stairs is the stair nose, and if you have engineered wood flooring, an engineered wood flooring stair nose is the perfect finishing touch. In this article, we will explore what engineered wood flooring stair nose is, its benefits, how to install it properly, and answer some frequently asked questions.
What is Engineered Wood Flooring Stair Nose?
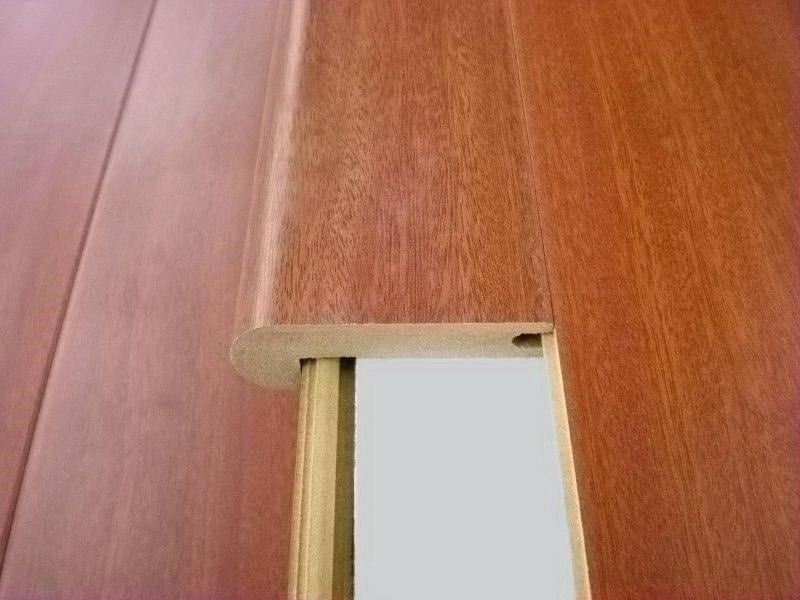
Engineered wood flooring stair nose is a specially designed molding that covers the edge of each step on your staircase. It provides a smooth transition between the stairs and the flooring while protecting the edges from wear and tear. Engineered wood flooring stair nose is specifically made to match the color, grain pattern, and texture of your engineered wood flooring, ensuring a seamless and cohesive look throughout your home.
Benefits of Using Engineered Wood Flooring Stair Nose
1. Protection: One of the primary benefits of using engineered wood flooring stair nose is its ability to protect the edges of your stairs from damage caused by foot traffic. Without proper protection, the edges can become worn down over time, compromising both the appearance and structural integrity of your staircase.
2. Safety: Engineered wood flooring stair nose also enhances safety by providing a smooth transition between steps. This helps prevent tripping hazards and ensures a seamless flow when ascending or descending the stairs.
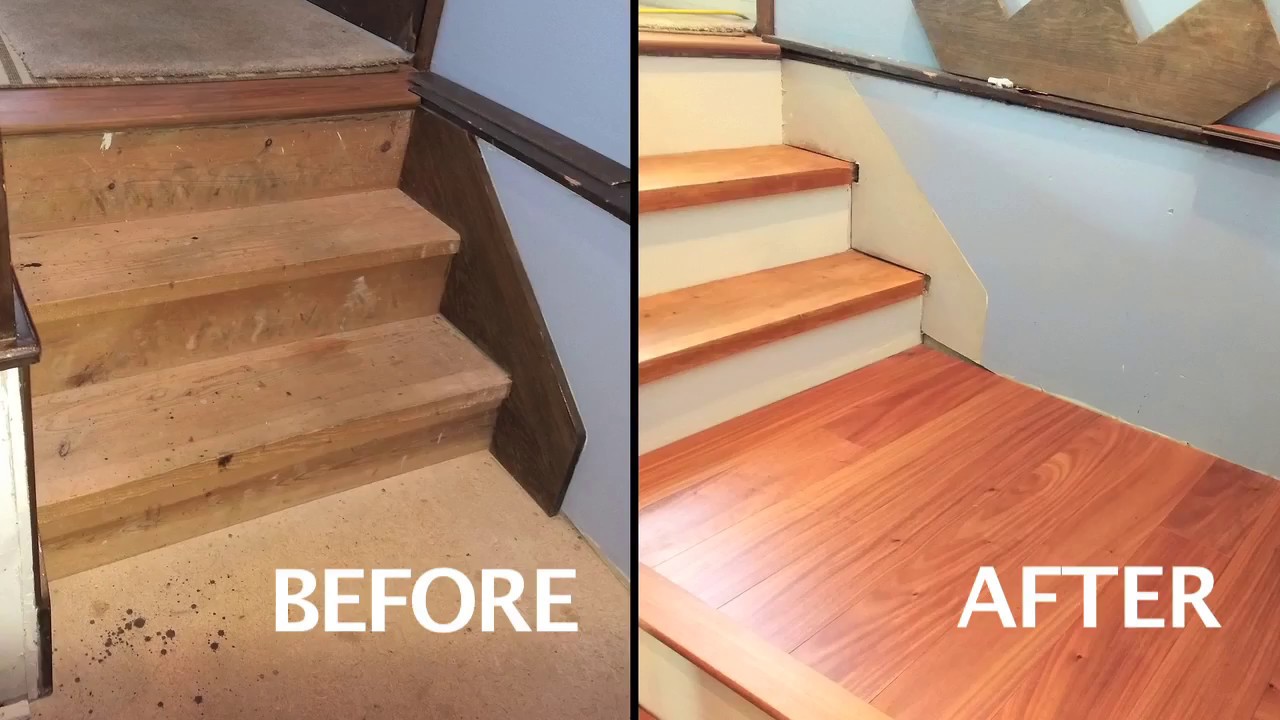
3. Aesthetics: Adding an engineered wood flooring stair nose elevates the overall aesthetics of your staircase by creating a finished look that complements your flooring. It adds depth and dimension to your stairs while tying them into the rest of your home’s décor.
4. Durability: Engineered wood flooring stair nose is designed to withstand heavy foot traffic and the daily wear and tear that stairs endure. It is made from high-quality materials, ensuring long-lasting durability and minimal maintenance requirements.
How to Install Engineered Wood Flooring Stair Nose
Installing engineered wood flooring stair nose requires precision and attention to detail. Here is a step-by-step guide to help you with the installation process:
1. Measure and Cut: Start by measuring the length of each step’s edge where the stair nose will be installed. Use a miter saw or a coping saw to cut the stair nose molding to the appropriate length.
2. Prepare the Staircase: Ensure that your staircase is clean, dry, and free of any debris. Remove any existing molding or trim along the edges of the steps.
3. Apply Adhesive: Apply a generous amount of construction adhesive along the back of the stair nose molding, focusing on the areas that will make contact with the step’s edge.
4. Press into Place: Carefully press the stair nose molding onto the edge of each step, ensuring a snug fit. Use a rubber mallet or a block of wood to gently tap it into place and secure proper adhesion.
5. Secure with Nails or Screws: For added stability, you can use finishing nails or screws to secure the stair nose molding further. Make sure to countersink them to ensure they are flush with the surface.
6. Fill Nail Holes: If you choose to use nails, fill the nail holes with wood filler that matches your engineered wood flooring color. Smooth out any excess filler using a putty knife and Allow it to dry completely before sanding it down for a seamless finish.
7. Finish and Seal: Once the stair nose molding is securely in place, you can finish and seal it to protect it from moisture and wear. Apply a coat of stain or paint that matches your flooring, followed by a clear sealant to enhance its durability.
8. Clean and Maintain: To keep your engineered wood flooring stair nose looking its best, regularly clean it with a soft cloth or mop and a gentle cleaner specifically designed for wood surfaces. Avoid using harsh chemicals or abrasive cleaning tools that could damage the finish.
In conclusion, using engineered wood flooring stair nose offers several benefits including protection, safety, aesthetics, and durability. By following the proper installation process, you can achieve a professional and finished look for your staircase while ensuring its longevity. Overall, installing engineered wood flooring stair nose is a precise process that requires measuring and cutting the molding to fit each step’s edge. The staircase must be prepared by removing any existing molding or trim and ensuring it is clean and dry. Construction adhesive is then applied to the back of the stair nose molding, which is pressed onto each step’s edge and secured with nails or screws for added stability. Nail holes can be filled with wood filler and sanded down for a seamless finish. Once the stair nose molding is in place, it can be finished and sealed to protect it from moisture and wear. Regular cleaning and maintenance will help keep it looking its best. Overall, using engineered wood flooring stair nose provides protection, safety, aesthetics, and durability for your staircase. Using engineered wood flooring stair nose offers several benefits, including protection, safety, aesthetics, and durability. However, proper installation is crucial to achieve a professional and finished look for your staircase while ensuring its longevity. Here is a step-by-step guide on how to install engineered wood flooring stair nose:
1. Prepare the Staircase: Before installing the stair nose molding, ensure that the staircase is clean and dry. Remove any debris and existing molding or trim along the edges of the steps.
2. Apply Adhesive: Apply a generous amount of construction adhesive along the back of the stair nose molding, focusing on the areas that will make contact with the step’s edge.
3. Press into Place: Carefully press the stair nose molding onto the edge of each step, ensuring a snug fit. Use a rubber mallet or a block of wood to gently tap it into place and secure proper adhesion.
4. Secure with Nails or Screws: For added stability, you can use finishing nails or screws to secure the stair nose molding further. Make sure to countersink them to ensure they are flush with the surface.
5. Fill Nail Holes: If you choose to use nails, fill the nail holes with wood filler that matches your engineered wood flooring color. Smooth out any excess filler using a putty knife and allow it to dry completely before sanding it down for a seamless finish.
6. Finish and Seal: Once the stair nose molding is securely in place, you can finish and seal it to protect it from moisture and wear. Apply a coat of stain or paint that matches your flooring, followed by a clear sealant to enhance its durability.
7. Clean and Maintain: To keep your engineered wood flooring stair nose looking its best, regularly clean it with a soft cloth or mop and a gentle cleaner specifically designed for wood surfaces. Avoid using harsh chemicals or abrasive cleaning tools that could damage the finish.
By following these installation steps, you can achieve a professional and finished look for your staircase while ensuring the durability and longevity of your engineered wood flooring stair nose. Regular cleaning and maintenance will help keep it looking its best for years to come.