This type of flooring is composed of different types of wood that are bonded and cut to form planks with different finishes, being the most common finishes of the laminate, veneer, and solid wood.
You'll notice four distinct types which resemble the planks you would usually find on normal wood flooring. When Getting off the ground consistently begin on the longest squarest wall installing three rows together to give you a base, utilizing wedges to provide you with the 10mm needed expansion gap.
You will find plenty of different options for instance oak, elm, cherry, alder, acacia, walnut, hornbeam, steamed beech, maple, birch, beech as well as ash.
Images Related to End Grain Wood Flooring DIY
End Grain Wood Flooring DIY

Or you can discover a location of the floor in which you can see the edge, quite possibly pulling up a home threshold, air vent or perhaps a small piece of scotia or skirting board. Wood floor may also be classified depending on the form of the flooring material used. Reclaimed woods normally require more labor and craftsmanship.
End Grain Wood Flooring u2013 How to Do It u2013 Larry Shudra Music

Usually the install can be performed with relatively straightforward tools and moderate skills like a chop saw and rented flooring nailer. Gorgeous solid wood flooring can appear wonderful, creating a genuine sense of individuality and style and a modern, contemporary atmosphere within any house. All wood floors, no matter the finish treatment or perhaps quality of the fire wood, will be prone to surface scratching.
End Grain Hardwood Floor Tiles Networx

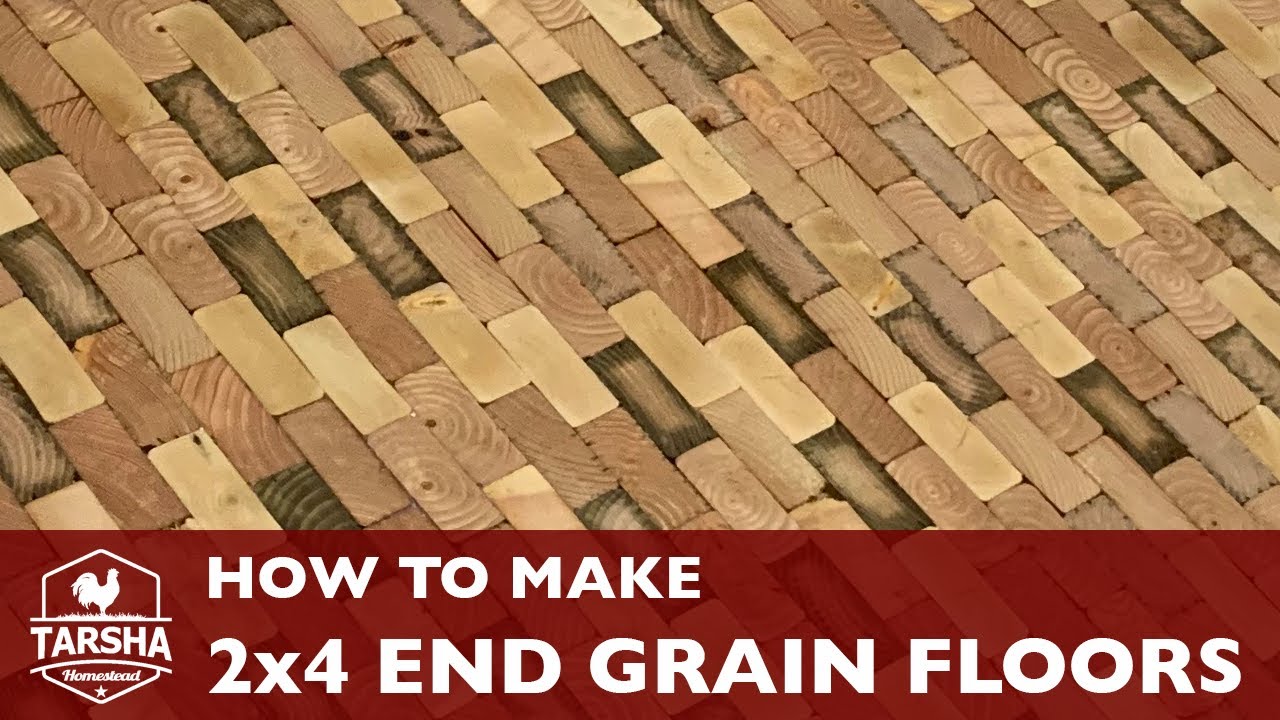
How to Make 2×4 End Grain Floors
Stylish Affordable DIY End Grain Block Flooring – Improvised Life
How to Construct Durable End Grain Flooring in 4 Steps
46 Best end grain flooring ideas end grain flooring, flooring

46 Best end grain flooring ideas end grain flooring, flooring

End Grain Wood Flooring u2013 How to Do It u2013 Larry Shudra Music

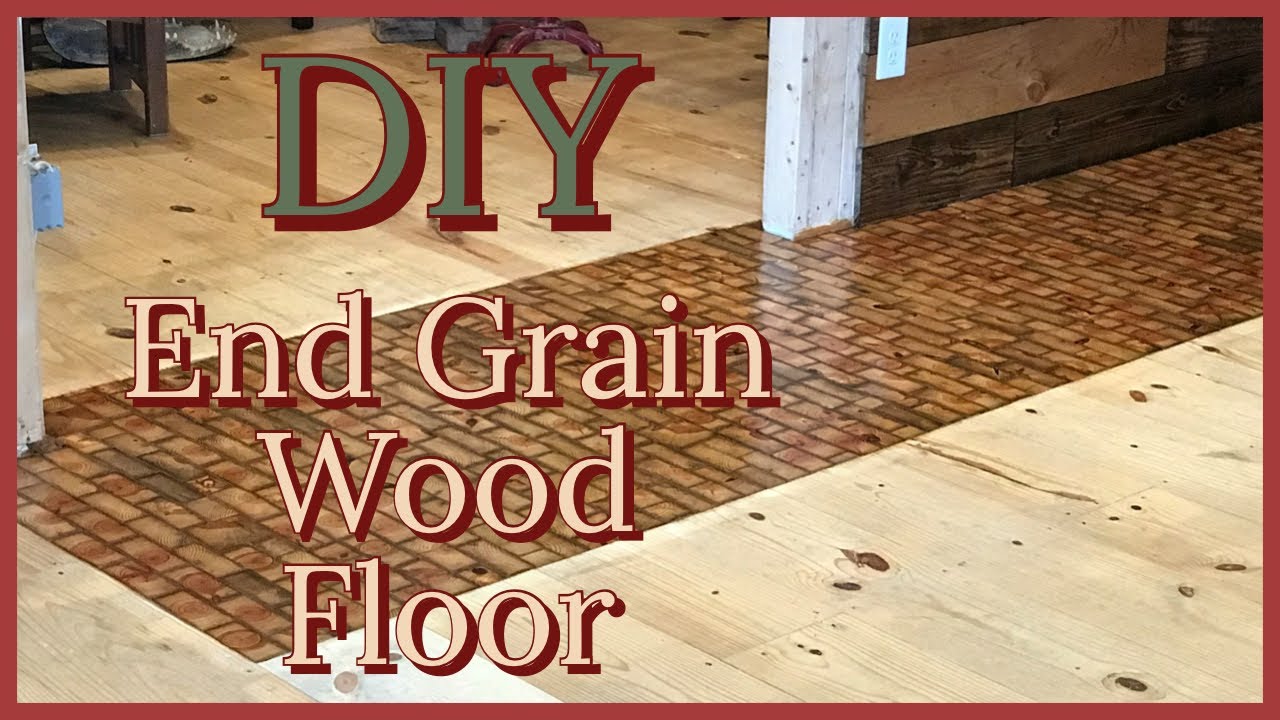
DIY End Grain Wood Floor
DIY An End Grain Wood Floor Hometalk
End Grain Wood Flooring u2013 How to Do It u2013 Larry Shudra Music

End grain floor patterns
End grain flooring? : r/woodworking

Related articles:
- Black Walnut Wood Flooring
- Wood Flooring Designs
- Wood Flooring Options For Kitchens
- Contemporary Wood Flooring Ideas
- Dark Wood Floor Bedroom Ideas
- Real Wood Flooring For Kitchens
- Natural Wood Floor Stain
- Oak Wood Flooring
- Birch Wood Flooring Reviews
- Wood Floor Damage Repair
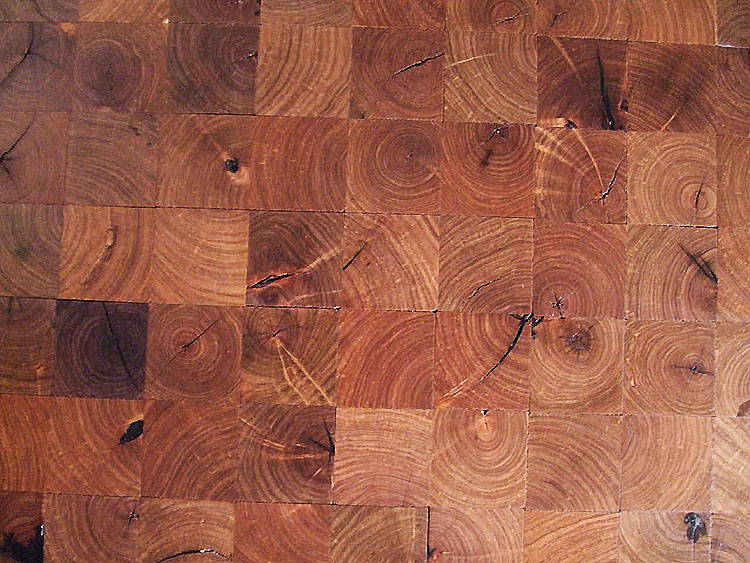
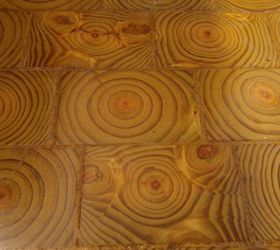
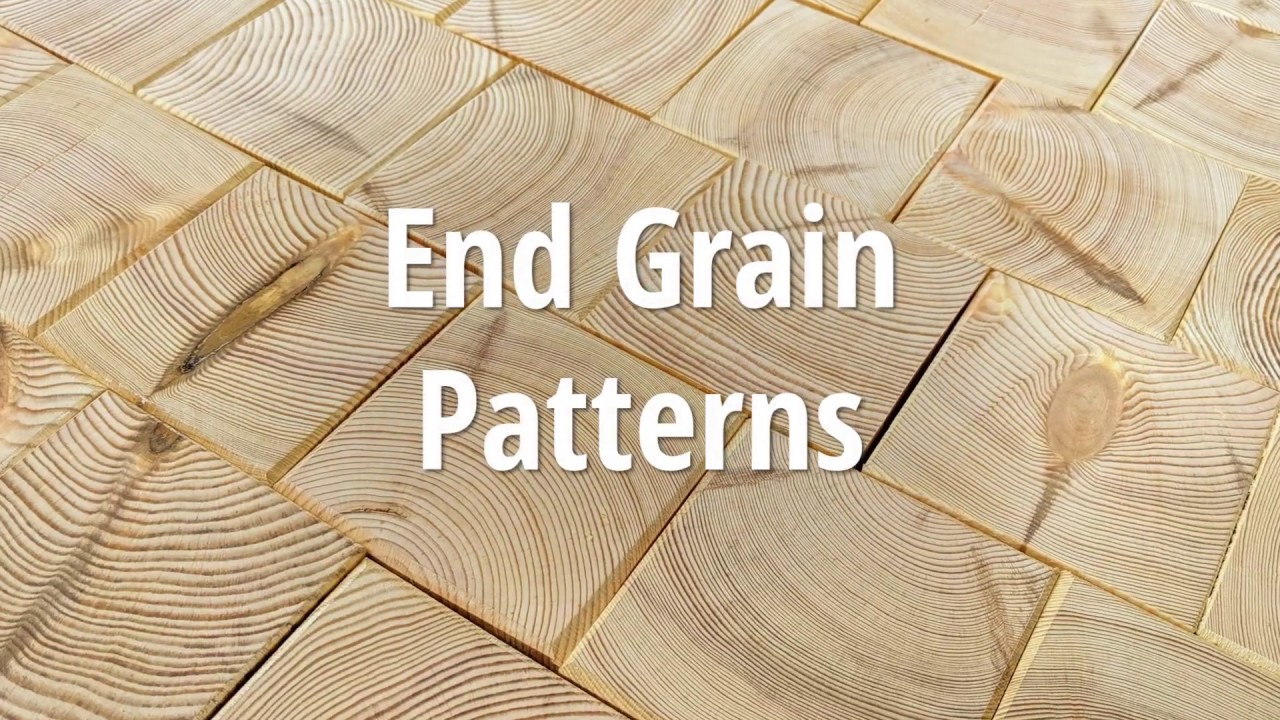
End grain wood flooring is a unique and eye-catching option for home improvement projects. This type of wood flooring is created by cutting pieces of hardwood into small cubes and then arranged in a mosaic pattern. The result is an attractive texture that adds character to any room. In addition, end grain wood flooring is also highly durable, making it an ideal choice for high-traffic areas of the home.
However, installing end grain wood flooring can be a bit of a challenge. As with any type of DIY project, it’s important to do your research beforehand and make sure you have the right tools and materials for the job. In this article, we’ll go over all the steps involved in a DIY end grain wood flooring project, so you can get the look you want without spending too much time or money.
What You Need for an End Grain Wood Flooring DIY Project
Before you start your end grain wood flooring project, you’ll need to make sure that you have all the necessary tools and materials. Here is a list of what you’ll need:
• Hardwood cubes
• Hammer
• Nails
• Wood glue
• Sandpaper
• Stained finish
• Paintbrush
• Vacuum cleaner
• Protective gear (gloves, safety glasses, etc.)
Step-by-Step Guide to Installing End Grain Wood Flooring
Once you’ve gathered all the supplies for your end grain wood flooring project, it’s time to get started! Here are the steps you should take:
1. Start by cleaning the area where you will be installing the end grain wood flooring. Use a vacuum cleaner to remove any dirt and debris from the area.
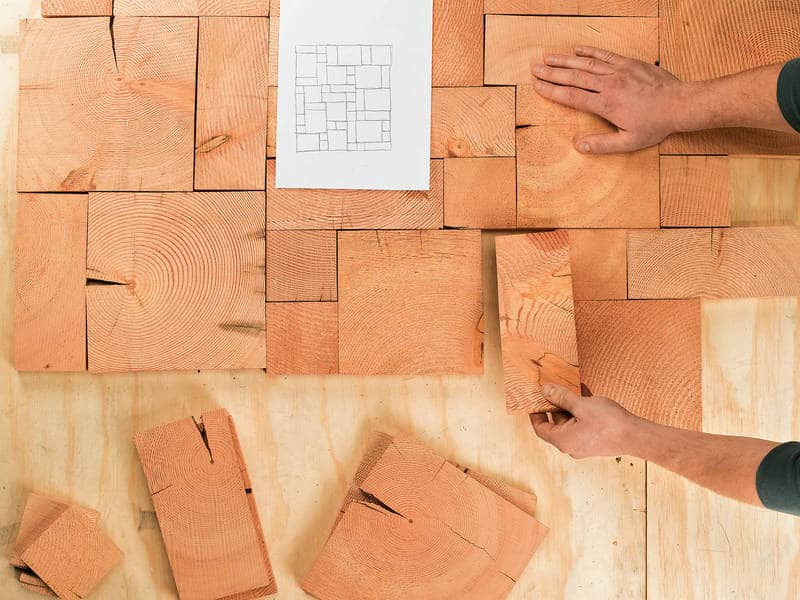
2. Cut the hardwood cubes into small pieces that are roughly 1 inch in size. This will make them easier to handle when installing them on your floor.
3. Arrange the cubes in a pattern that you like. Make sure there is an even amount of space between each piece and that they are laid out in straight lines.
4. Secure each piece using nails or wood glue. Hammer the nails into place and let the glue dry completely before moving on to the next step.
5. Once all of the pieces are secure, use sandpaper to smooth out any rough edges or bumps on your floor. This will help ensure that your end grain wood floor looks neat and professional when finished.
6. Apply a stained finish to your floor using a paintbrush. This will help protect your wood from damage over time and give it a beautiful shine.
7. Let the stain dry completely before using the space again. You may want to put furniture pads or felt furniture feet on any furniture that will be placed on top of your end grain wood floor in order to avoid scratching or damaging it over time.
Common Questions About End Grain Wood Flooring DIY Projects
Q: Is end grain wood flooring hard to install?
A: End grain wood flooring can be challenging to install but with proper preparation and knowledge of how to do so properly, it can be done as a DIY project successfully! Just make sure you have all the necessary tools and materials before beginning as well as taking your time with each step of the process so that everything is done correctly for a great looking end result!
Q: How long does an end grain wood flooring project take?
A: The amount of time it takes for an end grain wood flooring project depends on how large the area is and how detailed you want your design to be. On average, most projects take anywhere from one day up to several days depending on these factors.
Q: What type of finish should be used on end grain wood floors?
A: A stained finish is typically used on end grain wood floors as it provides protection against damage while also giving it a beautiful shine. You can also choose from other types of finishes such as oil-based or water-based polyurethane if desired.