Although cork floors have been fitted for hundreds of years, many people overlook cork as being a floor alternative for their home. These advantages are actually all because of to Suberin, a waxy material that occurs naturally in cork. The process does not hurt the cork oak tree at all as well as allows the same tree to be harvested time and again throughout its whole lifetime.
Here are Images about Cork Floor Tiles Dublin
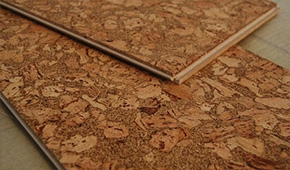
Cork Floor Tiles Dublin

Cork flooring is usually reluctant to quite a handful of issues including allergens, bacteria, mildew, mold, and moisture. This bark is harvested every nine years following the tree matures, having a typical lifetime of 200 years. Made up of multiple substrate layers based on the quality of the cork floors selected, these floors are similar in composition to engineered laminate floors with superior insulating as well as sound deadening qualities.
The Cork Flooring Specialists in Ireland – Natura Cork Flooring

Just because cork is resist to moisture and water you'll still want to wash up all spills as well as standing water to prevent it from getting underneath the tiles. This particular baked mold is then utilized for flooring. It can also be a low price venture in case you use a floating cork floor system and put in it yourself. For a lot of consumers among the greatest benefits of cork flooring is that it's eco friendly product.
Images Related to Cork Floor Tiles Dublin
How to Lay Cork Floor Tiles u0026 Parquet Flooring
The Cork Flooring Specialists in Ireland – Natura Cork Flooring

Photo Gallery – NATURA Cork Flooring

Photo Gallery – NATURA Cork Flooring

Services – NATURA Cork Flooring

Select Line Cork Floors u2014 Jelinek Cork Group®
The Cork Flooring Specialists in Ireland – Natura Cork Flooring

Quickfix Decorative Cork Floor Tiles – Ready Sealed u0026 Self Adhesive

Photo Gallery – NATURA Cork Flooring

Floor Sanding Custom Flooring Heartland Wood u0026 Cork Floor Company

What Do I Need to Know About Cork Flooring? Houzz IE
Cork Flooring Wicander Cork Floor Tiles From Contract Flooring

Related articles:
- Vintage Cork Floor
- Cork Flooring For Bathroom
- How To Clean Cork Flooring
- Cork Flooring Laundry Room
- Cork Floor Tiles
- Underlayment For Cork Floor
- Laying Cork Flooring
- Floating Cork Flooring
- Disadvantages Of Cork Floors
- Cork Floor Colours
Cork Floor Tiles Dublin: A Sustainable and Stylish Flooring Option
Introduction:
When it comes to flooring options, cork floor tiles have gained immense popularity in recent years. Known for their sustainability, durability, and unique aesthetic appeal, cork floor tiles are a great choice for homeowners in Dublin. This article will explore the benefits of cork floor tiles, their installation process, maintenance tips, and frequently asked questions to help you make an informed decision about incorporating this eco-friendly flooring option into your home.
1. The Benefits of Cork Floor Tiles:
Cork is a natural material extracted from the bark of the cork oak tree. It is an excellent choice for flooring due to its numerous benefits:
a) Sustainability: Cork is a renewable resource that can be harvested without harming the tree. The bark regenerates every 9-12 years, making it an environmentally friendly flooring option.
b) Comfort and Insulation: Cork floor tiles provide excellent insulation against both heat and sound. The cellular structure of cork traps air, creating a cushioning effect underfoot and reducing noise transmission between floors.
c) Durability: Despite its softness, cork is incredibly durable. It resists wear and tear, making it suitable for high-traffic areas like kitchens and living rooms. Additionally, its elasticity allows it to withstand pressure without permanent damage.
d) Allergen-free: Cork has natural antimicrobial properties that repel mold, mildew, and pests. It also resists dust mites and allergens, making it an ideal choice for individuals with allergies or asthma.
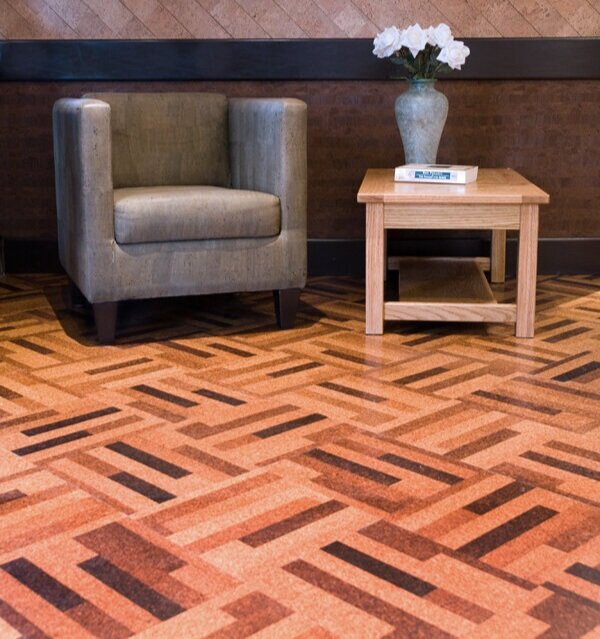
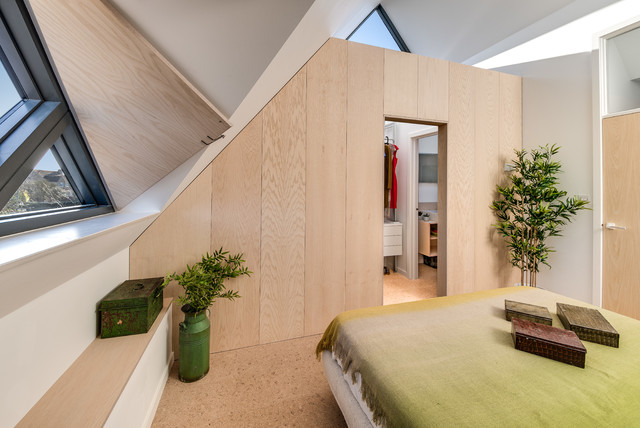
e) Aesthetic Appeal: Cork floor tiles come in various colors and patterns, allowing you to choose a style that complements your interior design. From traditional earth tones to vibrant hues, there is a cork floor tile for every taste.
FAQs:
Q1: Are cork floor tiles suitable for wet areas like bathrooms?
A1: While cork is naturally resistant to water, it is not entirely waterproof. However, with proper sealing and maintenance, cork floor tiles can be used in bathrooms. It is essential to wipe up any spills immediately and periodically reseal the tiles to protect them from moisture.
Q2: Can cork floor tiles be installed over existing flooring?
A2: Yes, cork floor tiles can be installed over various types of existing flooring, including hardwood, vinyl, and even concrete. However, it is crucial to ensure that the surface is clean, level, and free from moisture or damage before installation.
2. Installation Process:
Installing cork floor tiles requires precision and attention to detail. Here is a step-by-step guide to help you navigate the installation process:
a) Preparation: Begin by measuring the room and calculating the number of cork floor tiles needed. It is advisable to purchase an additional 10% of tiles to account for wastage and future replacements. Next, prepare the subfloor by cleaning it thoroughly and ensuring it is level. Remove any existing baseboards or moldings that may interfere with the installation process.
b) Acclimatization: Cork floor tiles need to acclimate to the room’s temperature and humidity before installation. Allow the tiles to sit in the room for at least 48 hours while maintaining the recommended temperature range (usually between 18-25 degrees Celsius).
c) Layout: Plan the layout of your cork floor tiles by starting from the center of the room and working your way outwards. This ensures a balanced appearance and minimizes cutting during installation. Use a chalk line or laser Level to mark the centerline of the room and create a grid pattern to guide tile placement.
d) Installation: Apply adhesive to the subfloor using a trowel, following the manufacturer’s instructions. Start laying the cork floor tiles along the centerline, pressing them firmly into place. Use a rubber mallet or a rolling pin to ensure proper adhesion and eliminate any air pockets. Leave a small gap around the edges of the room for expansion.
e) Cutting and fitting: As you reach the edges of the room or encounter obstacles like doorways or cabinets, you may need to cut the cork tiles to fit. Use a utility knife or a jigsaw with a fine-tooth blade to make precise cuts. Remember to leave a small gap for expansion when fitting tiles against walls or other fixed structures.
f) Finishing touches: Once all the cork floor tiles are in place, install baseboards or moldings to cover the expansion gaps and give your floor a polished look. Clean the floor thoroughly, removing any adhesive residue or debris. Finally, apply a protective sealant according to the manufacturer’s instructions to enhance durability and longevity.
Remember, if you are unsure about any step of the installation process, it is always best to consult a professional flooring installer for guidance and assistance. Overall, installing cork floor tiles can be a DIY project if you have the necessary skills and tools. However, it is important to follow the recommended steps and guidelines to ensure a successful installation. Consulting a professional is always a good idea if you are unsure about any aspect of the process. Step-by-step guide to help you navigate the installation process:
a) Preparation:
1. Measure the room and calculate the number of cork floor tiles needed.
2. Purchase an additional 10% of tiles to account for wastage and future replacements.
3. Prepare the subfloor by cleaning it thoroughly and ensuring it is level.
4. Remove any existing baseboards or moldings that may interfere with the installation process.
b) Acclimatization:
1. Allow the cork floor tiles to acclimate to the room’s temperature and humidity for at least 48 hours.
2. Maintain the recommended temperature range (usually between 18-25 degrees Celsius).
c) Layout:
1. Plan the layout of your cork floor tiles starting from the center of the room and working outwards.
2. Use a chalk line or laser level to mark the centerline of the room.
3. Create a grid pattern to guide tile placement.
d) Installation:
1. Apply adhesive to the subfloor using a trowel, following the manufacturer’s instructions.
2. Start laying the cork floor tiles along the centerline, pressing them firmly into place.
3. Use a rubber mallet or rolling pin to ensure proper adhesion and eliminate air pockets.
4. Leave a small gap around the edges of the room for expansion.
e) Cutting and fitting:
1. Cut cork tiles to fit as you reach edges of the room or encounter obstacles like doorways or cabinets.
2. Use a utility knife or jigsaw with a fine-tooth blade for precise cuts.
3. Leave a small gap for expansion when fitting tiles against walls or other fixed structures.
f) Finishing touches:
1. Install baseboards or moldings to cover expansion gaps and give your floor a polished look.
2. Clean the floor thoroughly, removing any adhesive residue or debris.
3. Apply a protective sealant according to manufacturer’s instructions to enhance durability and longevity.
Remember, if you are unsure about any step of the installation process, consult a professional flooring installer for guidance and assistance. Following the recommended steps and guidelines will ensure a successful installation.