When I first considered black walnut flooring for my home, I was captivated by its rich, dark chocolate tones and stunning grain patterns. I’d seen it in a friend’s craftsman-style home and couldn’t stop thinking about how it transformed their space with such dramatic elegance.
After living with my black walnut floors for three years now, I’ve learned so much about this beautiful wood, from selection and installation to daily maintenance and long-term care. Let me share my journey and help you decide if black walnut is right for your home.
Understanding Black Walnut’s Unique Character and Beauty
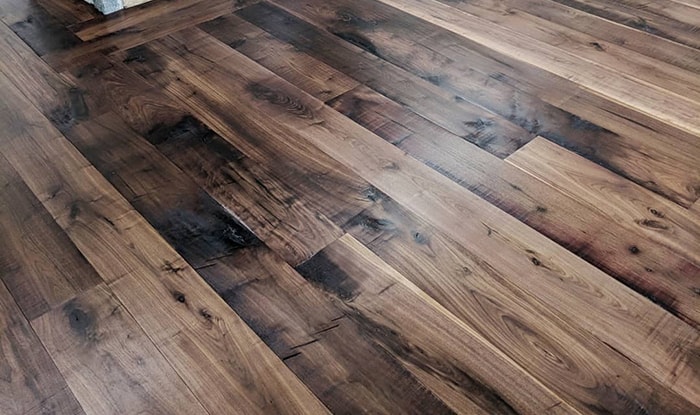
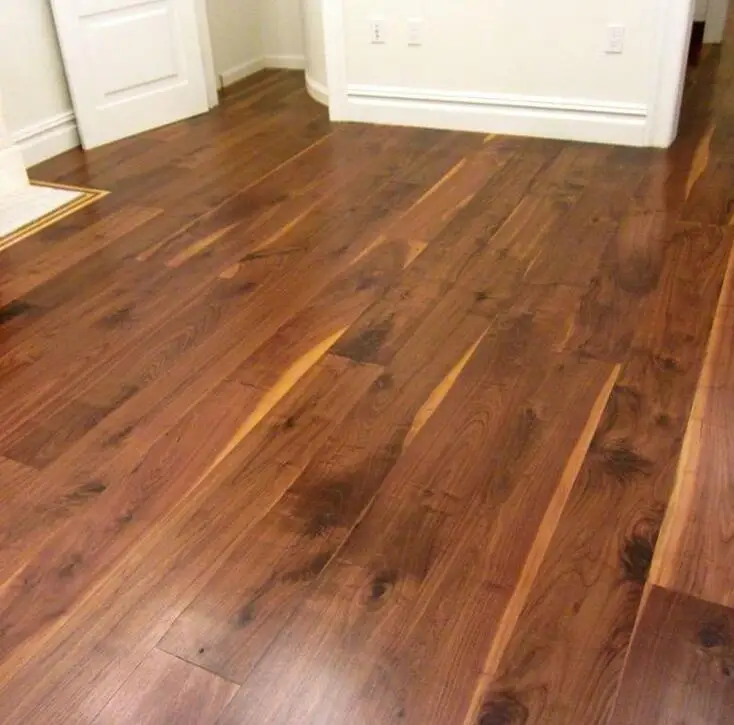
I spent weeks researching black walnut before committing to this investment. What sets it apart is that gorgeous, deep brown color with occasional purple and gray undertones. No two boards look identical; each piece tells its own story through swirling grain patterns and natural color variations. I learned that the sapwood, which appears as creamy tan streaks, adds character that some people love and others want to minimize. I embraced it as part of the wood’s authentic beauty.
The hardness factor surprised me during my research. Black walnut rates around 1010 on the Janka hardness scale, which is softer than red oak or maple. My flooring installer was honest about this, explaining that walnut would show dents and scratches more readily than harder woods. I decided the trade-off was worth it for that incredible color and grain. Three years in, yes, I have some character marks, but they’ve only added to the floor’s warmth and lived-in charm.
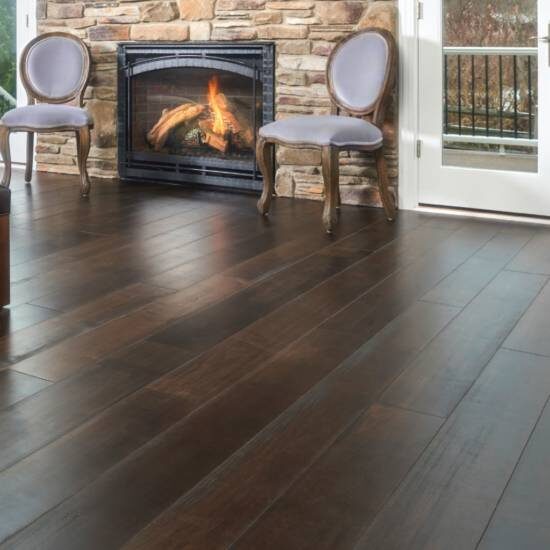
What really sold me was how black walnut ages over time. Unlike some woods that darken dramatically, walnut actually lightens slightly with sun exposure while developing a richer, more uniform patina.
I’ve noticed this happening near my south-facing windows, where the deepest browns have mellowed to warm chocolate tones. This gradual transformation feels like watching a fine wine mature. The floor evolves with me, becoming more beautiful as the years pass.
Selecting Quality Black Walnut Flooring Materials
I visited multiple lumber yards and flooring suppliers before making my selection. I learned that black walnut comes in several grades, with clear grade being the most expensive and uniform, while select and better grades include more natural character marks. I chose select grade because I wanted some knots and color variation without paying premium prices. This decision saved me about thirty percent while giving me the authentic, less manufactured look I preferred.
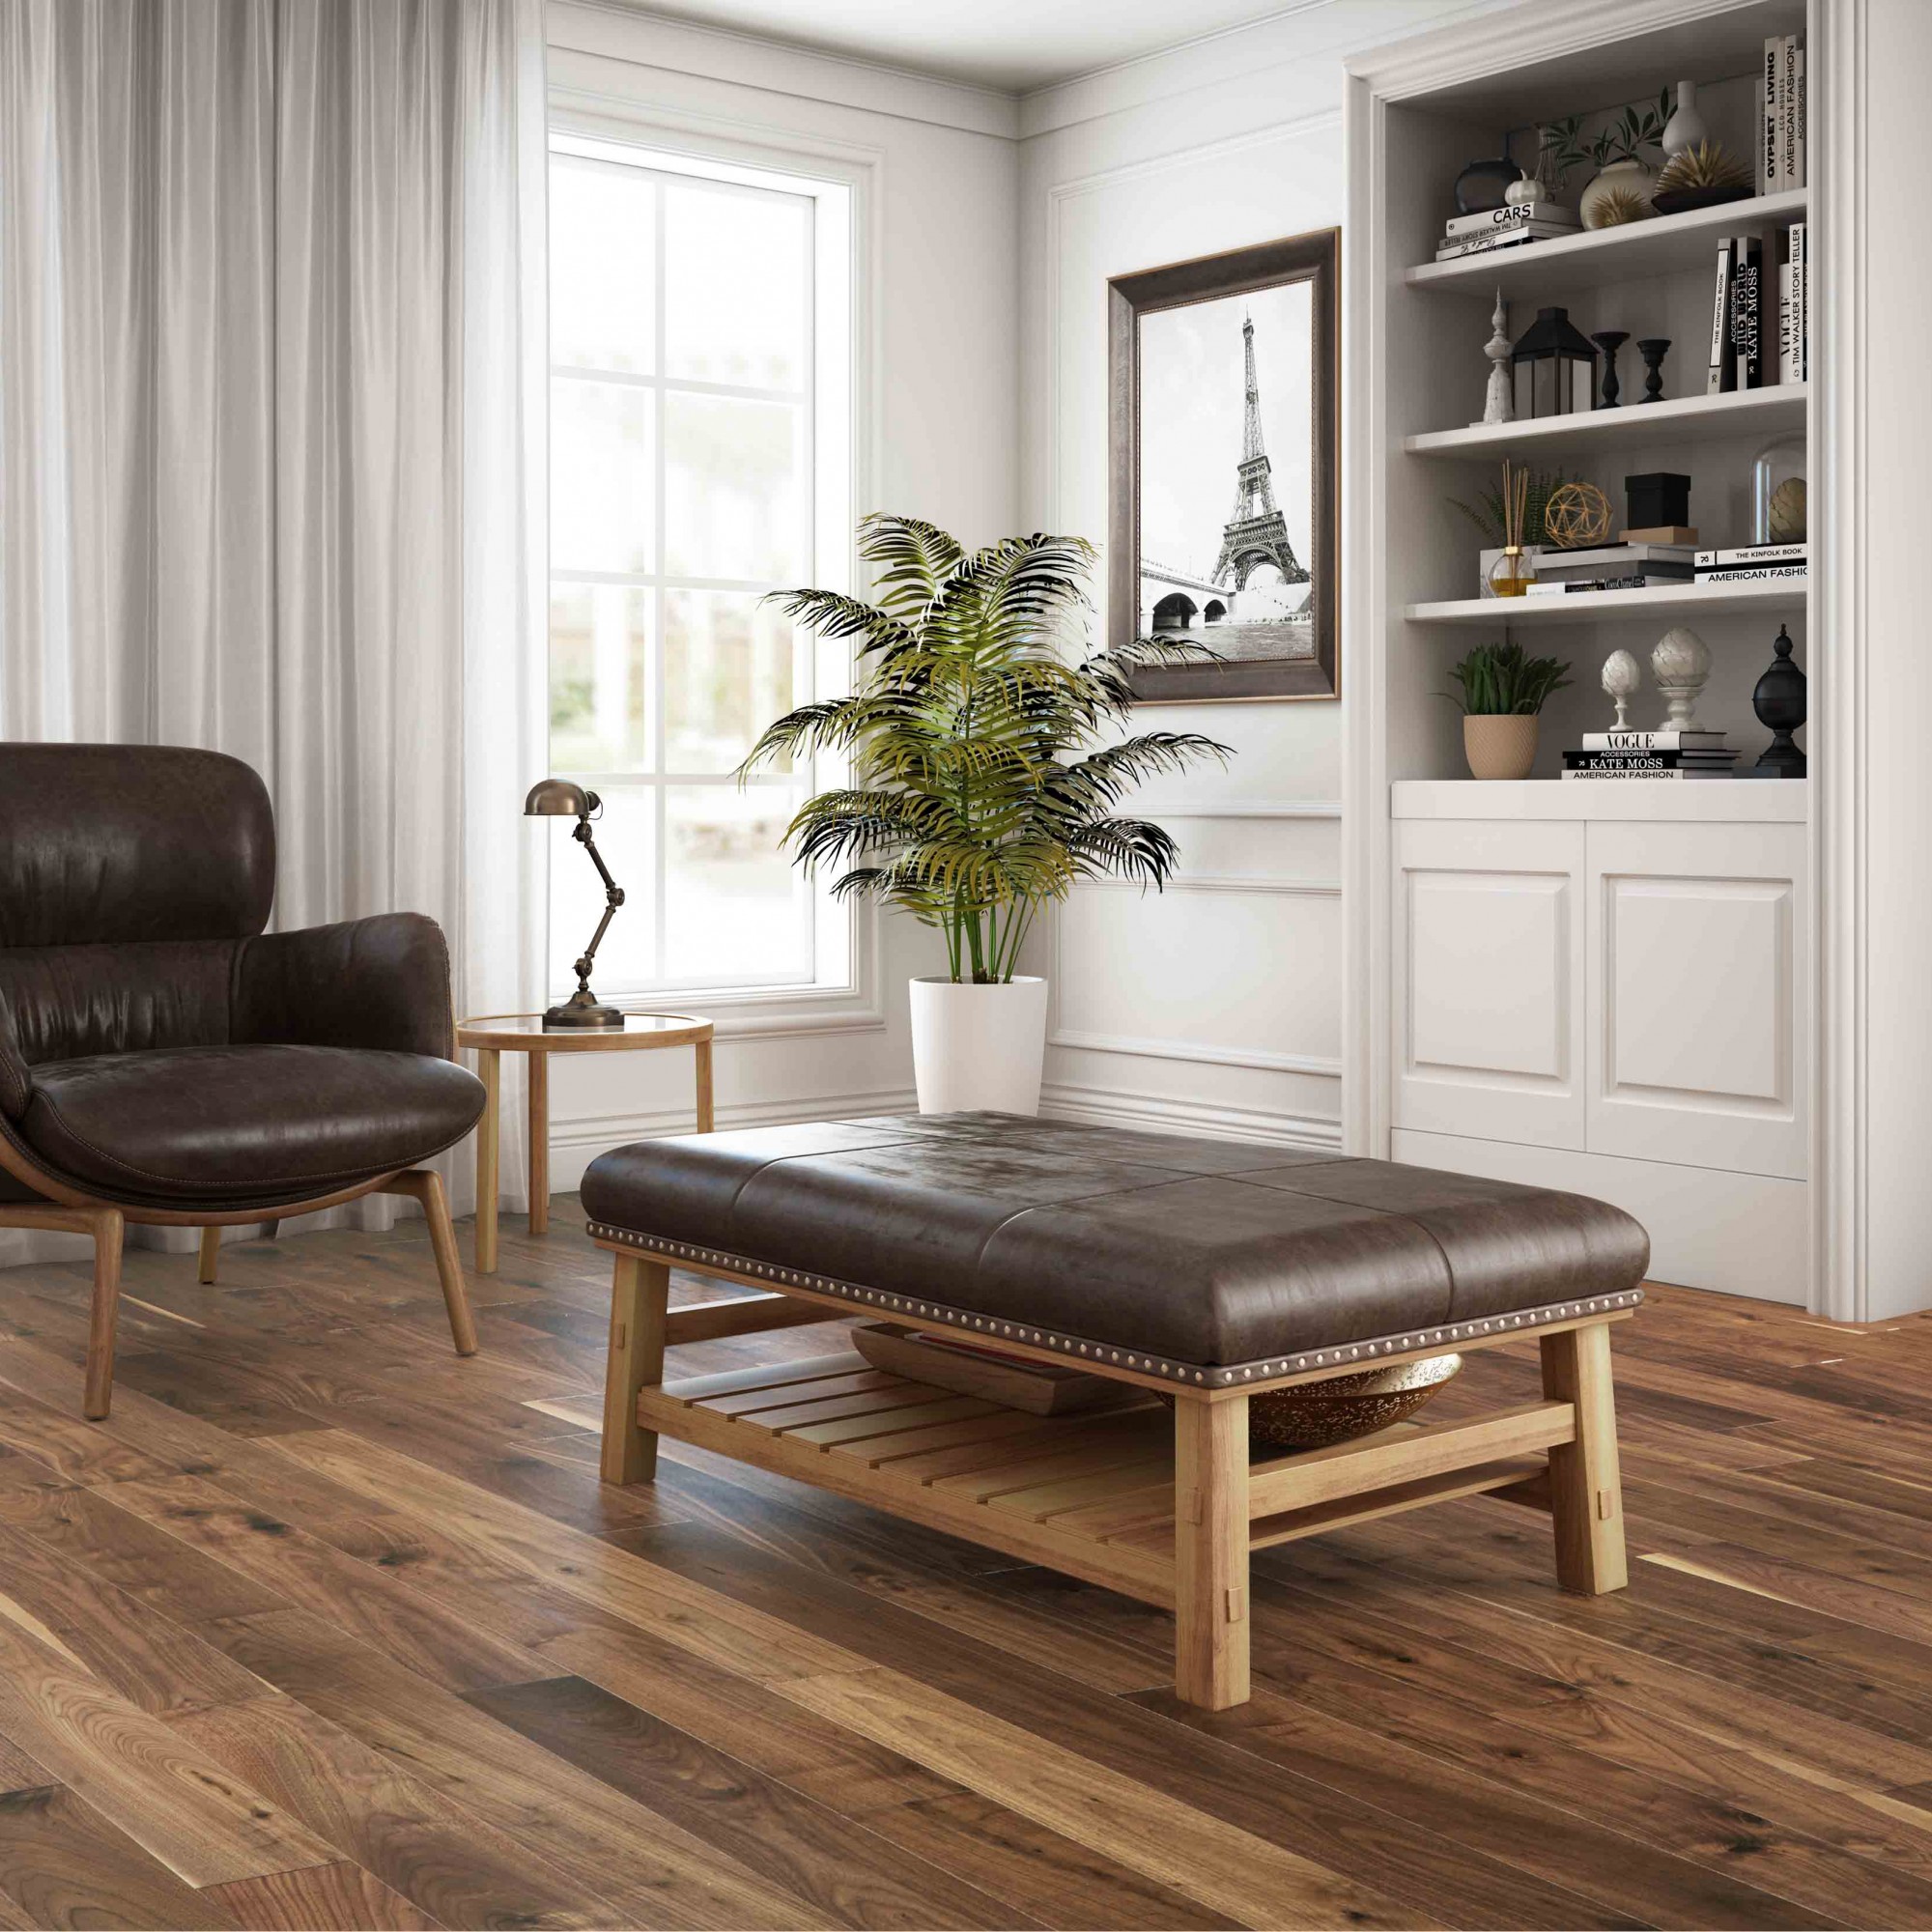
The width of the planks became an important consideration. I fell in love with wide planks, five to seven inches across, which showcase walnut’s grain patterns beautifully and make rooms feel more spacious. Narrow strips felt too busy and didn’t do justice to the wood’s natural beauty. I went with six-inch planks as my sweet spot, wide enough for impact but not so wide that waste became excessive during installation. This width also worked well with my home’s proportions.
I chose solid hardwood over engineered walnut despite the higher cost and installation complexity. Solid three-quarter-inch planks can be refinished multiple times over their lifetime, which justified the investment for me. I found a supplier who specialized in sustainably harvested American black walnut, which made me feel better about choosing this increasingly precious wood. The entire purchase, including delivery, cost about $12 per square foot, which was my single biggest renovation expense but was worth every penny.

Preparing for Installation and Acclimation
My installer stressed the importance of proper acclimation, and I’m glad I listened. Black walnut needs to adjust to your home’s temperature and humidity before installation to prevent gaps or buckling later. I had the flooring delivered three weeks early and stored it, still bundled, in the rooms where it would be installed. My installer used a moisture meter to verify the wood had reached equilibrium with my home’s conditions before starting work.
The subfloor preparation was more involved than I expected. My installer stripped the old carpet and found an unlevel plywood subfloor underneath. We spent two days addressing this, using leveling compound in low spots and sanding high areas. He explained that any imperfection would telegraph through the hardwood and affect how the floor performed long-term. This unglamorous prep work made all the difference in achieving a flat, stable installation.
I decided on nail-down installation over my prepared plywood subfloor. My installer used a pneumatic flooring nailer, blind-nailing through the tongue of each board at forty-five-degree angles. This method is more labor-intensive than floating floors but creates a solid, permanent installation that feels substantial underfoot. The process took four full days for my 800 square feet, including the time needed to carefully select and arrange boards for optimal grain patterns and color flow.

Choosing the Right Finish for Protection and Beauty
The finish selection felt almost as important as choosing the wood itself. I debated between oil-based polyurethane, water-based polyurethane, and natural oil finishes. My installer recommended water-based poly for its durability and low odor, but I chose oil-based for that warm amber glow it adds to walnut’s already rich color. Yes, the fumes were intense for a few days, and drying took longer, but the depth and warmth in the final result exceeded my expectations.
I went with a satin finish rather than glossy or matte. High gloss felt too formal and showed every speck of dust, while matte seemed to dull walnut’s natural luster. Satin gave me that perfect middle ground, a subtle sheen that enhances the wood’s character without looking plastic or overly reflective. The finish also hides minor scratches better than gloss, which matters with walnut’s softer nature. I appreciate this decision more as time passes.
My installer applied four coats of finish, sanding lightly between each coat. This meticulous process took three days once the flooring was installed, but it created a durable surface that’s held up beautifully. We kept windows open and fans running to manage fumes and speed drying. I stayed with friends during this phase because the smell was overwhelming. After a week, the odor dissipated completely, leaving just the beautiful scent of natural wood that I still notice when coming home.

Living With and Maintaining Black Walnut Floors
My daily maintenance routine is surprisingly simple. I sweep or vacuum most days to prevent dirt and grit from scratching the finish. I use a microfiber dust mop that picks up everything without needing any cleaning products. For deeper cleaning, I damp mop monthly with a hardwood floor cleaner specifically formulated for polyurethane finishes. I avoid excess water, wringing the mop until it’s barely damp, because standing water is hardwood’s enemy.
I’ve learned to manage the inevitable scratches and dents that come with softer hardwood. Furniture leg pads are essential. I use felt pads under everything and replace them when they wear thin. I keep area rugs in high-traffic zones and under my dining table. Despite my precautions, I do have some dents from dropped items and scratches from moving furniture. Honestly, these imperfections bother me less than I expected. They tell the story of life lived in this space.
I control sunlight exposure to manage color changes. I use UV-filtering window films on my sunniest windows and rotate area rugs periodically so fading patterns don’t become permanent shadows on my floor. I’ve embraced the gradual lightening as part of the wood’s natural evolution rather than fighting it. Some rooms that get less light have retained their darker, richer tones, creating subtle variations throughout my home that I find quite beautiful.

Understanding the Investment and Long-Term Value
Black walnut was expensive; there’s no sugar-coating that reality. My total project cost about $16,000 for materials, installation, and finishing in 800 square feet. That’s roughly double what red oak would have cost. However, I viewed this as a long-term investment in my home’s value and my daily quality of life. Three years later, I have zero regrets. These floors bring me joy every single day and have become my home’s defining feature.
The resale value consideration mattered to me as well. My realtor friend confirmed that black walnut flooring is a premium feature that appeals to discerning buyers. It signals quality and craftsmanship in ways that common flooring materials simply don’t. While I’m not planning to sell anytime soon, knowing that my investment will likely pay off eventually provides peace of mind. High-end buyers specifically seek homes with distinctive features like black walnut flooring.
The longevity factor justifies the cost. With proper care, solid black walnut floors can last over a century. They can be refinished multiple times when the finish wears, essentially giving me a lifetime floor. When I amortize the cost over even just thirty years, it becomes quite reasonable compared to replacing lesser flooring every decade. I’m creating something that could outlive me, which feels meaningful in our disposable culture.

Is black walnut flooring too dark for smaller rooms?
I was worried about this too, but it actually works beautifully. The key is having adequate lighting and using lighter wall colors and furnishings for contrast. In my 200-square-foot bedroom, the dark floors make the space feel cozy rather than cramped. I added extra lamps and kept the bedding light-colored. The dramatic contrast creates depth that makes the room feel larger, not smaller.
How does black walnut handle moisture compared to other hardwoods?
Black walnut has moderate moisture resistance but isn’t waterproof. I use it throughout my home except the bathrooms and laundry room. I’ve had minor spills that I wiped up immediately with no damage. However, standing water would cause problems. My kitchen has walnut flooring, and I’m just careful about spills. It performs similarly to other hardwoods, requiring prompt attention to moisture but handling normal life fine.
Can you install black walnut flooring yourself?
If you have solid carpentry skills and the right tools, yes. However, I strongly recommend hiring professionals. Black walnut is expensive, and mistakes are costly. Professional installers have pneumatic nailers, moisture meters, and experience with wood movement and grain matching. They completed my installation in four days. DIY would have taken me weeks and probably looked amateurish. The installation cost was worth it for peace of mind.
Does black walnut flooring scratch easily?
Yes, more easily than harder woods like maple or hickory. I’ve accumulated scratches and small dents over three years despite being careful. Furniture pads and area rugs help tremendously. The good news is that minor scratches blend into walnut’s varied grain and character. They don’t stand out like they would on lighter, more uniform wood. I view them as patina rather than damage now.
How often does black walnut flooring need refinishing?
That depends on traffic and care. High-traffic areas might need refinishing every 10-15 years, while low-traffic spaces could go 20-25 years. I’m three years in, and my floors still look great. Light surface scratches can often be addressed with a screen and recoat rather than full refinishing. Solid three-quarter-inch walnut can be refinished 4-6 times over its lifetime, so it’s truly a long-term floor.
Is black walnut flooring worth the high cost?
For me, absolutely yes. It’s the most beautiful, distinctive feature in my home. I chose to invest in floors rather than fancy appliances or expensive furniture. These floors will outlast trends and provide daily beauty for decades. If you love the look and can afford it, I think it’s worth every penny. However, if the budget is tight, there are lovely alternatives that cost less.

Natural Black Walnut – Boardwalk Hardwood Floors

Prefinished Solid American Black Walnut Wood Flooring
Related articles: