Regular family cleaning and dusting products and solutions will cause damage, however, and you must use only products specially created for hardwood. One of the biggest improvements that the majority of home owners do to their flooring surfaces should be to refinish them. Besides being gorgeous and hardwearing, hardwood floor surfaces are eco-friendly.
Here are Images about Angle Nailer Hardwood Floor
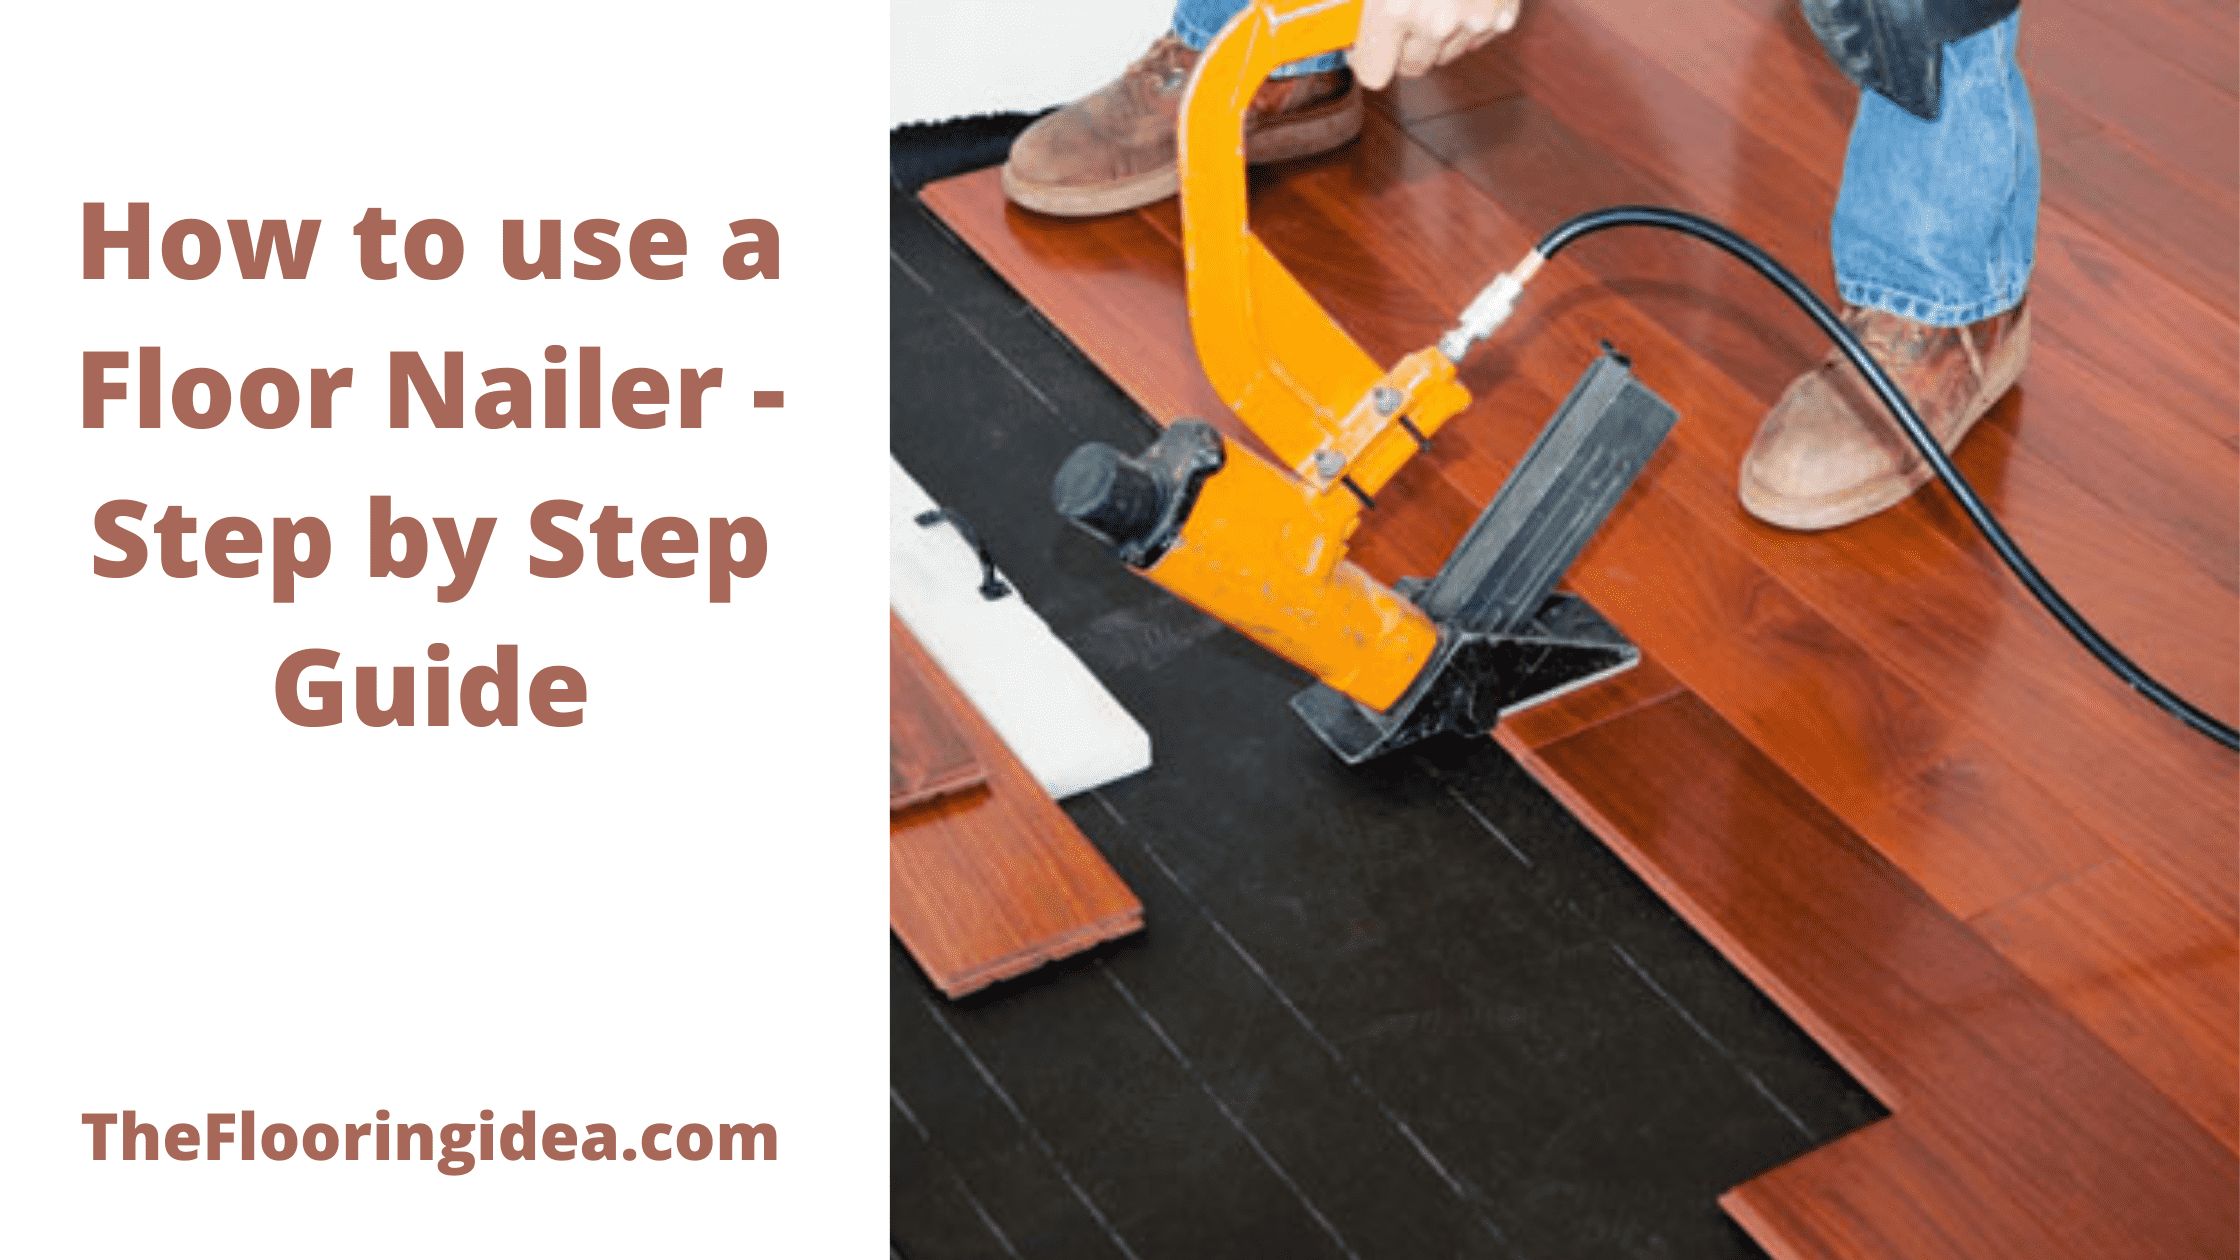
Angle Nailer Hardwood Floor
This particular type of wood flooring is solid all of the way from top to bottom. Pre-finished flooring is generally more wear resistant because the maker is able to employ a lot more durable coatings in a controlled factory environment. 00 a square foot which could add nearly savings which are Considerable depending on the actual size of the room.
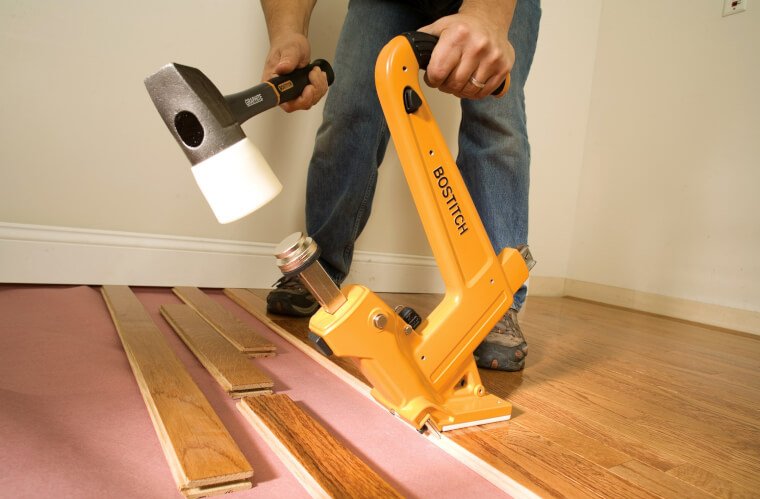
Can I Use A Nail Gun To Install Hardwood Floor The Pincer

The bulk of individuals selling hardwood flooring know almost no concerning moisture and wood, in case they do not even have a moisture meter, that’s an indication that they are not professional and know nothing or even very small about hardwood flooring and should not be advertising it. Installation time could be minimized with pre-finished hardwood flooring which removes the application and drying period of the finish as well as sealer.
Images Related to Angle Nailer Hardwood Floor
Installing Solid Hardwood Floors – Fastening By Nails Or Staples

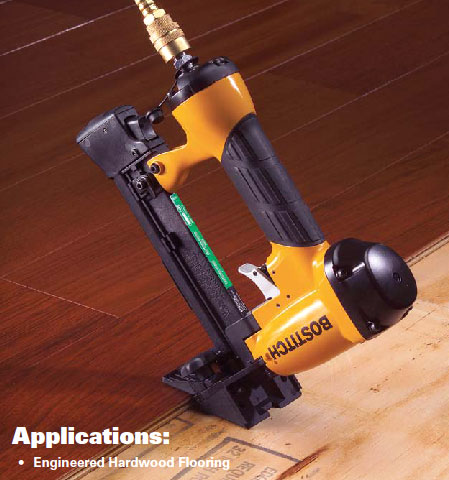
Bostitch Flooring Stapler for Engineered Hardwood (EHF1838K

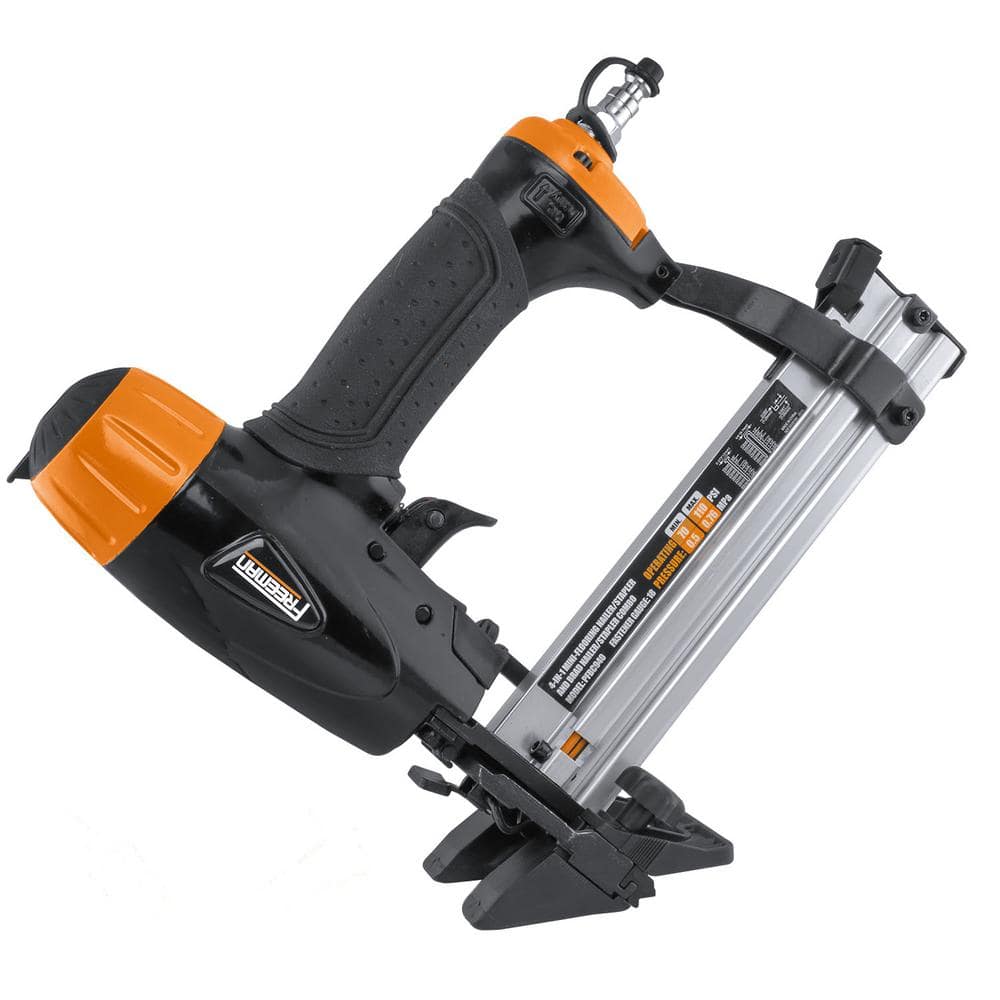
Freeman Pneumatic 4-in-1 18-Gauge 1-5/8 in. Mini Flooring Nailer and Stapler PFBC940
Best Floor Nailers To Install Floors With Ease: 2022 Reviews

DeWalt 20V Max Cordless Flooring Stapler Unleashed – Pro Tool Reviews

BOSTITCH LHF97125-2 Floor Runner Laminated Hardwood Flooring
Best Floor Nailer: Secure Your New Floor with Ease – Backyard Boss

How to use Finish Nailer Properly with Safety First

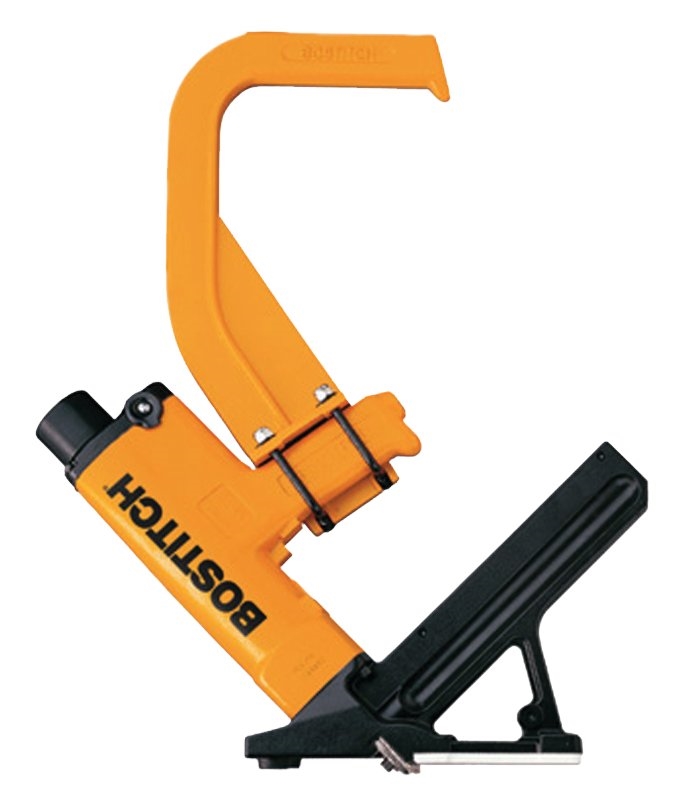
Stanley MIIIFN Angled Hardwood Flooring Cleat Nailer, 110 Nails, 1-1/2 – 2 in, 70 – 90 psi
How to Choose the Best Hardwood Flooring Nailers u2013 Easiklip Floors

How to Use a Floor Nailer in 7 Easy Steps –
How to Lay Engineered Wood Floors – This Old House
/cdn.vox-cdn.com/uploads/chorus_asset/file/19494255/wood_floors_toutxlbanner.jpg)
Related articles:
- Hardwood Floor Finish Brands
- Hand Scraped Hardwood Flooring
- Home Hardwood Floor
- Hardwood Floor Deep Cleaner
- Engineered Hardwood Floor
- Cherry Hardwood Flooring Reviews
- Hardwood Floor Cleaning And Refinishing
- Wide Plank Pine Hardwood Flooring
- Hardwood Flooring Designs Photos
- Hardwood Floor Selection Guide
Angle Nailer for Hardwood Floor: A Comprehensive Guide
Introduction:
Installing hardwood floors is a great way to add elegance and warmth to any space. However, the process of installing hardwood floors can be quite challenging, especially if you don’t have the right tools. One tool that is essential for this task is an angle nailer. In this article, we will explore the benefits of using an angle nailer for hardwood floor installation and provide a comprehensive guide on how to use it effectively.
Benefits of Using an Angle Nailer for Hardwood Floor Installation:
1. Enhanced Efficiency:
An angle nailer is designed specifically for installing hardwood floors, making the installation process faster and more efficient. It allows you to drive nails into the tongue of the flooring at a specific angle, ensuring a secure and tight fit. This not only saves time but also reduces the risk of damaging the wood during installation.
2. Improved Precision:
Unlike traditional nailing methods, which require you to hammer nails manually, an angle nailer provides precise control over nail placement. It ensures that nails are driven at the correct angle and depth consistently, resulting in a professional-looking finish. This precision helps to eliminate gaps between boards and minimizes the likelihood of squeaky or loose floorboards.
3. Ergonomic Design:
Angle nailers are ergonomically designed to reduce user fatigue and increase comfort during prolonged use. They feature comfortable grips and lightweight construction, allowing you to maneuver easily while working on your hardwood floor project. This ergonomic design translates into increased productivity and reduced strain on your body.
How to Use an Angle Nailer for Hardwood Floor Installation:
Step 1: Prepare the Work Area
Before using an angle nailer, ensure that the work area is clean and free from debris. Remove any existing flooring or carpeting, ensuring a smooth surface for the hardwood installation.
Step 2: Acclimate the Hardwood Flooring
Keep your hardwood flooring material in the room where it will be installed for at least 48 hours before installation. This allows the wood to adjust to the humidity and temperature of the space, minimizing the risk of warping or shrinking.
Step 3: Measure and Mark
Measure the room dimensions and determine the layout of your hardwood floor. Use a chalk line or laser level to mark guidelines on the subfloor, indicating where the first row of flooring will be placed.
Step 4: Load the Angle Nailer
Refer to the manufacturer’s instructions to load nails into the angle nailer’s magazine. Ensure that you are using nails specifically designed for hardwood flooring installation.
Step 5: Start Nailing
Position the angle nailer at a 45-degree angle, aligning it with the tongue of the first board. Hold the nailer firmly and depress the trigger to drive a nail into the tongue, securing it to the subfloor. Repeat this process for each subsequent board, ensuring a tight fit between boards.
FAQs:
Q1: Can I use a regular nail gun instead of an angle nailer for hardwood floor installation?
A1: While it is possible to use a regular nail gun for hardwood floor installation, an angle nailer is specifically designed for this purpose. Regular nail guns may not provide the same precision and control over nail placement, resulting in a less professional finish.
Q2: How many nails should I use per board when installing hardwood floors?
A2: It is recommended to use two nails per board, spaced approximately 8-10 inches apart. This ensures A secure and stable installation. However, it is important to follow the manufacturer’s guidelines and recommendations for your specific hardwood flooring product.
Q3: Do I need to use any adhesive along with the nails when installing hardwood floors?
A3: In most cases, using nails alone is sufficient for securing hardwood flooring. However, some installers may choose to use adhesive as an additional precautionary measure. Consult the manufacturer’s instructions or consult with a flooring professional to determine if adhesive is necessary for your specific installation.
Q4: Can I use an angle nailer for other types of flooring installations?
A4: Angle nailers are primarily designed for hardwood floor installations. While they may be suitable for other types of flooring, such as engineered wood or laminate, it is important to consult with the manufacturer or a flooring professional to ensure proper compatibility and usage.
Q5: How do I maintain and care for my angle nailer?
A5: Proper maintenance and care of your angle nailer are essential for its longevity and optimal performance. This includes regular cleaning, lubrication of moving parts, checking and replacing worn-out components, and storing it in a clean and dry environment when not in use. Refer to the manufacturer’s instructions for specific maintenance guidelines.
A5: Proper maintenance and care of your angle nailer are essential for its longevity and optimal performance. This includes regular cleaning, lubrication of moving parts, checking and replacing worn-out components, and storing it in a clean and dry environment when not in use. Refer to the manufacturer’s instructions for specific maintenance guidelines. It is important to note that the given text contains duplicate information in the FAQs section. Here is a revised version without duplication:
To install hardwood floors, start by applying adhesive along the subfloor using a trowel. Then, place the first board against the starting wall, ensuring that it is parallel to the longest wall in the room.
Next, use an angle nailer to drive nails into the tongue of the first board. Hold the nailer firmly and depress the trigger to drive a nail into the tongue, securing it to the subfloor. Repeat this process for each subsequent board, ensuring a tight fit between boards.
Here are some frequently asked questions about hardwood floor installation:
Q1: Can I use a regular nail gun instead of an angle nailer for hardwood floor installation?
A1: While it is possible to use a regular nail gun, an angle nailer is specifically designed for this purpose and provides better precision and control over nail placement.
Q2: How many nails should I use per board when installing hardwood floors?
A2: It is recommended to use two nails per board, spaced approximately 8-10 inches apart for a secure and stable installation. However, always follow the manufacturer’s guidelines for your specific hardwood flooring product.
Q3: Do I need to use any adhesive along with the nails when installing hardwood floors?
A3: In most cases, using nails alone is sufficient for securing hardwood flooring. However, consult the manufacturer’s instructions or a flooring professional to determine if adhesive is necessary for your specific installation.
Q4: Can I use an angle nailer for other types of flooring installations?
A4: Angle nailers are primarily designed for hardwood floor installations but may be suitable for other types of flooring such as engineered wood or laminate. Consult with the manufacturer or a flooring professional for proper compatibility and usage.
Q5: How do I maintain and care for my angle nailer?
A5: Proper maintenance and care are essential for the longevity and optimal performance of your angle nailer. This includes regular cleaning, lubrication of moving parts, checking and replacing worn-out components, and storing it in a clean and dry environment when not in use. Refer to the manufacturer’s instructions for specific maintenance guidelines.