Being hypoallergenic gives cork several outstanding health advantages to those that have allergies, along with opposition to mold, bacteria and mildew. The benefits simply keeping rolling out for cork flooring do not they? Well, we are not finished just yet, there are a couple of more you need to learn about. Today, cork flooring comes in a riot of styles.
Here are Images about Peel And Stick Cork Flooring Tiles
Peel And Stick Cork Flooring Tiles

In fact, cork has a fantastic resistant and it is incredibly resilient to pressure. Cork is actually a wood-based flooring information that is obtained from the bark of a cork oak tree. Do not let someone make use of the green item idea to over cost you. And after that, the tree could be harvested every nine years for the rest of the lifetime.
DECORATIVE 3mm Self-Adhesive Cork Floor Tiles (0.80m2) – – Amazon.com

In order to recognize the reason powering this product being green you need to learn about cork material. Amazingly, as remarkable as it already appears, a floors made up of cork has several more excellent attributes to give a discerning homeowner. This unique sustainable flooring that is none various other than' Cork Flooring' will be the focus of our content today.
Images Related to Peel And Stick Cork Flooring Tiles
5mm Self-Adhesive Cork Floor Tiles (0.80m2) – – Amazon.com

Globus Cork Eco-Friendly Flooring Brooklyn NY

White Cubes – 1/2 Inch (12mm) – Cork Wall Tile

Natural Cork Flooring from Duro Design, 12″x12″ Glue Down Tiles
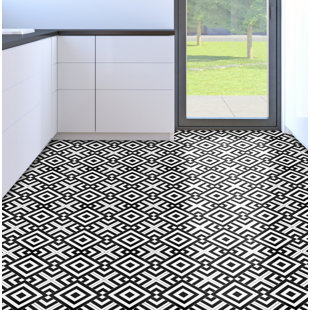
Self Adhesive Cork Tiles Wayfair
Cork Flooring Materials In Humid Bathroom Conditions
/assorted-cork-tiles-elevated-view-200544917-001-5849d2215f9b58a8cdcf1344.jpg)
Butleru0027s Pantry Update: Flooring for Under $100 Thistlewood

Cork Flooring Guide – Specifics, Pros u0026 Cons, Price Fantastic
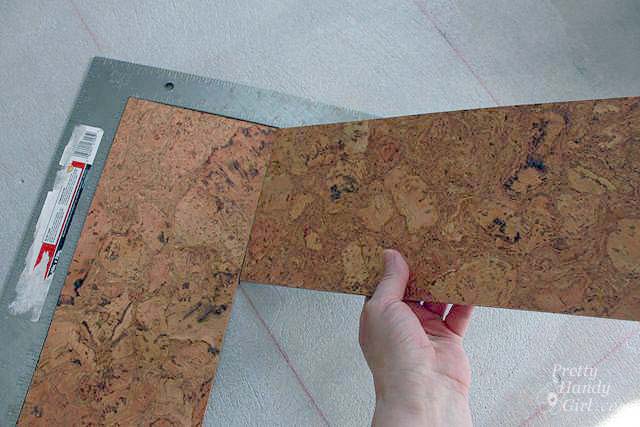
Installing Cork Tile Flooring in the Kitchen – Pretty Handy Girl
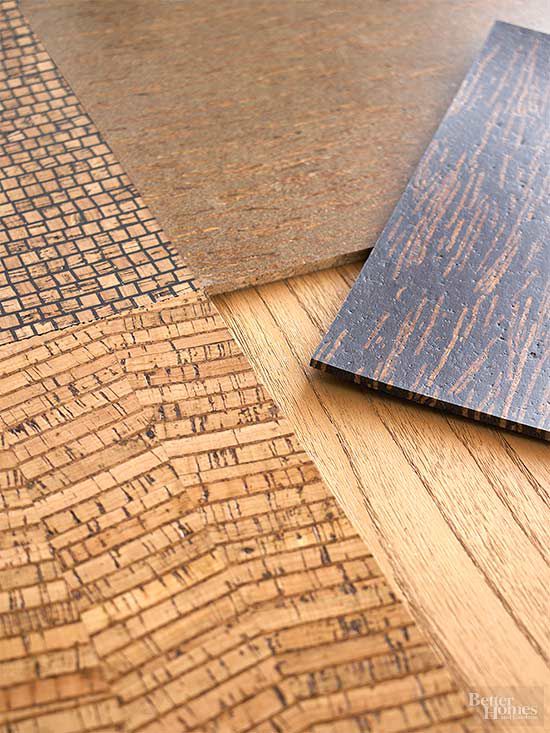
Cork Flooring Better Homes u0026 Gardens
3mm Sealed Cork Floor Tiles (0.80m2)

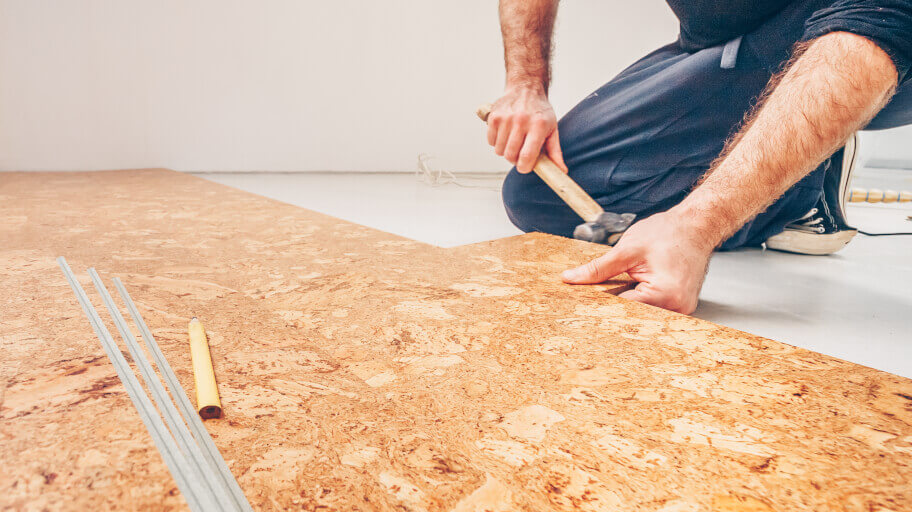
Cork Floor Install – How to install a cork glue down floor.

Related articles:
- Vintage Cork Floor
- Cork Flooring For Bathroom
- How To Clean Cork Flooring
- Cork Flooring Laundry Room
- Cork Floor Tiles
- Underlayment For Cork Floor
- Laying Cork Flooring
- Floating Cork Flooring
- Disadvantages Of Cork Floors
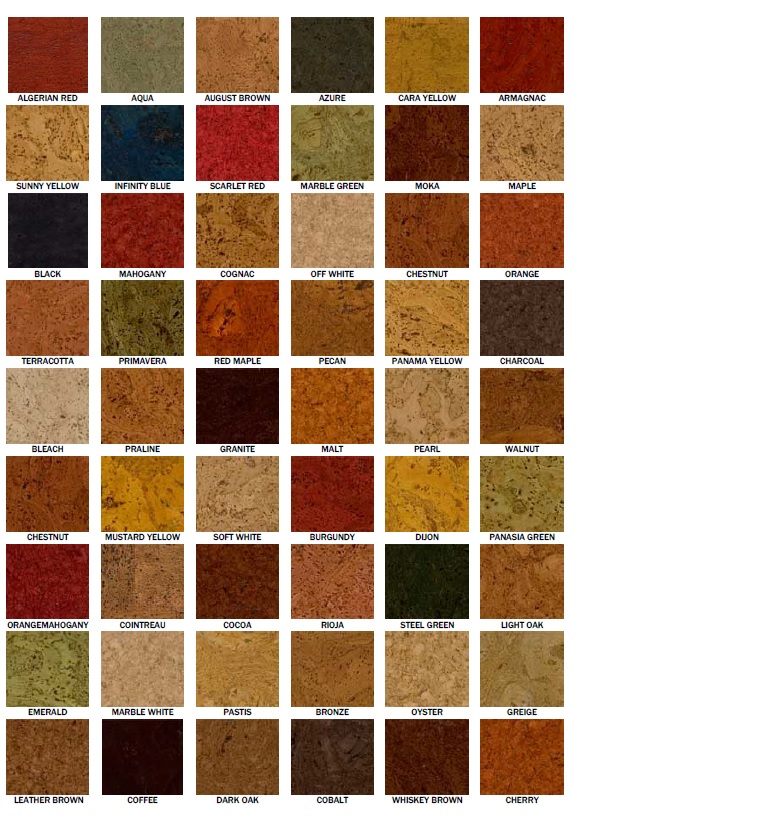
- Cork Floor Colours
Peel And Stick Cork Flooring Tiles: A Sustainable and Stylish Choice for Your Home
Introduction:
When it comes to flooring options, homeowners are often faced with a myriad of choices. From hardwood to laminate, vinyl to carpet, the possibilities can seem overwhelming. However, if you’re looking for a sustainable and stylish option that offers both functionality and aesthetic appeal, peel and stick cork flooring tiles are worth considering. In this comprehensive guide, we will delve into the world of peel and stick cork flooring tiles, exploring their benefits, installation process, maintenance requirements, and frequently asked questions.
I. What Are Peel And Stick Cork Flooring Tiles?
Peel and stick cork flooring tiles are a type of flooring material made from the bark of the cork oak tree (Quercus suber). The bark is harvested without harming the tree, making it an eco-friendly choice. The cork is then finely ground and mixed with binders before being pressed into convenient tile shapes. These tiles come with adhesive backing that allows for easy installation without the need for additional adhesives or glues.
II. Benefits of Peel And Stick Cork Flooring Tiles:
a) Sustainability: One of the key advantages of peel and stick cork flooring tiles is their sustainability. Cork oak trees can be harvested every nine years without causing any harm to the tree itself. This renewable harvesting process ensures that cork flooring remains an environmentally friendly choice.
b) Durability: Despite its soft and cushiony texture underfoot, cork is remarkably durable. It can withstand heavy foot traffic without suffering from wear and tear over time. Additionally, cork is resistant to moisture, mold, mildew, and pests, making it an excellent choice for areas prone to humidity or moisture such as kitchens and bathrooms.
c) Sound Insulation: Cork’s unique cellular structure contains millions of air-filled pockets that act as natural sound absorbers. This makes peel and stick cork flooring tiles an ideal choice for reducing noise transmission between floors. Whether you live in an apartment building or have a busy household, cork flooring can help create a peaceful and quiet environment.
d) Thermal Insulation: Another benefit of cork flooring is its excellent thermal insulation properties. The air-filled cells of cork act as natural thermal barriers, helping to keep your home warm in the winter and cool in the summer. This can lead to energy savings and a more comfortable living space.
e) Comfort: Peel and stick cork flooring tiles offer a soft and cushiony feel underfoot, making them comfortable to walk on for extended periods. This is especially beneficial for those with joint pain or foot conditions, as the natural elasticity of cork helps absorb impact and reduce strain on the joints.
III. Installation Process:
Installing peel and stick cork flooring tiles is a straightforward process that can be completed by most DIY enthusiasts. Here are the general steps involved:
1. Prepare the Subfloor: Ensure that the subfloor is clean, dry, and level before installing the cork tiles. Remove any debris or existing flooring materials, and make any necessary repairs to ensure a smooth surface.
2. Measure and Plan: Measure the dimensions of your room to determine how many tiles you will need. It’s advisable to purchase some extra tiles to account for any mistakes or future replacements.
3. Acclimate the Tiles: Leave the boxes of cork flooring tiles in the room where they will be installed for at least 48 hours before installation. This allows them to adjust to the temperature and humidity of the space.
4. Start from a Corner: Begin Installing the cork tiles in a corner of the room. Peel off the backing of one tile and stick it firmly onto the subfloor, starting at the corner. Press down on the tile to ensure proper adhesion.
5. Continue Installation: Peel off the backing of the next tile and align it with the edge of the first tile. Press down firmly to stick it in place. Repeat this process, working your way across the room in rows.
6. Trim and Fit: As you reach the edges of the room or encounter obstacles such as doorways, you may need to trim or cut tiles to fit. Use a utility knife or a cork-specific cutting tool to make precise cuts.
7. Apply Pressure: Once all the tiles are installed, use a heavy roller or a weighted object to apply pressure evenly across the entire floor. This will help ensure strong adhesion and prevent any loose tiles.
8. Allow for Expansion: Cork flooring can expand and contract with changes in temperature and humidity. Leave a small gap (about 1/4 inch) around the perimeter of the room to allow for this movement.
9. Finishing Touches: Install baseboards or molding to cover the gaps around the edges of the room. This will give your installation a polished and finished look.
10. Maintenance: To keep your peel and stick cork flooring tiles looking their best, sweep or vacuum regularly to remove dirt and debris. Avoid using harsh chemicals or abrasive cleaners that can damage the surface. Instead, use a damp mop with a mild detergent specifically designed for cork floors.
By following these steps, you can easily install peel and stick cork flooring tiles and enjoy all the benefits they offer in terms of sustainability, durability, sound and thermal insulation, and comfort. Installing peel and stick cork flooring tiles is a relatively simple process that can be done by following these steps:
1. Prepare the Subfloor: Make sure the subfloor is clean, dry, and level. Remove any debris or existing flooring materials. Repair any uneven areas to ensure a smooth surface.
2. Measure and Plan: Measure the dimensions of the room to determine how many tiles you will need. It’s recommended to purchase some extra tiles to account for mistakes or future replacements.
3. Acclimate the Tiles: Leave the boxes of cork flooring tiles in the room where they will be installed for at least 48 hours before installation. This allows them to adjust to the temperature and humidity of the space.
4. Start from a Corner: Begin installing the cork tiles in a corner of the room. Peel off the backing of one tile and firmly stick it onto the subfloor, starting at the corner. Press down on the tile to ensure proper adhesion.
5. Continue Installation: Peel off the backing of the next tile and align it with the edge of the first tile. Press down firmly to stick it in place. Repeat this process, working your way across the room in rows.
6. Trim and Fit: As you reach the edges of the room or encounter obstacles such as doorways, you may need to trim or cut tiles to fit. Use a utility knife or a cork-specific cutting tool to make precise cuts.
7. Apply Pressure: Once all the tiles are installed, use a heavy roller or a weighted object to apply pressure evenly across the entire floor. This helps ensure strong adhesion and prevents any loose tiles.
8. Allow for Expansion: Cork flooring can expand and contract with changes in temperature and humidity. Leave a small gap (about 1/4 inch) around the perimeter of the room to allow for this movement.
9. Finishing Touches: Install baseboards or molding to cover the gaps around the edges of the room. This gives your installation a polished and finished look.
10. Maintenance: To keep your peel and stick cork flooring tiles looking their best, sweep or vacuum regularly to remove dirt and debris. Avoid using harsh chemicals or abrasive cleaners that can damage the surface. Instead, use a damp mop with a mild detergent specifically designed for cork floors.
By following these steps, you can easily install peel and stick cork flooring tiles and enjoy all the benefits they offer in terms of sustainability, durability, sound and thermal insulation, and comfort.