The epoxy floors coatings are usually utilized over concrete floors to supply best binding results and visually attractive surfaces. Epoxy floors are able to stand up to weight and pressure high. Probably the most regularly used type of epoxy flooring for the place is the water based version as it likely the easiest of them to utilize as it's made up both of the primer and also topcoat and is definitely ideal for using in garage areas.
Here are Images about Epoxy Flooring Installation
Epoxy Flooring Installation
With good surface preparation, manufacturing epoxy floor covering programs enjoy a high possibility of success. It lays well on countless sorts of surfaces like metal, concrete, tile and wood and it is unwilling to most strong chemicals making for a durable and some color and long-lasting surface might possibly be extra to the epoxy for a bit of flare. Epoxy concrete paints are highly durable and will withstand pressure which is high.
Designer Epoxy Floor Installation That You Can Do Yourself
They are available in many different shades so matching isn't a difficulty and you'll get the same very long lasting durability that business industries get. You'll find many different flooring businesses specializing in the apps of epoxy resins. Epoxy flooring coatings are actually versatile and high-performing because of the inherent chemical attributes of epoxy. Odds are actually that the concrete is damaged as well as stained.
Images Related to Epoxy Flooring Installation
How Thick Should an Epoxy Floor Coating Be? – Florock

The Cons of DIY Epoxy Garage Coatings Dreamcoat Flooring

How to Install Epoxy Flooring » Residence Style
Designer Metallic Epoxy Floor Installation
How to Apply Garage Floor Epoxy Coatings The DIY Guide All
How to Install Epoxy Flooring for Garages – Pro Tool Reviews

Do-It-Yourself Epoxy Floor Coating
How to Apply Epoxy Floor Paint – A 7 step guide
Why Choose a Professional Epoxy Floor Installer

What Is Epoxy Floor Coating? A Homeowneru0027s Guide – Epoxy Floors LLC
Lifetime Epoxy Flooring Blog – Lifetime Epoxy Floor Coatings

Installation of Metallic Epoxy Flooring

Related articles:
- Epoxy Flooring Living Room
- 3D Epoxy Flooring
- Epoxy Flooring Ideas
- Residential Epoxy Flooring
- Epoxy Flooring Waterproof
- Epoxy Floor Coating Tips
- Metallic Epoxy Floor Designs
- Epoxy Flooring Contractors
- Epoxy Floor Coating Material
- Epoxy Floor Coating With Flakes
Epoxy Flooring Installation: A Comprehensive Guide to Enhancing Your Space
Introduction:
Epoxy flooring has become increasingly popular in recent years due to its durability, versatility, and aesthetic appeal. Whether you are considering epoxy flooring for your home, office, or industrial space, it is essential to understand the installation process thoroughly. This comprehensive guide will provide you with all the information you need to know about epoxy flooring installation, from preparation to finishing touches.
1. Understanding Epoxy Flooring:
Epoxy flooring is a type of seamless floor coating that consists of epoxy resin and a hardening agent. When mixed together, these components create a chemical reaction that forms a rigid, durable surface. Epoxy floors can be customized with various colors, patterns, and textures, making them suitable for a wide range of applications.
FAQs:
Q: What are the benefits of epoxy flooring?
A: Epoxy flooring offers numerous advantages such as high resistance to chemicals, stains, impact, and abrasion. It is easy to clean and maintain and can enhance the overall appearance of your space.
Q: Can epoxy flooring be installed on any surface?
A: Epoxy flooring can be applied to various substrates such as concrete, wood, and metal. However, proper surface preparation is crucial for achieving optimal adhesion.
2. Preparing the Surface:
Before installing epoxy flooring, thorough surface preparation is essential for ensuring a long-lasting bond and a flawless finish. Here are the key steps involved in preparing the surface:
a) Cleaning:
The first step is to remove any dirt, dust, grease, or other contaminants from the surface. This can be done by sweeping or vacuuming the area followed by scrubbing with a mild detergent solution.
b) Repairing Cracks and Imperfections:
Any cracks or imperfections on the surface should be repaired before applying epoxy. Small cracks can be filled with an epoxy crack filler or a suitable patching compound, while larger cracks may require professional assistance.
c) Diamond Grinding or Shot Blasting:
To enhance the adhesion of the epoxy coating, the surface should be mechanically abraded. This can be achieved through diamond grinding or shot blasting, which removes the top layer of the substrate and creates a rough texture for better bonding.
d) Moisture Testing:
Moisture can compromise the adhesion and performance of epoxy flooring. Conducting a moisture test is crucial to identify any moisture-related issues that need to be addressed before installation.
FAQs:
Q: Can I install epoxy flooring on a newly poured concrete floor?
A: It is recommended to wait at least 30 days after pouring concrete before installing epoxy flooring. This allows sufficient time for curing and moisture evaporation.
Q: What if there are existing coatings on the surface?
A: Existing coatings such as paint or sealers should be removed before applying epoxy flooring. This can be done through mechanical means like sanding, grinding, or chemical stripping.
3. Priming the Surface:
Priming the surface is a crucial step that ensures proper adhesion between the substrate and the epoxy coating. Here’s what you need to know about priming:
a) Choosing the Right Primer:
There are various types of primers available, each designed for specific substrates and conditions. Consult with an epoxy flooring professional to determine the most suitable primer for your project.
b) Applying the Primer:
Follow the manufacturer’s instructions to mix and apply the primer evenly onto the prepared surface. Use a roller or Brush to ensure complete coverage. Allow the primer to dry according to the recommended drying time before proceeding with the epoxy coating application.
4. Applying the Epoxy Coating:
Once the surface has been properly prepared and primed, it is time to apply the epoxy coating. Here are the steps involved in applying epoxy flooring:
a) Mixing the Epoxy Components:
Follow the manufacturer’s instructions to mix the epoxy components together. This usually involves combining a resin and a hardener in specific ratios.
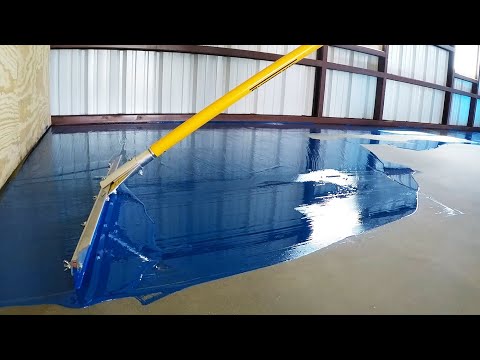
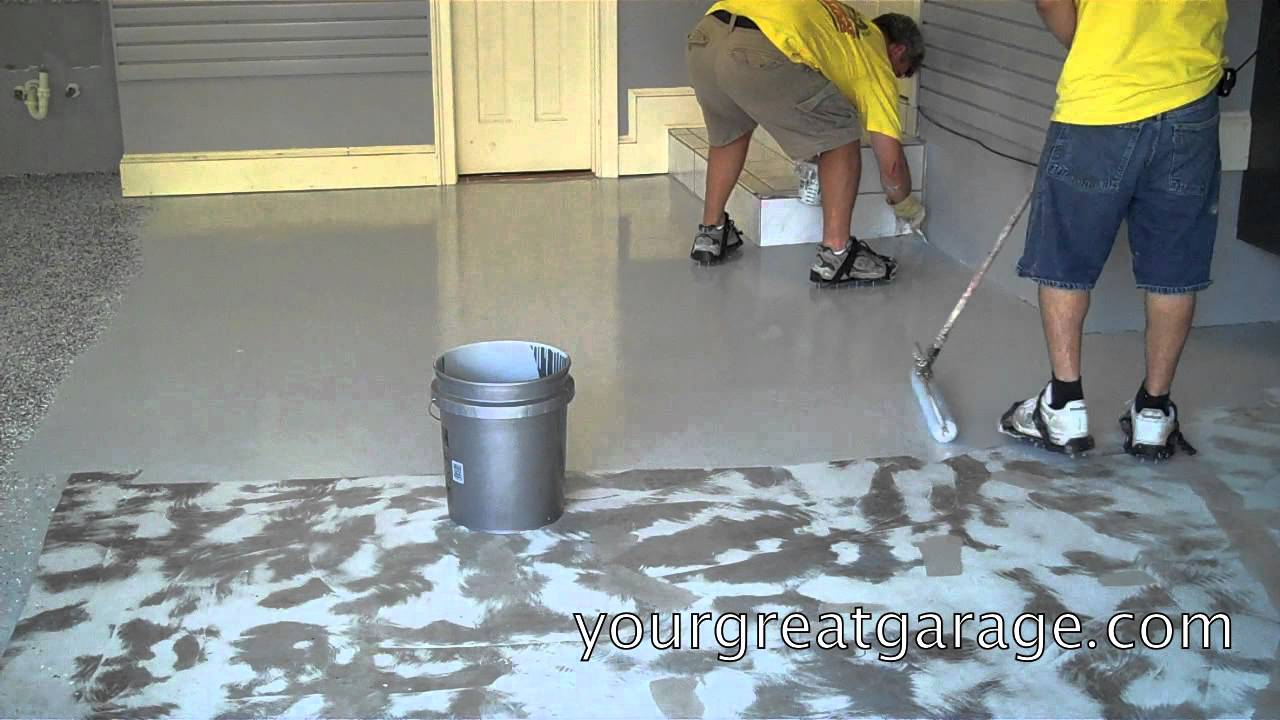
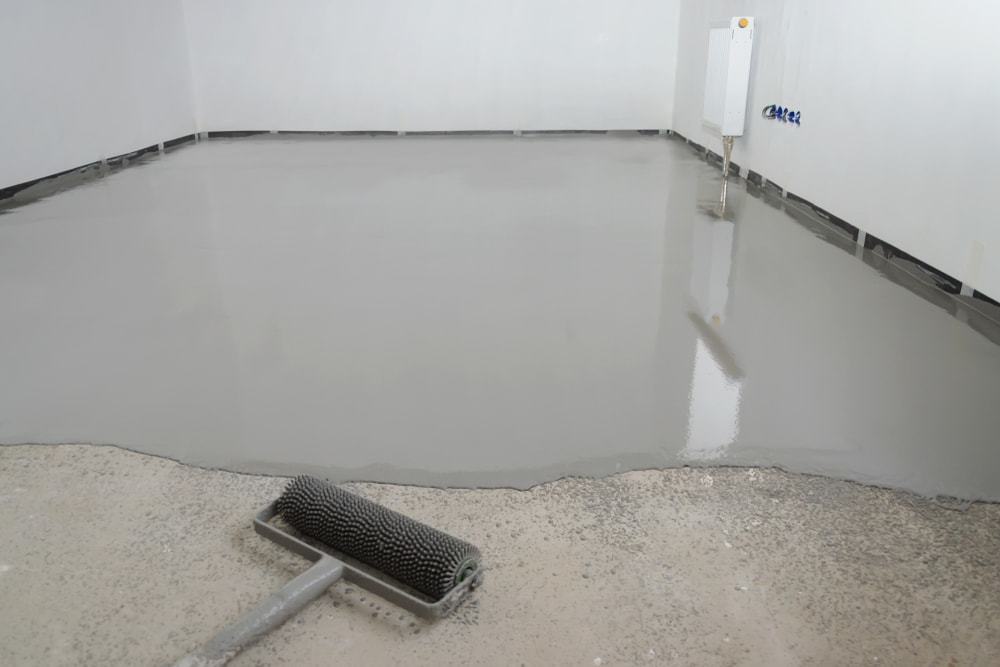
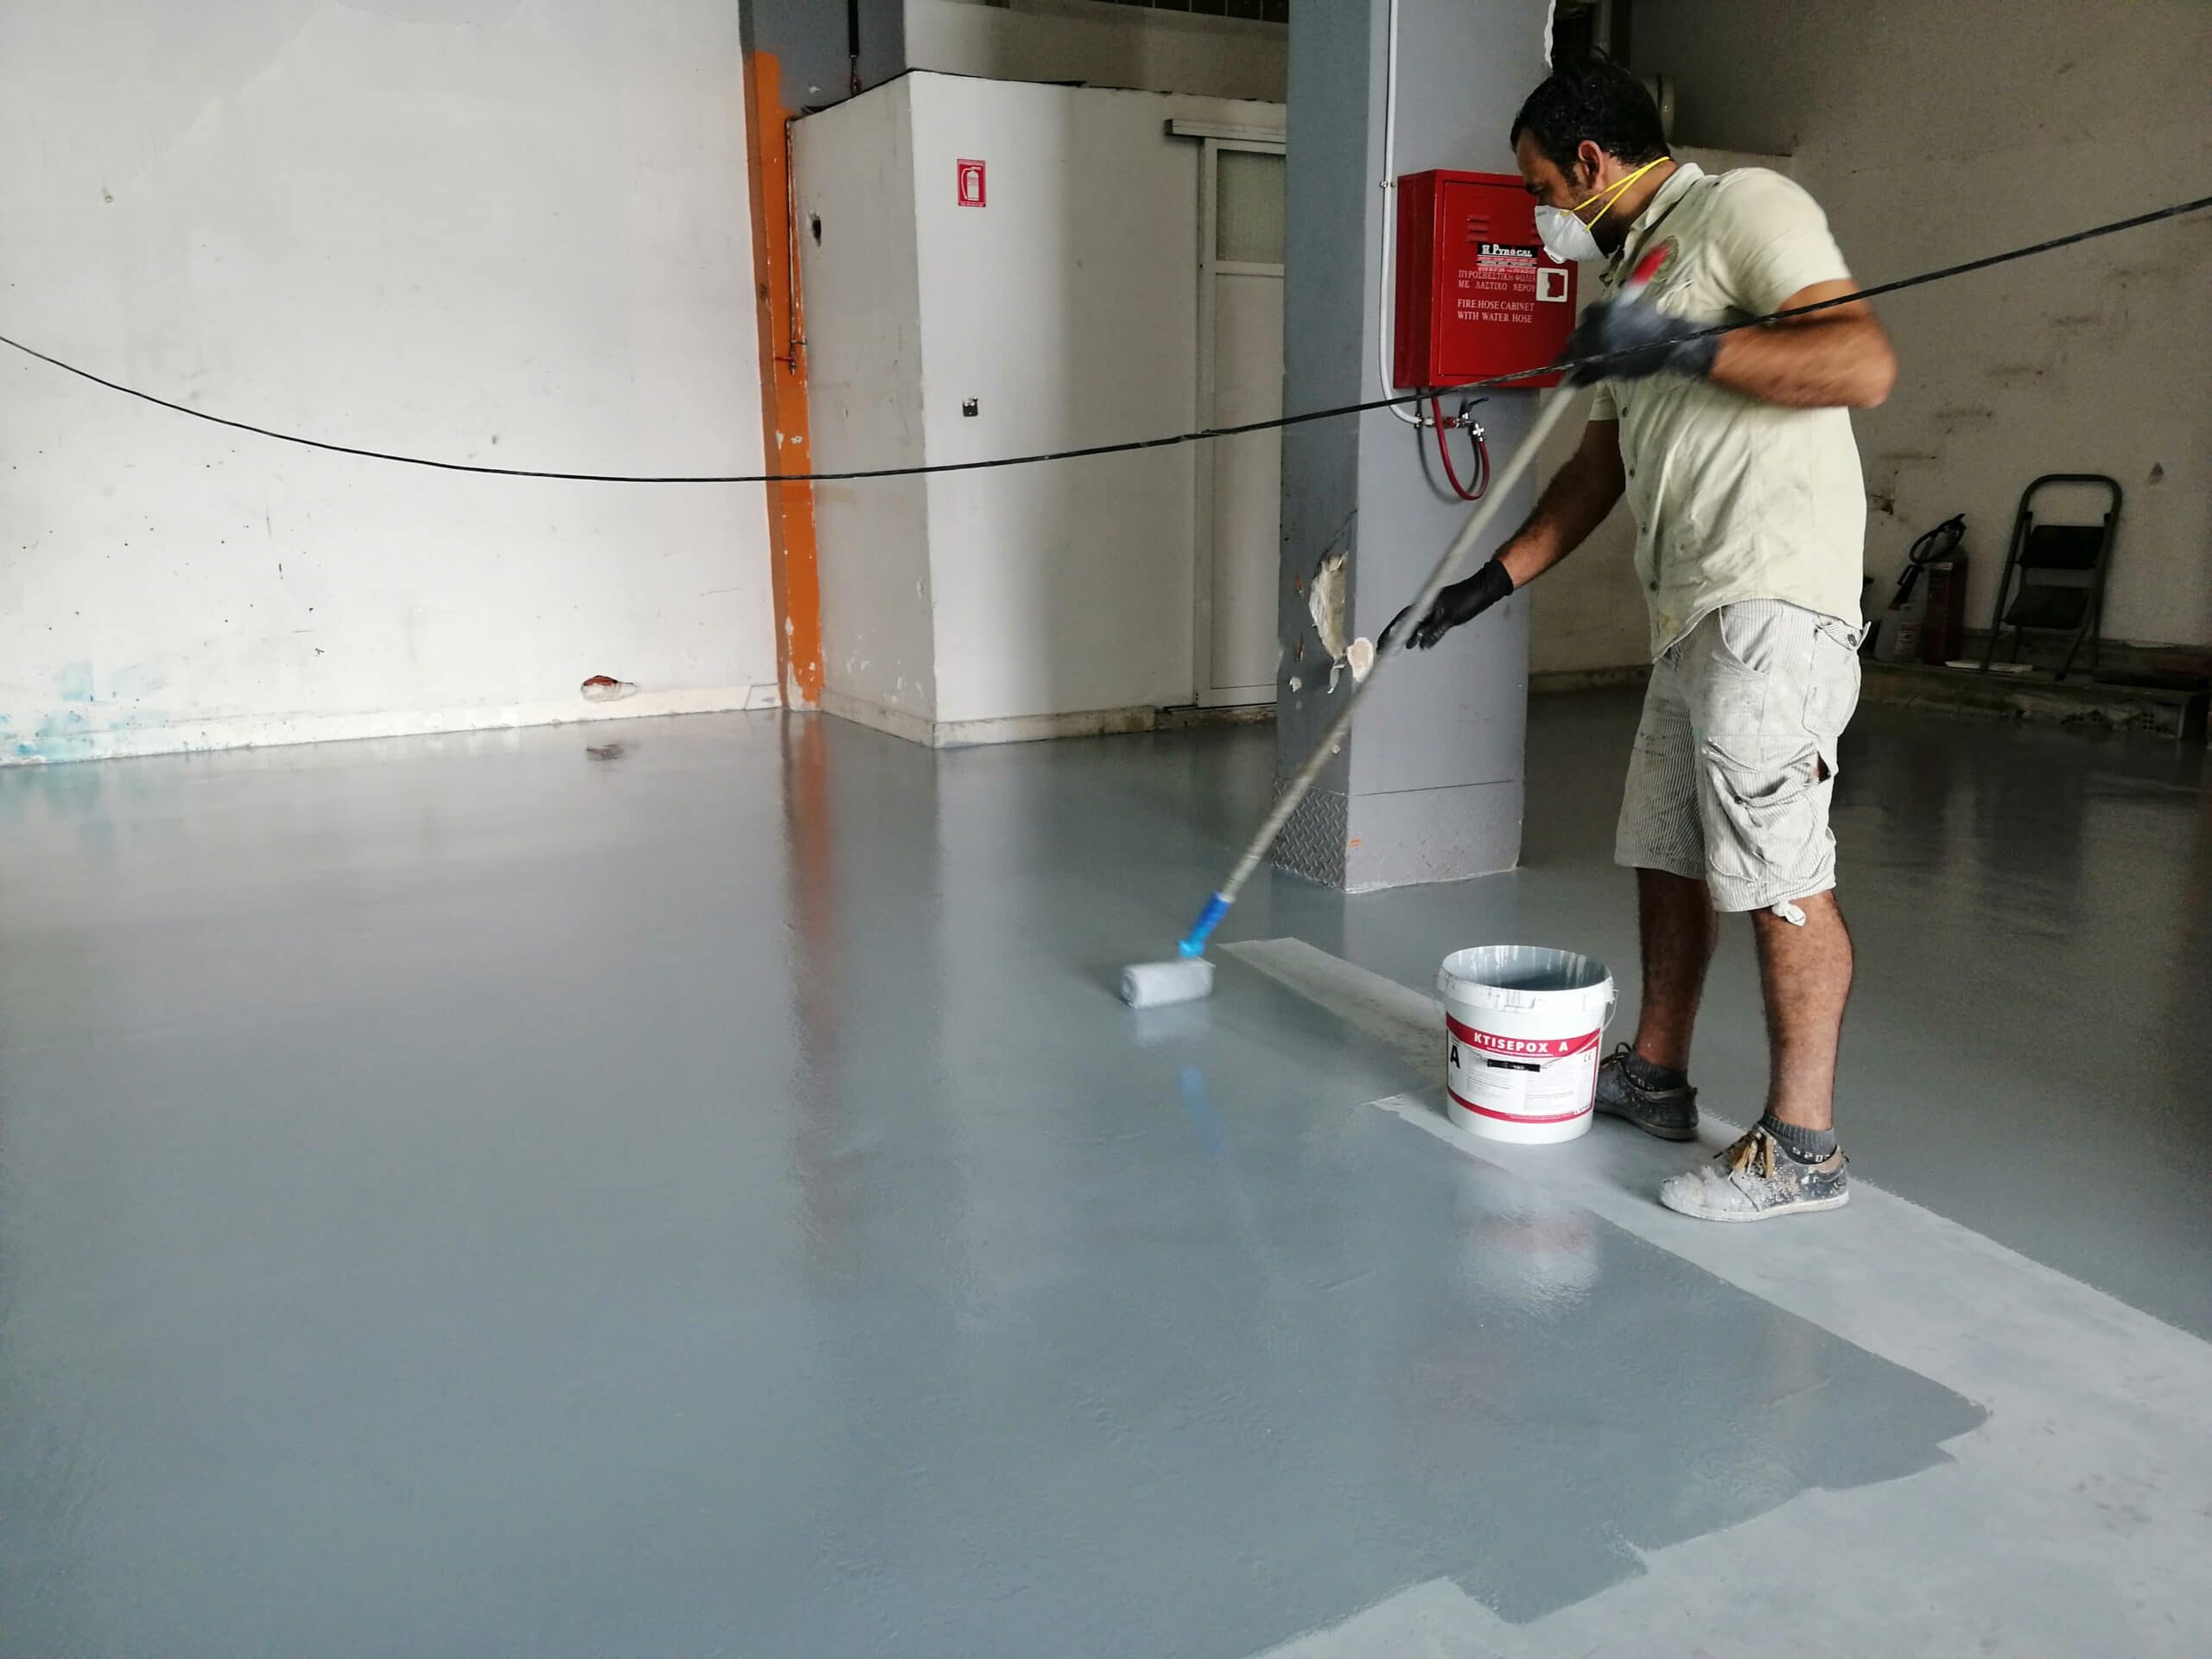
b) Applying the Epoxy:
Using a roller or squeegee, apply the mixed epoxy onto the primed surface. Work in small sections to ensure even coverage and avoid any puddles or uneven thickness.
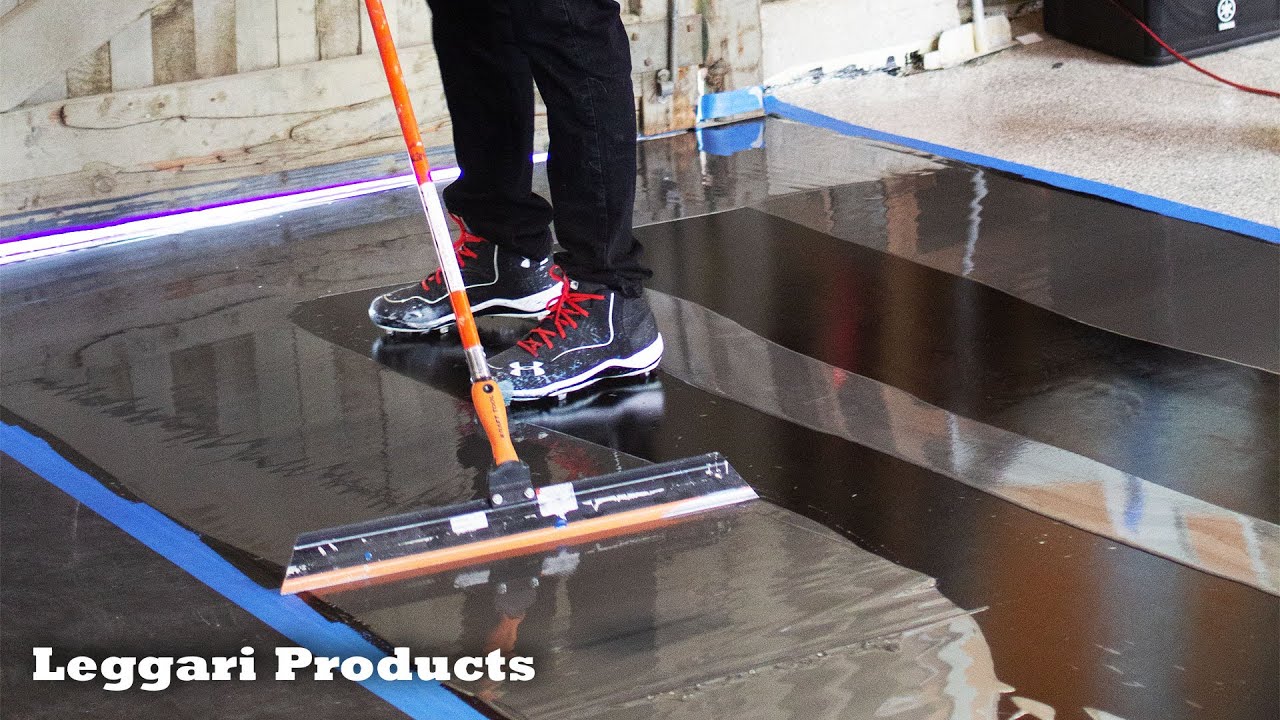
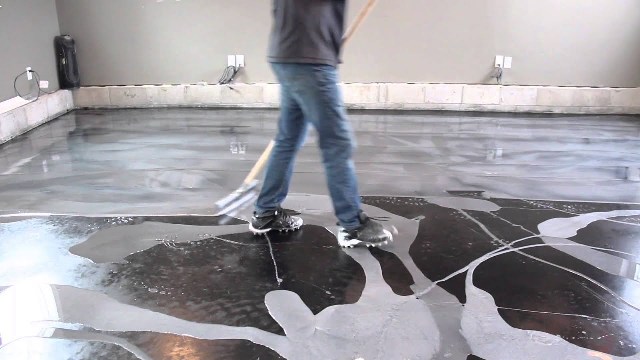
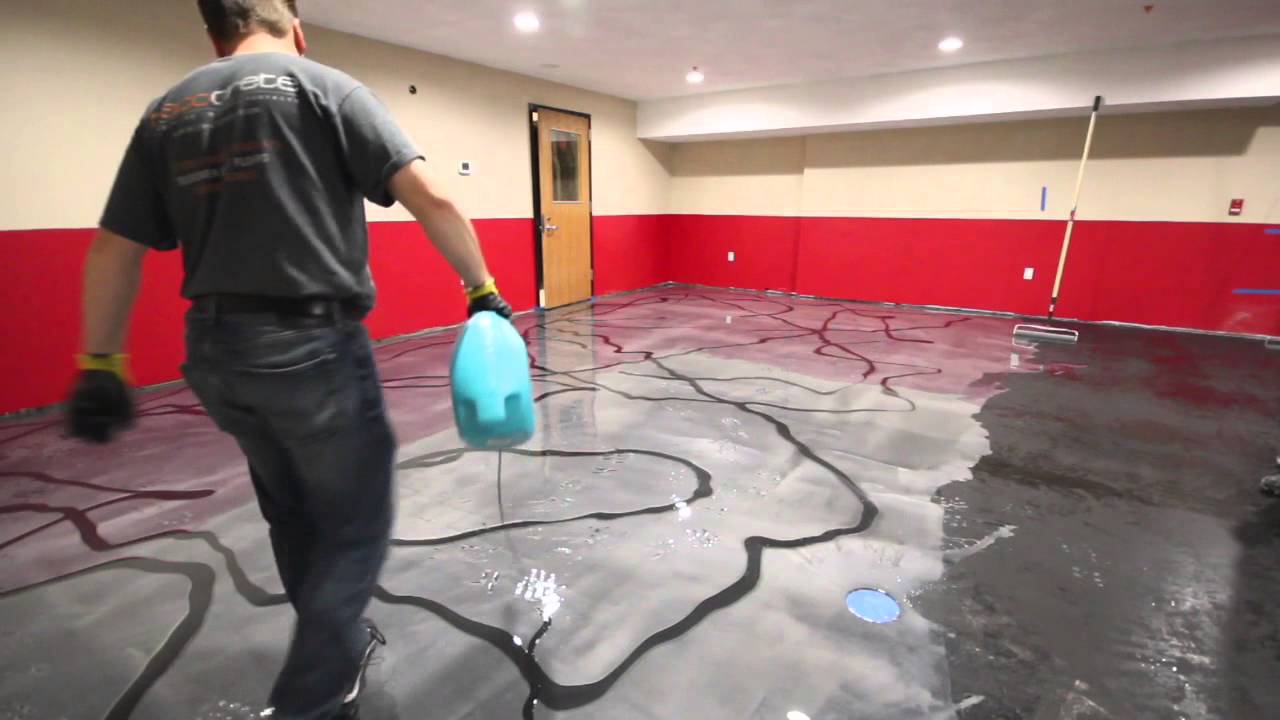
c) Adding Decorative Elements (Optional):
If desired, decorative elements such as color chips or flakes can be added to the wet epoxy surface for a customized look. These should be sprinkled evenly over the surface and sealed with a clear topcoat.
d) Allowing Proper Curing Time:
After applying the epoxy, allow it to cure according to the manufacturer’s recommendations. This typically involves keeping foot traffic and heavy objects off the surface for a specified period of time.
e) Applying a Topcoat (Optional):
For added durability and protection, applying a clear topcoat is recommended. This will provide an extra layer of resistance against chemicals, abrasion, and UV damage.
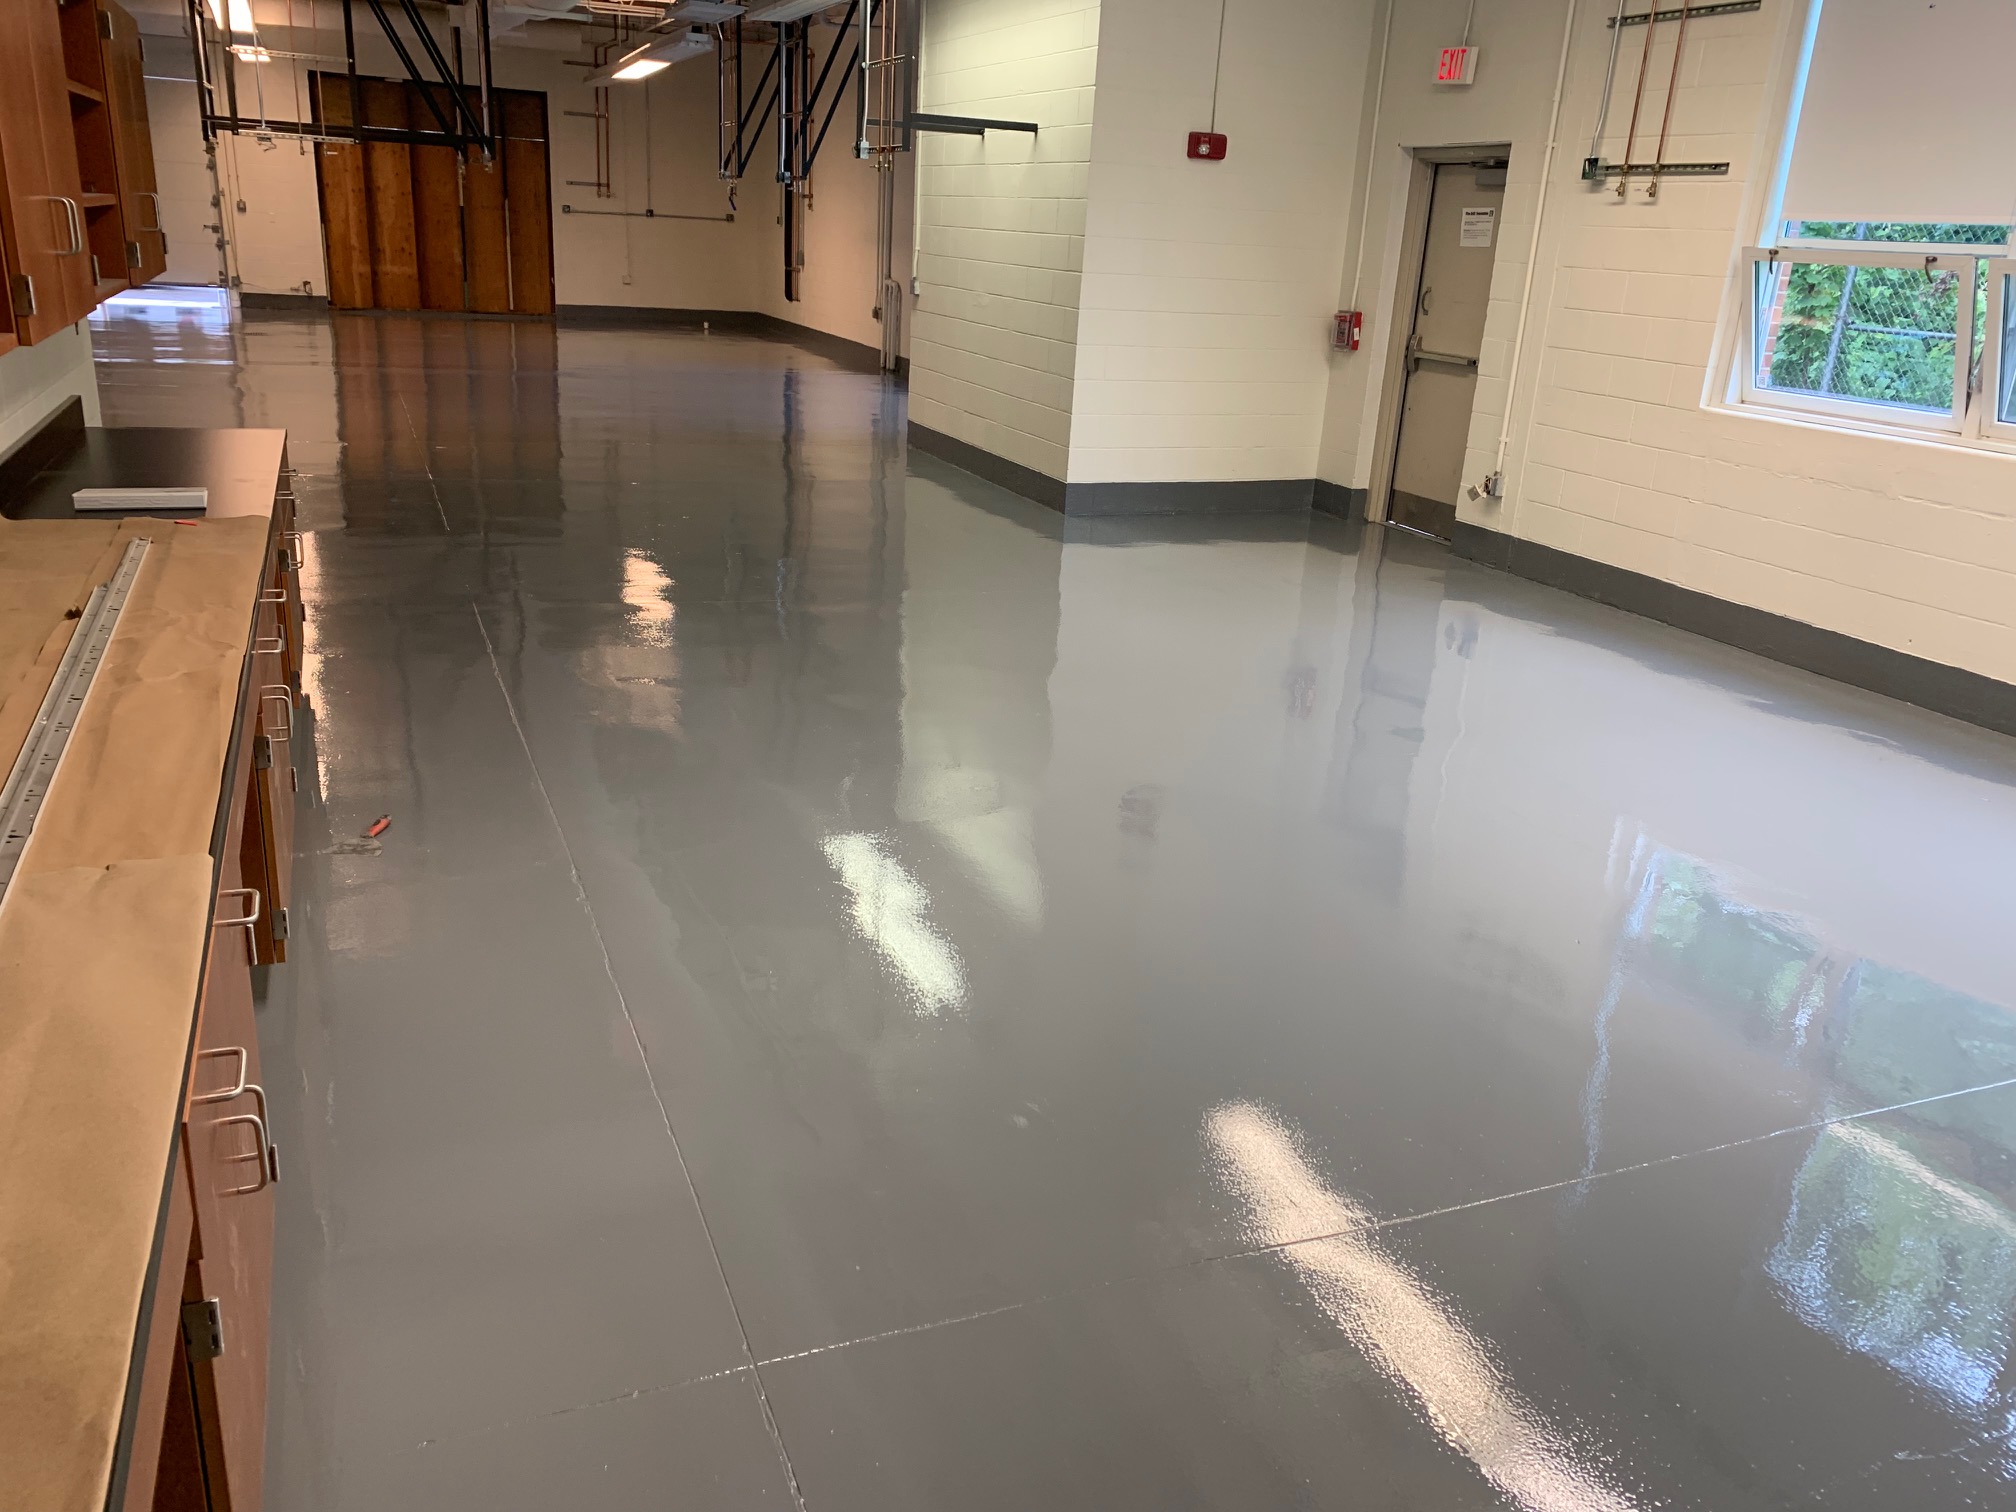
By following these steps for surface preparation, priming, and epoxy application, you can achieve a high-quality, long-lasting epoxy flooring system. It is important to consult with professionals or manufacturers for specific instructions and recommendations based on your project requirements. Overall, the process of applying epoxy coating to a surface involves several key steps: surface preparation, priming, mixing and applying the epoxy, adding decorative elements (optional), allowing proper curing time, and applying a topcoat (optional). Each step is important for achieving a high-quality and long-lasting epoxy flooring system. It is recommended to consult with professionals or manufacturers for specific instructions and recommendations based on your project requirements. Overall, the process of applying an epoxy coating involves the following steps:
1. Surface Preparation: Ensure the surface is clean, dry, and free from any debris or contaminants. Repair any cracks or imperfections in the surface using appropriate methods.
2. Priming: Follow the manufacturer’s instructions to mix and apply the primer evenly onto the prepared surface. Use a roller or brush to ensure complete coverage. Allow the primer to dry according to the recommended drying time before proceeding with the epoxy coating application.
3. Mixing the Epoxy Components: Follow the manufacturer’s instructions to mix the epoxy components together, usually a resin and a hardener, in specific ratios.
4. Applying the Epoxy: Using a roller or squeegee, apply the mixed epoxy onto the primed surface. Work in small sections to ensure even coverage and avoid any puddles or uneven thickness.
5. Adding Decorative Elements (Optional): If desired, decorative elements such as color chips or flakes can be added to the wet epoxy surface for a customized look. These should be sprinkled evenly over the surface and sealed with a clear topcoat.
6. Allowing Proper Curing Time: After applying the epoxy, allow it to cure according to the manufacturer’s recommendations. This typically involves keeping foot traffic and heavy objects off the surface for a specified period of time.
7. Applying a Topcoat (Optional): For added durability and protection, applying a clear topcoat is recommended. This will provide an extra layer of resistance against chemicals, abrasion, and UV damage.
It is important to consult with professionals or manufacturers for specific instructions and recommendations based on your project requirements. Following these steps will help you achieve a high-quality, long-lasting epoxy flooring system.