Properly sealed as well as maintained stained concrete lasts for generations and rarely needs replacement. Concrete flooring is actually outstanding flooring that is designing a long lasting impression on the quality of the life of yours by improving it holistically, no to mention the eco friendly features. The shiny surface is then sealed to keep the visual appeal and boost the floor's durability.
Here are Images about How To Lay Concrete Floor Slab
How To Lay Concrete Floor Slab
Solid wood floors require varnishing on a routine schedule, carpets could be a nightmare which need to be cleaned regularly, while the concrete flooring surfaces are actually sustainable and don't need any maintenance, other than a cleaning if needed. At this point cleaning on a polished concrete floor is so much easier and demands less time. Concrete floors might be polished dry or wet.
How to Pour a Concrete Slab
/PouringConcreteSlab-715d832fef224f53a859947db1914b16.jpg)
The benefits that one could buy from the polished concrete floors are usually numerous and several of them include the basic fact that the polished concrete floors provide a real low cost solution to the notion of flooring as a well as offering a good option in terms of green options.
Images Related to How To Lay Concrete Floor Slab
How to Pour a Concrete Slab for Beginners DIY
How to Place and Finish a Concrete Floor (with Pictures) – wikiHow

DIY Concrete Floor: Pouring Slab 3/3
How to Pour Concrete Over-Existing Concrete Slab? – The Constructor

How to Pour a Concrete Slab (DIY) Family Handyman
Concrete slab floor and how to make one by hand mixing the concrete
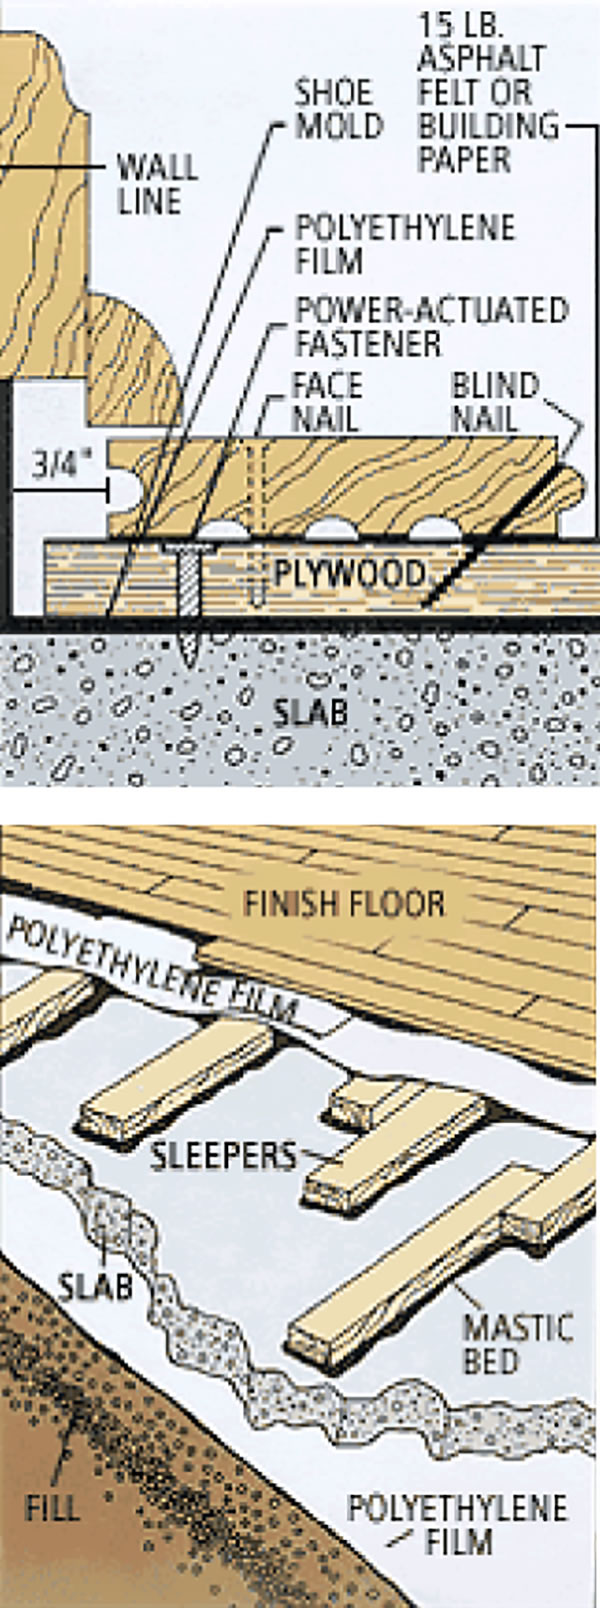
Installing a Hardwood Floor Over a Concrete Slab – American
6 Simple Steps for Concrete Floor Pour for a Durable Concrete Slab

DIY Laying a Concrete Slab
Concrete Floor Slab Construction Process – The Constructor

How to pour a concrete floor for an existing garage Best How-To Guide
How to prepare a site for concrete: base, forms and rebar

Related articles:
- Stained Concrete Floors Design
- Decorative Concrete Floors
- Acid Stained Concrete Floors
- Polished Concrete Floor In Bathroom
- Concrete Floor Stain And Polish
- White Mold On Concrete Floor
- Polished Concrete Floor
- Polished Concrete Floor Cleaning
- Staining Concrete Floors Indoors Yourself
- Flooring Options For Concrete Floors
Title: How to Lay a Concrete Floor Slab: A Comprehensive Guide
Introduction:
A concrete floor slab provides a solid foundation for various structures, ensuring durability and stability. Whether you’re building a garage, shed, or even extending your home, knowing how to lay a concrete floor slab is a valuable skill. In this comprehensive guide, we will walk you through the step-by-step process of laying a concrete floor slab, providing detailed instructions and helpful tips along the way.
I. Planning and Preparation:
Before starting any construction project, careful planning and thorough preparation are essential. This section will cover everything you need to consider before laying your concrete floor slab.
1. Assessing the Site:
Begin by evaluating the site where you intend to lay the concrete floor slab. Ensure that the ground is level and free from debris. If needed, remove any obstacles, such as rocks or tree roots, that may interfere with the pouring process.
2. Measuring and Calculating:
Accurate measurements are crucial for determining the amount of concrete required for your project. Measure the length and width of the area where the slab will be laid. Multiply these dimensions to calculate the total square footage. Additionally, consider the desired thickness of your slab (typically 4 inches) when calculating material quantities.
FAQs:
Q1: How do I determine the thickness of my concrete floor slab?
A1: The recommended thickness for most residential applications is 4 inches (10 cm). However, if you anticipate heavy loads or specific requirements, consult with a structural engineer for accurate guidance.
Q2: What type of concrete mix should I use?
A2: For most floor slabs, a standard concrete mix consisting of cement, aggregate (sand or gravel), and water is suitable. Consult with your local supplier to ensure you select an appropriate mix for your specific needs.
II. Gathering Materials and Equipment:
Once you have determined the necessary measurements and calculated how much concrete you’ll need, it’s time to gather the materials and equipment required for the job.
1. Materials:
– Concrete mix: Purchase the appropriate amount of quality concrete mix from a reputable supplier.
– Reinforcement: Depending on your project’s requirements, you may need to include steel reinforcement in the form of rebar or wire mesh.
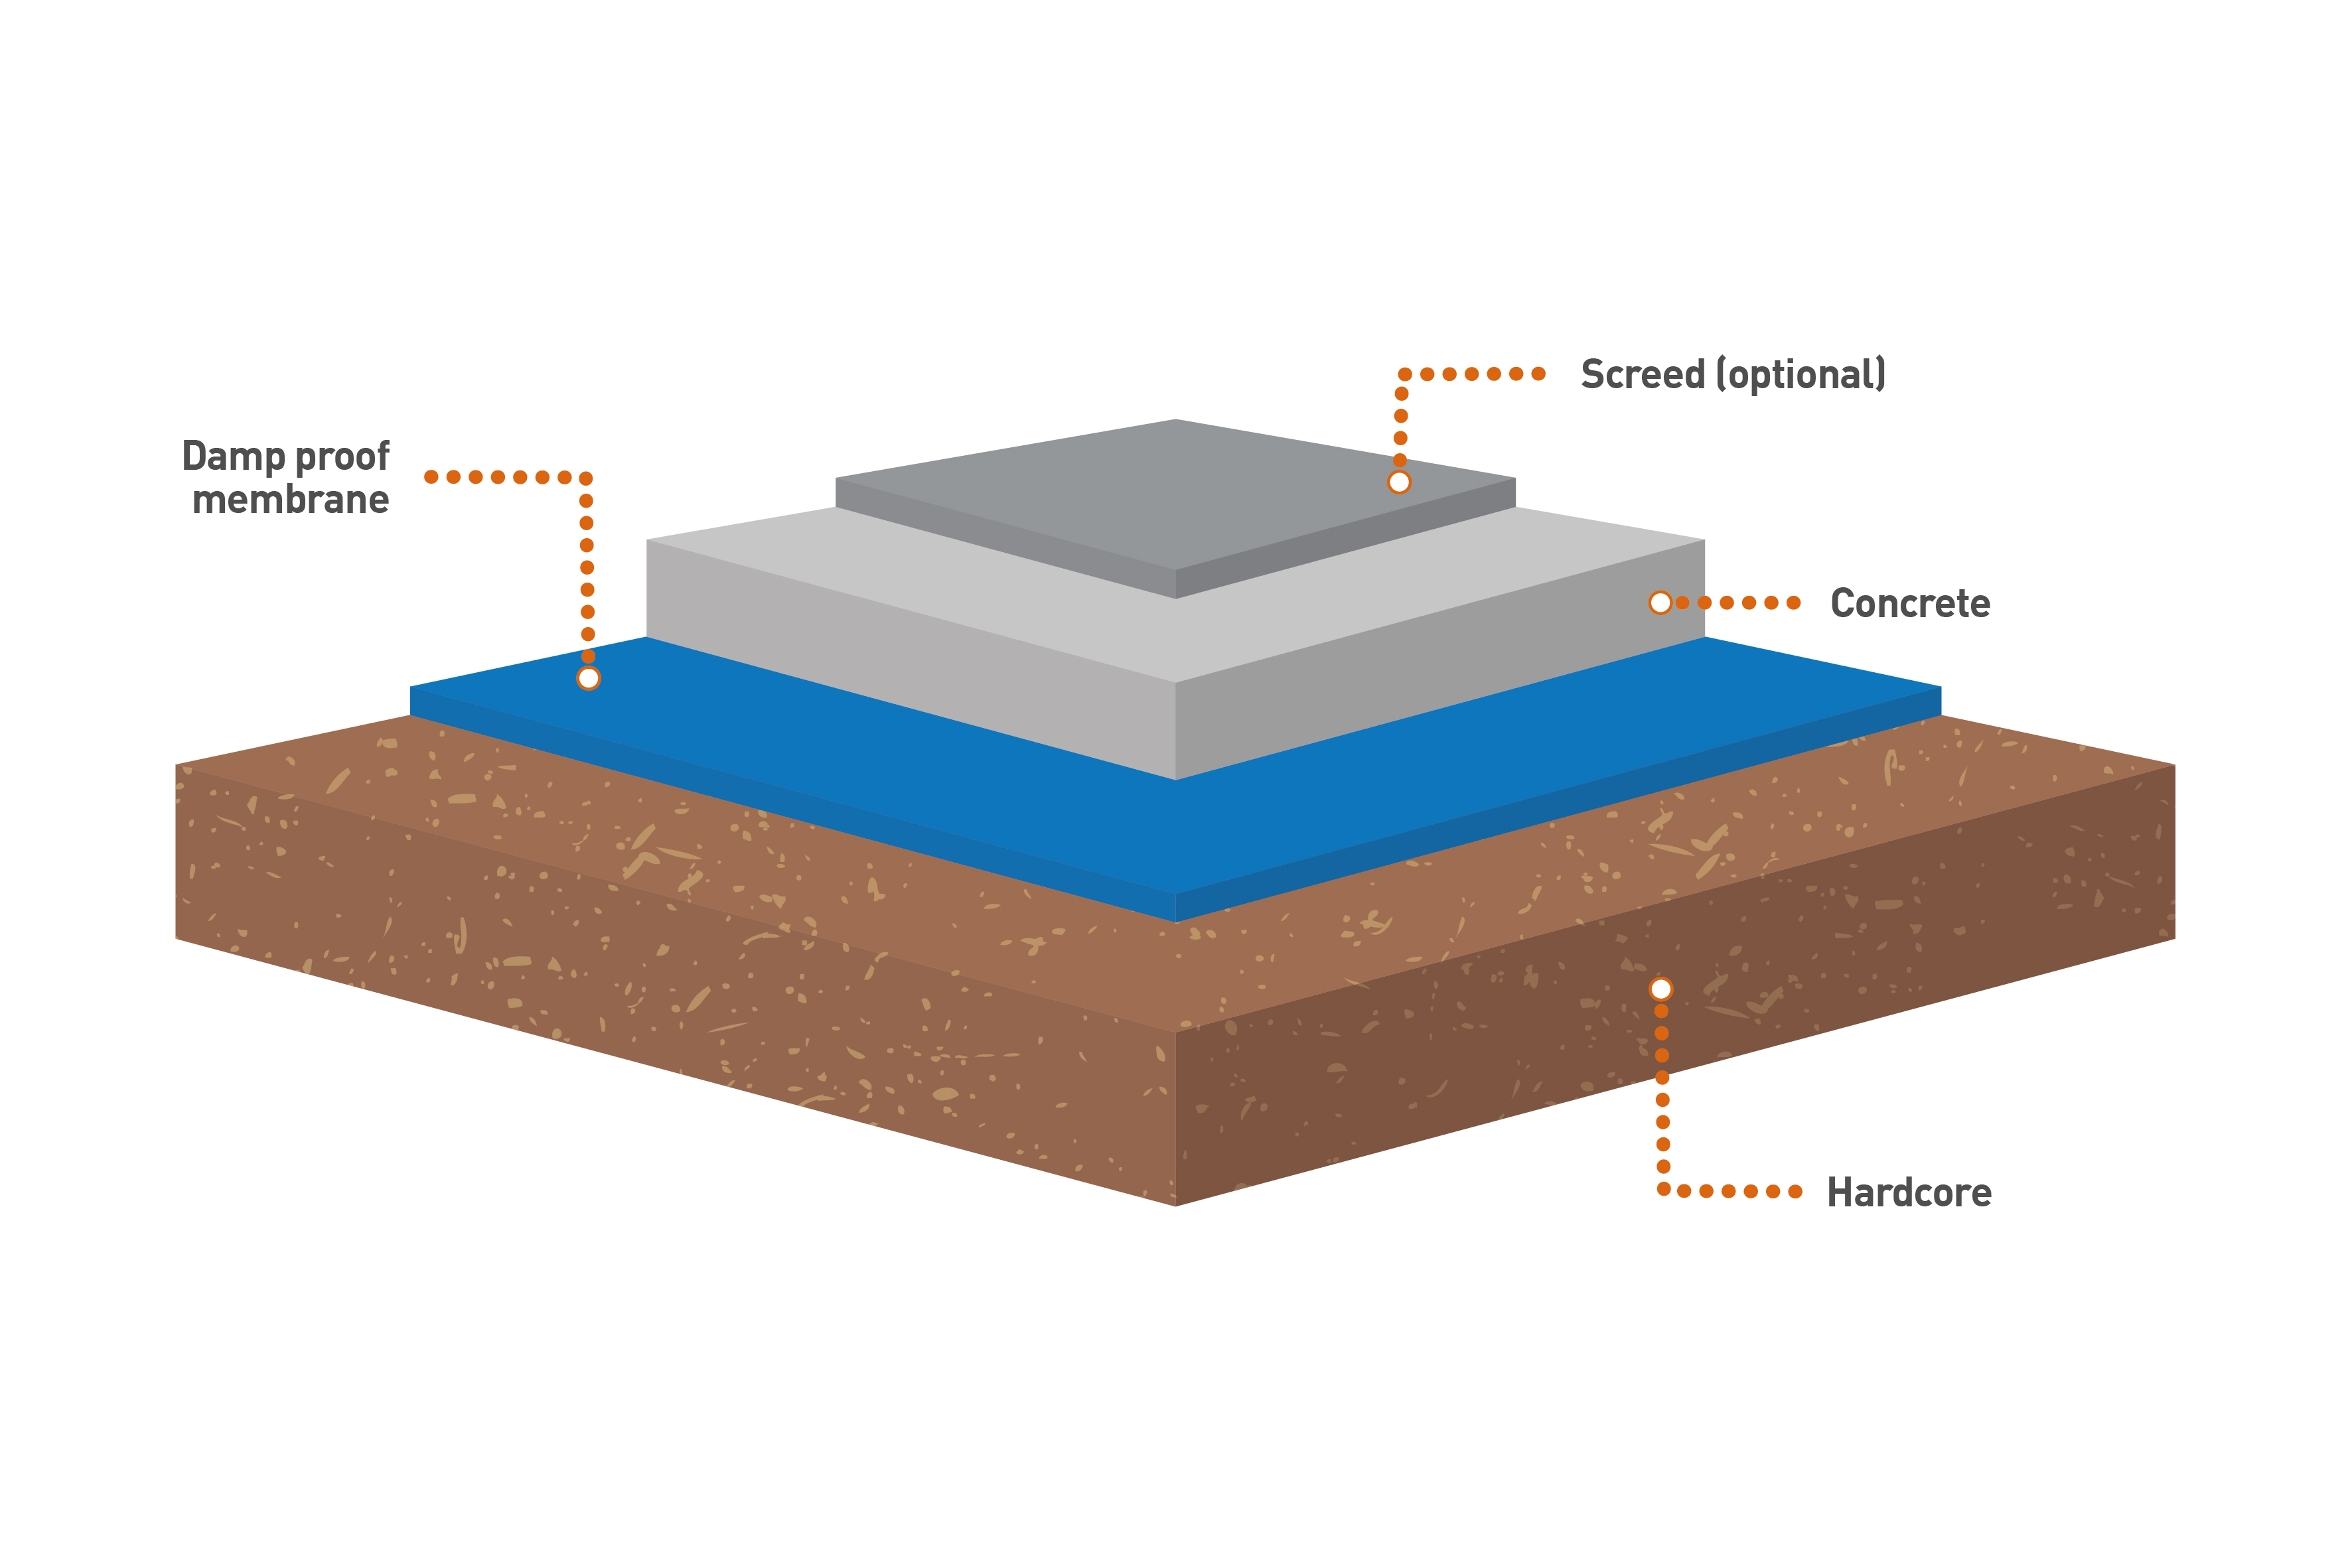
– Plastic sheeting: Use a plastic sheeting layer to prevent moisture from seeping up into the slab.
– Expansion joint material: Install expansion joints to minimize cracking due to temperature fluctuations.
2. Equipment:
– Shovel and wheelbarrow: For moving and transporting materials.
– Level and string lines: Essential tools for ensuring an even and level surface.
– Screed board and float: Used to smooth out the concrete surface during the finishing process.
– Concrete mixer or mixing container: Required if hand-mixing the concrete.
– Tamping tool or vibrating plate compactor (optional): Useful for compacting the base soil before pouring concrete.
FAQs:
Q1: Do I need reinforcement for my concrete floor slab?
A1: Reinforcement is not always necessary for small residential floor slabs. However, if you anticipate heavy loads or potential cracking due to underlying soil conditions, reinforcing with rebar or wire mesh is advisable.
Q2: Can I mix concrete by hand?
A2: While it is possible to mix concrete manually, it can be physically demanding and time-consuming. Using a concrete mixer (either rented or purchased) will ensure a more consistent mix and save you considerable effort.
III. Exc Avation and Site Preparation:
Before pouring the concrete slab, you’ll need to prepare the site and excavate the area according to the desired dimensions.
1. Clear the area: Remove any vegetation, rocks, or debris from the site to create a clean surface.
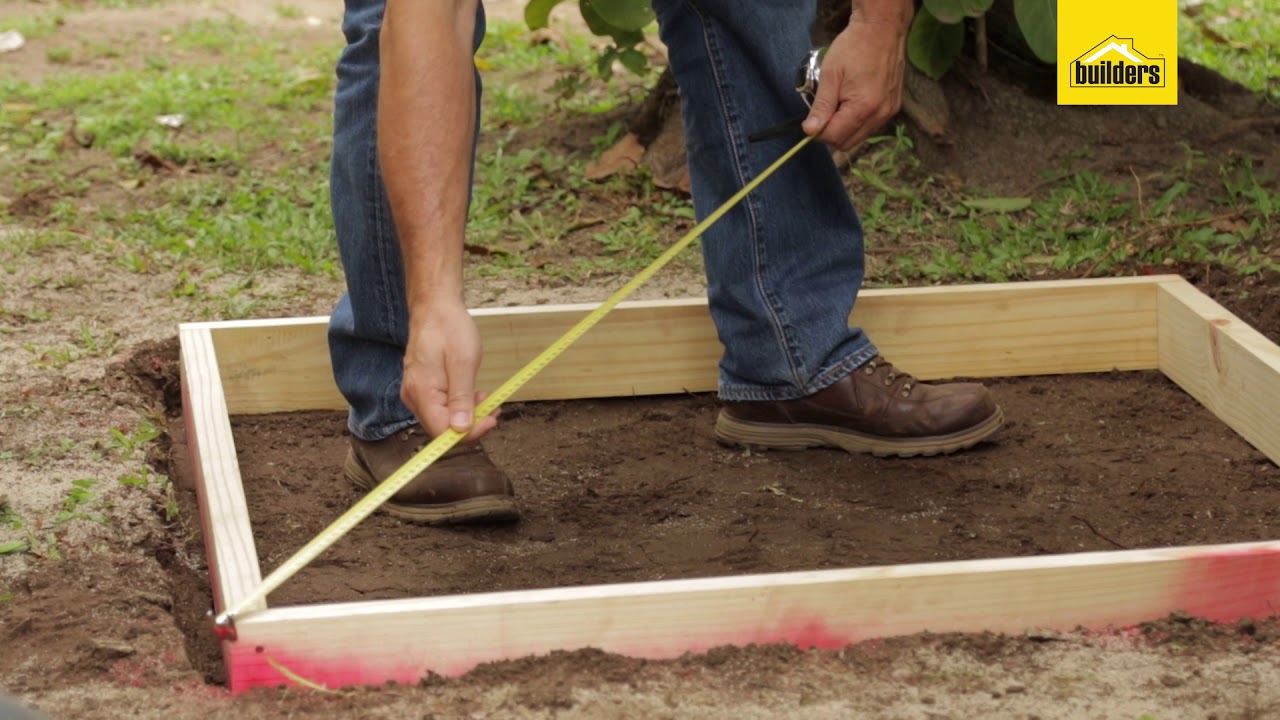
2. Mark the boundaries: Use stakes and string lines to mark the perimeter of the slab. Make sure the corners are square by measuring diagonally from corner to corner and adjusting as necessary.
3. Excavate the site: Dig down to the desired depth, accounting for the thickness of the slab and any additional base material. Compact the soil at the bottom of the excavation with a tamping tool or vibrating plate compactor.
4. Install base material (optional): If your soil conditions are poor or prone to shifting, it may be necessary to add a layer of compacted gravel or crushed stone as a stable base for your concrete slab.
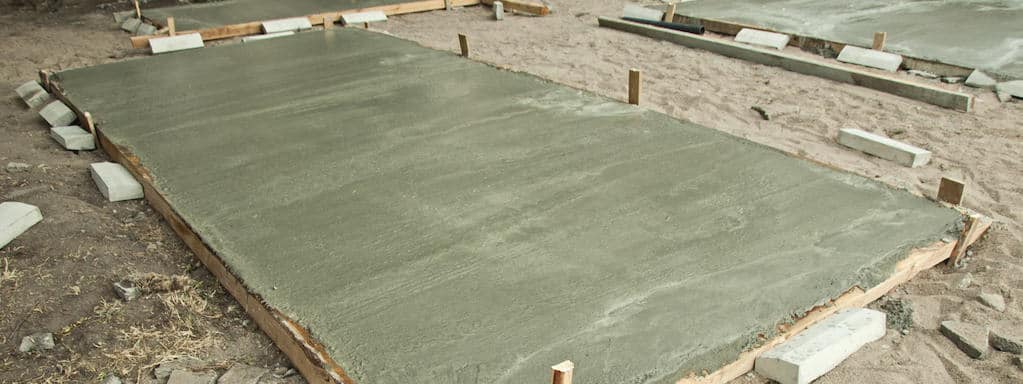
5. Install formwork: Construct sturdy formwork around the perimeter of the slab using wood or metal stakes and plywood or metal panels. Make sure it is level and securely anchored.
FAQs:
Q1: Do I need a permit for pouring a concrete slab?
A1: Permit requirements vary depending on your location and the size of your project. Check with your local building department to determine if a permit is required before starting work.
Q2: How deep should I excavate for my concrete slab?
A2: The recommended depth is typically 4-6 inches (10-15 cm) for residential floor slabs. However, consult with a professional or local building codes for specific requirements in your area.
IV. Pouring and Finishing the Slab:
With the site prepared, it’s time to pour and finish the concrete slab.
1. Prepare the concrete mix: Follow the instructions provided by the concrete supplier to properly mix the concrete. This may involve using a concrete mixer or hand-mixing in a large container.
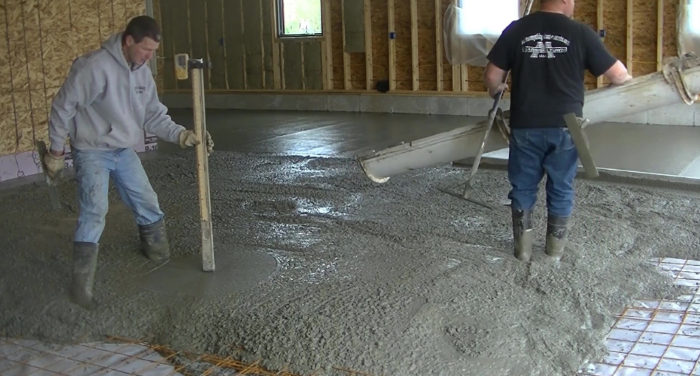
2. Pour the concrete: Begin pouring the concrete into the prepared formwork, starting at one corner and working your way across. Use a shovel or wheelbarrow to transport the concrete if necessary.
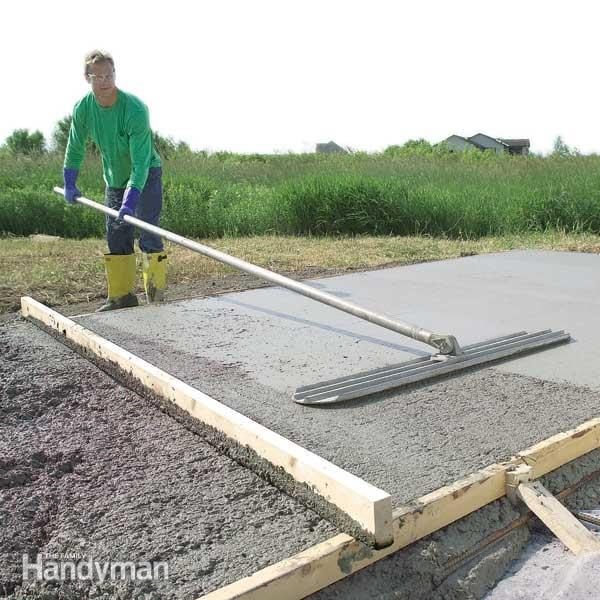
3. Spread and level the concrete: Use a screed board or long straight edge to spread and level the concrete, removing excess material as you go. Check for evenness using a level and adjust as needed.
4. Finish the surface: Once the concrete is leveled, use a float to smooth out any imperfections and create a consistent surface. You may also choose to add decorative finishes or textures at this stage.
5. Cure and protect the slab: After finishing, cover the slab with plastic sheeting or wet burlap to retain moisture and promote proper curing. Keep foot traffic off the slab for at least 24-48 hours, and avoid heavy loads for several days.
FAQs:
Q1: How long does it take for a concrete slab to cure?
A1: The curing process typically takes about 28 days for concrete to reach its full strength. However, it is generally safe to walk on after 24-48 hours and place light loads after 7 days.
Q2: Can I add color or texture to my concrete floor?
A2: Yes, there are various options for adding color and texture to concrete floors. These include integral color additives, acid stains, dyes, and stamped or textured finishes. Consult with a professional or your concrete supplier for guidance on the best methods for achieving your desired look. Q3: How long should I wait before applying a sealer to my concrete slab?
A3: It is recommended to wait at least 28 days after pouring the concrete slab before applying a sealer. This allows the concrete to fully cure and ensures proper adhesion of the sealer.