With numerous variants of engineered wood floors offered, choosing the appropriate wood floor can be at best, confusing and frustrating.Consider the point that hardwood flooring costs about the same quantity as high quality carpet installation, thus it gets to be a fairly easy choice to make if you're a long term homeowner. Solid hardwood floors come either unfinished or pre-finished.
Here are Images about Pictures Of Hardwood Floors With Borders
Pictures Of Hardwood Floors With Borders
The vast majority of men and women offering hardwood flooring know almost no concerning moisture and wood, in case they don't often have a moisture meter, that's an indicator that they're not professional & know nothing or pretty little about hardwood flooring and shouldn't be selling it. Installation time could be minimized with pre finished hardwood flooring which takes away the application and drying time of the finish as well as sealer.
Adding a Border to a Hardwood Floor JLC Online

After a few years, when the organic wood has weathered a bit, it is going to be needed to obtain the floors resurfaced. Though it's essential to check with the maker specifications for this process and it is every bit as significant if no more so that the present sub floor is actually consistent and well adhered to the joists to avoid shifting, heaving or breakage of the recently installed item.
Images Related to Pictures Of Hardwood Floors With Borders
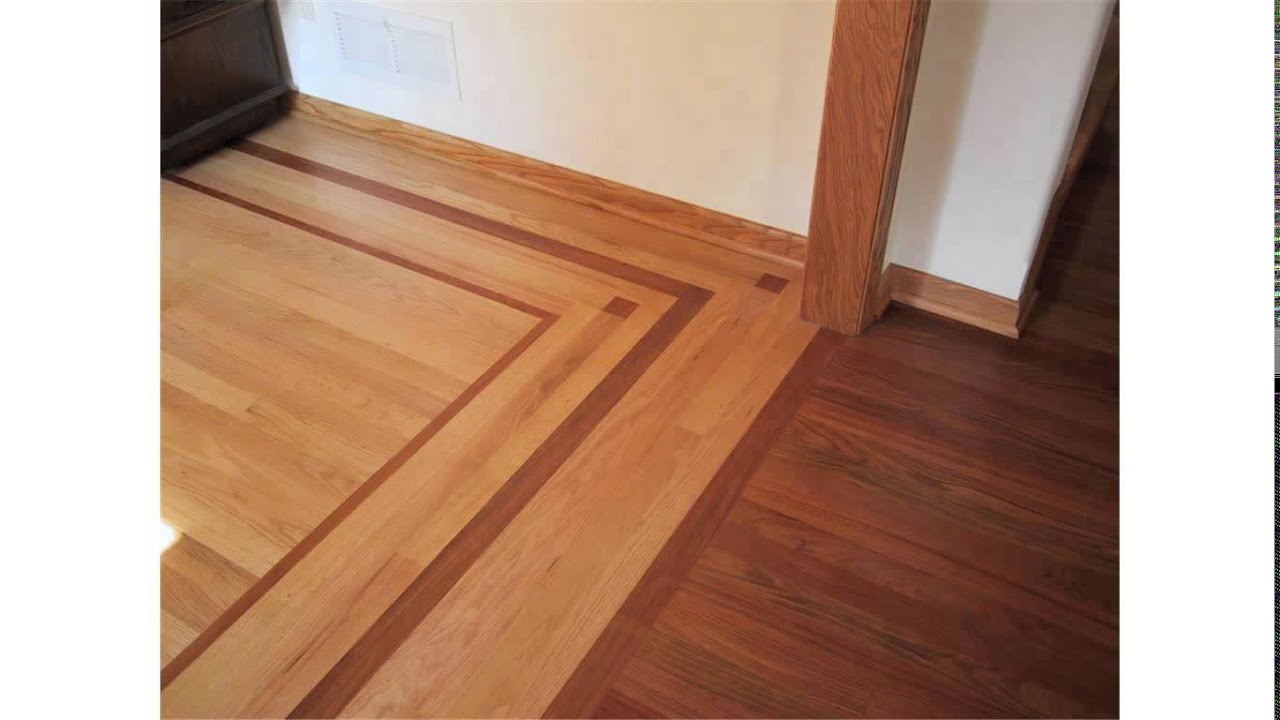
Hardwood Floor Border and Feature Strip

Hardwood Floor Border Designing

The Beauty of Hardwood Floor Borders
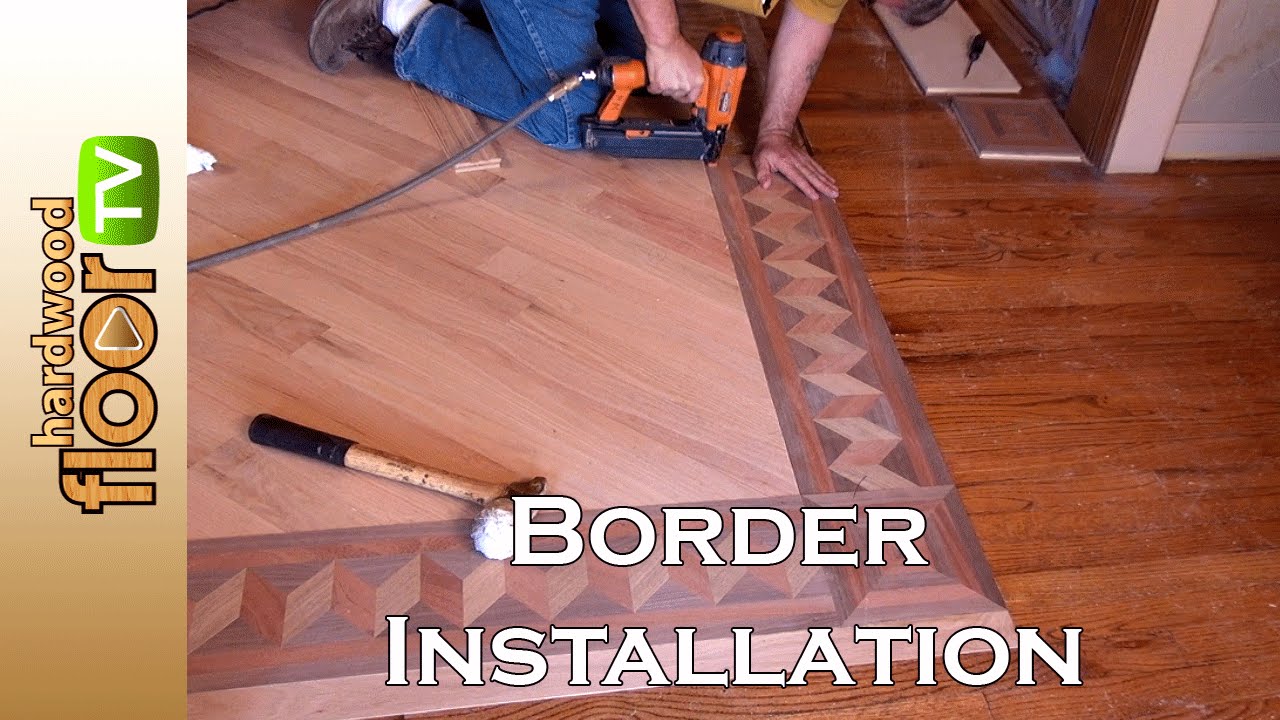
Installing Hardwood Flooring Borders – Video Series

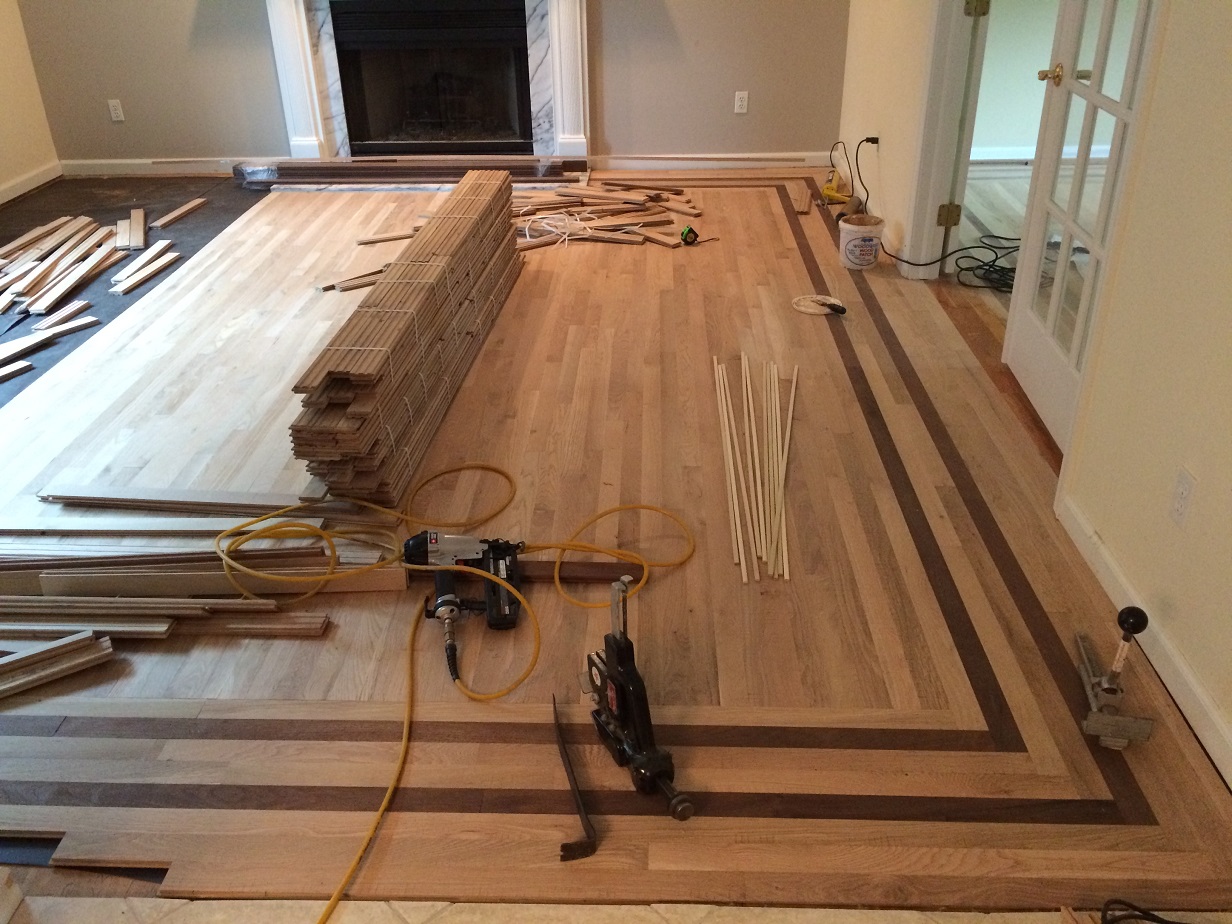
1 Red Oak with a Walnut Border Ozark Hardwood Flooring
Installing Hardwood Floor Borders
Hardwood Floors Border Designing – Fox Flooring

7 Wood Floor Border ideas wood floors, flooring, wood

Wood Floor Border Inlay Wc Floors
hardwood floor borders
Custom Hardwood Floor Bordering Services in Syracuse, NY

Wood Floor Border Inlay Wc Floors Wood floor design, Inlay

Related articles:
- Hardwood Floor Finish Brands
- Hand Scraped Hardwood Flooring
- Home Hardwood Floor
- Hardwood Floor Deep Cleaner
- Engineered Hardwood Floor
- Cherry Hardwood Flooring Reviews
- Hardwood Floor Cleaning And Refinishing
- Wide Plank Pine Hardwood Flooring
- Hardwood Flooring Designs Photos
- Hardwood Floor Selection Guide
Pictures Of Hardwood Floors With Borders: Enhancing the Beauty of Your Home
Introduction:
Hardwood floors are a timeless and elegant choice for any home. They not only add warmth and character to a space but also increase the value of your property. While hardwood floors alone can make a stunning statement, adding borders can take their beauty to another level. In this article, we will explore the concept of hardwood floors with borders and discuss various design options, installation techniques, and frequently asked questions related to this topic.
I. Understanding Hardwood Borders:
Hardwood floor borders are decorative elements that are installed along the perimeter or in the center of a room to create visual interest and define specific areas. These borders can be made from contrasting wood species, different stains, or even alternative materials like stone or metal. The possibilities are endless, allowing homeowners to personalize their spaces according to their unique tastes and preferences.
A. Types of Hardwood Borders:
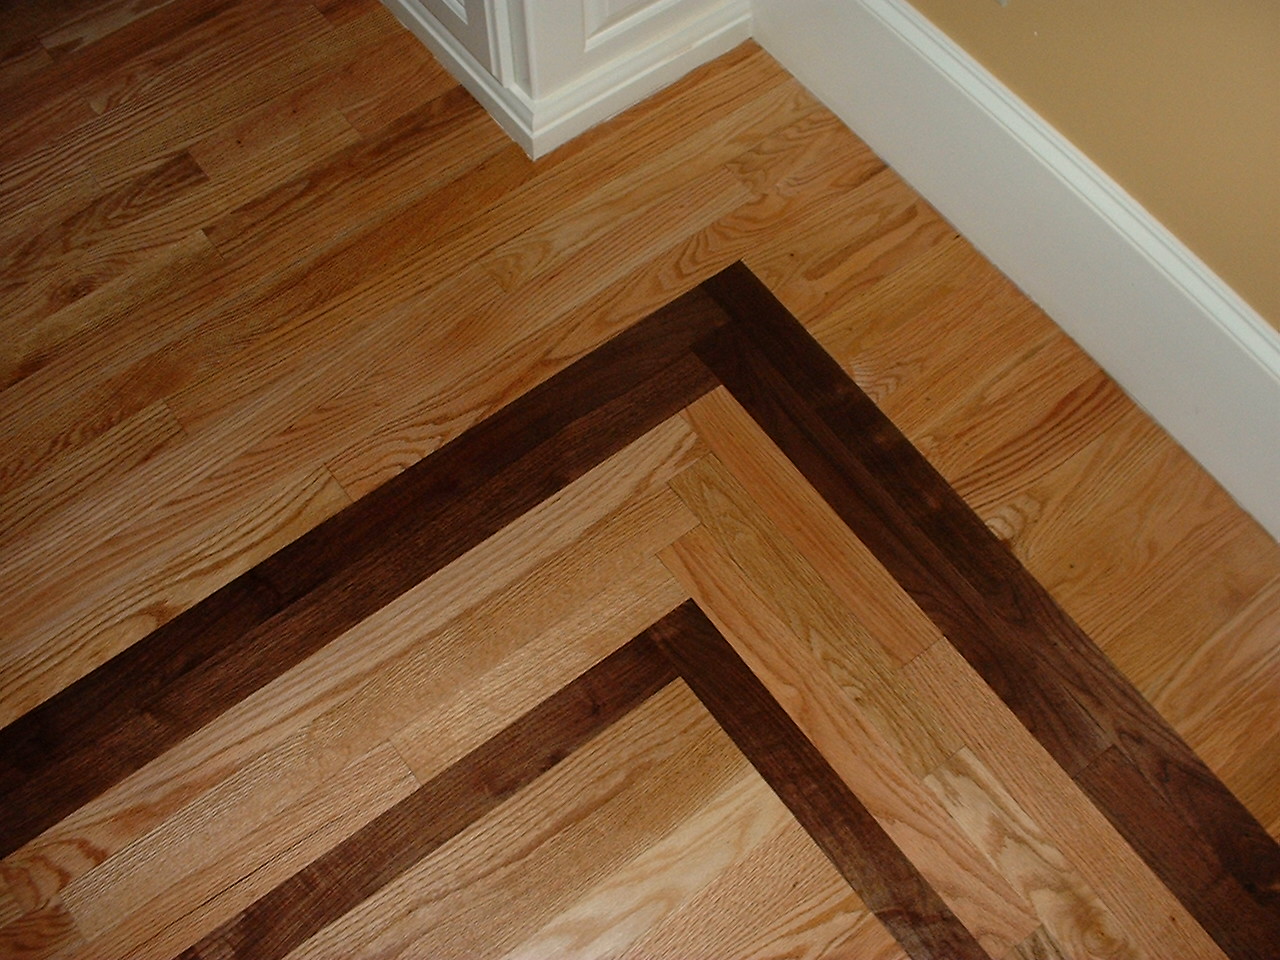
1. Traditional Border: This classic design features a narrow strip of contrasting wood species that is installed parallel to the walls, creating a frame-like effect.
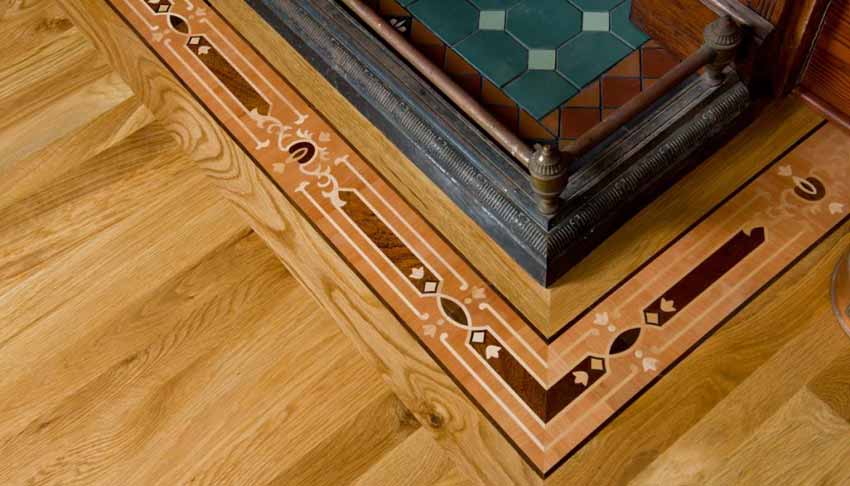
2. Inlay Border: An inlay border involves intricate patterns or designs made by combining different wood species, stains, or even marquetry techniques.
3. Medallion Border: A medallion border is a focal point in a room and often takes the form of an elaborate design at the center of the floor.
4. Feature Strip Border: Feature strip borders utilize thin strips of contrasting wood species to create a visually appealing accent around the perimeter or between different sections of a room.
B. Choosing the Right Border Design:
When selecting a border design for your hardwood floor, consider factors such as the overall style of your home, existing furnishings, and personal preferences. Here are some popular border designs to inspire you:
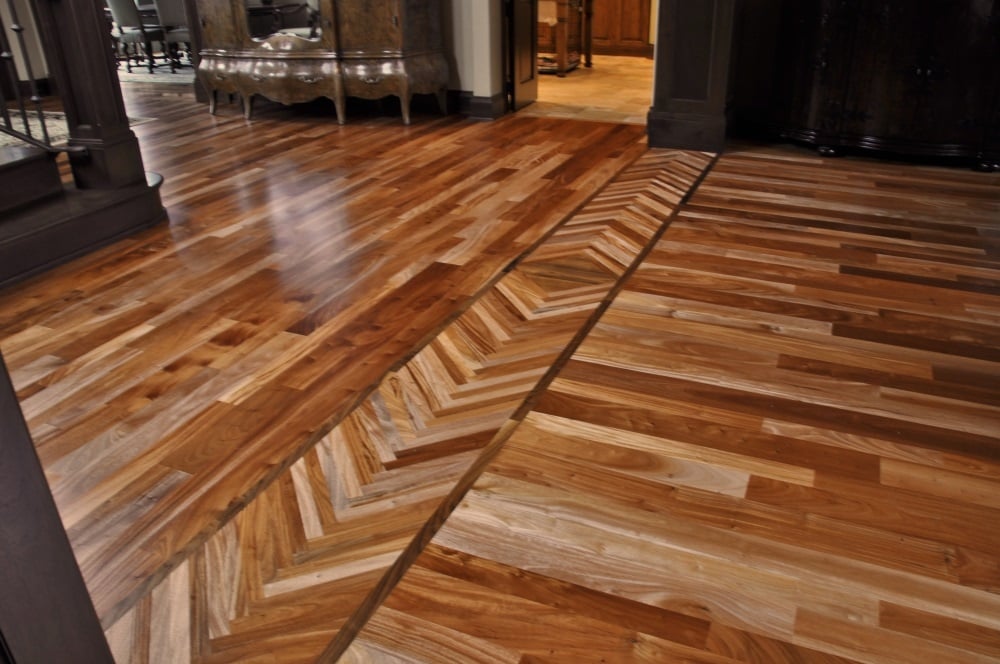
1. Herringbone Pattern: This timeless pattern creates an eye-catching zigzag effect by arranging rectangular pieces of wood in a diagonal pattern.
2. Chevron Pattern: Similar to the herringbone pattern, the chevron pattern features a V-shaped design that adds sophistication and movement to your floor.
3. Geometric Patterns: Geometric patterns, such as squares, diamonds, or hexagons, can create a modern and contemporary look in your space.
4. Floral or Leaf Motifs: Intricate floral or leafy designs add a touch of elegance and bring nature indoors.
II. Installation Techniques for Hardwood Floor Borders:
Installing hardwood floor borders requires precision and attention to detail. Here are two common techniques used:
A. Nail-down Method:
1. Prepare the Subfloor: Ensure that the subfloor is clean, level, and free from any debris or moisture.
2. Measure and Plan: Measure the area where the border will be installed and create a detailed layout plan.
3. Install the Border Strips: Start by attaching the border strips to the subfloor using nails or staples, making sure they are aligned correctly.
4. Install the Main Flooring: Once the border is secured, install the main flooring up to the edges of the border, ensuring a seamless transition.
B. Glue-down Method:
1. Prepare the Subfloor: Just like in the nail-down method, ensure that the subfloor is clean, level, and dry.
2. Measure and Plan: Measure and plan the layout of the border strips, taking into account any necessary adjustments for doorways or irregularities.
3. Apply Adhesive: Use a high-quality hardwood flooring adhesive to Secure the border strips to the subfloor. Apply the adhesive evenly and according to the manufacturer’s instructions.
4. Install the Border Strips: Carefully place the border strips onto the adhesive, ensuring they are aligned correctly and pressed firmly into place.
5. Install the Main Flooring: Once the border is secured, install the main flooring up to the edges of the border, pressing it firmly onto the adhesive for a secure bond.
Remember to consult with a professional or refer to manufacturer guidelines for specific installation instructions and best practices. It is also recommended to hire a professional installer if you are not experienced in hardwood floor installation. They will have the expertise and tools needed to ensure a precise and professional installation. Additionally, consider the following tips for a successful installation:
1. Use high-quality materials: Invest in high-quality hardwood flooring and border strips to ensure durability and longevity.
2. Allow for expansion: Hardwood flooring expands and contracts with changes in humidity and temperature. Leave a small gap between the border and the main flooring to allow for this movement.
3. Use proper tools: Use the appropriate tools, such as a miter saw or coping saw, to cut the border strips accurately for a seamless fit.
4. Take your time: Installing hardwood floor borders requires precision and attention to detail. Take your time to measure, plan, and install each piece carefully for a professional finish.
5. Finish with care: Once the installation is complete, apply a protective finish to both the border and main flooring to enhance their appearance and protect them from wear and tear.
Remember, hardwood floor borders can add a unique touch to your space and elevate the overall look of your floors. With proper planning, preparation, and installation techniques, you can achieve stunning results that will impress for years to come.