however, it does not need to be by doing this. All things considered, installing kitchen area flooring is already a costly proposition itself and in case it occurs that you are not satisfied with how it looks or it doesn't meet the expectations of yours it's either you spend once again and in addition have it redone or live with it for many years. It's reasonably simple to maintain bamboo kitchen flooring.
Here are Images about Kitchen Floor Led Lighting
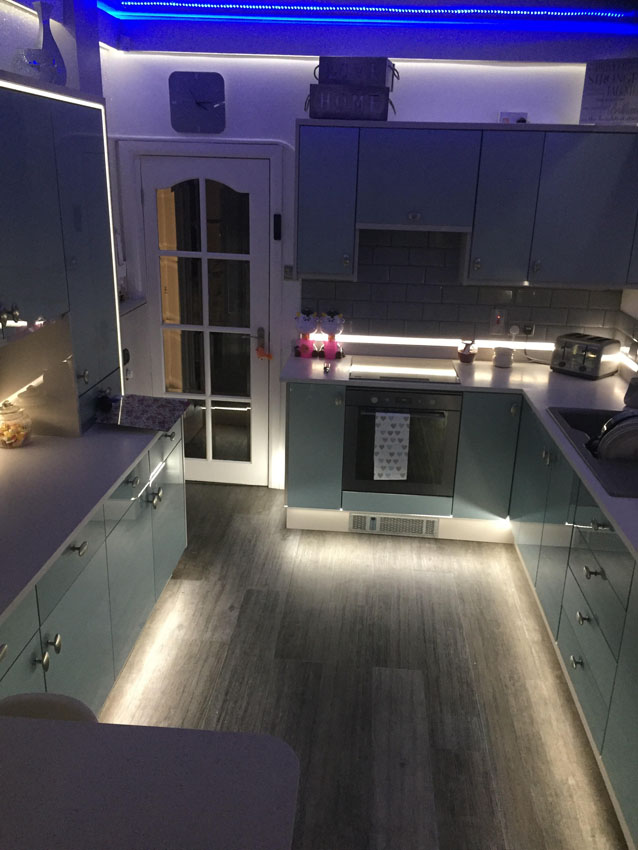
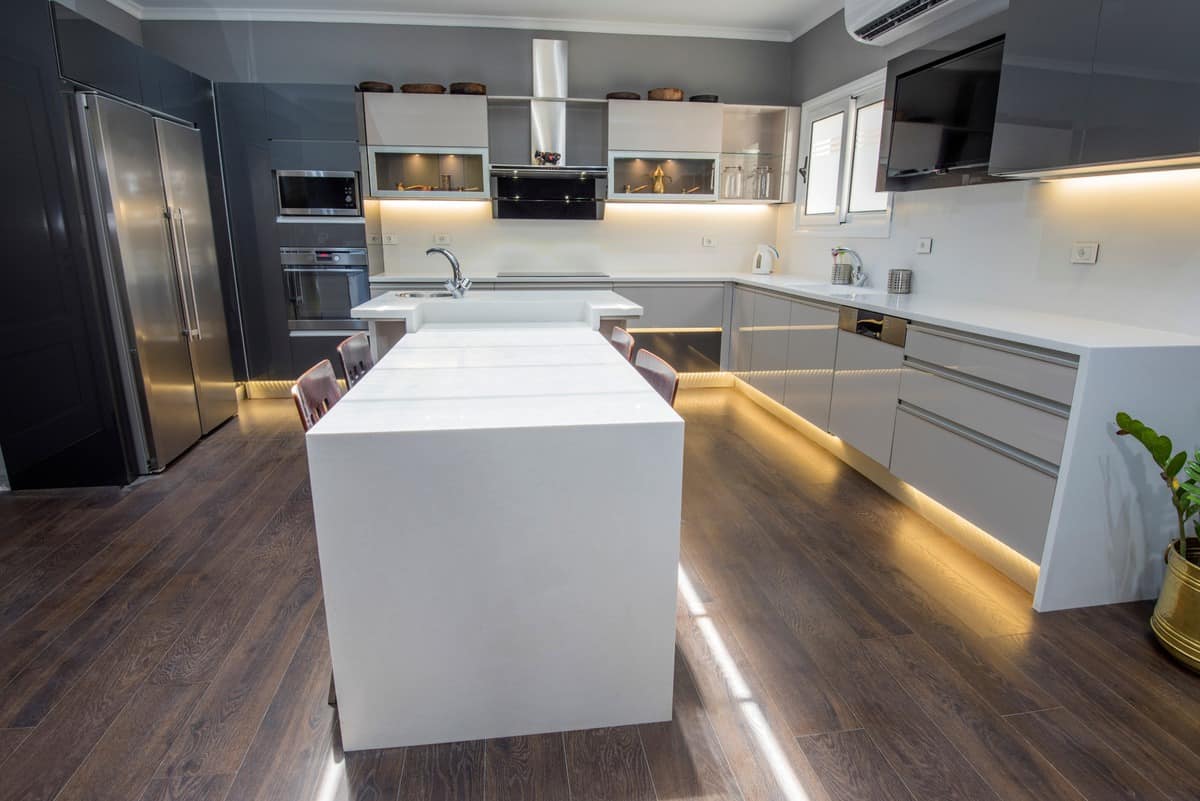
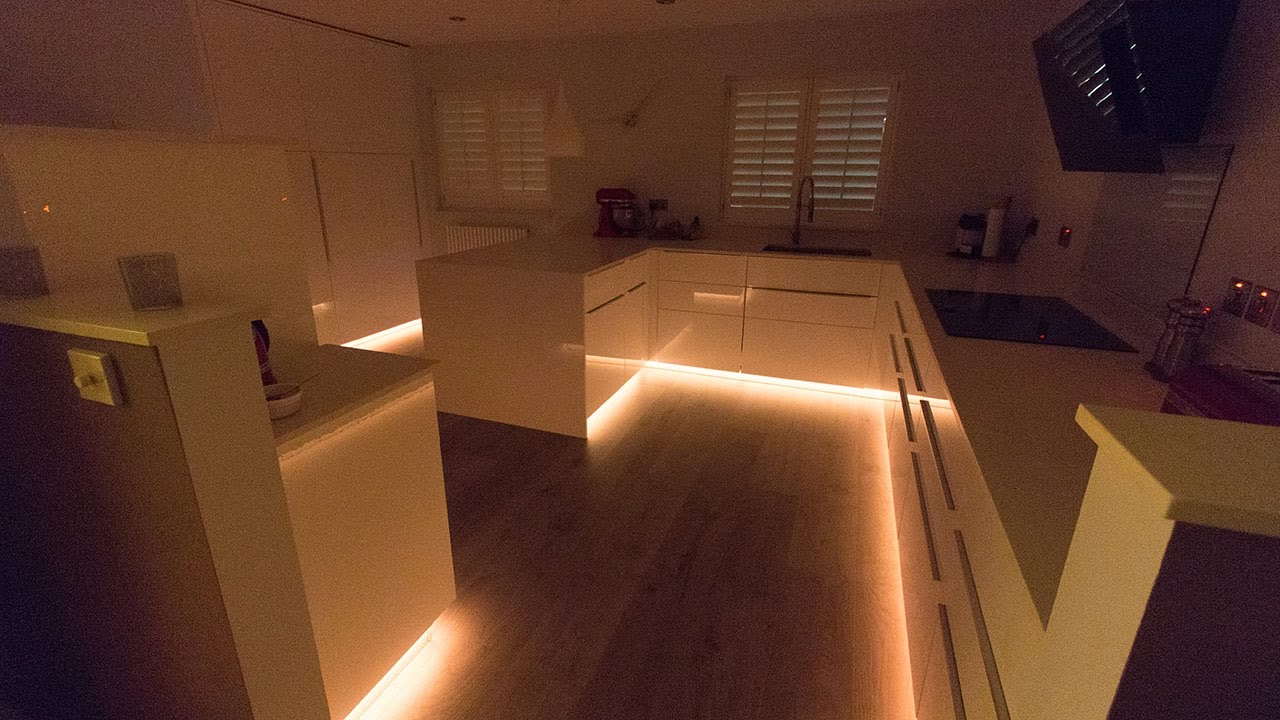
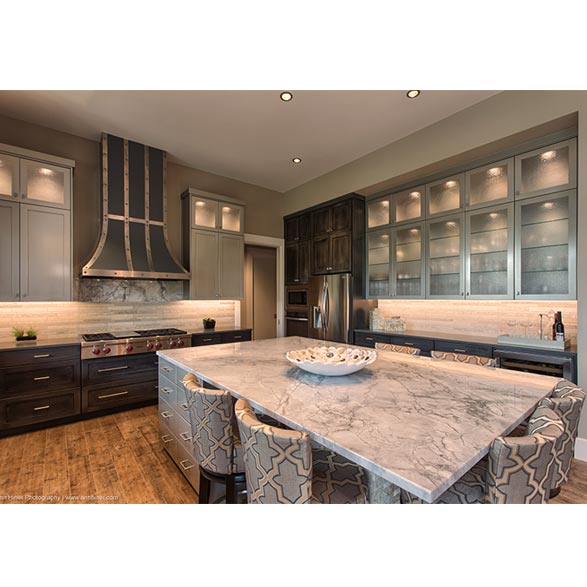
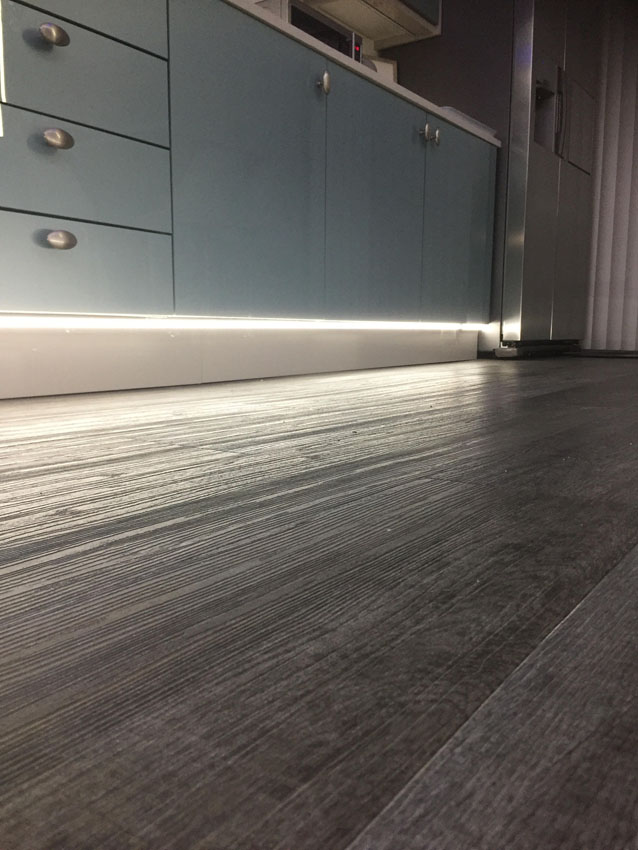
Kitchen Floor Led Lighting
Kitchen flooring made out of hardwood endures a lot longer than other options, in virtually any case it does have to experience resurfacing every sometimes. You can elect to select the higher laminate grades if you would be placing demands that are high on the floor of yours for the sake of durability. This flooring is so durable that it can take care of liquids as well as objects getting dropped on it.
How to Choose and Install LED Strip Lights for Kitchen Cabinets

Good wood kitchen flooring is an alternative choice that can be looked at in relation to kitchen floors. Heading right ahead to the local home improvement of yours or DIY store may seem to be the initial option of yours though it'd also be a good idea if you know what you're looking for. It's manufactured from industrial cork shavings or slices of corks of bottles made of plastic.
Images Related to Kitchen Floor Led Lighting
24 Kitchen under cabinet lighting ideas kitchen under cabinet

LED strip light under cabinets before floor tiles – YouTube

Smart Lighting For A Kitchen: A Practical Guide – Smart Home Point
Aluminum Profile “N” 78in Recessed Application

RGBW LEDs installed for kitchen plinth highlights
How to Light a Kitchen – Lightology
Choose LEDS for plinth, kickboard u0026 skirting-board feature lights
Benefits of Using LED Lights – Kitchen Remodel Lighting

10 Ways To Light Your Kitchen To Achieve The Right Look u0026 Ambience
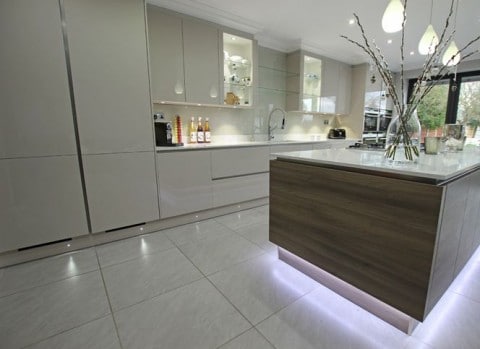
Four Zone TASK LED Strip Lighting in Columbia Kitchen Renovation

Fascinating Led Strip Lights Kitchens That Will Help You Craft

Floor level LED lights Kitchen cabinet styles, Kitchen lighting

Related articles:
- Stained Concrete Basement Floor
- Finishing Basement Floor
- Refinish Concrete Basement Floor
- Best Flooring For Basement
- Basement Gym Flooring Ideas
- Laminate Flooring In Basement
- Basement Concrete Floor Sweating
- Basement Floor Finishing Ideas
- Painting Unfinished Basement Floor
- Unique Basement Flooring
Kitchen Floor LED Lighting: Enhancing Style and Functionality
Introduction:
The kitchen is the heart of every home, where families gather to prepare meals, share stories, and create lasting memories. To make this space even more inviting and functional, homeowners are constantly seeking innovative ways to enhance their kitchens. One such way is by incorporating LED lighting into the kitchen floor. This unique lighting solution not only adds a touch of modern style but also increases safety and functionality in the kitchen. In this article, we will delve into the world of kitchen floor LED lighting, exploring its benefits, installation process, and answering frequently asked questions.
Benefits of Kitchen Floor LED Lighting:
1. Enhanced Aesthetics:
LED lighting fixtures embedded in the kitchen floor can transform an ordinary space into a visually stunning masterpiece. These lights create an ambiance that is both contemporary and elegant, elevating the overall aesthetic appeal of the kitchen. Whether you have a traditional or modern kitchen design, LED floor lighting can seamlessly blend with any style, adding a touch of sophistication.
2. Increased Safety:
One of the primary advantages of installing LED lighting in your kitchen floor is improved safety. With these lights illuminating your path, you can easily navigate through the kitchen during nighttime or low-light situations. They minimize the risk of tripping over obstacles or missing steps, making them particularly useful for homes with elderly residents or young children.
3. Task Lighting:
LED floor lighting can also serve as task lighting, providing focused illumination for specific areas in the kitchen. By strategically placing these lights near workstations such as countertops or islands, you can ensure optimal visibility while preparing meals or cooking intricate recipes. The bright yet glare-free light emitted by LEDs allows for precise cutting, chopping, and other culinary activities.
4. Energy Efficiency:
LED technology has revolutionized the lighting industry with its unparalleled energy efficiency. Compared to traditional incandescent bulbs, LEDs consume significantly less power while delivering brighter illumination. By opting for kitchen floor LED lighting, homeowners can reduce their energy consumption and contribute to a greener environment. Additionally, LEDs have a longer lifespan, reducing the frequency of bulb replacements and subsequent waste generation.
Installation Process:
Installing LED lighting in your kitchen floor may seem like a daunting task, but with proper planning and guidance, it can be a seamless process. Here is a step-by-step guide to help you get started:
1. Planning:
Before embarking on the installation process, it is crucial to carefully plan the layout of your LED floor lights. Consider the areas where you require additional illumination or want to create visual interest. Take measurements and create a detailed sketch to guide you during the installation.
2. Preparing the Floor:
To ensure a smooth installation, prepare the kitchen floor by thoroughly cleaning and removing any debris or obstacles. If necessary, repair any cracks or damages to create an even surface.
3. Wiring:
Next, determine the power source for your LED floor lights and install the necessary wiring. It is essential to consult a professional electrician if you are not familiar with electrical work or unsure about the safety precautions.
4. Installing Lighting Fixtures:
Once the wiring is set up, proceed with installing the LED lighting fixtures into the kitchen floor. Depending on your chosen design, this may involve drilling holes or cutting recesses in the flooring material. Ensure that each fixture is securely fastened and aligned according to your planned layout.
5. Connecting and Testing:
After all the lighting fixtures are in place, connect them to the wiring system and test their functionality To ensure that they are working properly. Make any necessary adjustments or repairs before proceeding to the next step.
6. Securing and Covering:
To ensure the longevity and safety of your LED floor lights, secure them in place using appropriate mounting brackets or adhesive. Additionally, cover the fixtures with protective covers or diffusers to prevent damage and reduce glare.
7. Final Touches:
Once the lights are installed and secured, do a final inspection of the entire system. Ensure that all connections are properly sealed and that there are no exposed wires or hazards. Clean up any debris from the installation process and enjoy your newly installed LED floor lighting in your kitchen!
In conclusion, LED floor lighting can add both functionality and aesthetics to your kitchen. By providing safety, task lighting, energy efficiency, and a simple installation process, LED floor lights are an excellent choice for homeowners looking to improve their kitchen lighting. Remember to always consult a professional if you are unsure about any step of the installation process or if you are not familiar with electrical work. Safety should always be a top priority when working with electricity. Installing LED floor lights in your kitchen can enhance the overall functionality and visual appeal of the space. Here are the steps to follow for a successful installation:
1. Planning: Carefully plan the layout of your LED floor lights by considering areas that require additional illumination or where you want to create visual interest. Take measurements and create a detailed sketch to guide you during the installation.
2. Preparing the Floor: Thoroughly clean the kitchen floor and remove any debris or obstacles. Repair any cracks or damages to create an even surface.
3. Wiring: Determine the power source for your LED floor lights and install the necessary wiring. If you’re not familiar with electrical work, consult a professional electrician for safety precautions.
4. Installing Lighting Fixtures: Install the LED lighting fixtures into the kitchen floor according to your planned layout. This may involve drilling holes or cutting recesses in the flooring material. Ensure each fixture is securely fastened and aligned.
5. Connecting and Testing: Connect all lighting fixtures to the wiring system and test their functionality before proceeding further. Make any necessary adjustments or repairs.
6. Securing and Covering: Secure the LED floor lights in place using appropriate mounting brackets or adhesive. Cover the fixtures with protective covers or diffusers to prevent damage and reduce glare.
7. Final Touches: Conduct a final inspection of the entire system, ensuring all connections are properly sealed with no exposed wires or hazards. Clean up any debris from the installation process.
In conclusion, LED floor lighting offers both functionality and aesthetics in your kitchen. It provides safety, task lighting, energy efficiency, and an easy installation process. Always prioritize safety by consulting professionals if needed during any step of the installation process or if you’re unfamiliar with electrical work.