One of the most important types is the stone flooring used in other buildings and castles. In many cases they actually do the setting up, unpolluted up, and also removal of all the old flooring and debris for a discounted price. You are able to sometimes find tile flooring on patios and barbeque areas. And then, have up the wood best floor and introduce the subfloor.
Images Related to Installing Tile Floor Underlayment
Installing Tile Floor Underlayment
As soon as you've your tile, you can pre-cut tiles which will be put from the edges of the floor in case the tile is just too large. In reality, tile floors are several of likely the most durable one around at the moment! This flooring type actually comes in a massive range of styles and designs.
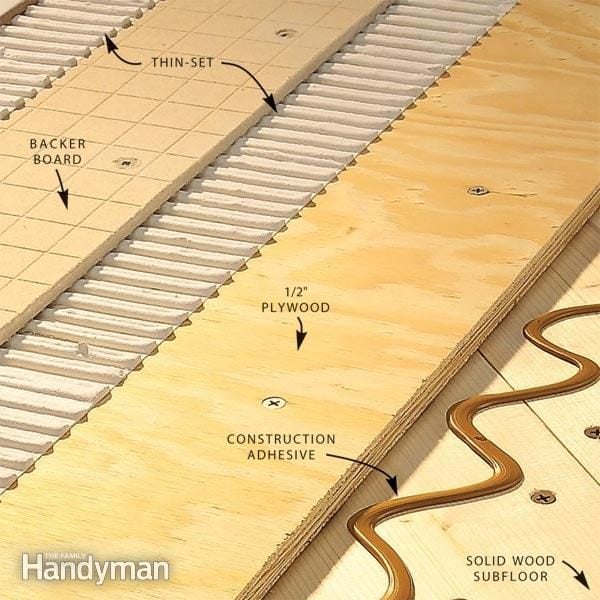
How to Install Tile Backer Board on a Wood Subfloor (DIY)
Tiled floors found in kitchens, joints and food processing facilities typically feature high concentrations of germ as well as bacteria buildup. Because they're thicker than typical tiles and in a position to resist traffic that is heavy, they may be much less susceptible to cracking compared to a sensitive, thinner tile. They're able to provide the impact of having drinking water on your floors that is oh so remarkable.
Cement Board Installation u2014 Cabinet Painting – Kitchen Remodeling
The Best Underlayment Options and How to Use Them – Bob Vila The Best Tile Underlayment Options and How to Use Them – Bob Vila

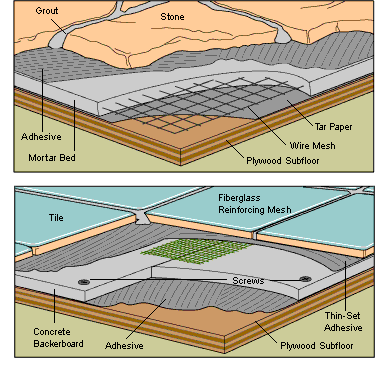
Subfloors and Underlayment for Ceramic Tile Floors Subfloors and Underlayment for Ceramic Tile Floors
/best-subfloors-to-use-for-laying-tile-1822586-hero-efcfac9422ab457da5d2cbc7f7361df7.jpg)
Preparing Subfloor for Tile The Home Depot Preparing Subfloor for Tile The Home Depot

Understand Tile Underlayment Principles before Floor Installation Understand Tile Underlayment Principles before Floor Installation
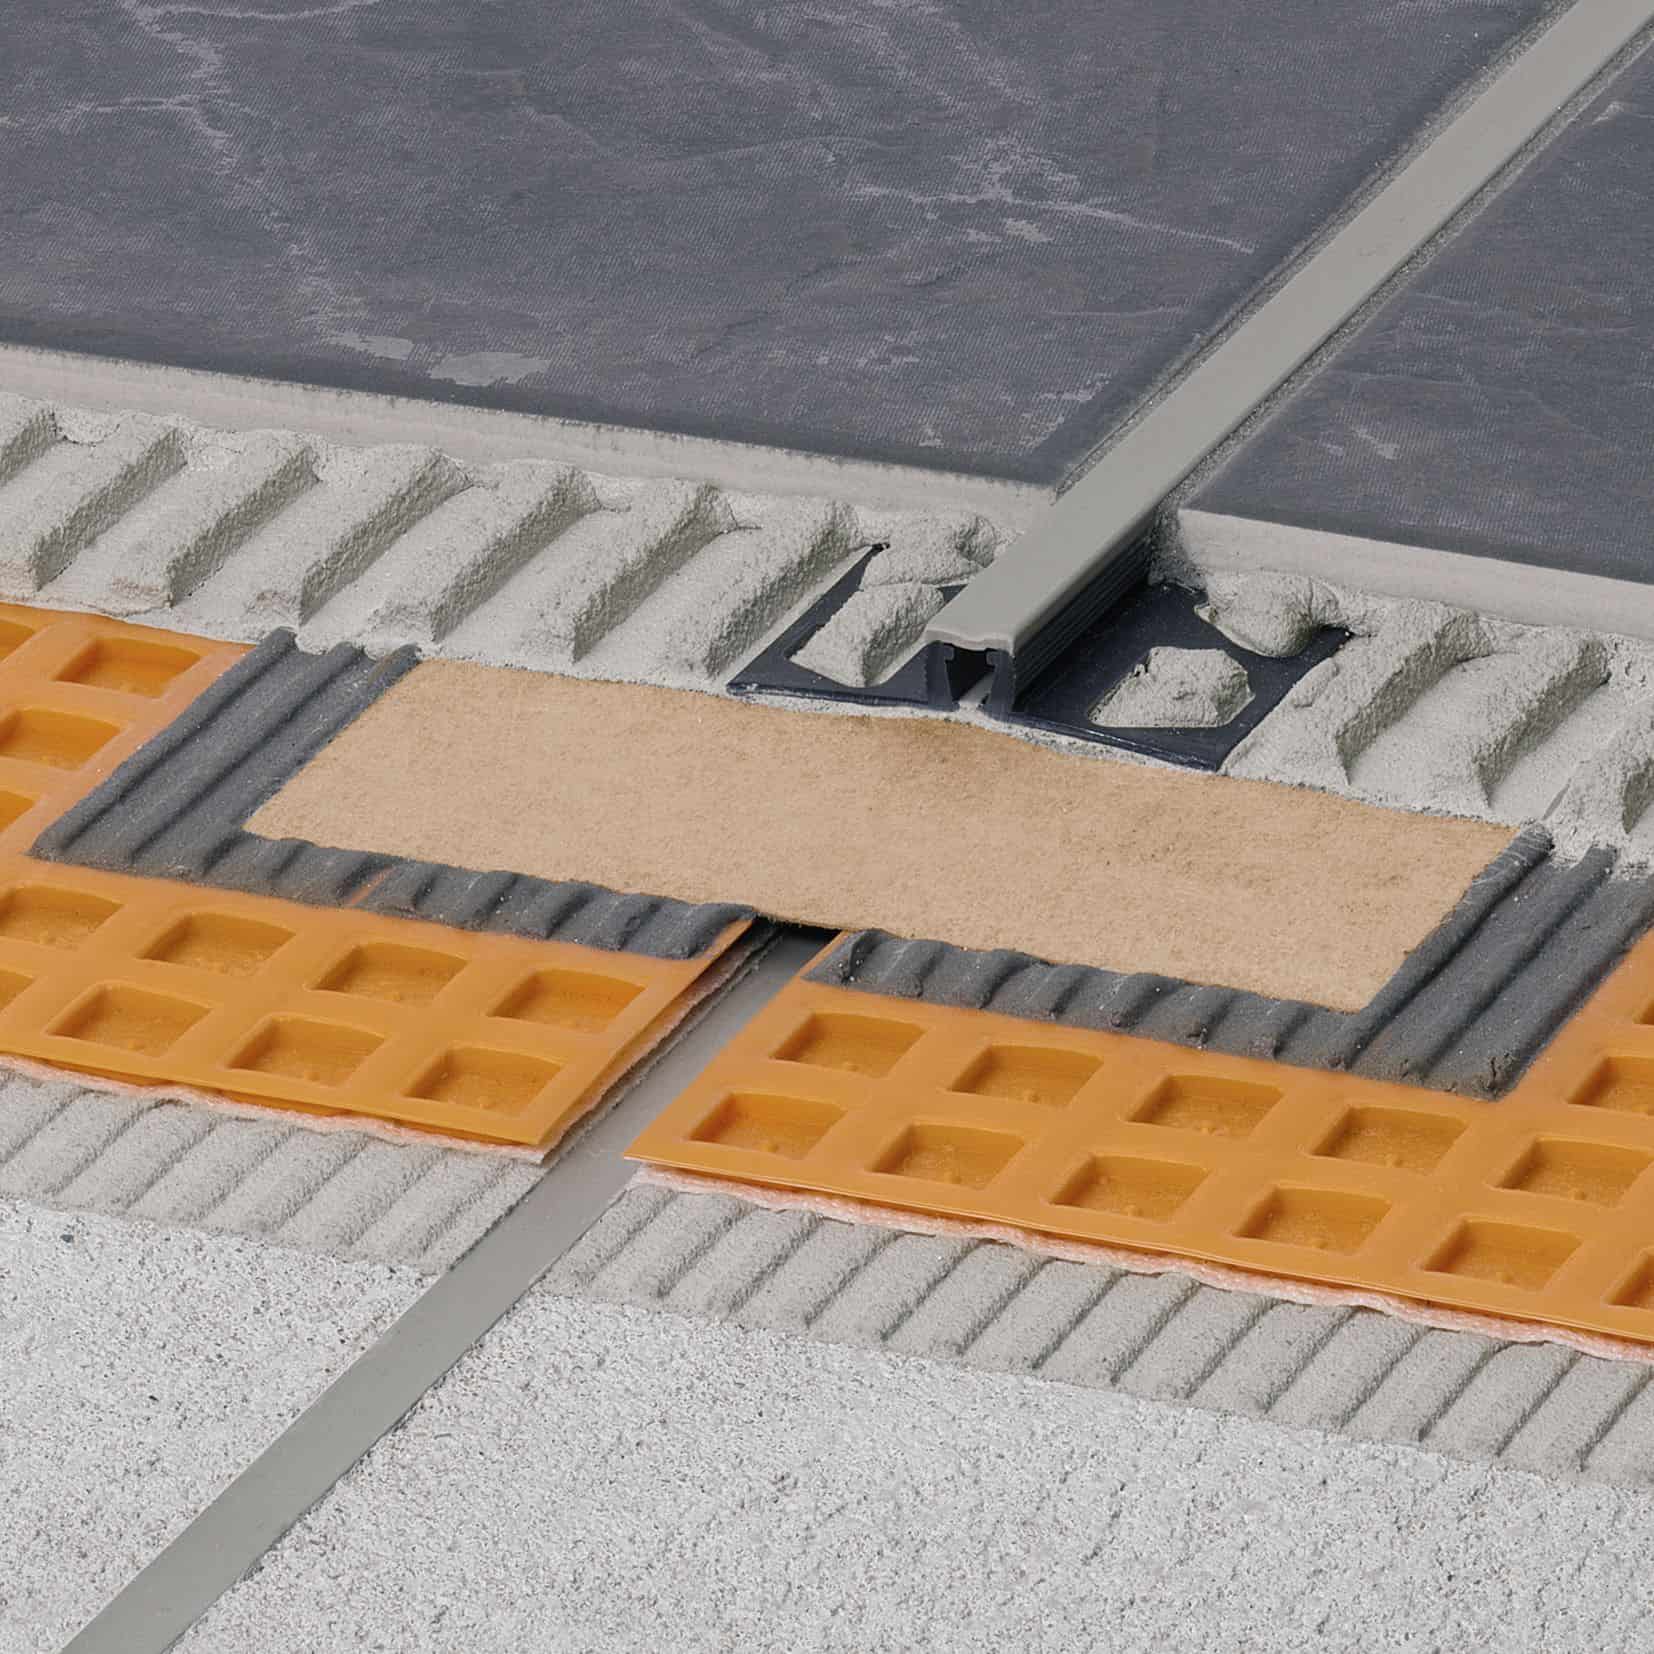
Prep a Subfloor for Tile – Fine Homebuilding Prep a Subfloor for Tile – Fine Homebuilding

How to Prepare a Subfloor for Tile Installation How to Prepare a Subfloor for Tile Installation
How to Tile a Floor Vinyl tile flooring, Floor installation How to Tile a Floor Vinyl tile flooring, Floor installation

Subfloors and Underlayment for Ceramic Tile Floors Subfloors and Underlayment for Ceramic Tile Floors
:max_bytes(150000):strip_icc()/best-subfloors-to-use-for-laying-tile-1822586-02-631a13bfdb954ff5a1f80ff1690500f0.jpg)
Installing Cement Board Underlayment – Concord Carpenter Installing Cement Board Underlayment – Concord Carpenter
Can You Lay Tile Directly Over a Plywood Subfloor? – Todayu0027s Homeowner Can You Lay Tile Directly Over a Plywood Subfloor? – Todayu0027s Homeowner
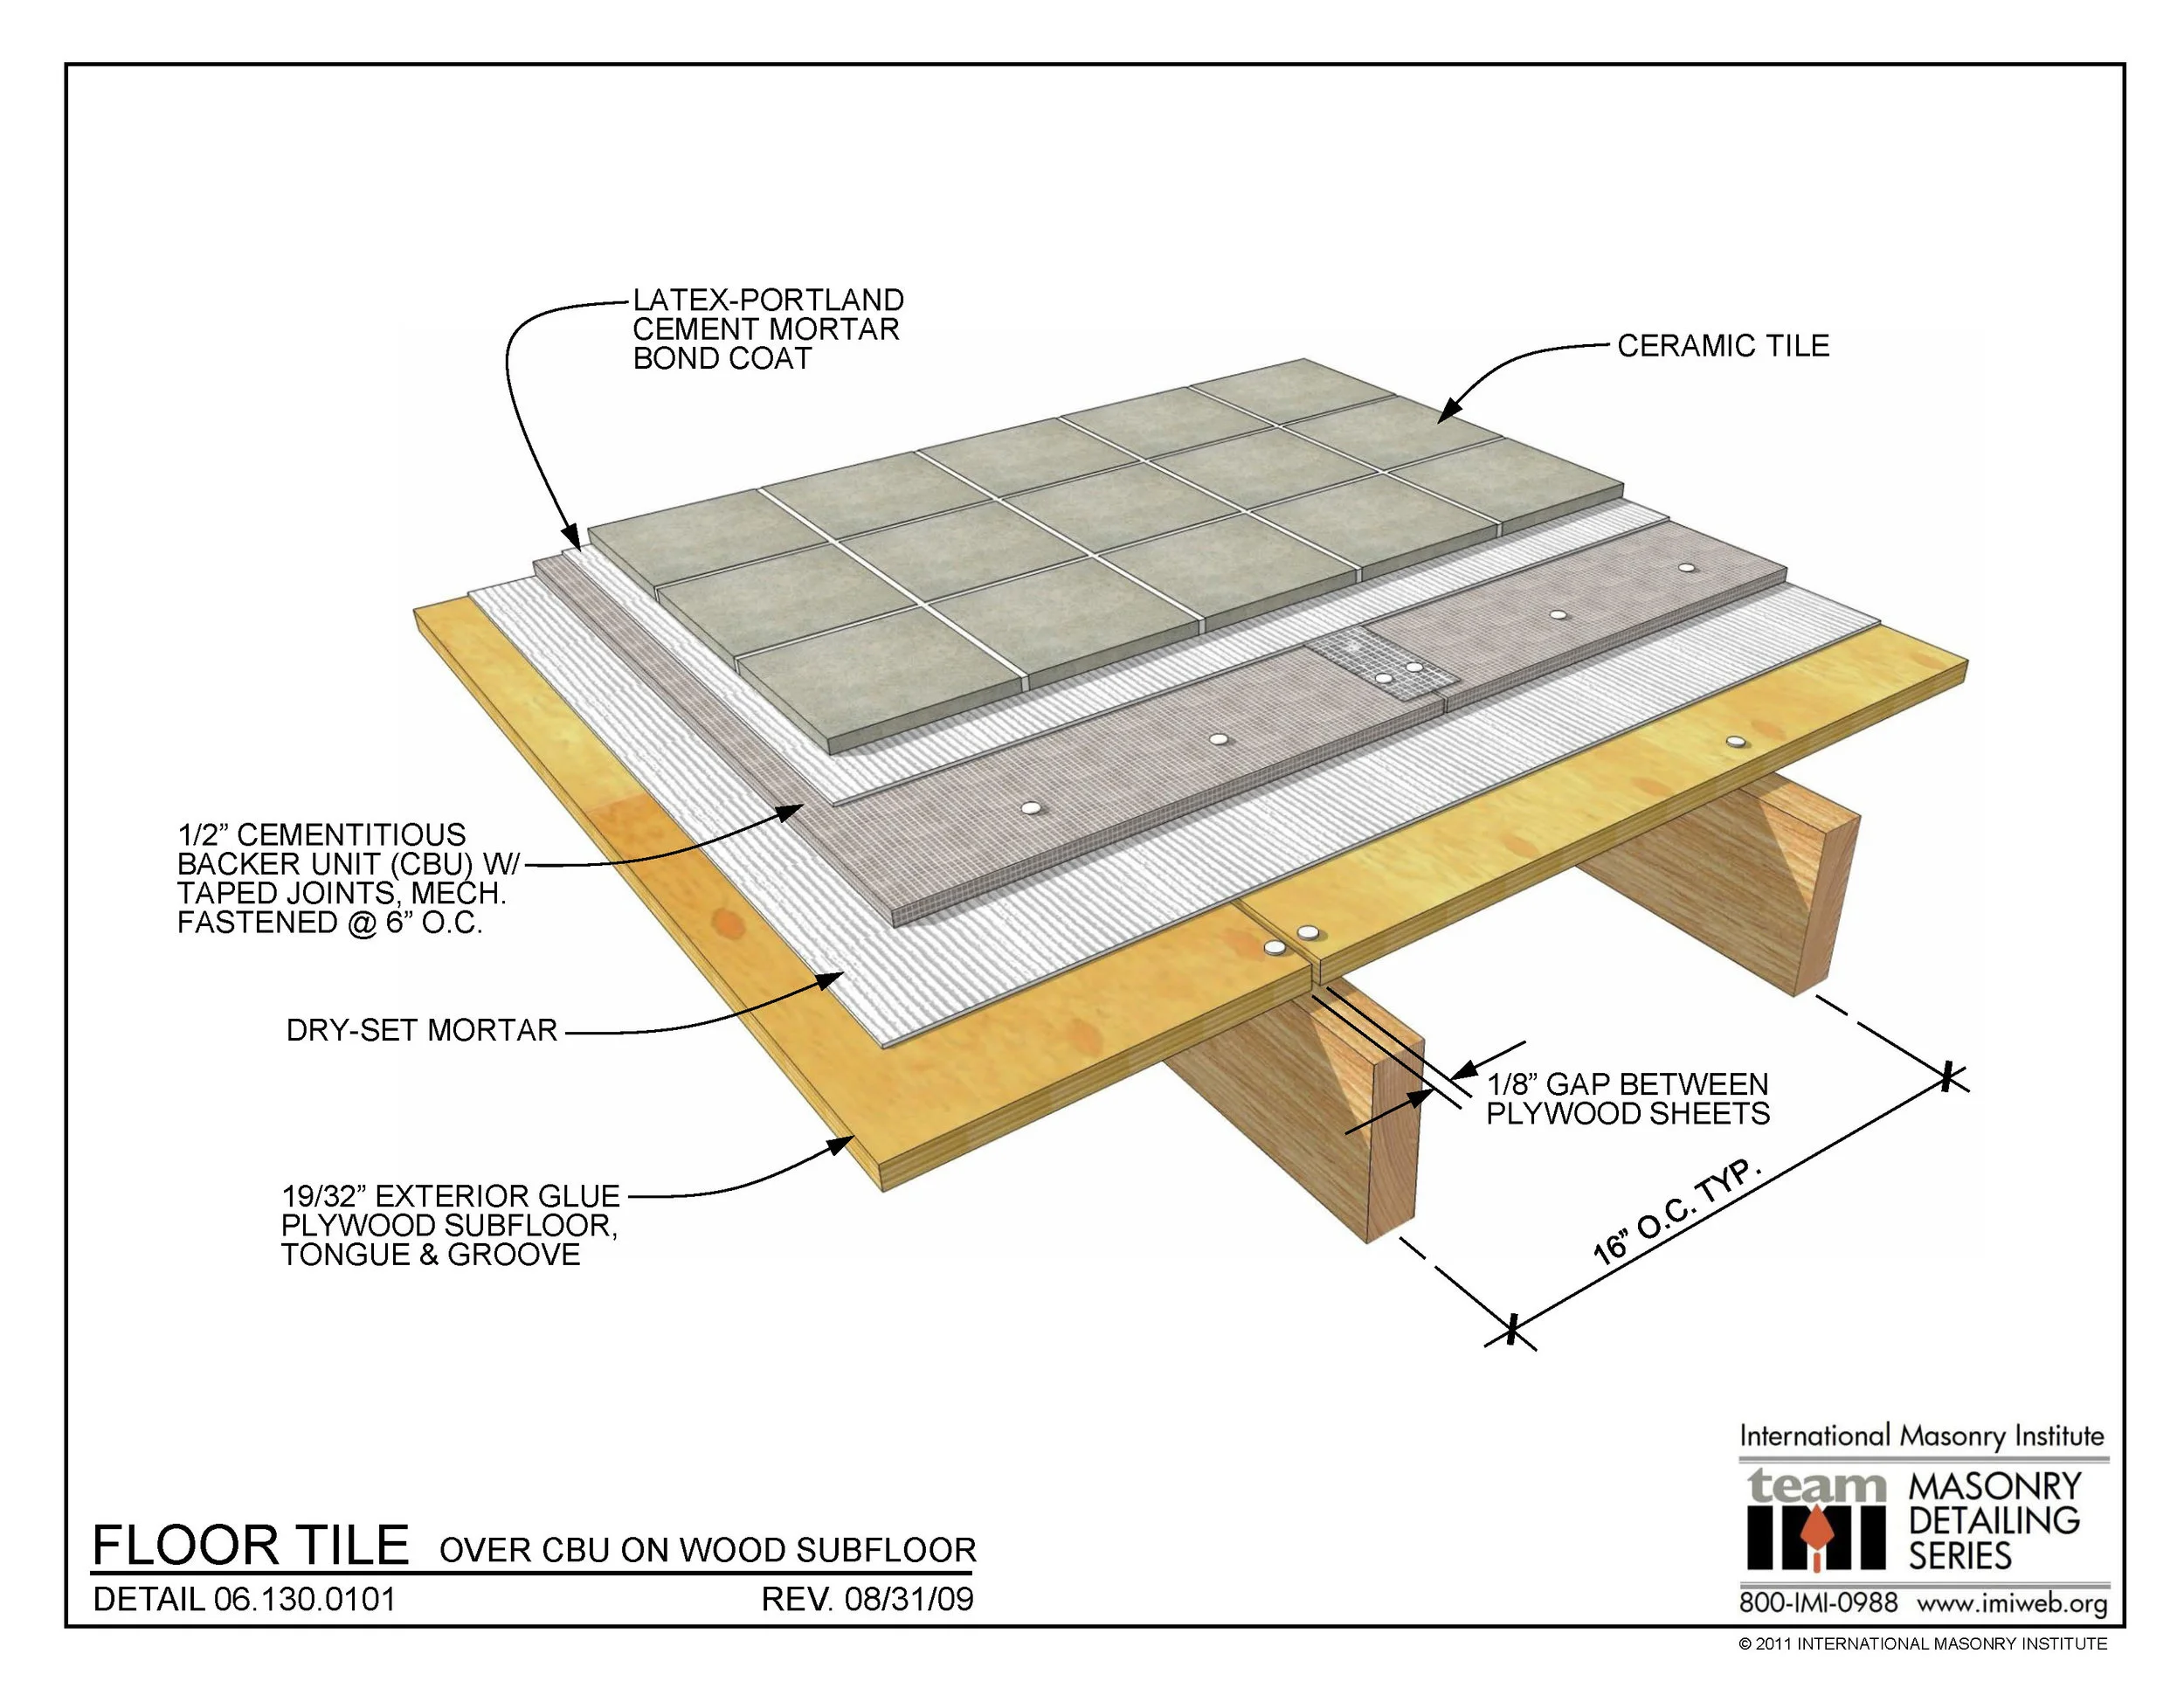
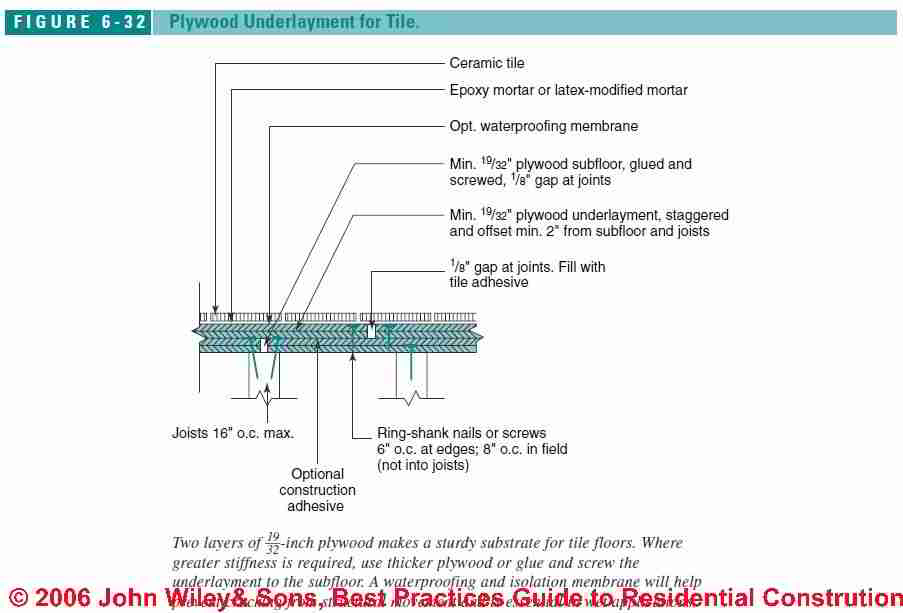
Floor-Framing u0026 Subfloor Details for Ceramic or Stone Tile Flooring Floor-Framing u0026 Subfloor Details for Ceramic or Stone Tile Flooring
Related articles:
- Vintage Bathroom Floor Tile Patterns
- Bathroom Floor Tile DIY
- Limestone Bathroom Floor Tiles
- Bathroom Floor Porcelain Tile
- Concrete Bathroom Floor Ideas
- White Bathroom Ceramic Tiles
- Bathroom Floor Baseboard
- Rustic Bathroom Flooring Ideas
- Bathroom Flooring Options
- Bamboo Bathroom Flooring Ideas
Installing tile floor underlayment is an important part of any tile floor installation project. Underlayment provides a barrier between the subfloor and the tiles, allowing for better adhesion and longevity of the tiles. This guide provides a step-by-step guide for installing tile floor underlayment, from preparation to installation.
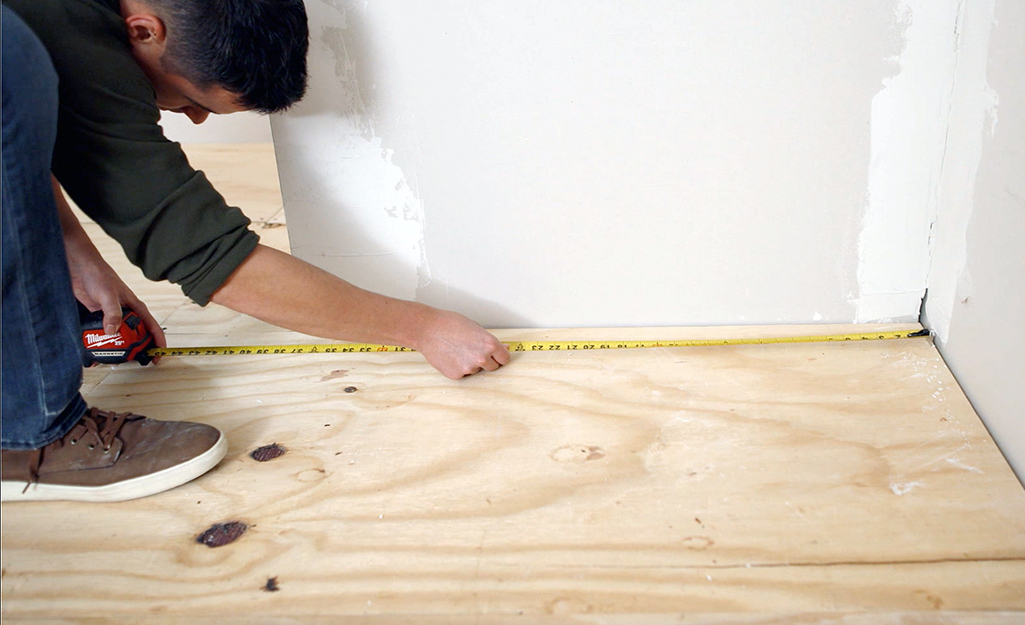
Preparing the Subfloor
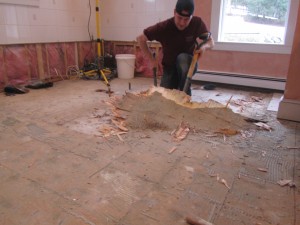
The first step in installing tile floor underlayment is preparing the subfloor. In order to ensure a successful installation, it is essential that the subfloor is clean and level. Any old adhesive or debris should be completely removed, and any uneven areas should be filled in with concrete patching compound. Once the subfloor is clean and level, it is ready for the next step.
Laying Out the Underlayment
The next step is laying out the underlayment. Starting at one corner of the room, roll out enough underlayment to cover an area that extends one foot beyond each wall. Use a sharp utility knife to cut the underlayment to fit around any obstacles or walls. Once the underlayment has been laid out, use a trowel to spread a thin layer of thinset mortar over the entire area.
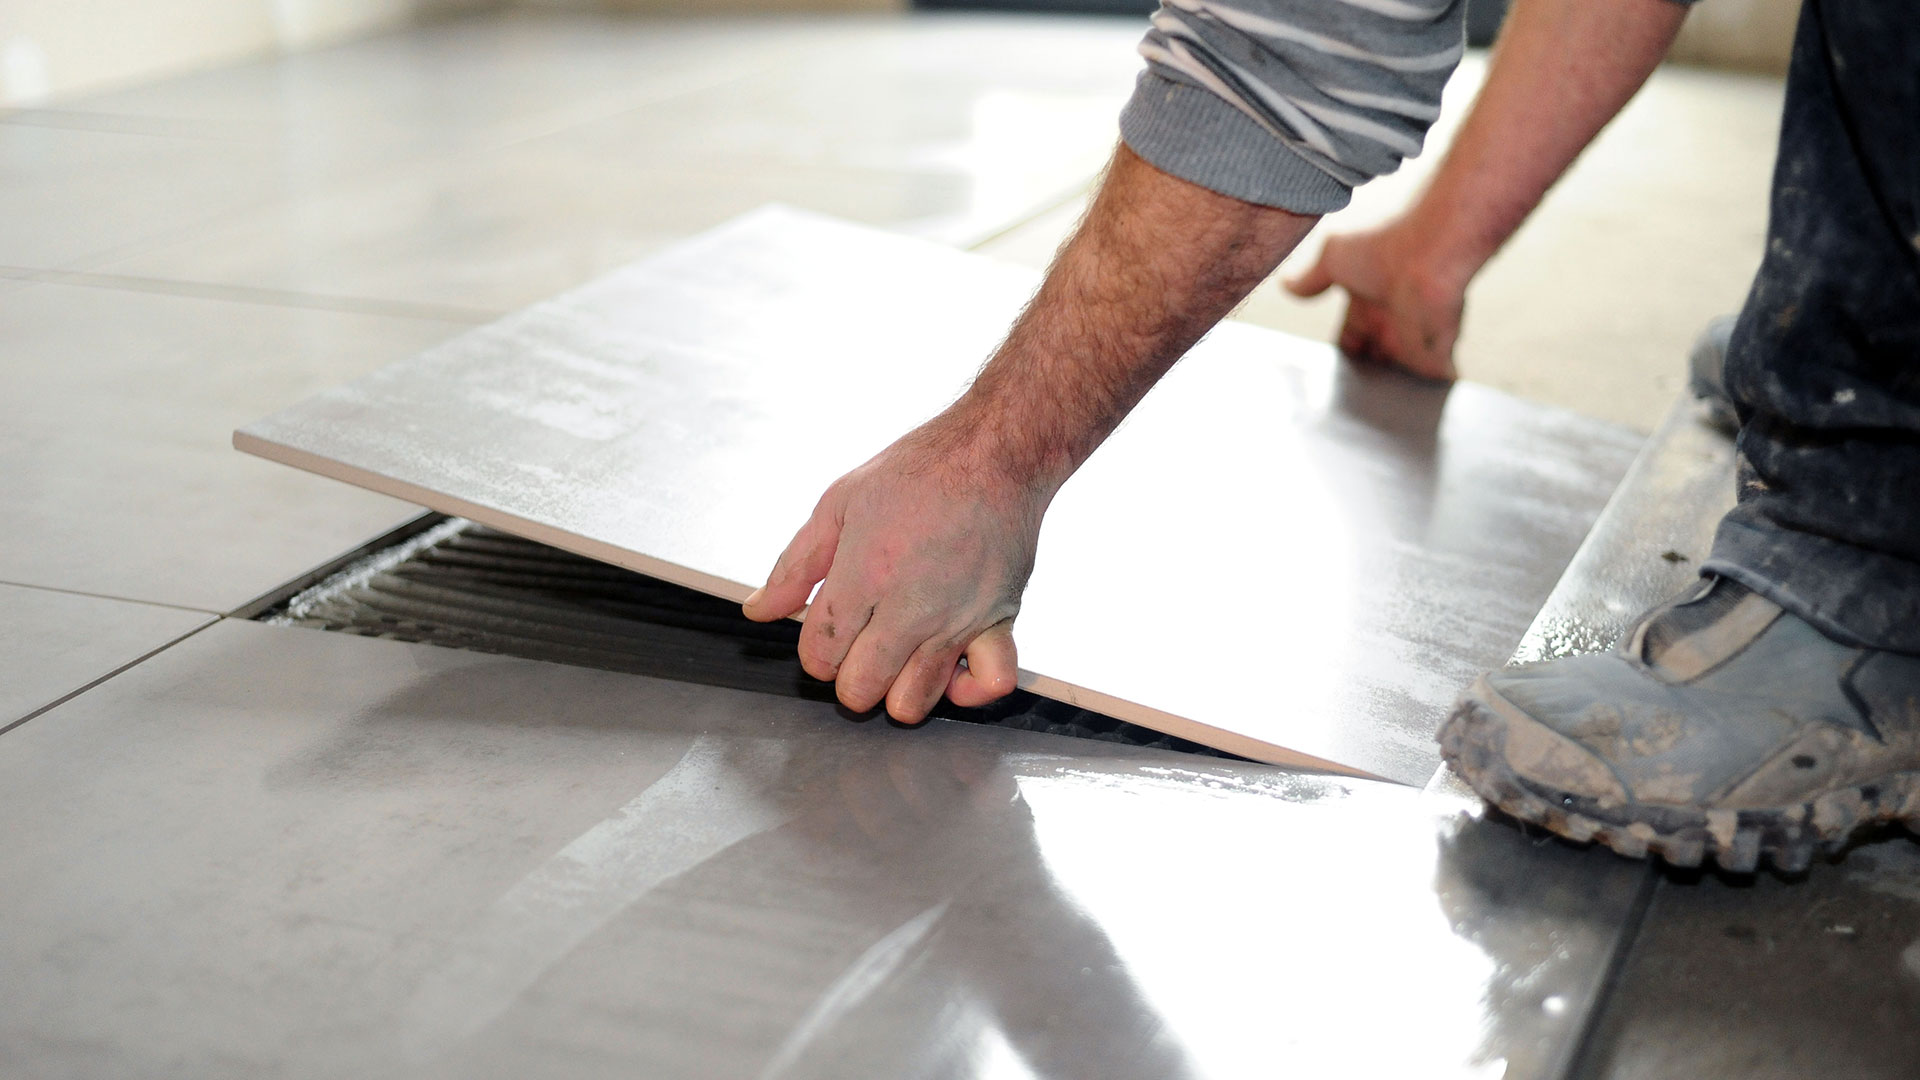
Installing the Underlayment
Once the thinset mortar has been applied, it is time to install the underlayment. Starting at one end of the room, begin installing the underlayment by pressing it into the thinset mortar with your hands. Make sure that it is firmly pressed into place, and that there are no air bubbles underneath it. Continue installing the underlayment until you reach the opposite end of the room.
Finishing Touches
Once all of the underlayment has been installed, use a notched trowel to spread more thinset mortar over any seams between sheets of underlayment. This will ensure that there are no gaps between sheets of underlayment, which could lead to water damage or other problems in the future. Finally, use a damp cloth or sponge to wipe away any excess thinset mortar that may have been left behind during installation.
Common Questions about Installing Tile Floor Underlayment
Q: Can I install tile floor underlayment on concrete?
A: Yes, you can install tile floor underlayment on concrete if it is clean and level. Any old adhesive or debris should be completely removed and filled in with concrete patching compound before installing tile floor underlayment.
Q: Do I need an extra layer of thinset mortar when installing tile floor underlayment?
A: Yes, an extra layer of thinset mortar between sheets of underlayment will ensure a strong bond and help prevent any water damage or other problems in the future.
Q: How long should I wait before laying down tiles after installing tile floor underlayment?
A: You should wait 24 hours after installing tile floor underlayment before laying down any tiles in order to give it time to properly dry and settle into place.
Conclusion
Installing tile floor underlayment is an important part of any tile floor installation project. Following this step-by-step guide will ensure a successful installation process from start to finish. With proper preparation and installation techniques, you can rest assured that your tile floor will look great and last for years to come.