Luxury vinyl flooring can also be referred to as cheap vinyl flooring. You will be a fool to consider the newest floors in the same way these days. Spills are very easily removed by simply wiping it with a damp cloth. The sole problem with Vinyl is that it is tough to recycle. You are able to use vinyl throughout your entire home to get the physical appearance of hardwood, yet not have to worry about damaging effects as water.
Images Related to How To Install Vinyl Flooring Over Tile
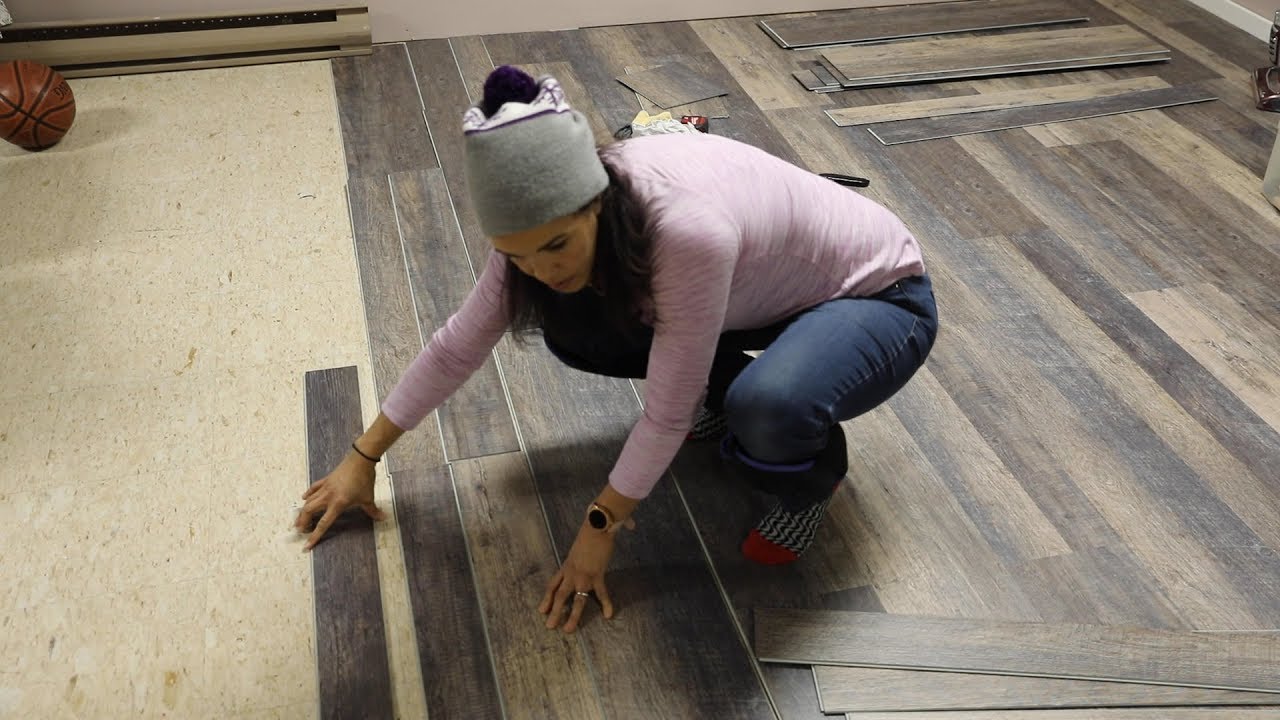
How To Install Vinyl Flooring Over Tile
/cdn.vox-cdn.com/uploads/chorus_asset/file/19650591/flooring_install.jpg)
Vinyl kitchen flooring is long-lasting, practical, economical, and beautiful. Vinyl flooring comes in 2 forms. Once your new floor is cut, inserted as well as fixed, remember a couple of suggestions to guarantee that it stays shipshape. Though you've a doormat to keep off the dirt which comes from the outside, a few dust can continue to get in and accumulate in the flooring of yours.
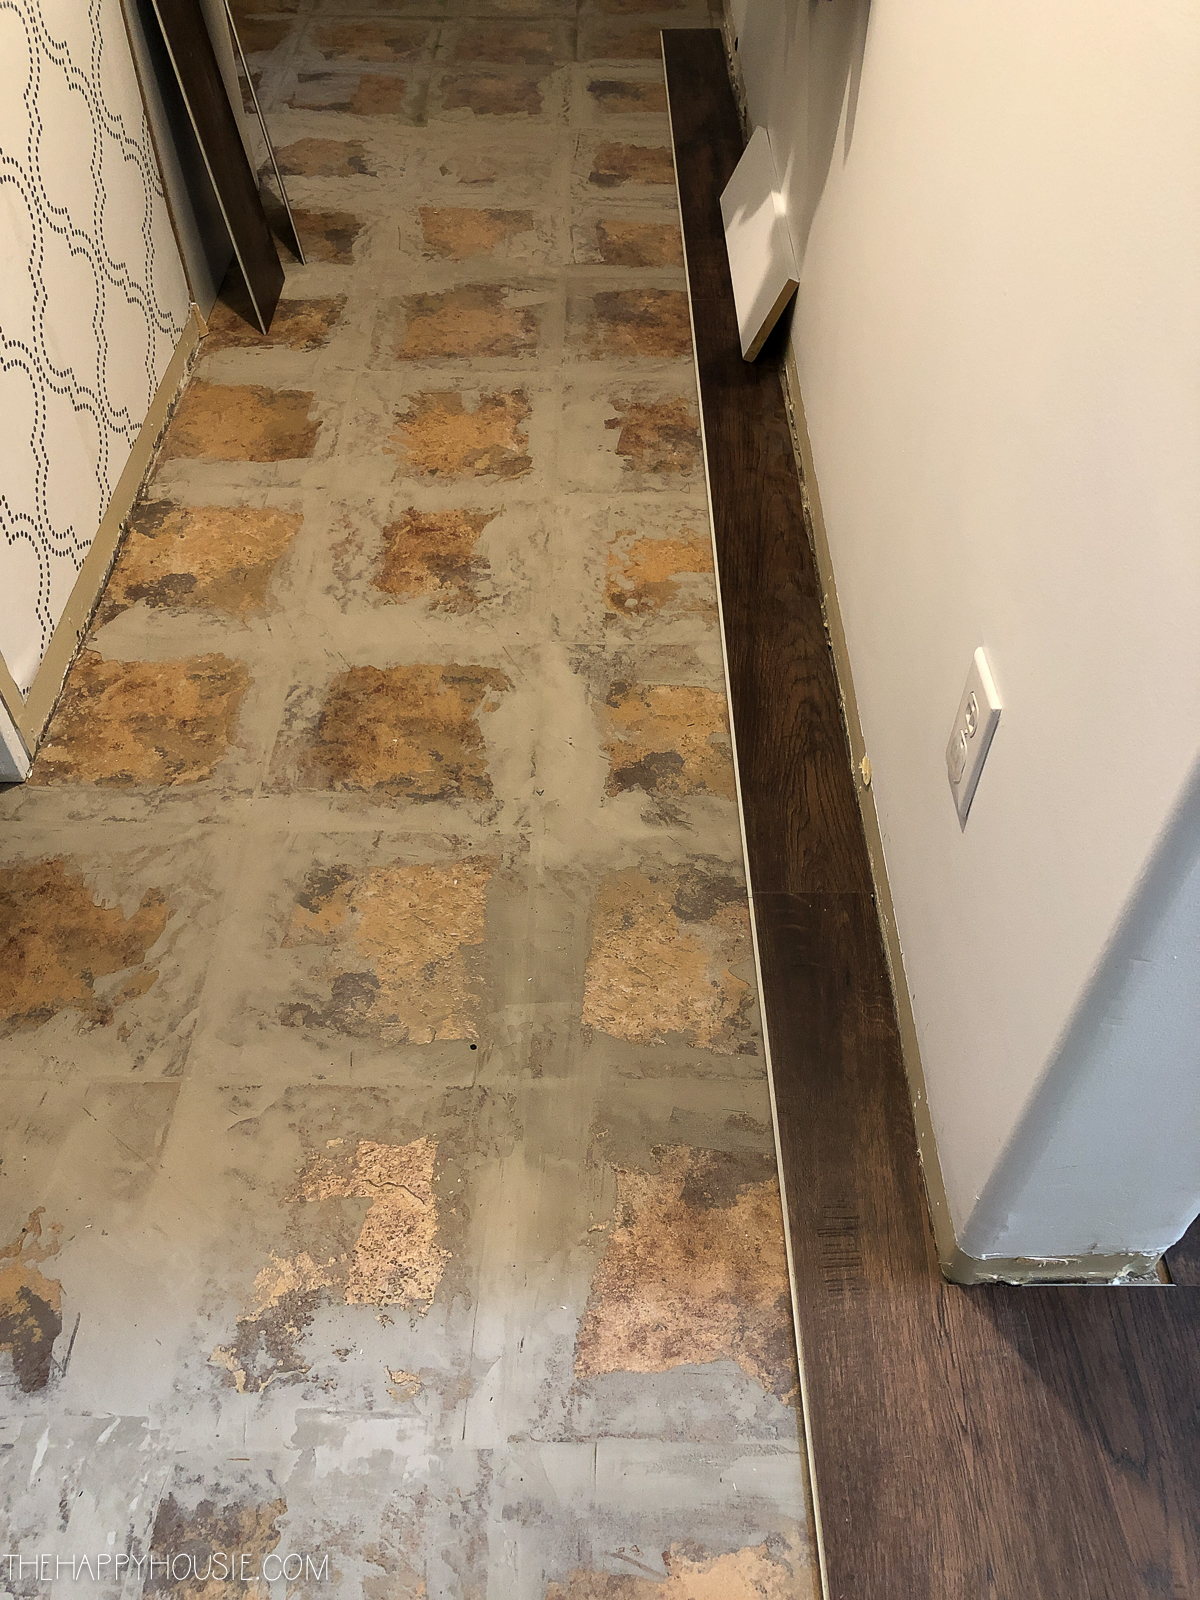
How to Install Vinyl Flooring Over Tiles (Over Linoleum Tiles) – Thrift Diving
Made of vinyl, however, your floors are warmer plus more comfortable to step on. If you are excited about adding brand new style and beauty to the home's design you ought to consider vinyl flooring. In case a little puddle of water rests on top part of hardwood for a long period of time it is able to destroy it. Parents with kids who have asthmatic or allergic tendencies usually choose vinyl for their flooring for this distinct advantage.
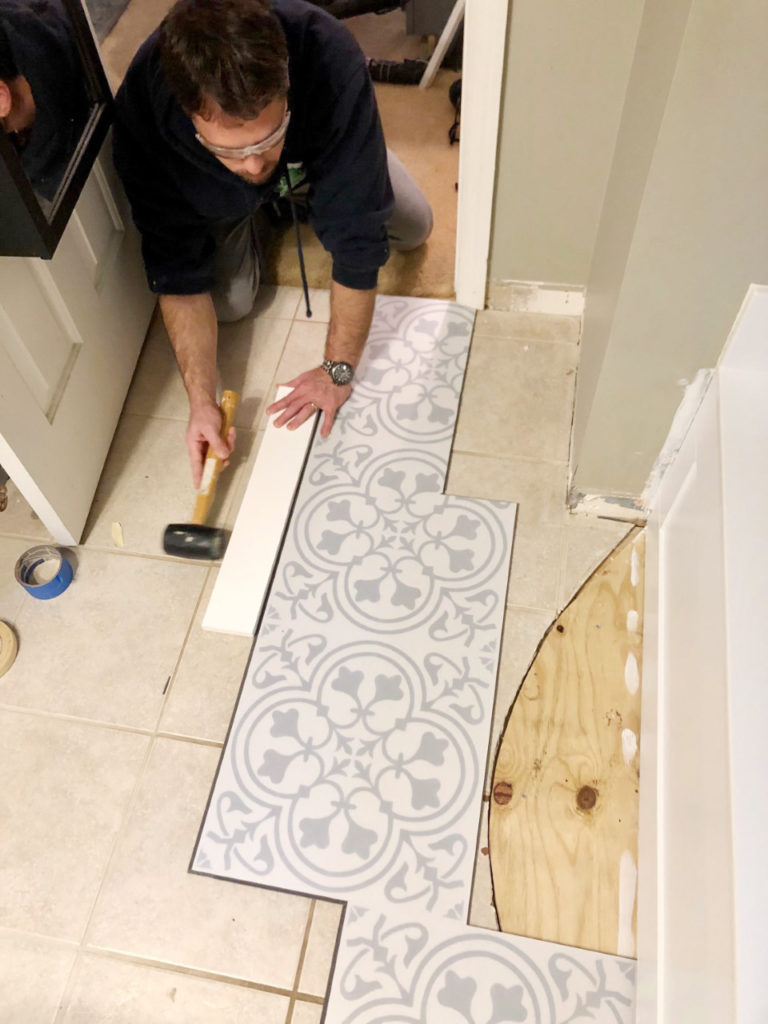
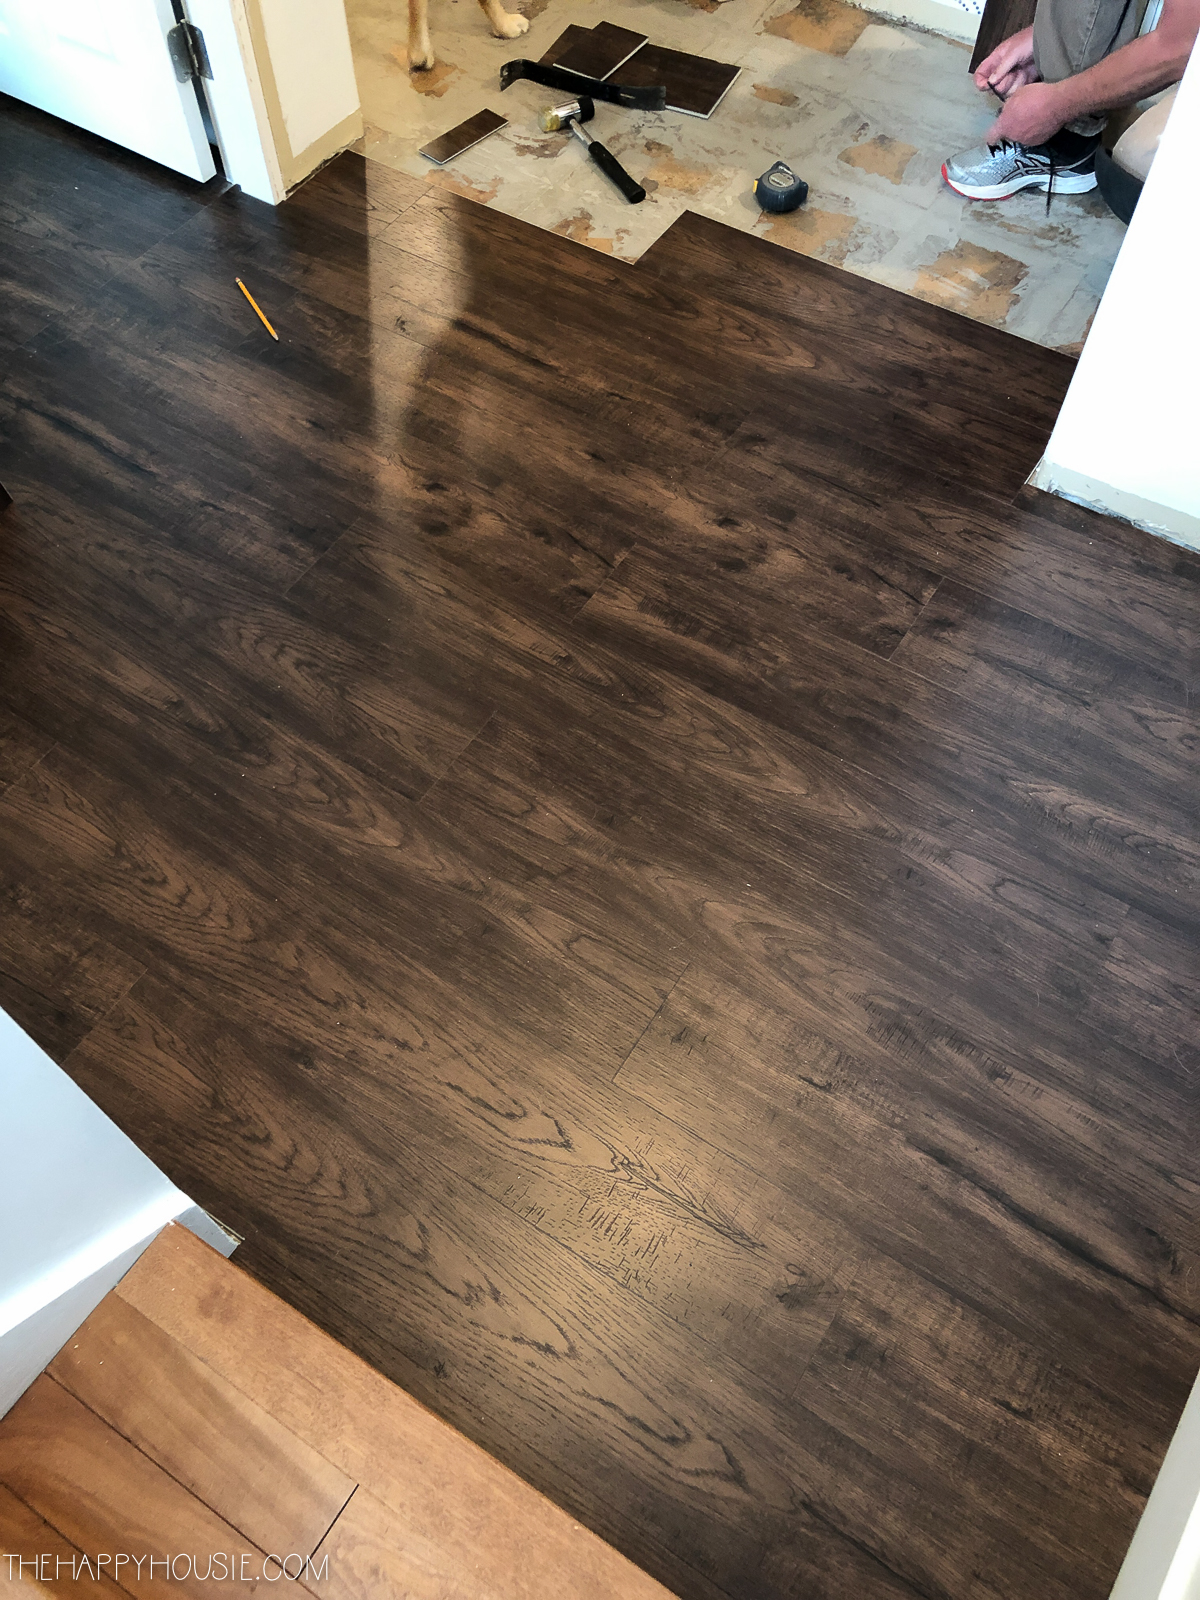
How to Install Vinyl Plank Over Tile Floors The Happy Housie
Can You Put Vinyl Flooring Over Tile? – Zothex Flooring

LVT Flooring Over Existing Tile the Easy Way – Vinyl Floor
Installing Luxury Vinyl over existing tiles. – Choices Flooring

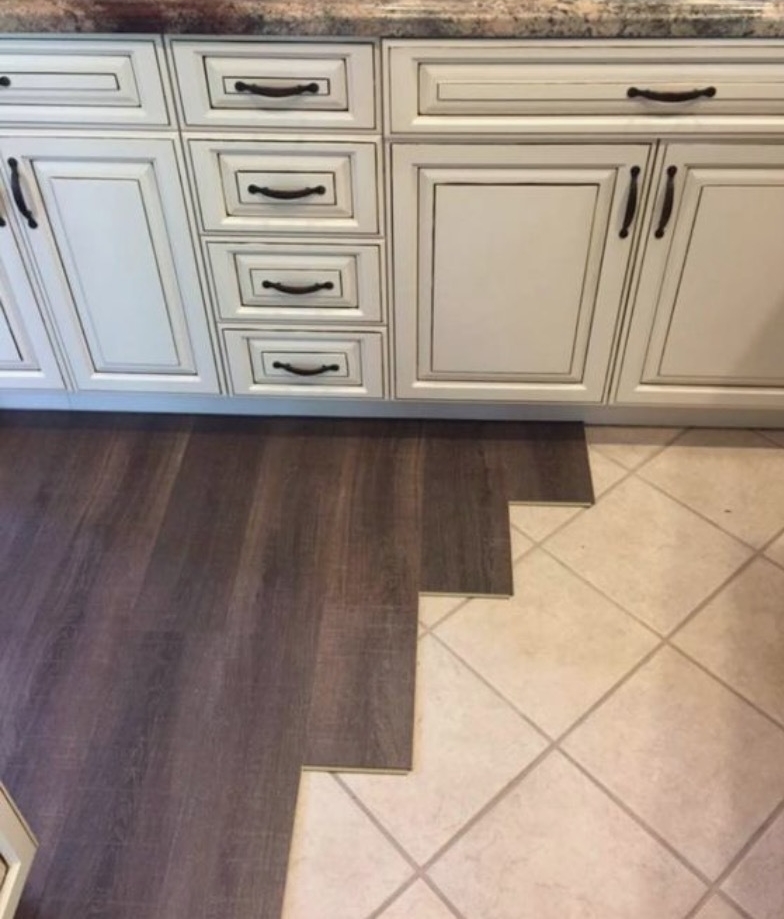
vinyl plank flooring over tile / should I do this?
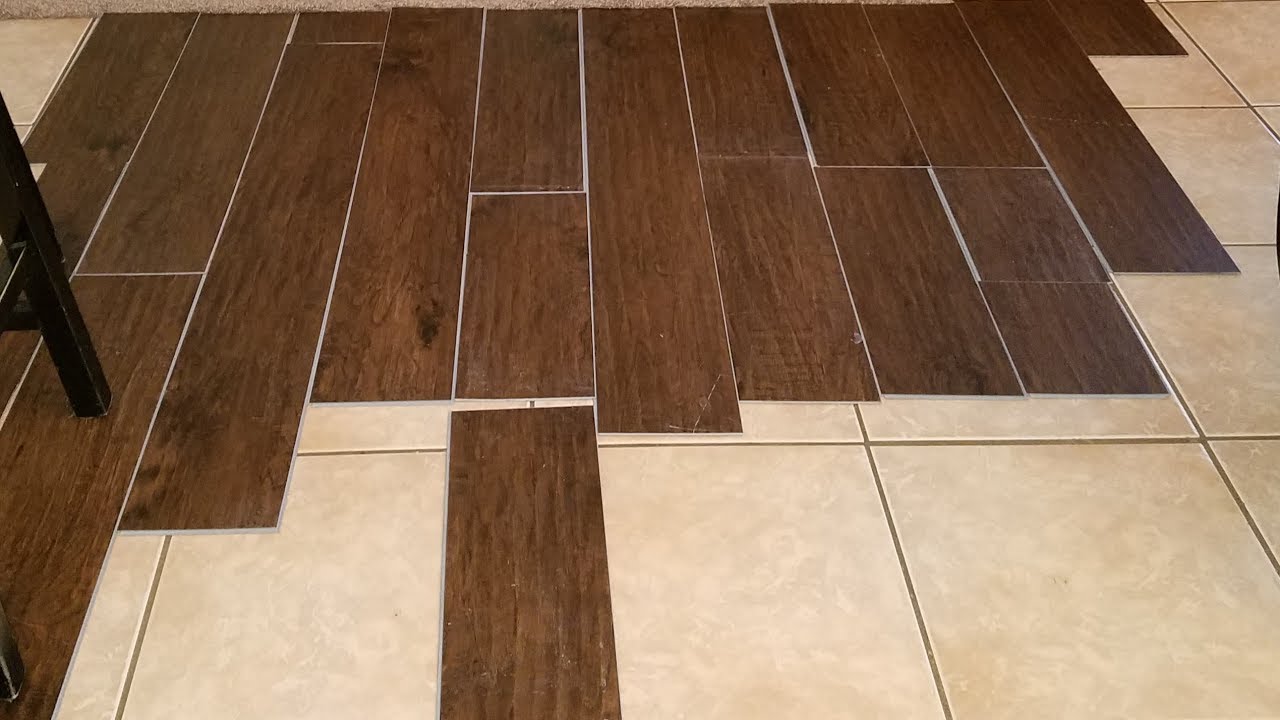
We put down vinyl plank flooring over tile! We did use a bag of

How to Prepare a Vinyl Floor for Ceramic Tile
/can-you-tile-over-vinyl-floor-1822596_FINAL_NEW-b4003c12b3ce48b382e80c57fb340b03.png)
How to Install Vinyl Plank Over Tile Floors The Happy Housie
Can You Put Vinyl Flooring Over Tile?
I did this myself, Vinyl plank flooring over tile Vinyl wood

How to Install Vinyl Plank Flooring as a Beginner Home Renovation

Everything Designers want you to know about COREtec u2014 Savvy Interiors
Related articles:
- Vinyl Flooring Bathroom Tile
- Modern Vinyl Flooring
- Funky Vinyl Flooring
- Vinyl Flooring For Kitchen
- Vintage Look Vinyl Flooring
- Kitchen Vinyl Floor Tiles Ideas
- Vinyl Flooring With Wood Look
- Waterproof Vinyl Flooring
- Vinyl Flooring For Cheap
- How To Remove Vinyl Flooring
How To Install Vinyl Flooring Over Tile
Vinyl flooring is a popular choice for homeowners, as it offers a durable and affordable option that can mimic the look of more expensive materials like hardwood or tile. If you currently have tile flooring in your home and are looking to update the look without the hassle and cost of removing the existing tiles, installing vinyl flooring over tile can be a practical solution. In this article, we will provide you with a step-by-step guide on how to install vinyl flooring over tile, along with some frequently asked questions to help you through the process.
Preparing the Tile Surface
Before you begin installing vinyl flooring over tile, it is essential to prepare the surface properly. This will ensure that the new flooring adheres properly and provides a smooth and even finish. Follow these steps to prepare the tile surface:
1. Clean the Tiles: Start by thoroughly cleaning the tiles using a mild detergent and warm water. Remove any dirt, grease, or grime that may be present on the surface. You can use a soft-bristle brush or sponge to scrub away any stubborn stains.
2. Repair Damaged Tiles: Examine the tiles for any cracks or loose pieces. If you find any damaged tiles, remove them carefully using a chisel or scraper. Replace them with new ones if necessary and ensure that the surface is level and even.
3. Fill Grout Lines: If your tile has grout lines, fill them with a floor-leveling compound to create a smooth surface. Apply the compound using a trowel, making sure to fill in all gaps and cracks. Allow it to dry completely before moving on to the next step.
4. Sand the Surface: To enhance adhesion, lightly sand the entire tile surface using fine-grit sandpaper or an orbital sander. This will roughen up the surface and allow the adhesive to bond better with the tiles.
Installing Vinyl Flooring
Once you have prepared the tile surface, you can proceed with installing the vinyl flooring. Follow these steps for a successful installation:
1. Measure and Cut: Start by measuring the dimensions of the room to determine how much vinyl flooring you will need. Add a few extra inches to the measurements for any mistakes or adjustments. Use a utility knife or vinyl cutter to cut the vinyl flooring into the desired size and shape. Make sure to leave an extra inch or so around the edges to allow for expansion.
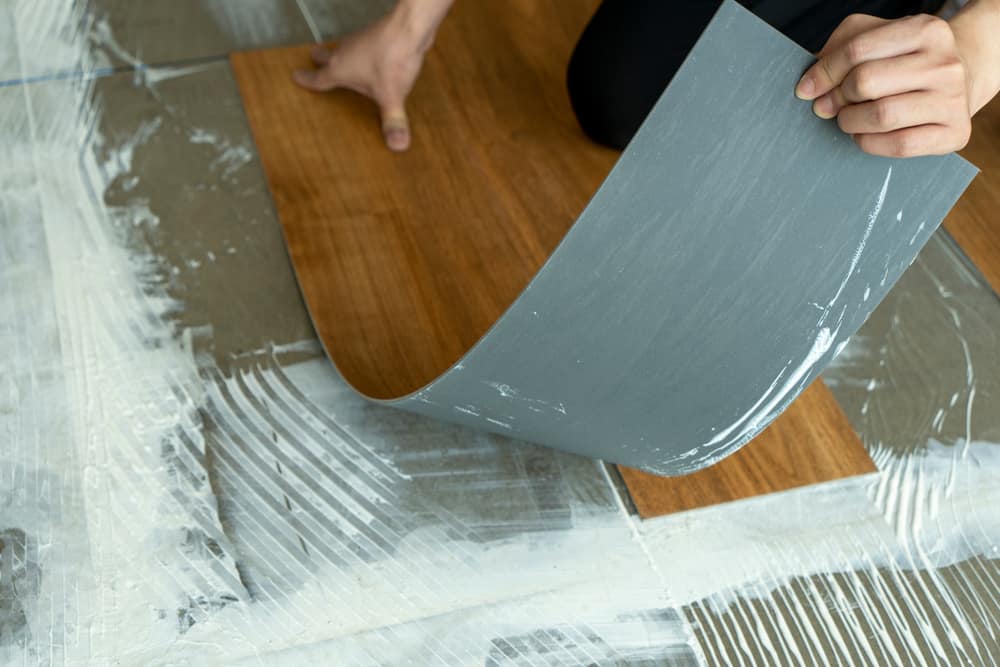
2. Apply Adhesive: Apply a high-quality adhesive specifically designed for vinyl flooring using a trowel or roller. Begin at one corner of the room and work your way towards the opposite wall. Spread the adhesive evenly, making sure to cover the entire surface area where you will be laying the vinyl flooring.
3. Lay Vinyl Flooring: Carefully place the pre-cut vinyl flooring on top of the adhesive, starting from one corner and working your way across the room. Press down firmly on each piece as you go to ensure proper adhesion. Use a floor roller to smooth out any air bubbles or wrinkles in the vinyl.
4. Trim Excess Edges: Once all the vinyl flooring is laid down, use a utility knife or vinyl trimmer to trim off any excess edges along the walls or corners. Take your time and make precise cuts for a clean and professional finish.
5. Allow Time for Adhesive to Dry: After completing the installation, it is crucial to allow sufficient time for the adhesive to dry completely before walking on or placing any furniture on the newly installed vinyl Flooring. Check the manufacturer’s instructions for the recommended drying time, as it can vary depending on the type of adhesive used. Avoid applying any pressure or moving furniture on the floor until it is fully dry to prevent any damage or shifting of the vinyl tiles. 6. Clean and Maintain: Once the adhesive has dried, clean the vinyl flooring with a mild detergent and warm water. Avoid using harsh chemicals or abrasive cleaners that can damage the surface. Regularly sweep or vacuum the floor to remove dirt and debris, and promptly clean up any spills to prevent staining. Additionally, place protective pads under furniture legs to avoid scratching or indenting the vinyl flooring.
7. Use Area Rugs or Mats: To further protect your vinyl flooring, consider using area rugs or mats in high-traffic areas or areas prone to spills, such as entryways or kitchens. This will help prevent wear and tear and extend the lifespan of your vinyl flooring.
8. Avoid Excessive Moisture: Vinyl flooring is generally water-resistant but not waterproof. Avoid excessive moisture by promptly wiping up any spills and avoiding mopping with excessive water. Use a damp mop or cloth for regular cleaning instead.
9. Repair any Damage: If your vinyl flooring gets damaged, such as scratches or tears, it is important to repair it promptly to prevent further damage. For small scratches, you can use a vinyl floor repair kit to fill in the damaged area. For larger tears or damage, it may be necessary to replace the affected tiles or sections of the vinyl flooring.
10. Follow Manufacturer’s Recommendations: Always follow the manufacturer’s recommendations for cleaning, maintenance, and repairs specific to your vinyl flooring. This will ensure that you are taking proper care of your flooring and maximizing its lifespan.
By following these steps and properly maintaining your vinyl flooring, you can enjoy a durable and attractive floor surface for years to come. Vinyl flooring is a popular choice for many homeowners due to its durability, affordability, and easy maintenance. To ensure the longevity and appearance of your vinyl flooring, it is important to follow proper installation and maintenance procedures. Here are ten steps to help you install and care for your vinyl flooring:
1. Prepare the Subfloor: Before installing vinyl flooring, make sure that the subfloor is clean, dry, and level. Remove any existing flooring or debris and repair any cracks or uneven areas.
2. Measure and Cut the Vinyl: Measure the dimensions of the room and add a few inches for trimming. Roll out the vinyl flooring and use a utility knife or vinyl cutter to cut it to size. Make sure to leave enough room around obstacles such as cabinets or doorways.
3. Apply Adhesive: Apply adhesive to the back of the vinyl flooring using a trowel or roller, starting from one corner and working your way across the room. Press down firmly on each piece as you go to ensure proper adhesion. Use a floor roller to smooth out any air bubbles or wrinkles in the vinyl.
4. Trim Excess Edges: Once all the vinyl flooring is laid down, use a utility knife or vinyl trimmer to trim off any excess edges along the walls or corners. Take your time and make precise cuts for a clean and professional finish.
5. Allow Time for Adhesive to Dry: After completing the installation, it is crucial to allow sufficient time for the adhesive to dry completely before walking on or placing any furniture on the newly installed vinyl flooring. Check the manufacturer’s instructions for the recommended drying time, as it can vary depending on the type of adhesive used. Avoid applying any pressure or moving furniture on the floor until it is fully dry to prevent any damage or shifting of the vinyl tiles.
6. Clean and Maintain: Once the adhesive has dried, clean the vinyl flooring with a mild detergent and warm water. Avoid using harsh chemicals or abrasive cleaners that can damage the surface. Regularly sweep or vacuum the floor to remove dirt and debris, and promptly clean up any spills to prevent staining. Additionally, place protective pads under furniture legs to avoid scratching or indenting the vinyl flooring.
7. Use Area Rugs or Mats: To further protect your vinyl flooring, consider using area rugs or mats in high-traffic areas or areas prone to spills, such as entryways or kitchens. This will help prevent wear and tear and extend the lifespan of your vinyl flooring.
8. Avoid Excessive Moisture: Vinyl flooring is generally water-resistant but not waterproof. Avoid excessive moisture by promptly wiping up any spills and avoiding mopping with excessive water. Use a damp mop or cloth for regular cleaning instead.
9. Repair any Damage: If your vinyl flooring gets damaged, such as scratches or tears, it is important to repair it promptly to prevent further damage. For small scratches, you can use a vinyl floor repair kit to fill in the damaged area. For larger tears or damage, it may be necessary to replace the affected tiles or sections of the vinyl flooring.
10. Follow Manufacturer’s Recommendations: Always follow the manufacturer’s recommendations for cleaning, maintenance, and repairs specific to your vinyl flooring. This will ensure that you are taking proper care of your flooring and maximizing its lifespan.
By following these steps and properly maintaining your vinyl flooring, you can enjoy a durable and attractive floor surface for years to come.