The classic basement flooring is a basic cement floor, that you can make use of paint or spots to develop various patterns. You are going to be ready to choose excellent basement flooring which fits your needs in case you know precisely what to make out of the basement of yours in the long run.
Here are Images about How To Install Cork Flooring In Basement
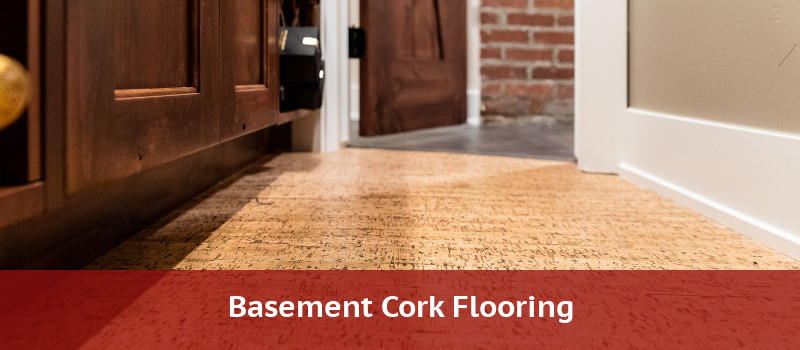
How To Install Cork Flooring In Basement
/cork-flooring-in-unfurnished-new-home-647206431-2eceda7dc48e4eecbabde1b709de459f.jpg)
While it is accurate this kind of floor has the important advantage of being quicker to clean if the cellar floods and of maintaining the basement cooler throughout the summer months, additionally, there are other aspects that you should take into consideration about cement flooring if you desire to change the basement of yours into a leisure room.
Installing Cork Flooring in a Basement Pros u0026 Cons and Best Brands
As they're underground, and we are living in a relatively moist environment, and basements are susceptible to mold damage. You will find a number of choices on the market for safeguarding your storage area or basement floor, like an epoxy coating or perhaps a roll-out rubber mat, but the most durable and among the most appealing is actually a polyurea coating. That is normal and fine of course.
Images Related to How To Install Cork Flooring In Basement
Cork Works: Installing Cork Flooring u2013 Mother Earth Living

Cork Flooring In Basements HGTV
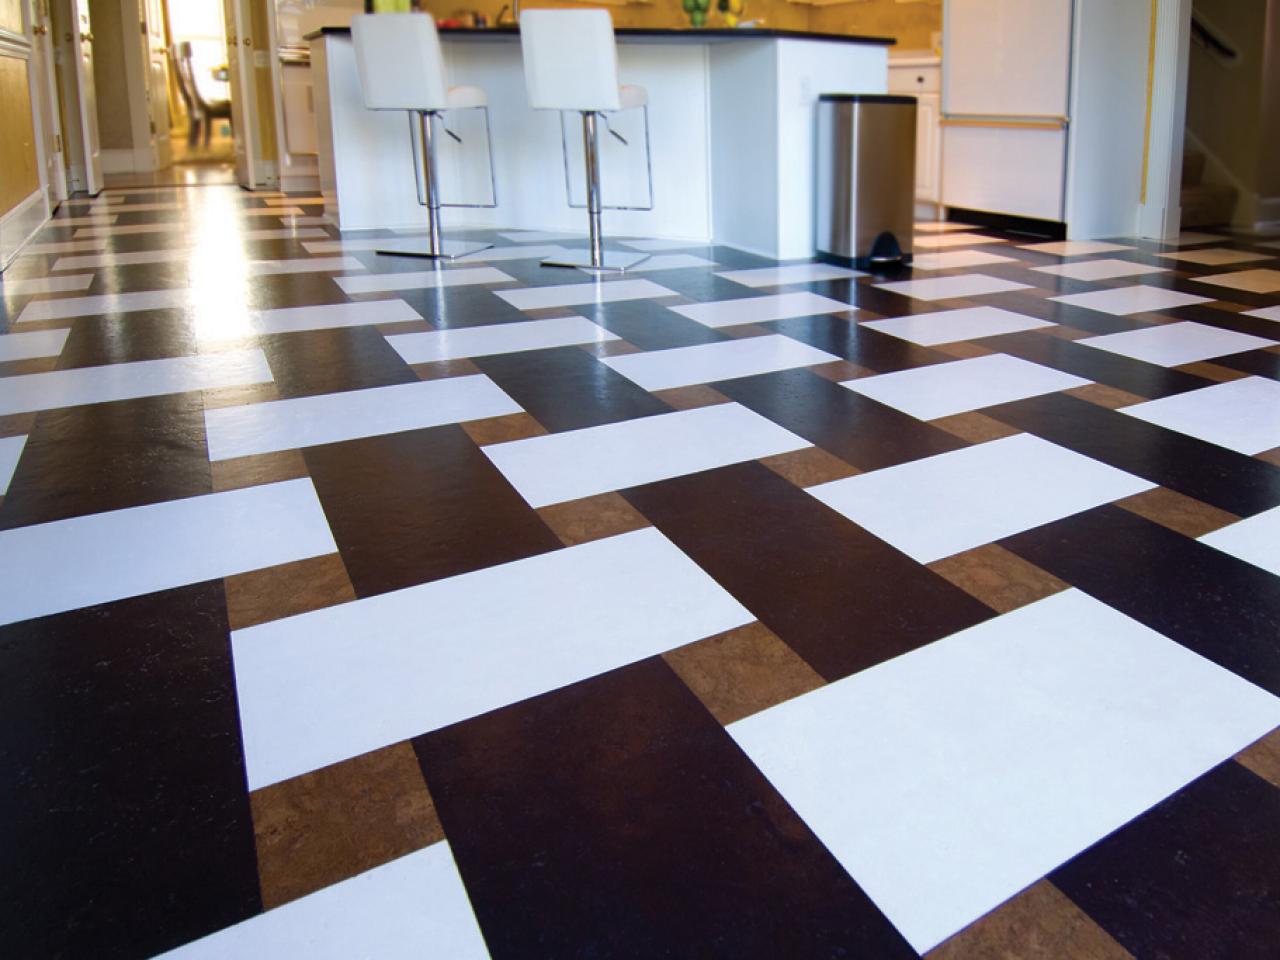
How I Saved Over $700 on Cork Flooring for the Basement

How I Saved Over $700 on Cork Flooring for the Basement

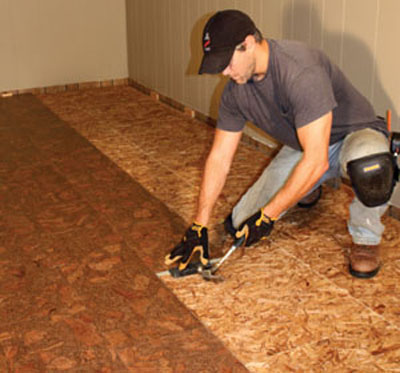
DIY Steps for Installing a Insulated Basement Floor – Extreme How To
How I Saved Over $700 on Cork Flooring for the Basement

Cork Works: Installing Cork Flooring u2013 Mother Earth Living

Cork Flooring 101: Cost, Types, u0026 Installation – This Old House
/cdn.vox-cdn.com/uploads/chorus_asset/file/23088021/0421_NB_All_About_Cork_Floors_Cork_flooring_iStock_950010876.jpg)
Floating Cork Flooring – Information on Floating Cork Floors

Should You Install Cork Flooring in Your Flip? Paces Funding

All About Cork Flooring and Why Itu0027s Perfect for the Basement

Cork Soundproofing Does Cork Have Acoustic Properties?

Related articles:
- Stained Concrete Basement Floor
- Finishing Basement Floor
- Refinish Concrete Basement Floor
- Best Flooring For Basement
- Basement Gym Flooring Ideas
- Laminate Flooring In Basement
- Basement Concrete Floor Sweating
- Basement Floor Finishing Ideas
- Painting Unfinished Basement Floor
- Unique Basement Flooring
How to Install Cork Flooring in Basement
Cork flooring is becoming an increasingly popular choice for homeowners looking to add warmth and comfort to their basements. Not only is cork a sustainable and eco-friendly option, but it also offers excellent insulation properties and durability. Installing cork flooring in your basement can be a DIY project with the right tools and knowledge. In this article, we will guide you through the step-by-step process of installing cork flooring in your basement.
1. Preparing the Basement Subfloor
Before you begin installing cork flooring, it is crucial to prepare your basement subfloor properly. The subfloor should be clean, dry, level, and free from any debris or imperfections. Start by removing any existing flooring material, such as carpet or vinyl. Use a scraper or pry bar to lift the old flooring carefully.
Next, inspect the subfloor for any moisture issues. Basements are prone to high humidity levels, so it is important to address any dampness before proceeding with the installation. Test the moisture levels using a moisture meter and ensure they are within the manufacturer’s recommended range for cork flooring.
If there are moisture concerns, consider installing a vapor barrier or waterproofing system to prevent any potential damage to the cork flooring over time. Consult with a professional if you are unsure about how to address moisture issues in your basement.
FAQs:
Q: Can I install cork flooring directly on a concrete basement floor?
A: While it is possible to install cork flooring directly on a concrete basement floor, it is essential to address any moisture concerns first. Concrete can retain moisture, which may damage the cork over time. Consider using a vapor barrier or waterproofing system to protect your cork flooring.
Q: Do I need to level my basement subfloor before installing cork flooring?
A: Yes, it is crucial to have a level subfloor for proper installation of cork flooring. Uneven surfaces can cause gaps or buckling in the cork tiles. Use a self-leveling compound or hire a professional to ensure your subfloor is level before proceeding with the installation.
2. Acclimating the Cork Tiles
Cork flooring is a natural material that expands and contracts with changes in temperature and humidity. To prevent any potential issues after installation, it is essential to acclimate the cork tiles to the basement environment before installing them.
Start by unpacking the cork tiles and allowing them to sit in the basement for at least 48 hours. This will allow the tiles to adjust to the temperature and humidity levels of the space. Keep them away from direct sunlight and ensure proper airflow during this acclimation period.
FAQs:
Q: How long should I acclimate cork flooring before installation?
A: It is recommended to acclimate cork flooring for at least 48 hours before installation. However, in some cases, manufacturers may recommend a longer acclimation period depending on the specific product. Always follow the manufacturer’s guidelines for best results.
Q: Can I speed up the acclimation process for cork flooring?
A: While it is important not to rush the acclimation process, you can help speed it up by ensuring proper ventilation and airflow in the basement. Make sure there are no plastic coverings or obstacles obstructing air circulation around the cork tiles during acclimation.
3. Installing Cork Flooring Tiles
Once your basement subfloor is prepared and the cork tiles have been properly acclimated, you can proceed with the installation process. Follow these steps to install cork flooring in your Basement:
1. Prepare the subfloor: Ensure that the basement subfloor is clean, dry, and level. Remove any existing flooring and repair any cracks or uneven areas.
2. Lay down a moisture barrier: If moisture is a concern in your basement, it is recommended to install a vapor barrier or waterproofing system to protect the cork flooring. This will help prevent any potential damage over time.
3. Start in a corner: Begin the installation in a corner of the room, laying down the first cork tile. Leave a small gap between the tile and the wall to allow for expansion.
4. Use adhesive: Apply adhesive to the subfloor using a trowel, following the manufacturer’s instructions. Press the cork tile firmly into place, ensuring it is flat and level.
5. Continue installation: Repeat the process, laying down one tile at a time, until you have covered the entire basement floor. Make sure to leave small gaps between tiles for expansion.
6. Trim as needed: Use a utility knife or saw to trim any pieces that need to fit around obstacles such as pipes or corners.
7. Allow for drying time: After completing the installation, allow the adhesive to dry according to the manufacturer’s instructions before walking on the floor or placing furniture.
8. Seal the cork flooring: Depending on the type of cork flooring you have installed, it may be necessary to apply a sealant or finish to protect it from moisture and wear.
Remember to always follow the manufacturer’s instructions for installation and maintenance of your specific cork flooring product. If you are unsure about any steps or have concerns about moisture in your basement, consult with a professional for guidance. The acclimation process for cork flooring is important to ensure that the tiles adjust to the humidity and temperature of the room, which helps to prevent them from expanding or contracting after installation. While it is not recommended to speed up the acclimation process, you can improve airflow and ventilation in the basement to aid in the process. This can be done by removing any plastic coverings or obstacles that may obstruct air circulation around the cork tiles during acclimation.
When installing cork flooring in your basement, it is crucial to prepare the subfloor properly. This involves ensuring that it is clean, dry, and level. Any existing flooring should be removed, and any cracks or uneven areas should be repaired.
If moisture is a concern in your basement, it is recommended to lay down a moisture barrier such as a vapor barrier or waterproofing system before installing the cork flooring. This will help protect the cork from potential damage over time.
The installation process starts in a corner of the room, where you lay down the first cork tile. Leave a small gap between the tile and the wall to allow for expansion. Adhesive should be applied to the subfloor using a trowel according to the manufacturer’s instructions. Press each cork tile firmly into place, ensuring it is flat and level.
Continue this process one tile at a time until you have covered the entire basement floor. Remember to leave small gaps between tiles for expansion. Trim any pieces that need to fit around obstacles such as pipes or corners using a utility knife or saw.
After completing the installation, allow the adhesive to dry according to the manufacturer’s instructions before walking on the floor or placing furniture. Depending on the type of cork flooring installed, it may be necessary to apply a sealant or finish to protect it from moisture and wear.
Always follow the manufacturer’s instructions for installation and maintenance of your specific cork flooring product. If you have any doubts or concerns about moisture in your basement, it is advisable to consult with a professional for guidance.