You'll find loads of good options to the types of flooring you make use of on the top floors of your home, and there is bound to be something that will reflect the taste of yours and present you with the basement space you've consistently wanted. Mildew and moisture can ruin most floor coverings.
Here are Images about Redo Basement Floor
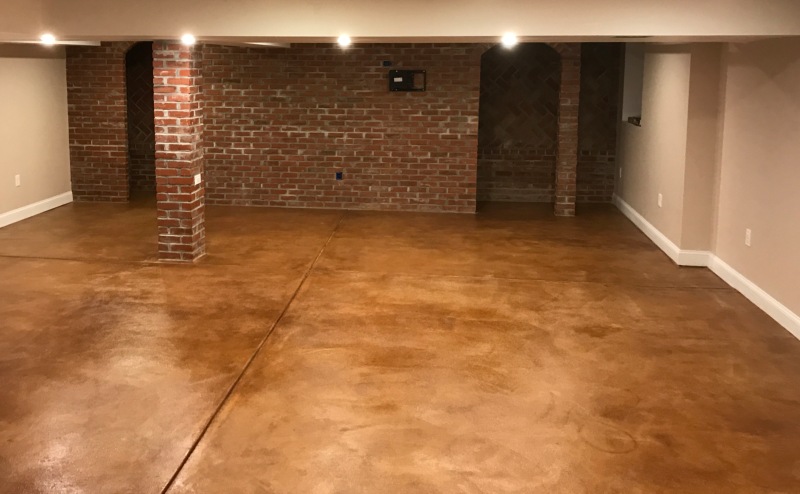
Redo Basement Floor

If your basement allows moisture into the room, it will likely ruin some floor your choose. What will you want to make use of this specific space of the home of yours for. Leaks which come about once a heavy rain, for example, suggest that there's a problem with the waterproofing. Many basement flooring suggestions take into consideration the different varieties of materials to be used for set up.
DIY Basement Floor Stain and finish, 2 colors, Without Etching!
That will be an incredibly challenging aspect when selecting the right flooring for the basement of yours since most of the components are porous but at levels which are various. This makes flooring choices especially sparse as the flooring must be mold-resistant and resilient ; this typically rules out carpet and tile.
Images Related to Redo Basement Floor
My most expensive basement finishing MISTAKE and exactly how you

13 Basement Flooring Ideas (Concrete Wood u0026 Tile) Finishing

Steps for Finishing Your Basement Budget Dumpster
15 DIY Basement Flooring Ideas – Affordable DIY Flooring Options

ThermalDry™ Basement Flooring Systems Basement Systems
BASEMENT IDEAS: u201cSemi-Finishedu201d Option an Economical Compromise
5 of the Most Durable Basement Flooring Options
.jpg?widthu003d800u0026nameu003d11513489635_f12521f2a2_k%20(1).jpg)
15 DIY Basement Flooring Ideas – Affordable DIY Flooring Options

A Guide to Stained Concrete Basement Floors
Finish Basement Ideas (Step to Finish Basement Floor and Ceiling

9 Basement Flooring Ideas for Your Home – Bob Vila

What Is The Average Cost To Finish A Basement? u2013 Forbes Advisor

Related articles:
- Stained Concrete Basement Floor
- Finishing Basement Floor
- Refinish Concrete Basement Floor
- Best Flooring For Basement
- Basement Gym Flooring Ideas
- Laminate Flooring In Basement
- Basement Concrete Floor Sweating
- Basement Floor Finishing Ideas
- Painting Unfinished Basement Floor
- Unique Basement Flooring
How to Redo a Basement Floor: Step-by-Step Guide
Redoing a basement floor can be an intimidating job for the average homeowner. However, it is a relatively simple task that anyone with a little bit of knowledge and the right tools can accomplish. In this article, we will provide you with a step-by-step guide on how to properly redo your basement floor. With some basic instructions and tips, you will be able to transform your basement floor from drab to fab in no time!
Preparing the Basement Floor for Redoing
The first step in redoing your basement floor is preparing it for the job. This includes removing any furniture, rugs, or other items that may be obstructing the area. Additionally, you should use a vacuum cleaner to remove any dust and debris from the floor. If there are any cracks in the concrete, it is important to patch them up before beginning the process. Once the area is cleared and patched up, you are ready to begin redoing your basement floor.
Choosing the Right Type of Flooring
The next step is selecting the type of flooring that you would like to put down in your basement. This choice largely depends on personal preference and budget. You may choose something as simple as carpet or vinyl tiles or something more luxurious such as hardwood or ceramic tile. However, keep in mind that certain types of floors may require additional preparations such as underlayment or adhesive before installation can begin.
Installing Your New Basement Floor
Once you have chosen your new flooring material, it is time to start installing it on your basement floor. Depending on which type of material you have selected, this may involve laying down an adhesive or underlayment layer before placing down the actual tiles or boards. It is also important to make sure that all pieces fit together tightly and securely so that no water can seep through any gaps or crevices between them. To ensure that everything fits together properly, it may be beneficial to use spacers along the edges of each piece of material before securing them into place with nails or screws. Once all of the pieces are in place, use caulk around any joints and seams to seal them up completely and prevent water from seeping through.
Finishing Touches for Your New Basement Floor
Now that your new basement floor has been installed, there are still a few finishing touches you need to do before you can enjoy its beauty for years to come. These include sealing any gaps between pieces with caulk and applying grout if necessary (depending on which type of material you used). Additionally, you should apply a coat of sealant over the entire surface of your new basement floor for added protection against moisture damage and staining. Finally, apply a few coats of wax overtop for an extra layer of glossiness and shine!
FAQs About Redoing Basement Floors
Q: What kind of materials should I use when redoing my basement floor?
A: The type of material you choose largely depends on personal preference and budget; however, some common options include carpeting, vinyl tiles, hardwood boards, ceramic tiles, natural stone tiles, etc. It is important To make sure that whatever material you choose is designed to be used in a basement environment and won’t be easily damaged by moisture.
Q: How do I prepare the floor before I start redoing it?
A: Before beginning any work on your basement floor, it is important to clear the area of any furniture, rugs, or other obstructions. Additionally, a vacuum cleaner should be used to remove any dust and debris from the floor. If there are any cracks in the concrete, they should be patched up before installation can begin. Finally, you should make sure that the surface is even and that any uneven spots are smoothed out with a trowel.