Most hardwoods darken and be bolder over time, but some woods as Santos Mahogany essentially get lighter from sunlight. The elegance, versatility and organic beauty of wood flooring has made it the most popular selections for today's home owners and with great reason! Along with the visual trends, wood flooring reduces other, dust, and allergens debris associated with carpets and rugs without the "cold" feel of tile.
Images Related to Gluing Engineered Wood Flooring To Concrete
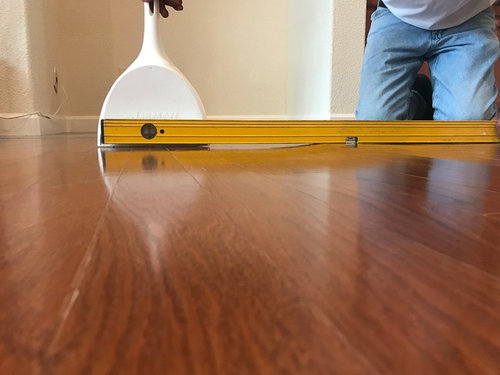
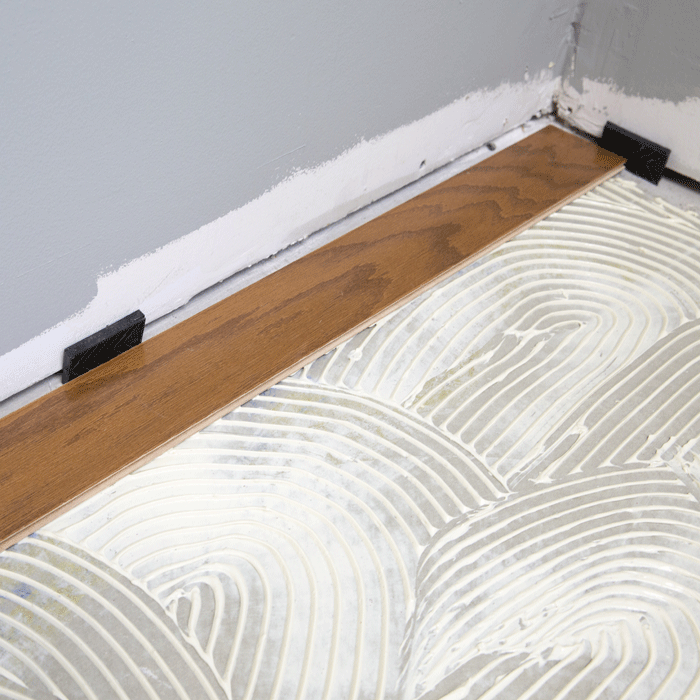
Gluing Engineered Wood Flooring To Concrete

You can put in built wood flooring that's just as gorgeous and can last just so long as a solid wood floor without the increased cost as well as the high maintenance that tough wood flooring is able to require. Today's laminate floor surfaces are created utilizing a photographic picture of wood, marble, or tile which is bonded to fiberboard, supported with melamine plastic as well as coated with lightweight aluminum oxide.
Glue Wood Flooring to a Concrete Slab – Fine Homebuilding

Reclaimed woods are steeped within historical past. With hardwood floors not a lot has altered since the 70s to enhance it's tolerance of regular living conditions. With ease of maintenance and several shopping venues, having an engineered wood flooring has never been easier. Darker colors are also perfect for bedrooms as well as office rooms, though the wood must be stronger since these rooms contain heavy furniture that is apt to be moved frequently.
Installing Engineered Hardwood on Concrete – Twenty u0026 Oak

Glue down engineered hardwood on concrete
Installing Engineered Hardwood on Concrete – Twenty u0026 Oak

Installing Engineered Flooring on a Concrete Slab – Fine Homebuilding

How to Install Engineered Hardwood u2013 Glue Down Method

Installing Engineered Hardwood Floors u2013 Ultimate Guide

Glue Wood Flooring to a Concrete Slab – Fine Homebuilding

Engineered Hardwood Flooring Installation: Tips and Common

Which Method Should I Use to Install My Engineered Wood Floor

How to install wood floors on concrete – Quora

Engineered Hardwood Floors Installation – Hardwood Floor
How to Install a Wood Subfloor Over Concrete Olde Wood Ltd.
Related articles:
- Black Walnut Wood Flooring
- Wood Flooring Designs
- Wood Flooring Options For Kitchens
- Contemporary Wood Flooring Ideas
- Dark Wood Floor Bedroom Ideas
- Real Wood Flooring For Kitchens
- Natural Wood Floor Stain
- Oak Wood Flooring
- Birch Wood Flooring Reviews
- Wood Floor Damage Repair
Gluing Engineered Wood Flooring To Concrete: A Comprehensive Guide
Introduction:
Engineered wood flooring has become increasingly popular due to its durability, versatility, and aesthetic appeal. One of the challenges homeowners face when installing engineered wood flooring is how to secure it to a concrete subfloor. While traditional methods involve nailing or floating the flooring, gluing offers a reliable and long-lasting solution. In this article, we will provide you with a detailed guide on gluing engineered wood flooring to concrete, including step-by-step instructions, FAQs, and expert tips.
I. Preparing the Subfloor:
Before you begin gluing engineered wood flooring to concrete, it is crucial to prepare the subfloor properly. Here are the necessary steps:
1. Clean the Concrete:
Start by thoroughly cleaning the concrete subfloor to ensure proper adhesion. Remove any dirt, dust, or debris using a vacuum cleaner or broom. For stubborn stains or adhesive residues, consider using a concrete cleaner or degreaser.
2. Level the Surface:
Next, inspect the concrete surface for any irregularities or uneven spots. Use a leveling compound to fill in any gaps or low areas. This step is crucial as it ensures a smooth and stable base for your engineered wood flooring.
3. Moisture Testing:
Concrete subfloors can be prone to moisture issues that can damage your flooring over time. Perform a moisture test by taping a plastic sheet securely to the concrete floor and leaving it for 24-48 hours. If condensation droplets appear on the underside of the plastic sheet, it indicates excess moisture. In such cases, it is essential to address moisture problems before proceeding with gluing.
FAQs:
Q1: Can I glue engineered wood flooring directly on top of an old adhesive residue?
A1: It is not recommended to glue engineered wood flooring directly onto old adhesive residue as it may compromise adhesion and result in an uneven surface. It is best to remove the old adhesive and clean the concrete thoroughly before proceeding with gluing.
Q2: How long should I wait after leveling the concrete before gluing the engineered wood flooring?
A2: The drying time for leveling compounds can vary depending on the product used. Follow the manufacturer’s instructions for specific drying times. As a general guideline, it is recommended to wait at least 24 hours before applying adhesive to ensure the compound is fully cured.
II. Selecting the Right Adhesive:
Choosing the appropriate adhesive is crucial for a successful glued-down installation of engineered wood flooring. Here are some factors to consider:
1. Type of Adhesive:
There are various types of adhesives suitable for gluing engineered wood flooring to concrete, including moisture-cured urethane, epoxy, or polyurethane adhesives. It is important to select an adhesive specifically designed for bonding wood to concrete.
2. Compatibility with Engineered Wood Flooring:
Ensure that the adhesive you choose is compatible with engineered wood flooring. Check the manufacturer’s recommendations or consult a flooring specialist if unsure.
3. Moisture Resistance:
Opt for an adhesive with high moisture resistance, especially if you live in an area prone to humidity or have observed moisture issues during the subfloor preparation stage.
FAQs:
Q1: Can I use regular construction adhesive for gluing engineered wood flooring to concrete?
A1: Regular construction adhesives may not offer sufficient bonding strength and moisture resistance required for gluing engineered wood flooring to concrete. It is advisable to use adhesives specifically formulated For bonding wood to concrete.
Q2: How do I know if an adhesive is moisture-resistant?
A2: Look for adhesives that specifically mention moisture resistance on their packaging or consult the manufacturer’s specifications. Additionally, you can ask a flooring specialist for recommendations on moisture-resistant adhesives.
III. Applying the Adhesive:
Once you have selected the appropriate adhesive, follow these steps for applying it to the concrete subfloor:
1. Prepare the Adhesive:
Mix the adhesive according to the manufacturer’s instructions. Use a clean bucket and stir well to ensure uniformity in consistency.
2. Apply the Adhesive:
Using a trowel or notched trowel, spread a thin layer of adhesive onto the concrete subfloor. Work in small sections to prevent the adhesive from drying before you can lay down the engineered wood planks.
3. Notch the Adhesive:
After spreading the adhesive, use the notched side of the trowel to create ridges or grooves in the adhesive. This helps enhance adhesion and provides better grip for the engineered wood planks.
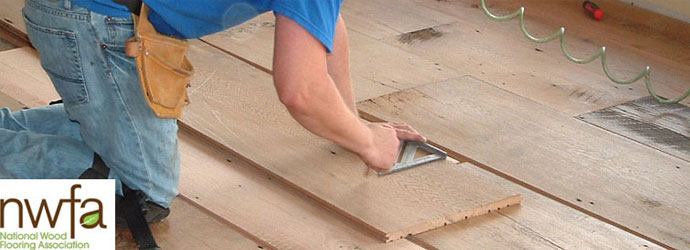
4. Lay Down the Engineered Wood Planks:
Carefully place each plank onto the adhesive, pressing down firmly to ensure proper bonding. Use spacers between planks to maintain consistent spacing and allow for expansion.
5. Clean Up Excess Adhesive:
Wipe off any excess adhesive that may have squeezed out from between the planks using a damp cloth or sponge. Be sure to clean up promptly before the adhesive dries.
FAQs:
Q1: Can I use a different trowel for applying the adhesive?
A1: It is recommended to use a notched trowel specifically designed for applying adhesive. The notches on the trowel help create ridges in the adhesive, ensuring better adhesion and grip.
Q2: How long should I wait before removing the spacers between planks?
A2: The drying time for the adhesive can vary depending on the product used. Follow the manufacturer’s instructions for specific drying times. As a general guideline, it is advisable to wait at least 24 hours before removing spacers and allowing foot traffic on the newly installed engineered wood flooring. This allows the adhesive to fully cure and ensures a strong bond between the wood and concrete. A3: Additionally, you can perform a test to check the moisture resistance of an adhesive. First, apply a small amount of the adhesive onto a non-porous surface such as glass or metal. Let it dry completely and then place a few drops of water on top of the adhesive. If the adhesive remains intact and does not soften or dissolve in the presence of water, it can be considered moisture-resistant. However, if the adhesive starts to deteriorate or loses its bonding properties when exposed to water, it may not be suitable for moisture-prone areas.