Now, folks understand the chance of this area for something a lot more for example extra living space, family suites as well as bedrooms. A number of measures are interested in adding the basement floor. Constantly keep in mind that a basement isn't as well ventilated as the various other rooms of the home, are considerably colder, and allow in little or perhaps no natural sunlight.
Here are Images about Epoxy Basement Floor Covering
Epoxy Basement Floor Covering
The concrete floor must remain its place serving the initial purpose of the house's structure, and put the overlay of it. Preparing ahead and making good choices regarding your flooring could save you a lot of headaches in the future. Try to stay away from making use of probably the cheapest supplies and quickest means of the flooring since they do not last long and need extra work and outlay to deal with later.
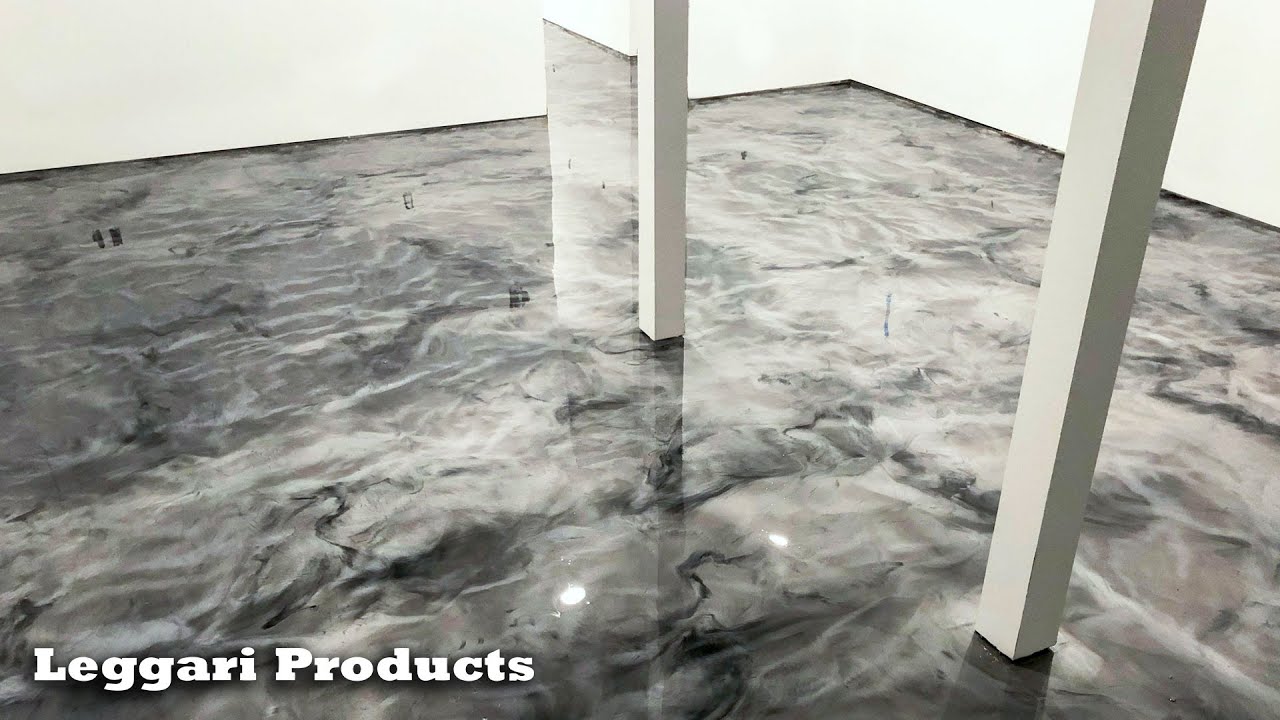
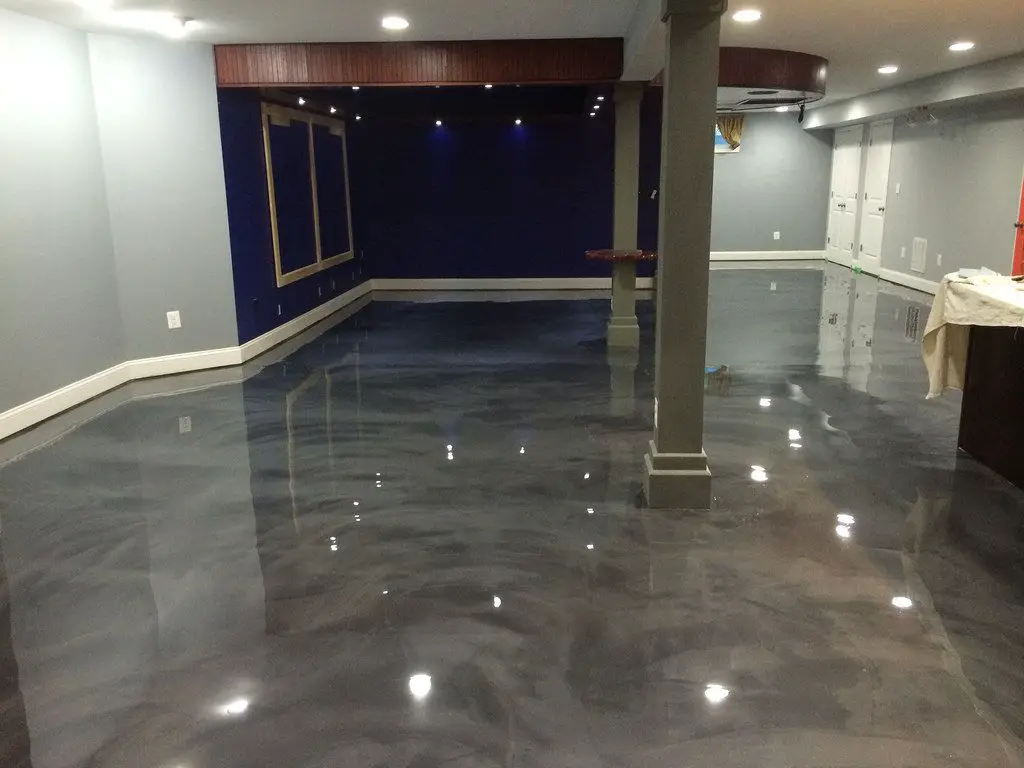
Entire Basement Coated Using Leggariu0027s Epoxy Floor Kit Silver u0026 Black Epoxy Floor Installation
Despite concrete's challenging surface, they'll still be harmed by spills and must be sealed occasionally. A few much better choices that you are able to think about are actually ceramic or porcelain tile, vinyl flooring, or perhaps leaving the floors as cement but staining or painting it. Take a moment and consider the floor surfaces in the rooms in your house.
Images Related to Epoxy Basement Floor Covering
Basement Floor Epoxy Coating Services in Maryland u0026 Virginia
Epoxy Floor Coatings Transylvania Concrete Coatings

Basement Flooring Solutions u2014 Central Illinois Epoxy
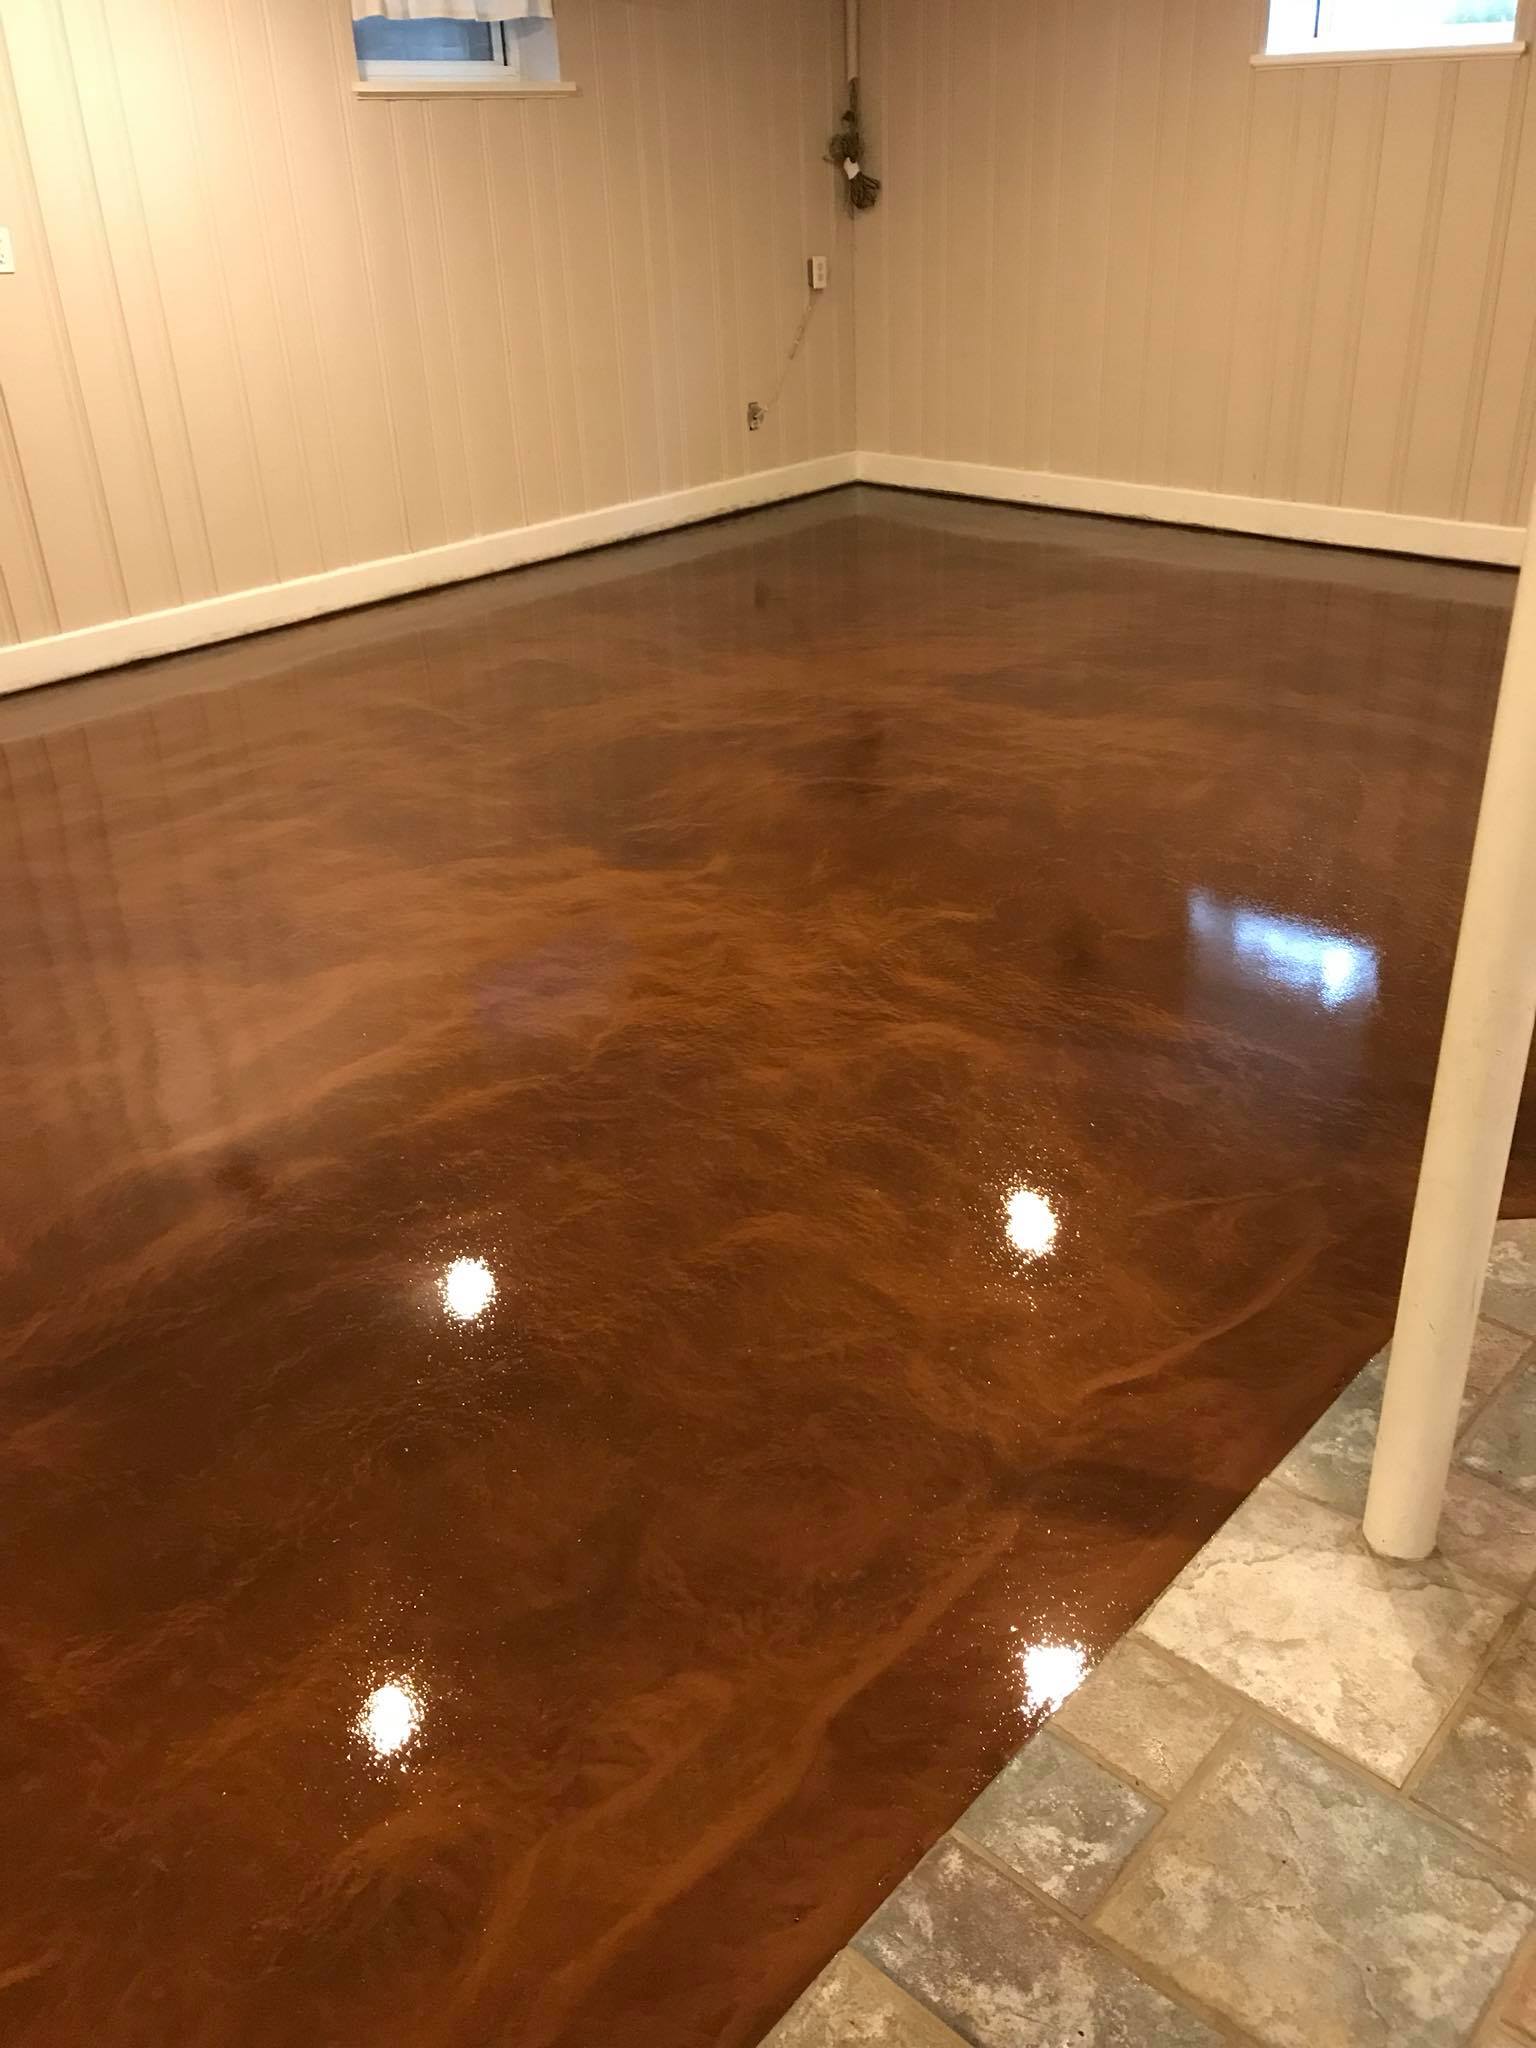
Basement Epoxy Flooring

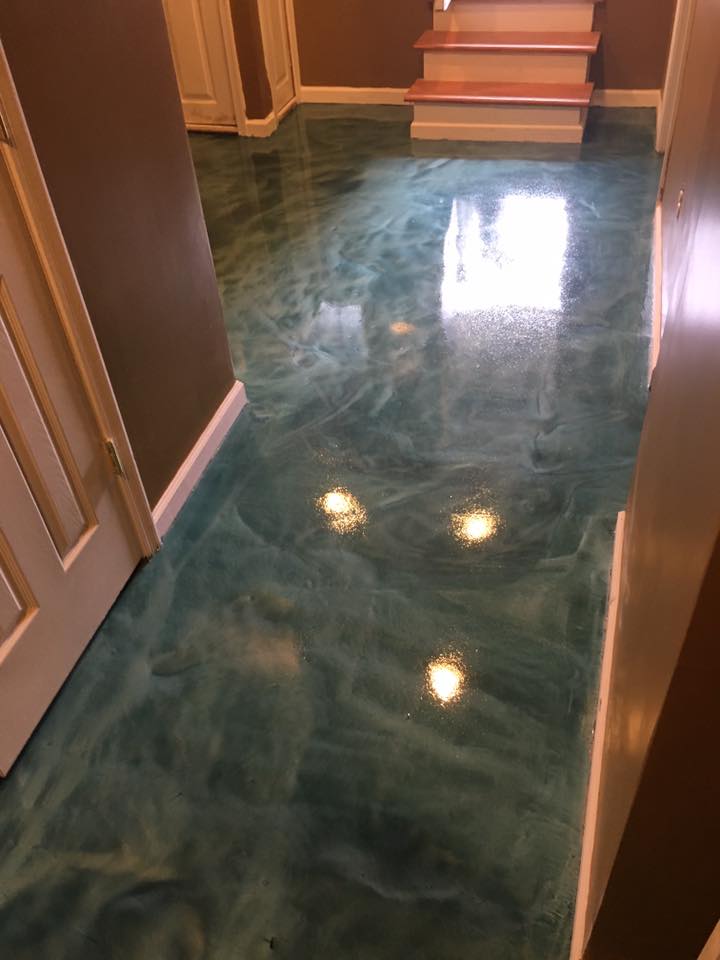
Metallic Epoxy Floor Systems by Michigan Specialty Coatings

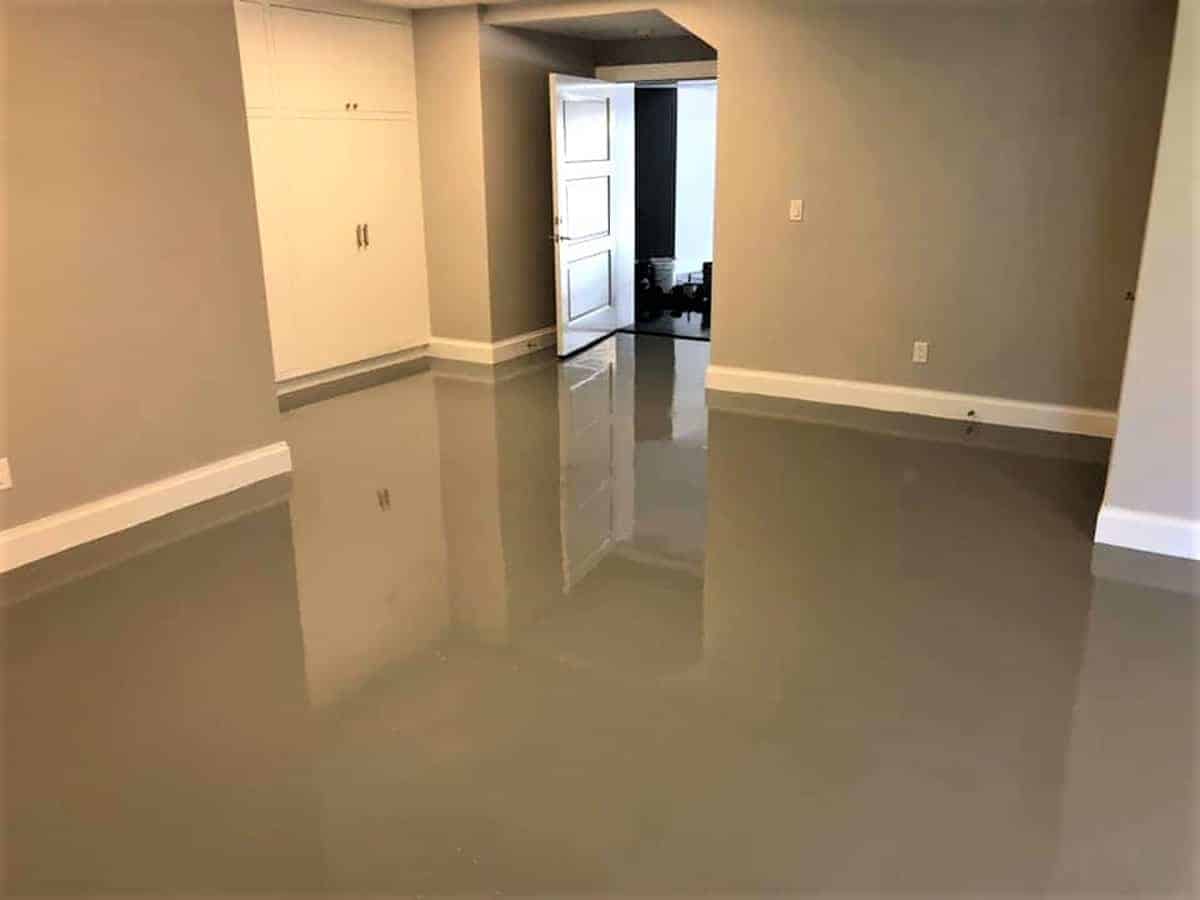
Smooth Epoxy Floor in Basement – Mile High Coatings

How To Epoxy Basement Floor A Step By Step Guide By Expert
Strong Concrete Foundations with Epoxy Floors Nashville TN

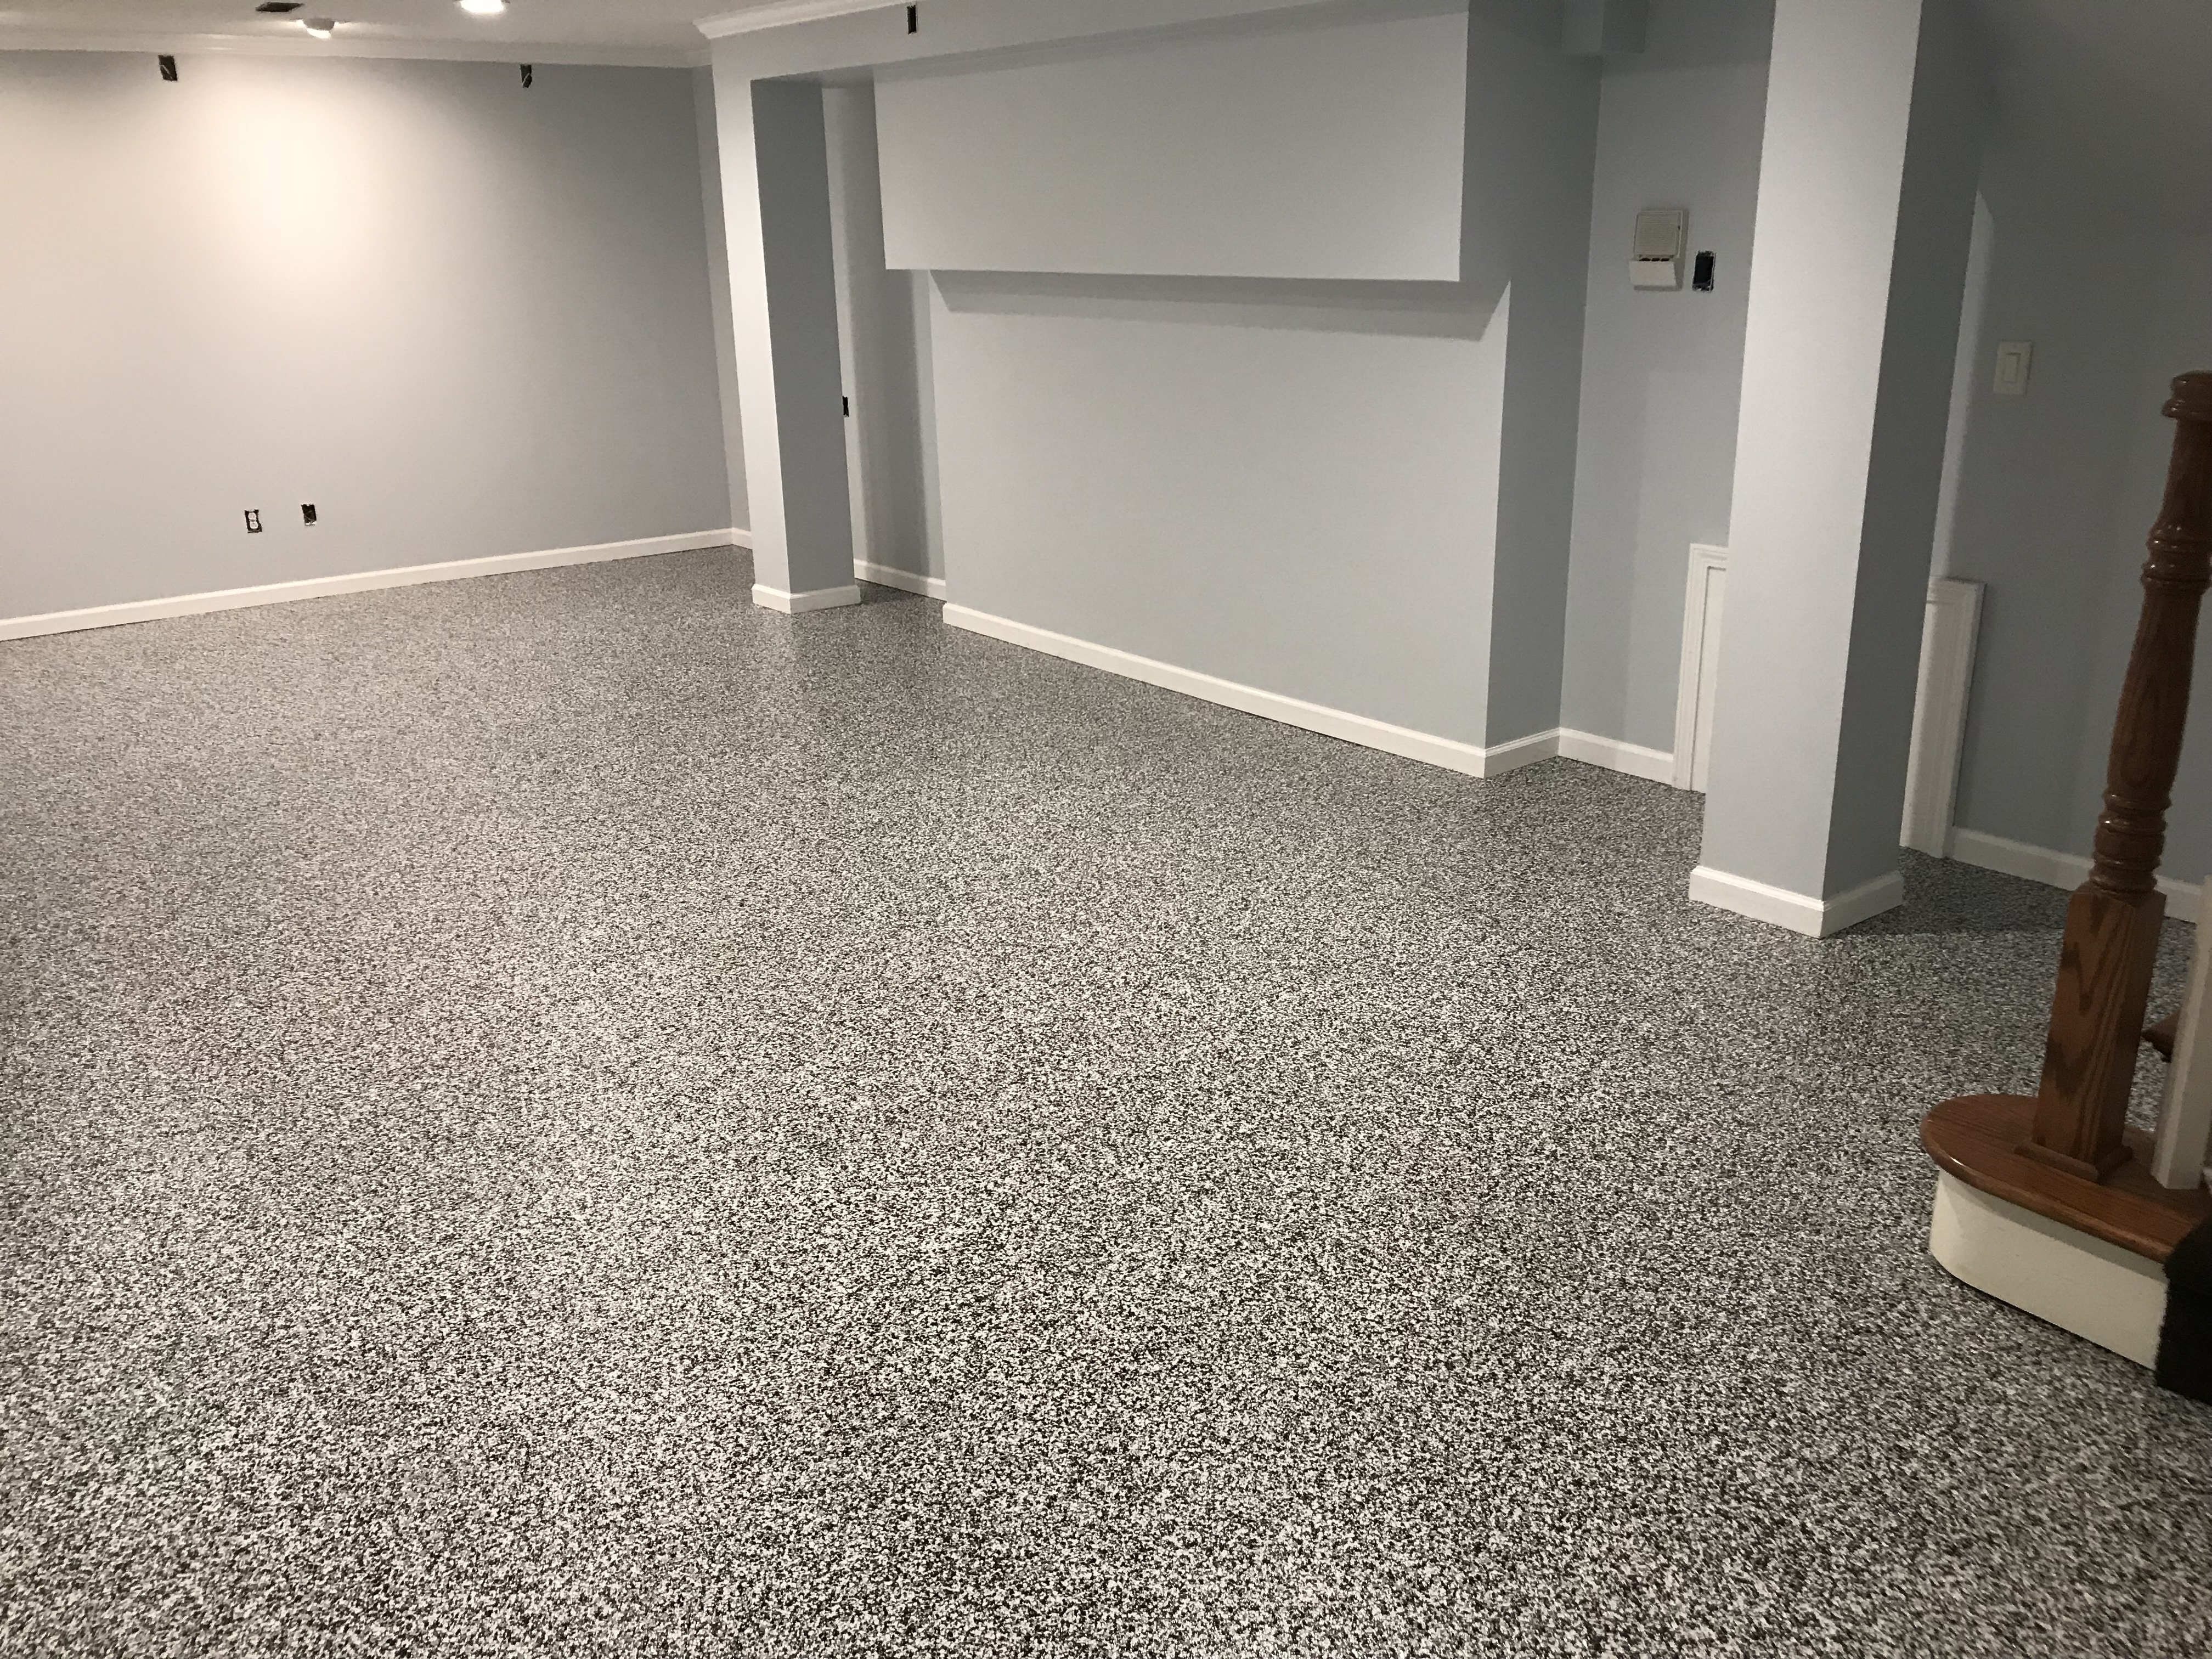
Ditch Your Basement Carpet Indy Floor Coating Indianapolis, IN
Metallic Epoxy Floor Systems by Michigan Specialty Coatings

Wheaton Epoxy Flooring – Residential, Commercial, Industrial Floor

Epoxy Flooring: What You Must Know u0026 Should Avoid

Related articles:
- Stained Concrete Basement Floor
- Finishing Basement Floor
- Refinish Concrete Basement Floor
- Best Flooring For Basement
- Basement Gym Flooring Ideas
- Laminate Flooring In Basement
- Basement Concrete Floor Sweating
- Basement Floor Finishing Ideas
- Painting Unfinished Basement Floor
- Unique Basement Flooring
Epoxy Basement Floor Covering: Transform Your Space with Style and Durability
Introduction:
The basement is often an overlooked area of the house, used primarily for storage or as a laundry room. However, with the right flooring solution, it has the potential to become a functional and inviting space. One such solution is epoxy basement floor covering. This versatile and durable material not only enhances the aesthetic appeal of your basement but also provides numerous practical benefits. In this article, we will explore the world of epoxy basement floor covering, its advantages, installation process, maintenance requirements, and address frequently asked questions to help you make an informed decision.
I. Understanding Epoxy Basement Floor Covering
Epoxy basement floor covering is a type of flooring system that utilizes epoxy resin to create a smooth, glossy surface. It consists of multiple layers that are applied on top of an existing concrete floor to provide protection and improve its appearance. The epoxy resin used in this process is a two-part mixture composed of a resin and a hardener. When combined, they chemically react to form a rigid plastic-like substance that adheres to the concrete.
Advantages of Epoxy Basement Floor Covering:
1. Durability: Epoxy basement floor coverings are incredibly durable and resistant to wear and tear. They can withstand heavy foot traffic, furniture movement, and impact from dropped objects without chipping or cracking.
2. Moisture Resistance: Basements are prone to moisture-related issues such as dampness and water seepage. Epoxy floor coverings create a waterproof barrier that helps prevent water damage and mold growth.
3. Easy Maintenance: Unlike other flooring options like carpet or hardwood, epoxy floors are effortless to clean and maintain. Regular sweeping or vacuuming followed by mopping with mild detergent is usually sufficient to keep them looking new.
4. Versatility: Epoxy basement floor coverings come in a wide range of colors, patterns, and finishes. Whether you prefer a solid color, a metallic effect, or a decorative flake design, epoxy can be customized to suit your personal style.
5. Chemical Resistance: Epoxy coatings are resistant to chemicals such as oil, gasoline, and household cleaners. This makes them an ideal choice for basements used as workshops or storage areas.
FAQs:
Q: Can epoxy basement floor coverings be installed over existing flooring?
A: Yes, epoxy basement floor coverings can be applied over various types of existing flooring, including concrete, tile, or vinyl. However, it is essential to ensure that the existing floor is in good condition and properly prepared before applying the epoxy coating.
Q: How long does it take to install an epoxy basement floor covering?
A: The installation time for an epoxy basement floor covering depends on several factors, such as the size of the area and the condition of the existing floor. On average, it can take anywhere from two to five days. This includes surface preparation, application of multiple layers of epoxy resin, and curing time.
II. Installation Process of Epoxy Basement Floor Covering
Installing epoxy basement floor coverings requires careful preparation and attention to detail. Here is a step-by-step guide to help you understand the process:
1. Surface Preparation:
The first step in installing an epoxy basement floor covering is preparing the surface. This involves thoroughly cleaning the existing floor to remove any dirt, grease, or debris. Any cracks or imperfections should be repaired using suitable concrete patching materials. 2. Etching the Surface:
After the surface is clean, it needs to be etched to create a rough texture that will help the epoxy adhere better. This can be done using an etching solution or by mechanically grinding the surface.
3. Priming the Surface:
Once the surface is etched, a primer should be applied to ensure proper adhesion of the epoxy coating. The primer acts as a bonding agent between the existing floor and the epoxy.
4. Mixing the Epoxy:
Next, the epoxy resin and hardener should be mixed according to the manufacturer’s instructions. It is important to follow the correct mixing ratio to ensure proper curing and durability of the epoxy.
5. Applying the Epoxy:
The mixed epoxy should be poured onto the prepared surface and spread evenly using a roller or squeegee. It is essential to work quickly and efficiently to ensure even coverage and prevent pooling or streaking.
6. Adding Decorative Elements (Optional):
If desired, decorative elements such as color flakes or metallic pigments can be sprinkled onto the wet epoxy to create a unique design. These elements should be applied while the epoxy is still wet and then sealed with an additional layer of clear epoxy.
7. Curing Time:
After application, the epoxy needs time to cure and harden. The curing time can vary depending on factors such as temperature and humidity. It is important to allow sufficient curing time before subjecting the floor to heavy use or foot traffic.
8. Final Touches:
Once fully cured, any excess or uneven areas can be sanded down for a smooth finish. A topcoat of clear sealer can also be applied for added protection and shine.
Overall, installing an epoxy basement floor covering requires careful preparation, proper mixing, and attention to detail throughout each step of the process. Following these guidelines will help ensure a durable, waterproof, and visually appealing flooring solution for your basement. The process of installing an epoxy basement floor covering involves several steps, including surface preparation, etching the surface, priming the surface, mixing the epoxy, applying the epoxy, adding decorative elements (optional), curing time, and final touches.
1. Surface Preparation: The existing floor needs to be thoroughly cleaned to remove dirt, grease, or debris. Cracks or imperfections should be repaired with suitable concrete patching materials.
2. Etching the Surface: The cleaned surface needs to be etched to create a rough texture for better adhesion of the epoxy. This can be done using an etching solution or by mechanically grinding the surface.
3. Priming the Surface: After etching, a primer should be applied to ensure proper adhesion of the epoxy coating. The primer acts as a bonding agent between the existing floor and the epoxy.
4. Mixing the Epoxy: The epoxy resin and hardener should be mixed according to the manufacturer’s instructions. Following the correct mixing ratio is crucial for proper curing and durability of the epoxy.
5. Applying the Epoxy: The mixed epoxy is poured onto the prepared surface and spread evenly using a roller or squeegee. It’s important to work quickly and efficiently to ensure even coverage and prevent pooling or streaking.
6. Adding Decorative Elements (Optional): Color flakes or metallic pigments can be sprinkled onto the wet epoxy for a unique design. These elements should be applied while the epoxy is still wet and then sealed with an additional layer of clear epoxy.
7. Curing Time: After application, the epoxy needs time to cure and harden. The curing time can vary depending on temperature and humidity. Sufficient curing time should be allowed before subjecting the floor to heavy use or foot traffic.
8. Final Touches: Once fully cured, any excess or uneven areas can be sanded down for a smooth finish. A topcoat of clear sealer can also be applied for added protection and shine.
Following these steps will ensure a durable, waterproof, and visually appealing epoxy basement floor covering.