However this luxury is going to come with a considerable price simply because it's not only needed to buy the cost of the particular wood flooring, you'll need to have into account the selling price of pro installation. Having said that, ensure you prepare your home for a wood floor before the installation. Not like when you place a tiled floor, there's no need to draw out the position of each wood board you lay.
Images Related to Engineered Wood Flooring Installation Floating Over Concrete
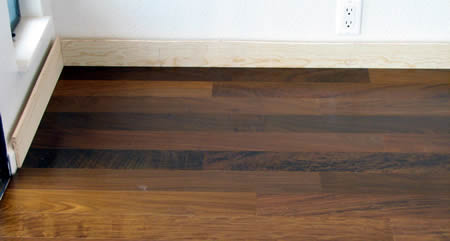
Engineered Wood Flooring Installation Floating Over Concrete
/cdn.vox-cdn.com/uploads/chorus_asset/file/19493784/howto_tilefloor_04.jpg)
Laminate flooring cost less than wood flooring and as well entails significantly less installation time as compared to a hardwood floor. It can certainly be touched up with a hand held orbital sander rather compared to industrial floor sanders. The press lock device means that no matter what size you pick they each will be easily installed. It is cheaper, much easier to clean and doesn't call for specialized cutting/trimming (most parts are consistent repeating patterns).
Installing Wood Floors On Concrete Slab Steller Floors

Finally, the acrylic-impregnated type of wood flooring is a mix of solid and acrylic timber. In case you're only going to remain at a property for a specific period, or perhaps you're a landlord flooring your properties for hard-usage, you'd likely choose laminate as it strikes a good balance of cost/quality, while a family looking to make somewhere the home of theirs for an extended period could make the leap and opt for solid wood.
Installing Wood Flooring Over Concrete (DIY)
Guide: How to Install Engineered Hardwood Floors
How to Install a Hardwood Floating Floor

Floating Engineered Hardwood Floor and Laminate Installation How To Mryoucandoityourself
Can I Install Hardwood Floors On A Slab Floors By The Shore

Which Method Should I Use to Install My Engineered Wood Floor

hardwood floors over concrete floors DIY
DIY Installation of Floating Engineered Hardwood Flooring u2014 My
Floating Floor vs. Nail Down Slaughterbeck Floors, Inc.
How To Install Engineered Hardwood Over Concrete – Flooring

Engineered Wood Flooring Over Concrete Slab Engineered wood

Which Tools Do You Need to Install Engineered Hardwood Floors

Related articles:
- Black Walnut Wood Flooring
- Wood Flooring Designs
- Wood Flooring Options For Kitchens
- Contemporary Wood Flooring Ideas
- Dark Wood Floor Bedroom Ideas
- Real Wood Flooring For Kitchens
- Natural Wood Floor Stain
- Oak Wood Flooring
- Birch Wood Flooring Reviews
- Wood Floor Damage Repair
Engineered Wood Flooring Installation Floating Over Concrete
Engineered wood flooring is a popular choice among homeowners due to its durability, versatility, and aesthetic appeal. One of the most common methods of installation for engineered wood flooring is floating over concrete. This method offers several benefits and is relatively easy to accomplish with the right tools and techniques. In this article, we will explore the process of installing engineered wood flooring floating over concrete in detail, including step-by-step instructions, frequently asked questions, and tips for a successful installation.
I. Introduction to Engineered Wood Flooring
Before diving into the installation process, let’s first understand what engineered wood flooring is and why it is a preferred choice for many homeowners. Engineered wood flooring consists of multiple layers of wood veneer pressed together, with a top layer made of hardwood. This construction provides stability and resistance to moisture, making it suitable for installation in areas where solid hardwood may not be appropriate, such as basements or on concrete subfloors.
II. Pre-Installation Preparation
1. Acclimation: Before installing engineered wood flooring, it is crucial to allow the planks to acclimate to the environment where they will be installed. This helps prevent excessive expansion or contraction after installation. Place the boxes of flooring in the room for at least 48 hours, ensuring they are kept off the ground and stacked flat.
FAQ: How long should I acclimate my engineered wood flooring before installation?
Answer: It is recommended to acclimate your engineered wood flooring for a minimum of 48 hours. However, for optimal results, consult the manufacturer’s guidelines as some may suggest a longer acclimation period depending on the specific product.
2. Moisture Testing: Moisture can be a significant concern when installing engineered wood flooring over concrete. Before proceeding with installation, it is essential to test the moisture content of the concrete subfloor using a moisture meter. Ideally, the moisture reading should be less than 4%.
FAQ: What happens if the concrete subfloor has excessive moisture?
Answer: Excessive moisture in the concrete subfloor can cause various issues, such as cupping, warping, or buckling of the engineered wood flooring. If the moisture reading is above the recommended level, it is necessary to address the moisture issue before proceeding with installation. Options include using a moisture barrier or applying a suitable moisture mitigation system.
III. Installation Process
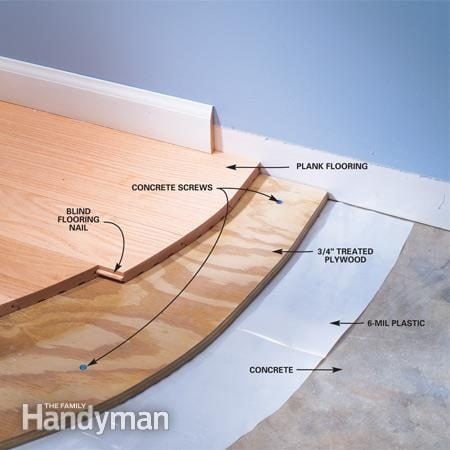
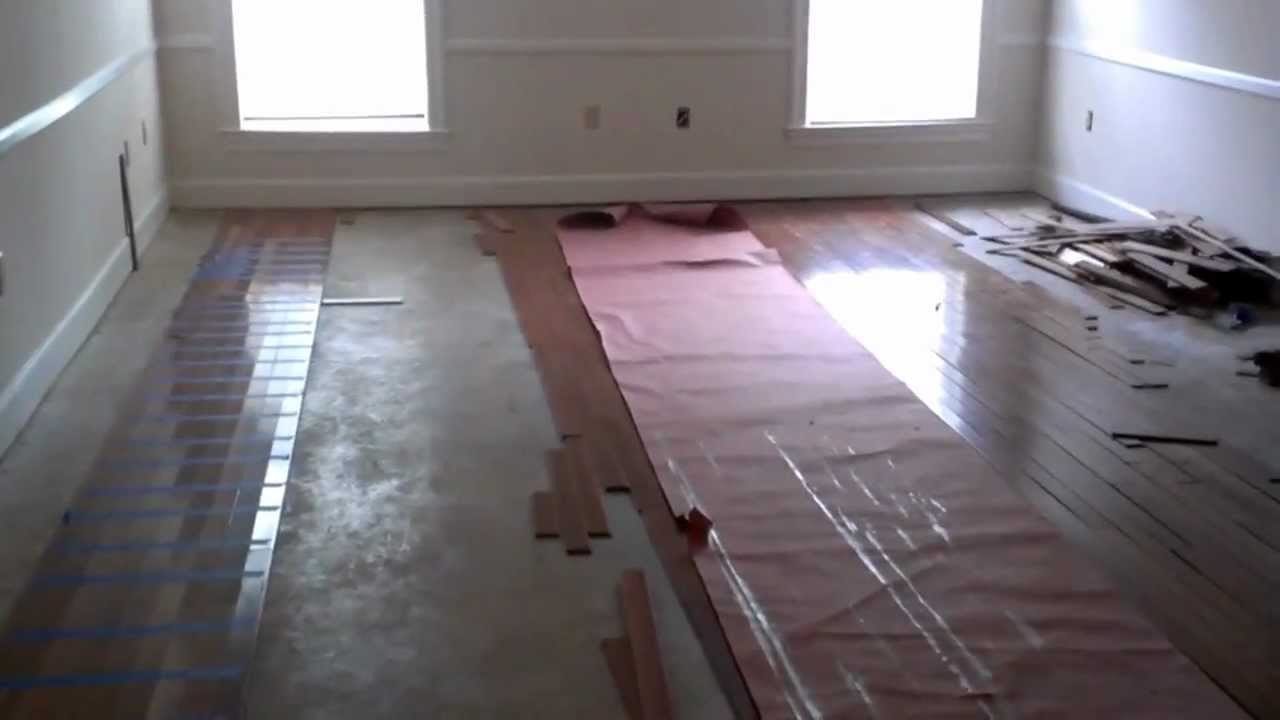
1. Subfloor Preparation: Before installing engineered wood flooring, ensure that the concrete subfloor is clean, level, and free from any debris or imperfections. Use a vacuum cleaner or broom to remove dust and dirt, followed by a damp mop to remove any residual particles.
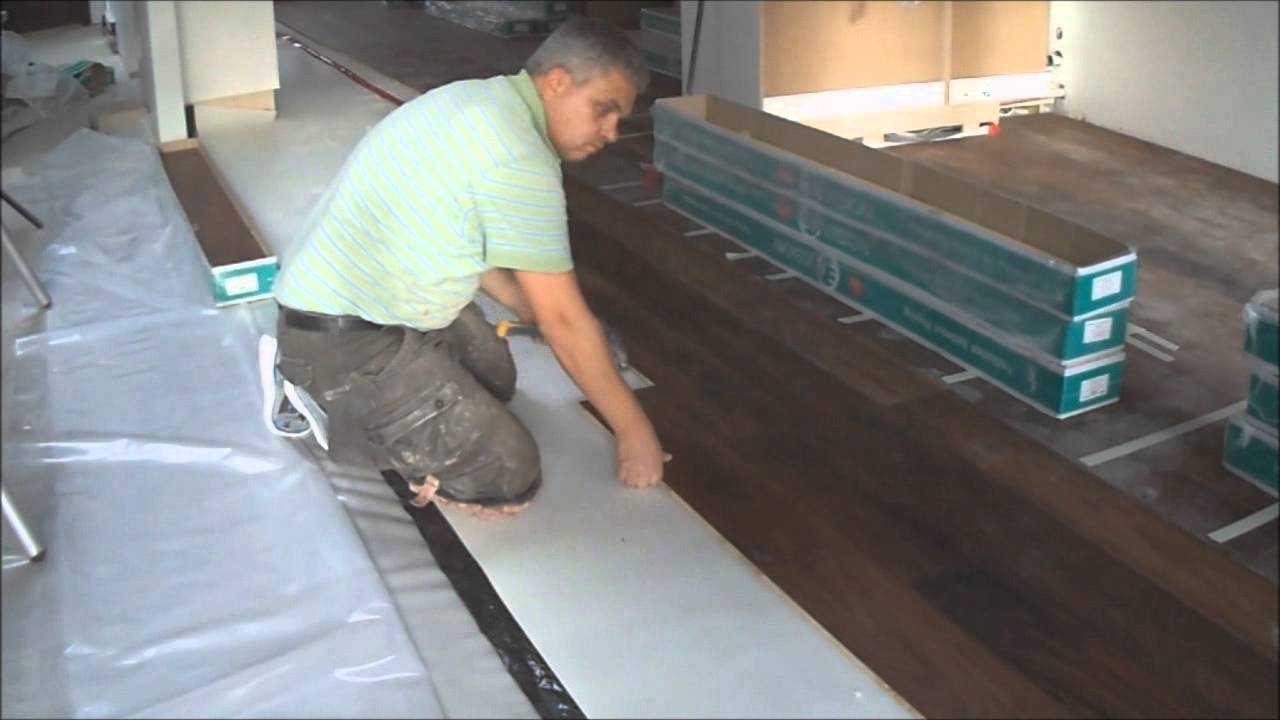
2. Moisture Barrier Installation: If necessary, install a moisture barrier over the concrete subfloor to prevent moisture from reaching the engineered wood flooring. There are various types of moisture barriers available, such as plastic sheeting or foam underlayment with built-in vapor barriers. Follow the manufacturer’s instructions for proper installation.
FAQ: Is a moisture barrier always required when installing engineered wood flooring over concrete?
Answer: While not always required, a moisture barrier is highly recommended when installing engineered wood flooring over concrete. It adds an extra layer of protection against potential moisture-related issues and ensures the longevity of your flooring.
3. Underlayment Installation: After installing the moisture barrier (if needed), it is time to lay down the underlayment. Underlayment helps reduce noise transmission, provides cushioning underfoot, and acts as a Moisture barrier. There are different types of underlayment available, such as foam or cork, so choose the one that best suits your needs and follow the manufacturer’s instructions for installation.
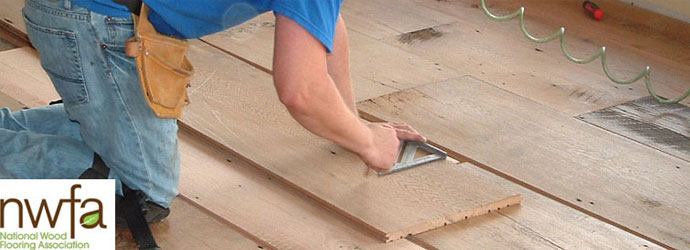
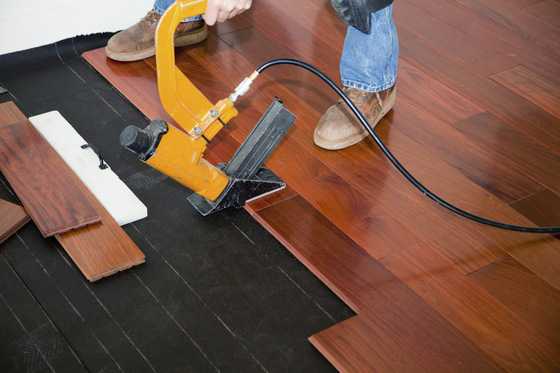
4. Engineered Wood Flooring Installation: Finally, it is time to install the engineered wood flooring. Start by laying down the first row of flooring against the longest wall, ensuring a 1/2-inch expansion gap between the flooring and the wall. Use spacers to maintain this gap throughout the installation process.
Continue installing the flooring by interlocking each plank using a tongue and groove system. Use a tapping block and mallet to ensure a tight fit between planks. Stagger the joints between rows for a more stable and aesthetically pleasing installation.
5. Finishing Touches: Once all the flooring is installed, remove spacers and install baseboards or trim to cover the expansion gap along the walls. Use transition pieces when transitioning from one type of flooring to another or from one room to another.
FAQ: Can engineered wood flooring be installed over existing tile or vinyl flooring?
Answer: Yes, engineered wood flooring can be installed over existing tile or vinyl flooring in most cases. However, it is important to ensure that the existing floor is clean, level, and in good condition before installation. Consult the manufacturer’s guidelines for specific instructions on installing over different types of existing flooring.
In conclusion, acclimating the engineered wood flooring, testing moisture levels, preparing the subfloor, installing moisture barriers and underlayment, and finally installing the flooring itself are all crucial steps in successfully installing engineered wood flooring over concrete. By following these steps and consulting manufacturer guidelines, you can have a beautiful and durable flooring solution in your space.