Since 1890 the very first Congregational Church found Chicago has had their cork floor that shows amazing durability. By this point you ought to comprehend that cork is an eco friendly material and good for the environment. It is almost a shame to miss any opportunity to power this green information each day. The floor will not absorb dust or maybe let any molds or even fungi to grow.
Here are Images about DIY Cork Flooring Installation
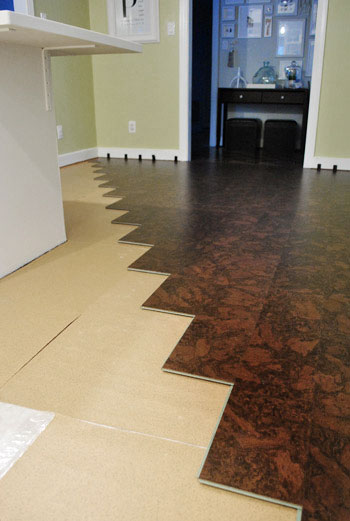
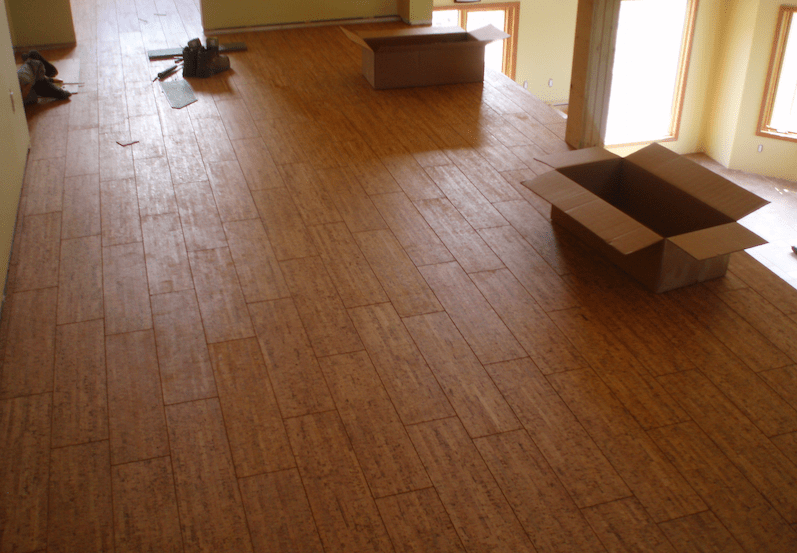
DIY Cork Flooring Installation
/cdn.vox-cdn.com/uploads/chorus_asset/file/22873091/H1006HANDBOOK01.jpg)
Cork floors companies, thanks to technology, can easily give a huge selection of styles. You simply need to be concerned that it's installed properly. It is considered green because it's eco-friendly, sustainable and naturally inexhaustible. Not merely is able to it compress up to 40 % without damage it should also absorb serious shocks & impacts.
How to Install Cork Flooring – (Tips and Guidelines For Your DIY

This means that you are able to be worry free if you get this flooring solution in your bath room, kitchen area or basement. Cork as being a flooring answer has still existed for thousands of years. The latest flooring could be utilized right away and afterwards refinished when necessary. Cork flooring concept is just another addition to the checklist.
Images Related to DIY Cork Flooring Installation
Cork Works: Installing Cork Flooring u2013 Mother Earth Living

Cork Flooring Installation: PRO or DIY?Learning Center

How To Install A Floating Cork Floor Young House Love
Cork Flooring Installation: PRO or DIY?Learning Center

How to Install Cork Flooring- Cork Flooring Installation Made Easy

Cork Flooring Installation – How to Do It DIY Home Improvement
Cork Flooring 101: Cost, Types, u0026 Installation – This Old House
/cdn.vox-cdn.com/uploads/chorus_asset/file/23088021/0421_NB_All_About_Cork_Floors_Cork_flooring_iStock_950010876.jpg)
A Toast to the Floor – Phoenix Commotion

Cork Flooring Installation: PRO or DIY?Learning Center

Cork Flooring in Basements and Below-Grade Environments
/cork-flooring-in-unfurnished-new-home-647206431-2eceda7dc48e4eecbabde1b709de459f.jpg)
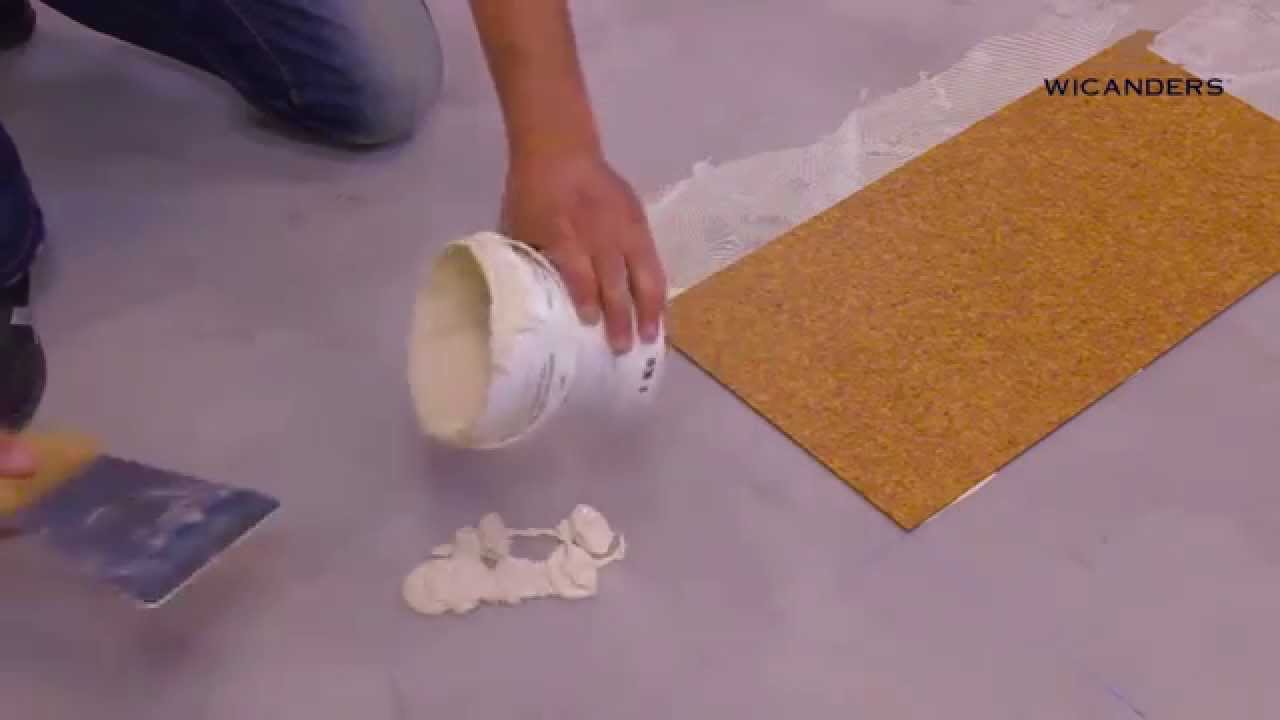
How to install Wicanders glue down cork flooring
How To Replace Carpet With Lovely Cork Flooring Without Hiring A

Related articles:
- Vintage Cork Floor
- Cork Flooring For Bathroom
- How To Clean Cork Flooring
- Cork Flooring Laundry Room
- Cork Floor Tiles
- Underlayment For Cork Floor
- Laying Cork Flooring
- Floating Cork Flooring
- Disadvantages Of Cork Floors
- Cork Floor Colours
DIY Cork Flooring Installation: A Comprehensive Guide
Cork flooring is a popular choice for homeowners looking for a sustainable, eco-friendly flooring option that also adds warmth and character to any room. Installing cork flooring yourself can be a rewarding project that saves you money on installation costs. In this comprehensive guide, we will walk you through the steps of DIY cork flooring installation, from preparation to finishing touches.
Preparation:
Before you begin installing cork flooring, it is essential to prepare the subfloor properly. The subfloor should be clean, dry, and level. Remove any existing flooring and make sure the surface is free of debris. If necessary, use a self-leveling compound to even out any uneven areas.
FAQs:
Q: Can I install cork flooring over existing tile?
A: Yes, you can install cork flooring over existing tile as long as the tile is in good condition and the surface is level. Make sure to fill in grout lines with a leveling compound before installing the cork flooring.
Underlayment:
One of the key components of a successful cork flooring installation is the underlayment. Cork flooring requires a cushioned underlayment to provide comfort underfoot and reduce noise. There are several types of underlayment available, including cork underlayment specifically designed for use with cork flooring.
FAQs:
Q: Do I need to use an underlayment with cork flooring?
A: Yes, using an underlayment is crucial for the proper installation of cork flooring. The underlayment provides cushioning, sound insulation, and moisture protection for the cork planks.
Installation:
When it comes to installing cork flooring, there are two main methods: glue-down and floating. The glue-down method involves applying adhesive to the subfloor and pressing the cork tiles or planks into place. The floating method involves interlocking the cork planks without adhesive.
FAQs:
Q: Which installation method is better for DIYers – glue-down or floating?
A: The floating method is generally easier for DIYers because it does not require adhesive and allows for more flexibility during installation. However, if you have experience with adhesive applications, the glue-down method may provide a more secure bond.
Finishing Touches:
Once you have installed your cork flooring, it’s time to add the finishing touches. Trim any excess underlayment around the edges of the room and install baseboards or quarter round molding to cover expansion gaps. Use a color-matched caulk to seal any gaps between the cork flooring and walls.
FAQs:
Q: How do I clean and maintain my cork flooring?
A: To clean your cork flooring, sweep or vacuum regularly to remove dirt and debris. Use a damp mop with a mild detergent solution to clean up spills or stains. Avoid using harsh chemicals or abrasive cleaners that can damage the finish of your cork flooring.
Conclusion:
Installing cork flooring yourself can be a challenging but rewarding project that adds beauty and value to your home. By following these steps and tips, you can achieve professional-looking results while saving money on installation costs. Remember to take your time, follow manufacturer instructions carefully, and enjoy the process of transforming your space with eco-friendly cork flooring.
In conclusion, DIY cork flooring installation is a feasible project for homeowners looking to add a sustainable and stylish touch to their spaces. With proper preparation, underlayment selection, installation techniques, and finishing touches, you can achieve professional results without breaking the bank. So roll up your sleeves, grab your Tools, and get ready to transform your space with beautiful cork flooring! Remember, if you have any doubts or concerns during the installation process, don’t hesitate to consult with a professional or reach out to the manufacturer for guidance. With the right tools, materials, and knowledge, you can successfully install cork flooring in your home and enjoy its many benefits for years to come. Good luck with your DIY project! Remember, safety is always a priority when undertaking any DIY project. Make sure to wear appropriate safety gear, such as gloves and goggles, and follow all manufacturer instructions and guidelines. If you encounter any issues during the installation process that you are unsure how to handle, don’t hesitate to seek help from a professional.
With the right tools, materials, and knowledge, you can successfully install cork flooring in your home and enjoy its many benefits for years to come. Good luck with your DIY project!