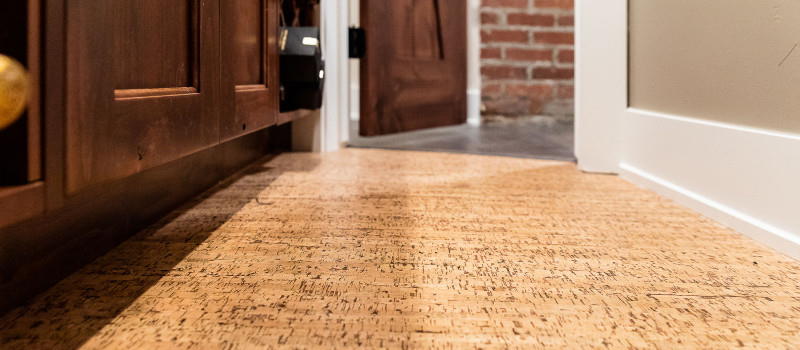
The natural color, shading and pattern variation are remarkable. If you'd like to discover more we suggest you comply with the links above. You can find a lot of reputed companies nowadays, offering a large variety in this renewable flooring option. Cork is a practical flooring alternative for the majority of rooms in the home of yours. The ideal example is actually imagining a cork stopper in a champagne bottle.
Here are Images about Cork Flooring Over Concrete Slab
Cork Flooring Over Concrete Slab
/cork-flooring-in-unfurnished-new-home-647206431-2eceda7dc48e4eecbabde1b709de459f.jpg)
To find out if cork flooring is perfect for you, you might want to read customer reviews as well as testimonials online to check out when it would be suitable for the home of yours. This flooring remedy is additionally really easy to clean and maintain. These cells really help in keeping the air basic between the top and bottom & prevent rapid temperature differences as hardwood or perhaps concert.
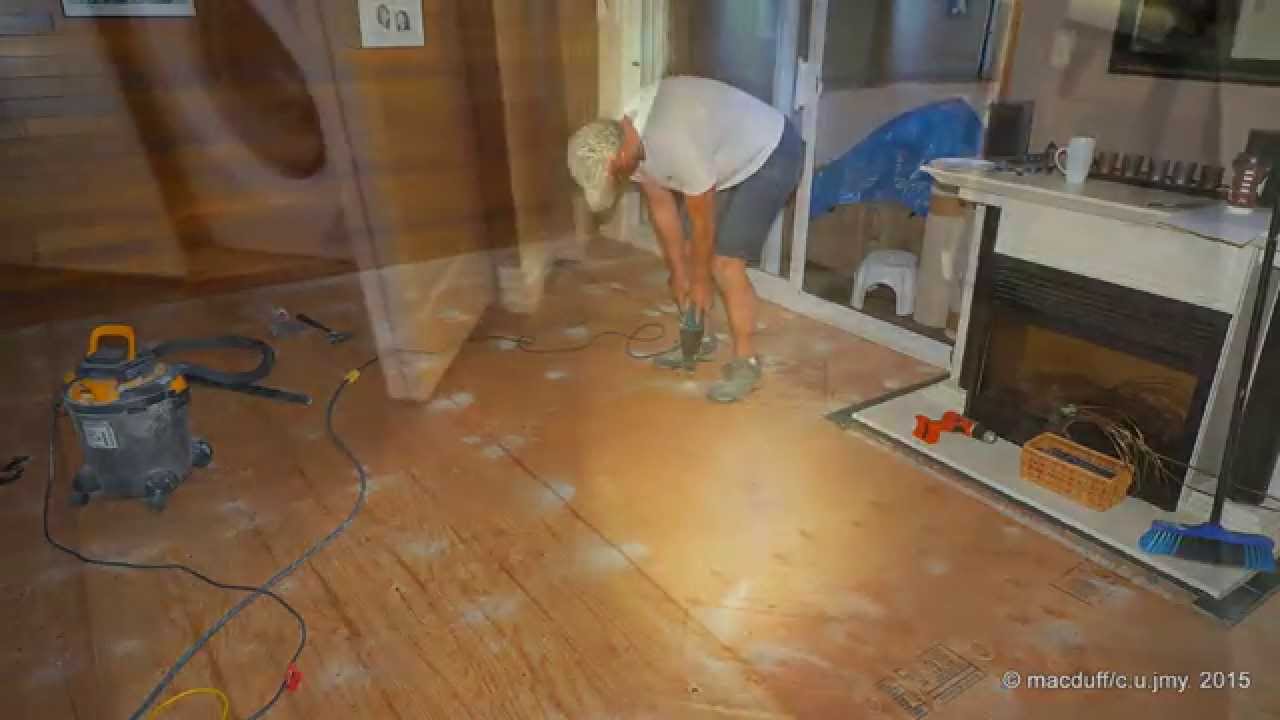
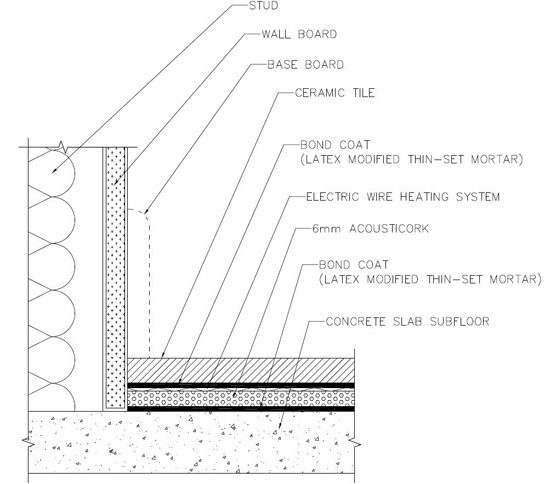
cork flooring installation on a concrete slab
You will find a number of ideas we are able to offer you roughly cork flooring. Cork flooring is not a brand new flooring item, in fact it has been used for a huge number of years. Cork's natural color and shade variation makes it possible for it to rival every additional wood flooring product. Flooring is often a nightmare if you do this yourself or simply not turn out the way you intended.
Images Related to Cork Flooring Over Concrete Slab
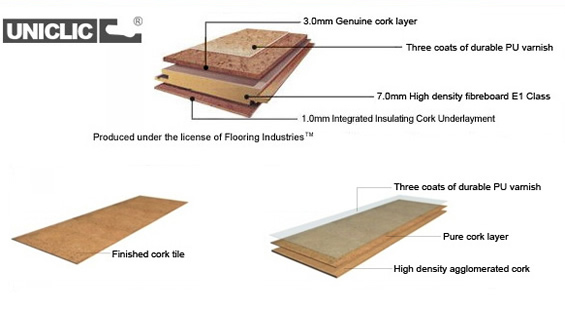
Cork tiles or Floating Cork Flooring
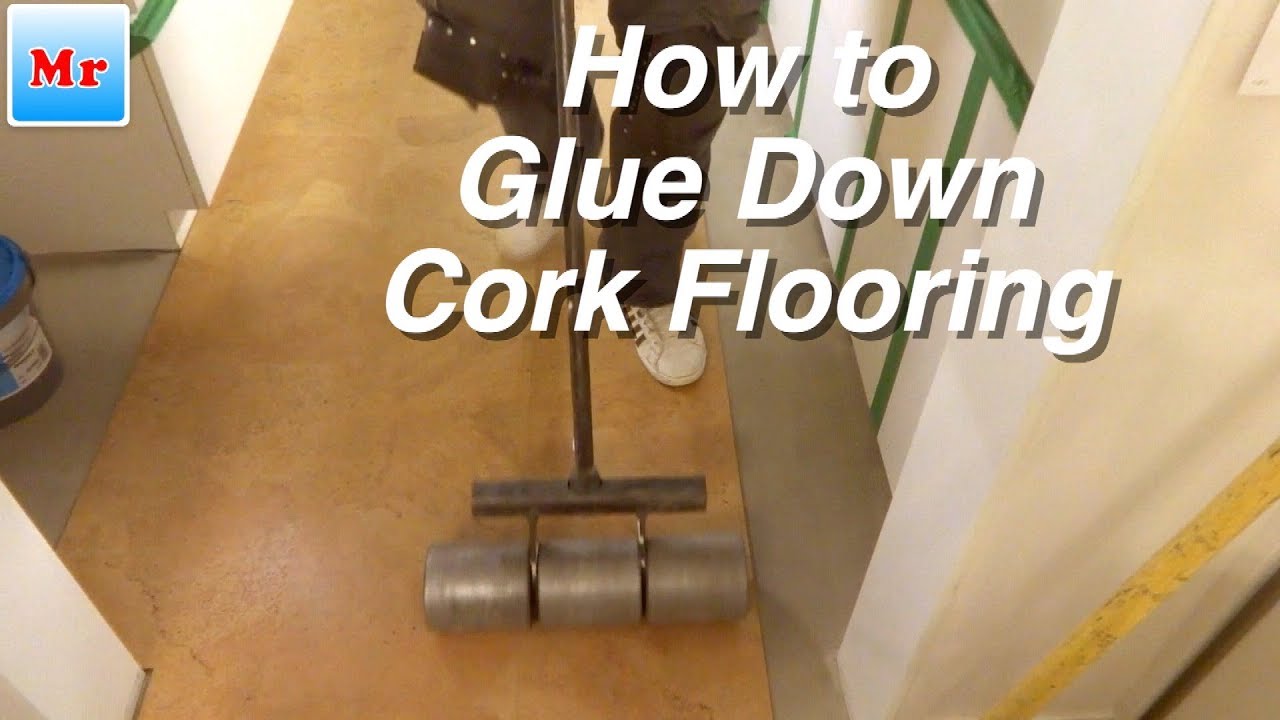
How to Install Glue Down Cork Flooring Over Concrete Subfloor in Bathroom and Kitchen
How to Install a Cork Floor – This Old House
/cdn.vox-cdn.com/uploads/chorus_image/image/65892042/h1006handbook08.0.jpg)
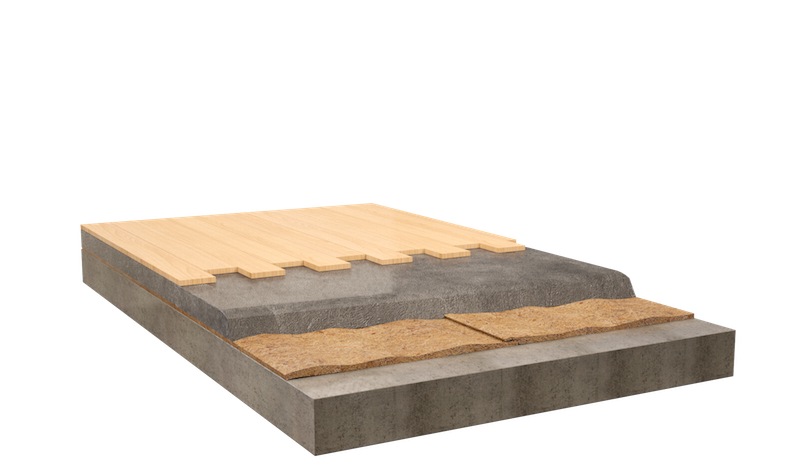
ThermaCork Flooring u2014 Thermacork
Cork Tile Floor I Installation Instructions I Underlayment
Installing Cork Flooring in a Basement Pros u0026 Cons and Best Brands
Concrete vs Cork Flooring 2022 Comparison, Pros u0026 Cons

Cork Flooring 101: Cost, Types, u0026 Installation – This Old House
:no_upscale()/cdn.vox-cdn.com/uploads/chorus_asset/file/23088021/0421_NB_All_About_Cork_Floors_Cork_flooring_iStock_950010876.jpg)
Installing Cork Flooring 2 – Construction Canada
http://www.cartwheelfactory.com/cork-underlayment.html

Cork Flooring, a Natural Choice HGTV
How I Saved Over $700 on Cork Flooring for the Basement

Related articles:
- Vintage Cork Floor
- Cork Flooring For Bathroom
- How To Clean Cork Flooring
- Cork Flooring Laundry Room
- Cork Floor Tiles
- Underlayment For Cork Floor
- Laying Cork Flooring
- Floating Cork Flooring
- Disadvantages Of Cork Floors
- Cork Floor Colours
Cork Flooring Over Concrete Slab: A Durable and Eco-Friendly Option
Introduction:
Cork flooring has gained popularity in recent years as a sustainable and durable flooring option. One of the key advantages of cork flooring is its ability to be installed over a concrete slab, making it a versatile choice for homeowners. In this article, we will explore the process of installing cork flooring over a concrete slab, the benefits it offers, and address some frequently asked questions to help you make an informed decision.
1. Preparing the Concrete Slab:
Before installing cork flooring over a concrete slab, it is essential to ensure that the surface is clean, dry, and level. Any cracks or imperfections should be repaired to create a smooth base for the cork tiles. Start by removing any existing flooring materials such as carpet or tiles. Next, thoroughly clean the concrete surface using a mild detergent and water solution. Allow the floor to dry completely before proceeding with the installation.
FAQ: Can I install cork flooring over a damp or uneven concrete slab?
Answer: No, it is crucial to ensure that the concrete slab is dry and level before installing cork flooring. Moisture can damage the cork tiles, leading to warping or mold growth. Similarly, an uneven surface can cause the tiles to crack or become loose over time.
2. Moisture Barrier Installation:
To prevent moisture from seeping through the concrete slab and damaging the cork flooring, it is recommended to install a moisture barrier. This barrier acts as a protective layer between the concrete and cork tiles. There are different types of moisture barriers available in the market, such as sheet membranes or liquid-applied options. Follow the manufacturer’s instructions for proper installation of the moisture barrier.
FAQ: Do I need a moisture barrier even if my concrete slab seems dry?
Answer: Yes, it is always advisable to install a moisture barrier regardless of how dry your concrete slab appears. Moisture can still be present within the concrete, and a barrier will provide an added layer of protection against potential damage to the cork flooring.
3. Acclimation of Cork Tiles:
Cork tiles are a natural material that can expand or contract with changes in temperature and humidity. To ensure a successful installation, it is vital to acclimate the cork tiles to the room’s environment before laying them on the concrete slab. Place the unopened boxes of cork tiles in the room where they will be installed and let them sit for at least 72 hours. This allows the tiles to adjust to the temperature and humidity levels, minimizing any potential expansion or contraction after installation.
FAQ: Can I skip the acclimation process?
Answer: No, it is not advisable to skip the acclimation process when installing cork flooring over a concrete slab. Failure to acclimate the tiles can lead to buckling or separation after installation due to variations in temperature and humidity.
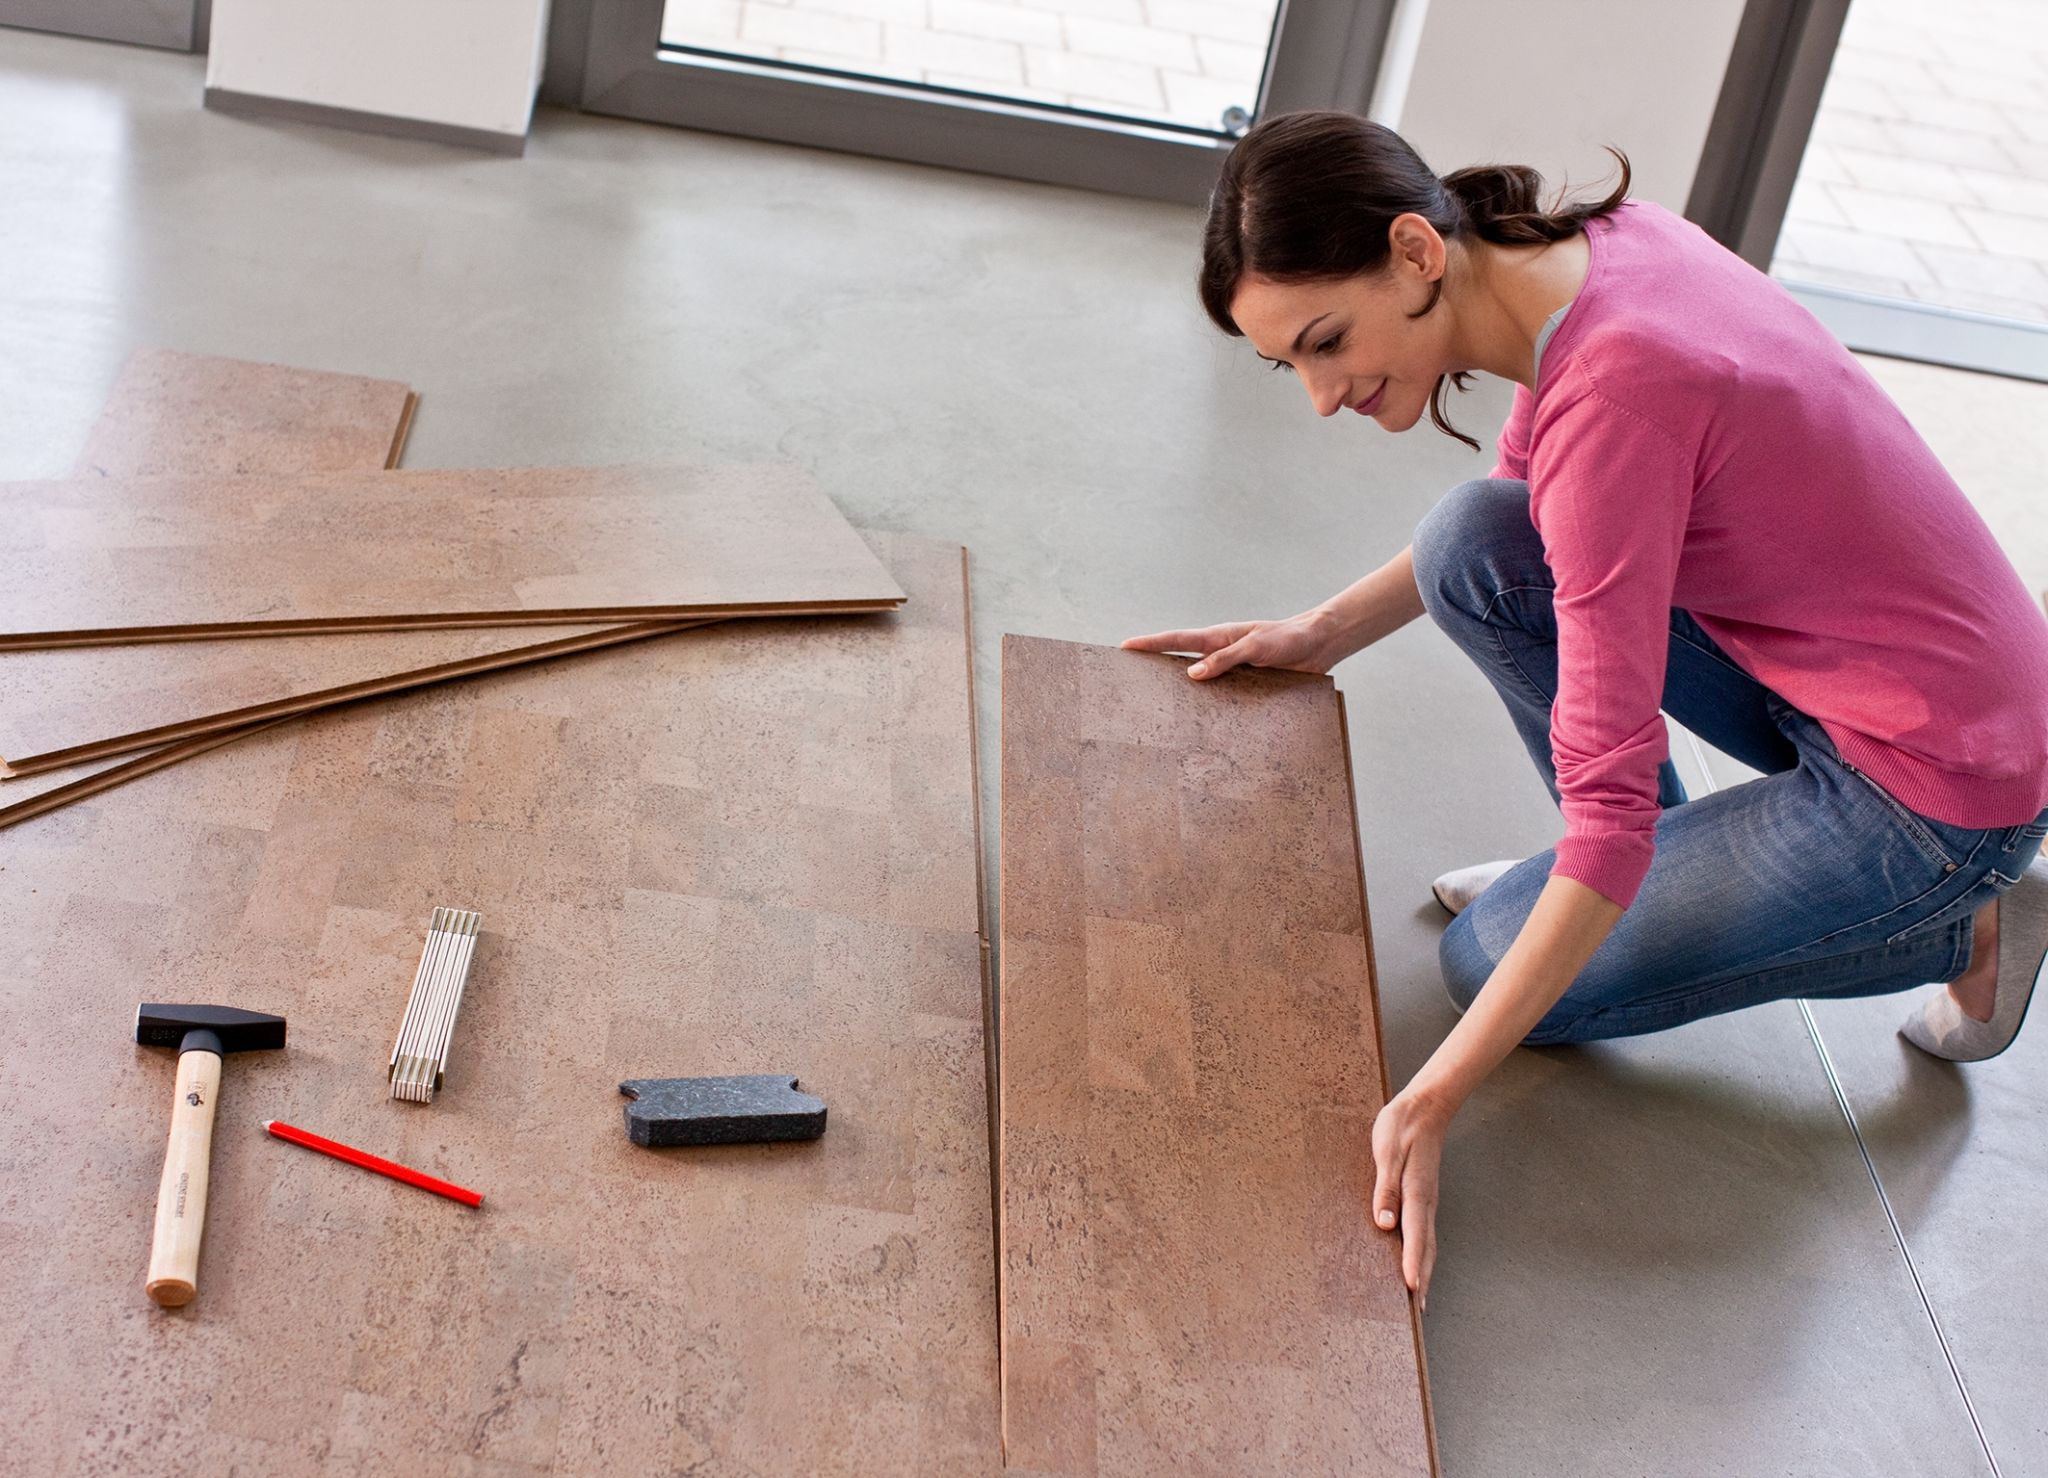
4. Cork Tile Installation:
Once the concrete slab is prepared, moisture barrier installed, and cork tiles acclimated, you are ready to begin installing the flooring. Start by measuring and marking reference lines on the floor to ensure straight and even tile placement. Apply a high-quality cork adhesive recommended by the manufacturer using a trowel, spreading it evenly across the concrete surface. Begin laying the cork tiles along the reference lines, pressing them firmly into place. Use a rolling pin or weighted roller to ensure proper adhesion and remove any air bubbles.
FAQ: Can I install cork flooring without adhesive?
Answer: No, it is Not recommended to install cork flooring without adhesive. Adhesive is necessary to ensure that the cork tiles adhere securely to the concrete slab, preventing them from shifting or coming loose over time. Using adhesive also helps to create a more stable and durable floor surface. Additionally, adhesive helps to reduce noise and provide insulation properties. It is essential to follow the manufacturer’s instructions for proper adhesive application and drying time.
5. Finishing and Maintenance:
After the cork tiles are installed, allow them to fully cure according to the manufacturer’s instructions before walking on or placing furniture on them. Once cured, apply a protective finish or sealant to the cork flooring to enhance its durability and resistance to moisture and stains. Follow the manufacturer’s recommendations for the specific product you choose.
Regular maintenance of cork flooring includes sweeping or vacuuming to remove dirt and debris, as well as damp mopping with a mild detergent or recommended cork floor cleaner. Avoid using harsh chemicals or abrasive cleaners that can damage the cork surface.
FAQ: Can I refinish cork flooring?
Answer: In most cases, cork flooring can be refinished. However, it is important to check with the manufacturer or a professional installer before attempting to refinish cork flooring. The thickness of the cork layer and the type of finish applied can determine whether refinishing is possible.
Overall, installing cork flooring over a concrete slab requires careful preparation, including moisture barrier installation, acclimation of tiles, proper adhesive application, and finishing. Following these steps and adhering to manufacturer’s instructions will help ensure a successful and long-lasting installation. Installing cork flooring over a concrete slab requires careful preparation and adherence to manufacturer’s instructions. Here are the steps involved:
1. Prepare the Concrete Slab: Ensure that the concrete slab is clean, dry, and level. Remove any existing flooring, patch any cracks or uneven areas, and thoroughly clean the surface.
2. Install Moisture Barrier: Before installing cork tiles, it is essential to install a moisture barrier to prevent moisture from the concrete slab from damaging the cork flooring. Use a high-quality moisture barrier recommended by the manufacturer and follow their installation instructions.
3. Acclimate Cork Tiles: Allow the cork tiles to acclimate to the environment in which they will be installed. This typically involves storing them in the room where they will be installed for a certain period of time to adjust to the temperature and humidity conditions. Failure to acclimate can lead to buckling or separation after installation.
4. Cork Tile Installation: Measure and mark reference lines on the floor to ensure straight and even tile placement. Apply a high-quality cork adhesive recommended by the manufacturer using a trowel, spreading it evenly across the concrete surface. Start laying the cork tiles along the reference lines, pressing them firmly into place. Use a rolling pin or weighted roller to ensure proper adhesion and remove air bubbles.
5. Finishing and Maintenance: After installation, allow the cork tiles to fully cure according to manufacturer’s instructions before walking on or placing furniture on them. Apply a protective finish or sealant recommended by the manufacturer to enhance durability and resistance to moisture and stains.
Regular maintenance includes sweeping or vacuuming to remove dirt and debris, as well as damp mopping with a mild detergent or recommended cork floor cleaner. Avoid using harsh chemicals or abrasive cleaners that can damage the cork surface.
FAQ: Can I refinish cork flooring?
Answer: In most cases, cork flooring can be refinished, but it is important to check with the manufacturer or a professional installer before attempting to refinish. The thickness of the cork layer and the type of finish applied can determine whether refinishing is possible.
By following these steps and adhering to manufacturer’s instructions, you can ensure a successful and long-lasting installation of cork flooring over a concrete slab.