Bathroom floors tiles seem to build up dirt, grime and moisture so they must be easy to clean and shouldn’t be slippery. However, in case you’ve used hardwood flooring surfaces with the rest of the home, you may be interested using it in the bathroom as well. Ceramic flooring with different types of pages may also be offered.
Here are Images about Bathroom Flooring Wood Effect
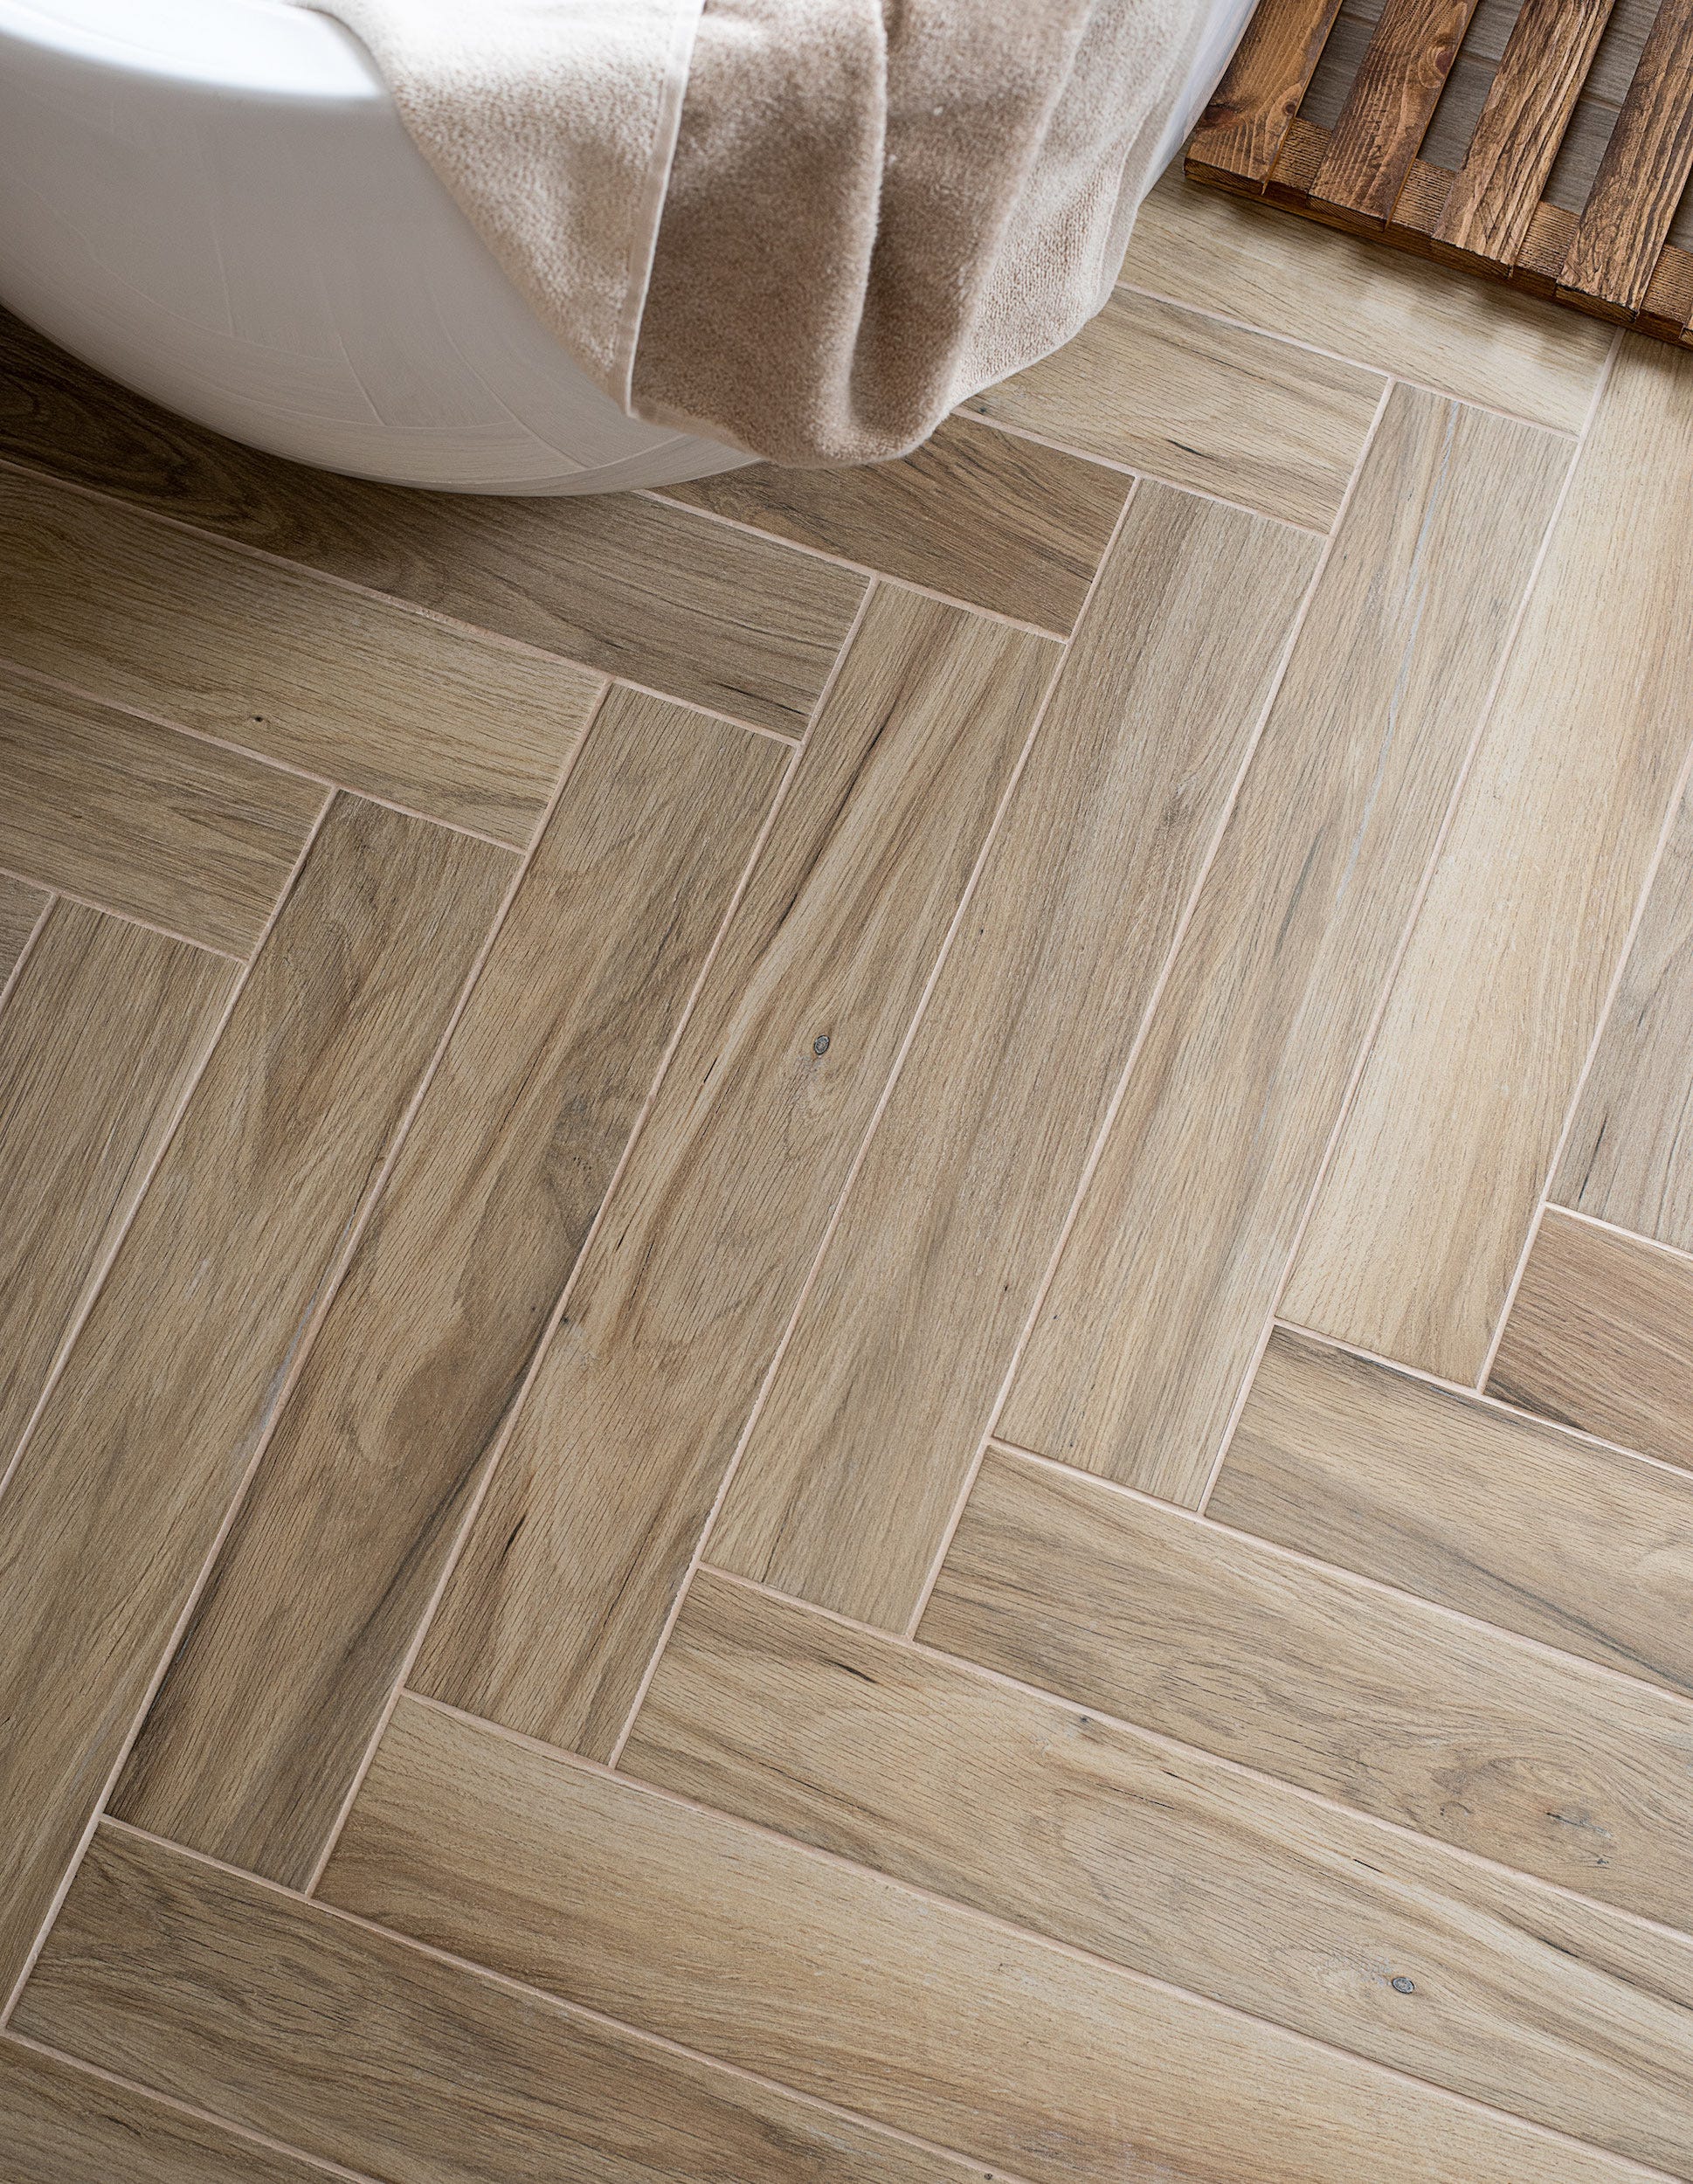
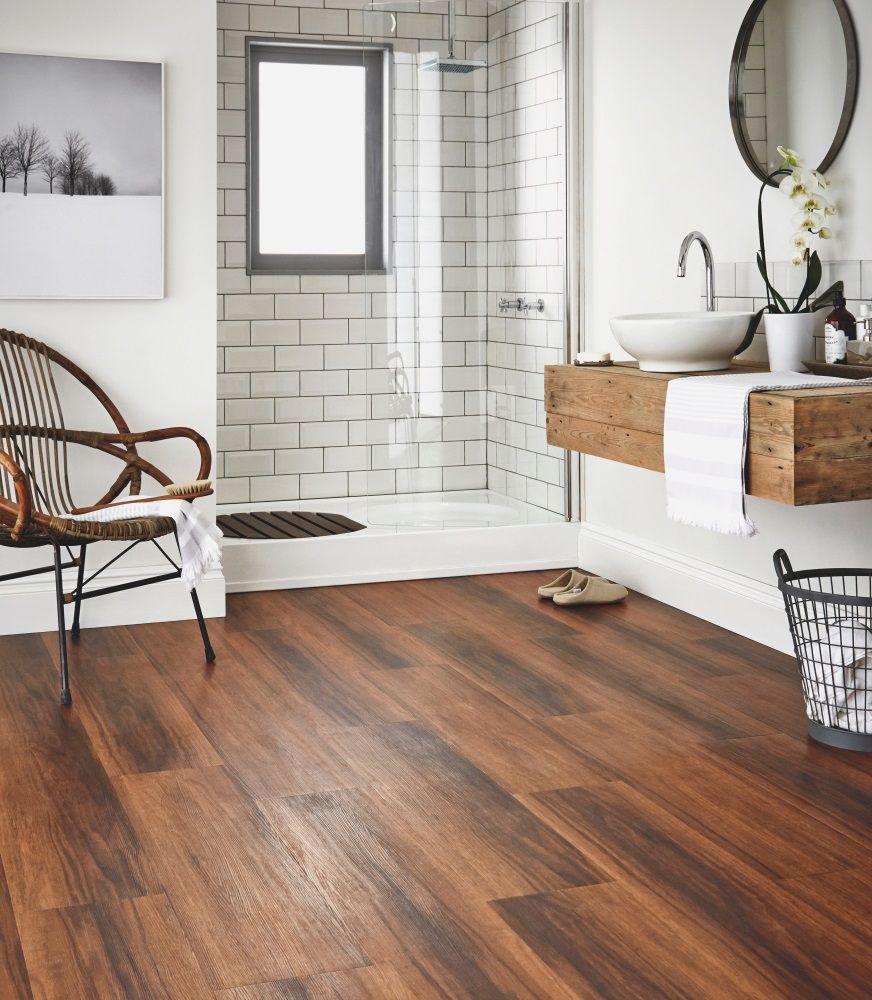
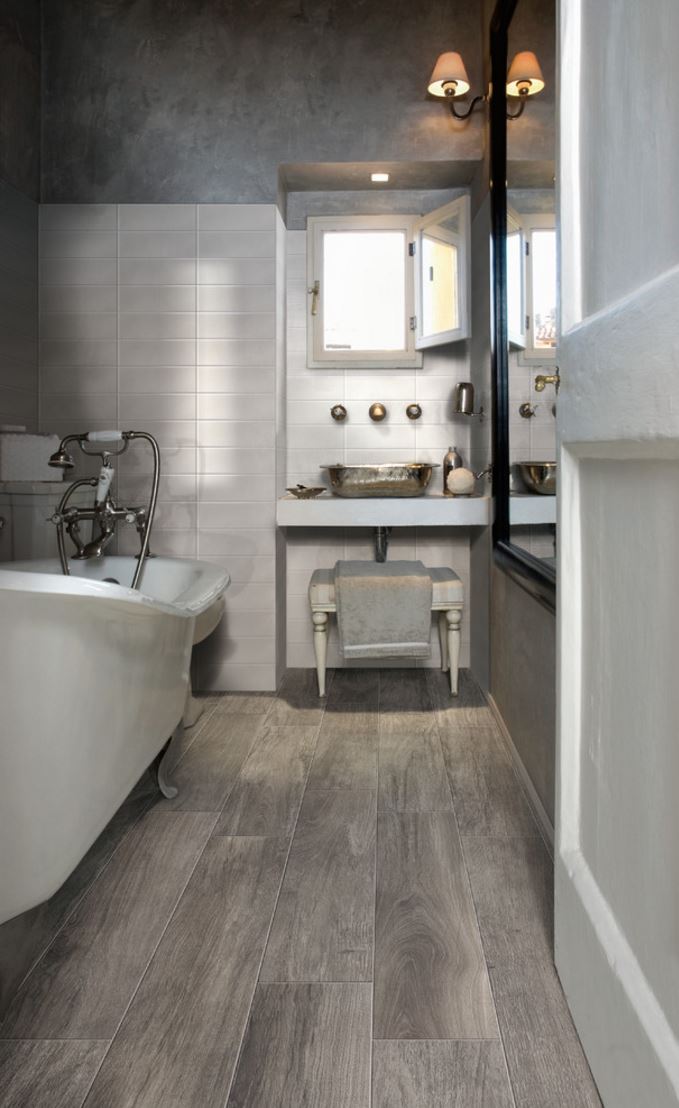
Bathroom Flooring Wood Effect

The installation could very well be the most important step in the total procedure. Let your creativity flow to get a great ambiance and feel. You can use bath room floor ceramic to make your bath room warm as well as appealing or even dramatic or even feminine or modern. The process of laying the vinyl tiles is really simple. If perhaps you have an excellent budget, you are able to go in for marble or granite flooring.
Muniellos Light Oak 910×153 Anti-Slip Tiles Walls and Floors

Laminate flooring surfaces for the bathroom are amazingly a good choice over carpets & solid hardwood-made floors. At this time there are three issues that your bathroom flooring faces which the flooring in other areas of the home of yours does not have to brace up for – clean water, weather extremes as well as humidity. Generally different kinds of tiles are coupled in a single mesh to offer you a diverse mosaic tile.
Images Related to Bathroom Flooring Wood Effect
Bathroom floor tile ideas to brighten up your home for spring and

Natural Wood Effect Flooring Tiles and Planks Wood floor

Bathroom Flooring Ideas – Choosing Bathroom Flooring
5 Stylish Bathrooms with Wood Effect Tiles – Tilesporcelain

27 Bathroom wood effect floor ideas tile bathroom, bathroom

Wood Effect Bathroom Tiles and Panels – Porcelain Quorn Stone

Bathroom Flooring: What Are Your Options? Direct Wood Flooring Blog

Wickes Boutique Maryland Oak Glazed Porcelain Wood Effect Wall u0026 Floor Tile – 1140 x 200mm

Best Design Ideas for Bathroom Flooring Trends
Decorating with Porcelain and Ceramic Tiles That Look Like Wood
Bathroom Flooring Upgrades

Related articles:
- Vintage Bathroom Floor Tile Patterns
- Bathroom Floor Tile DIY
- Limestone Bathroom Floor Tiles
- Bathroom Floor Porcelain Tile
- Concrete Bathroom Floor Ideas
- White Bathroom Ceramic Tiles
- Bathroom Floor Baseboard
- Rustic Bathroom Flooring Ideas
- Bathroom Flooring Options
- Bamboo Bathroom Flooring Ideas
Bathroom Flooring Wood Effect: The Perfect Blend of Beauty and Practicality
Introduction:
When it comes to bathroom flooring, selecting the right material is crucial. It not only needs to be durable and water-resistant but should also add a touch of elegance to your space. One such option that has gained immense popularity in recent years is bathroom flooring with a wood effect. This flooring solution provides the perfect blend of beauty and practicality, offering homeowners a wide range of benefits. In this article, we will delve into the details of bathroom flooring with a wood effect, exploring its advantages, installation process, maintenance requirements, and addressing some frequently asked questions.
Benefits of Bathroom Flooring Wood Effect:
1. Aesthetics: One of the primary reasons homeowners opt for bathroom flooring with a wood effect is its aesthetic appeal. It brings warmth and natural beauty to the space, creating a cozy and inviting atmosphere. Whether you prefer a rustic farmhouse look or a modern contemporary style, there are various wood effects available to suit your taste.
2. Water Resistance: Unlike traditional hardwood floors that are susceptible to water damage, bathroom flooring with a wood effect is designed to be water-resistant. The top layer is typically coated with a protective sealant that prevents water from seeping in and causing any structural damage. This feature makes it an ideal choice for bathrooms where moisture levels are high.
3. Durability: Another advantage of bathroom flooring with a wood effect is its durability. Unlike real wood floors that are prone to scratches and dents, this type of flooring is engineered to withstand heavy foot traffic and resist wear and tear. It can handle the daily demands of a busy bathroom without losing its charm or functionality.
4. Easy Maintenance: Cleaning bathroom flooring with a wood effect is relatively simple. Regular sweeping or vacuuming followed by mopping with warm water and a mild detergent is usually sufficient to keep it looking pristine. Additionally, many wood-effect floorings come with stain-resistant properties, making it easier to remove any spills or stains.
5. Versatility: Wood-effect bathroom flooring offers a wide range of design options, allowing you to achieve the desired look for your space. From different wood species like oak, maple, or cherry to various colors and finishes, you can find a flooring solution that complements your overall bathroom decor. Whether you prefer a light, airy feel or a dark, rich ambiance, the possibilities are endless.
Installation Process:
Installing bathroom flooring with a wood effect requires careful planning and attention to detail. Here is a step-by-step guide to help you through the process:
1. Preparation: Start by removing the existing flooring material, ensuring the surface is clean, dry, and free from any debris. It is essential to check for any signs of moisture or damage that may need to be addressed before installation.
2. Acclimation: Before installing the wood-effect flooring, allow it to acclimate to the bathroom’s humidity and temperature for at least 48 hours. This will minimize the chances of expansion or contraction after installation.
3. Subfloor Preparation: Ensure that the subfloor is level and smooth. Any imperfections should be fixed using a suitable self-leveling compound or filler. This step is crucial in preventing any issues with the finished flooring.
4. Underlayment: Install an underlayment over the subfloor to provide additional moisture protection and cushioning. There are various options available depending on your specific needs and budget.
5. Installation: Follow the manufacturer’s instructions for laying out and installing the Wood-effect flooring. This may involve using adhesive or interlocking mechanisms to secure the planks or tiles in place. Take care to maintain proper spacing and alignment for a professional-looking finish.
6. Finishing Touches: Once the flooring is installed, trim any excess material and install transition strips at doorways or areas where the wood-effect flooring meets other types of flooring. This will create a seamless transition and provide a finished look to the installation.
7. Maintenance: After the installation is complete, follow the recommended maintenance guidelines provided by the manufacturer. This may include regular cleaning, avoiding harsh chemicals or abrasive tools, and promptly addressing any spills or stains to ensure the longevity and appearance of your wood-effect bathroom flooring.
In conclusion, bathroom flooring with a wood effect offers several advantages such as water resistance, durability, easy maintenance, and versatility in design options. However, it requires careful planning and proper installation to ensure optimal performance and longevity. By following these steps and guidelines, you can achieve a beautiful and functional wood-effect flooring in your bathroom. Some potential improvements to the text could be:
1. Adding more specific details and examples about the different design options available for wood-effect bathroom flooring. This could include mentioning different types of wood finishes, colors, and patterns that can be achieved.
2. Providing more information on how to properly address any signs of moisture or damage before installation. This could include tips on how to identify and fix these issues, such as using a moisture barrier or repairing any damaged subflooring.
3. Explaining the benefits of using a specific type of underlayment for wood-effect bathroom flooring. This could include discussing the advantages of using a moisture-resistant underlayment or one that provides additional cushioning for comfort.
4. Including tips on how to properly maintain wood-effect bathroom flooring, such as regularly sweeping or vacuuming to remove debris, using a gentle cleanser specifically designed for wood floors, and avoiding excessive moisture exposure.
5. Offering suggestions on how to incorporate other elements of bathroom decor, such as choosing complementary wall colors or adding decorative accents like plants or artwork, to enhance the overall aesthetic of the space.
By incorporating these improvements, the text can provide readers with a more comprehensive guide to installing wood-effect bathroom flooring and creating a beautiful and functional bathroom design. Spacing and alignment are important elements for achieving a professional-looking finish in any written document. To improve the spacing and alignment of the text provided, you can make the following adjustments:
1. Remove excess line breaks: Remove unnecessary line breaks to create a more compact and visually appealing layout. For example, remove the repeated “
” sections.
2. Align paragraphs: Ensure that each paragraph is properly aligned, either justified or left-aligned.
3. Use consistent spacing: Maintain consistent spacing between paragraphs to improve readability and organization. Instead of using multiple line breaks, use a single line break between paragraphs.
Here is an improved version of the text with adjusted spacing and alignment:
Spacing and alignment for a professional-looking finish.
6. Finishing Touches: Once the flooring is installed, trim any excess material and install transition strips at doorways or areas where the wood-effect flooring meets other types of flooring. This will create a seamless transition and provide a finished look to the installation.
7. Maintenance: After the installation is complete, follow the recommended maintenance guidelines provided by the manufacturer. This may include regular cleaning, avoiding harsh chemicals or abrasive tools, and promptly addressing any spills or stains to ensure the longevity and appearance of your wood-effect bathroom flooring.
In conclusion, bathroom flooring with a wood effect offers several advantages such as water resistance, durability, easy maintenance, and versatility in design options. However, it requires careful planning and proper installation to ensure optimal performance and longevity. By following these steps and guidelines, you can achieve a beautiful and functional wood-effect flooring in your bathroom.
Some potential improvements to the text could be:
1. Adding more specific details and examples about the different design options available for wood-effect bathroom flooring. This could include mentioning different types of wood finishes, colors, and patterns that can be achieved.
2. Providing more information on how to properly address any signs of moisture or damage before installation. This could include tips on how to identify and fix these issues, such as using a moisture barrier or repairing any damaged subflooring.
3. Explaining the benefits of using a specific type of underlayment for wood-effect bathroom flooring. This could include discussing the advantages of using a moisture-resistant underlayment or one that provides additional cushioning for comfort.
4. Including tips on how to properly maintain wood-effect bathroom flooring, such as regularly sweeping or vacuuming to remove debris, using a gentle cleanser specifically designed for wood floors, and avoiding excessive moisture exposure.
5. Offering suggestions on how to incorporate other elements of bathroom decor, such as choosing complementary wall colors or adding decorative accents like plants or artwork, to enhance the overall aesthetic of the space.
By incorporating these improvements, the text can provide readers with a more comprehensive guide to installing wood-effect bathroom flooring and creating a beautiful and functional bathroom design.