Wood, bamboo, cork, laminates or vinyl are not the optimal flooring choices for your bathroom. Decoration is often the key to attaining this, and just about the most significant elements of any bathroom is utilizing the correct flooring. Bamboo and cork is able to retain moisture and they can become thriving justification for other microorganisms and bacteria.
Here are Images about Bathroom Floor With Wood Look Tile
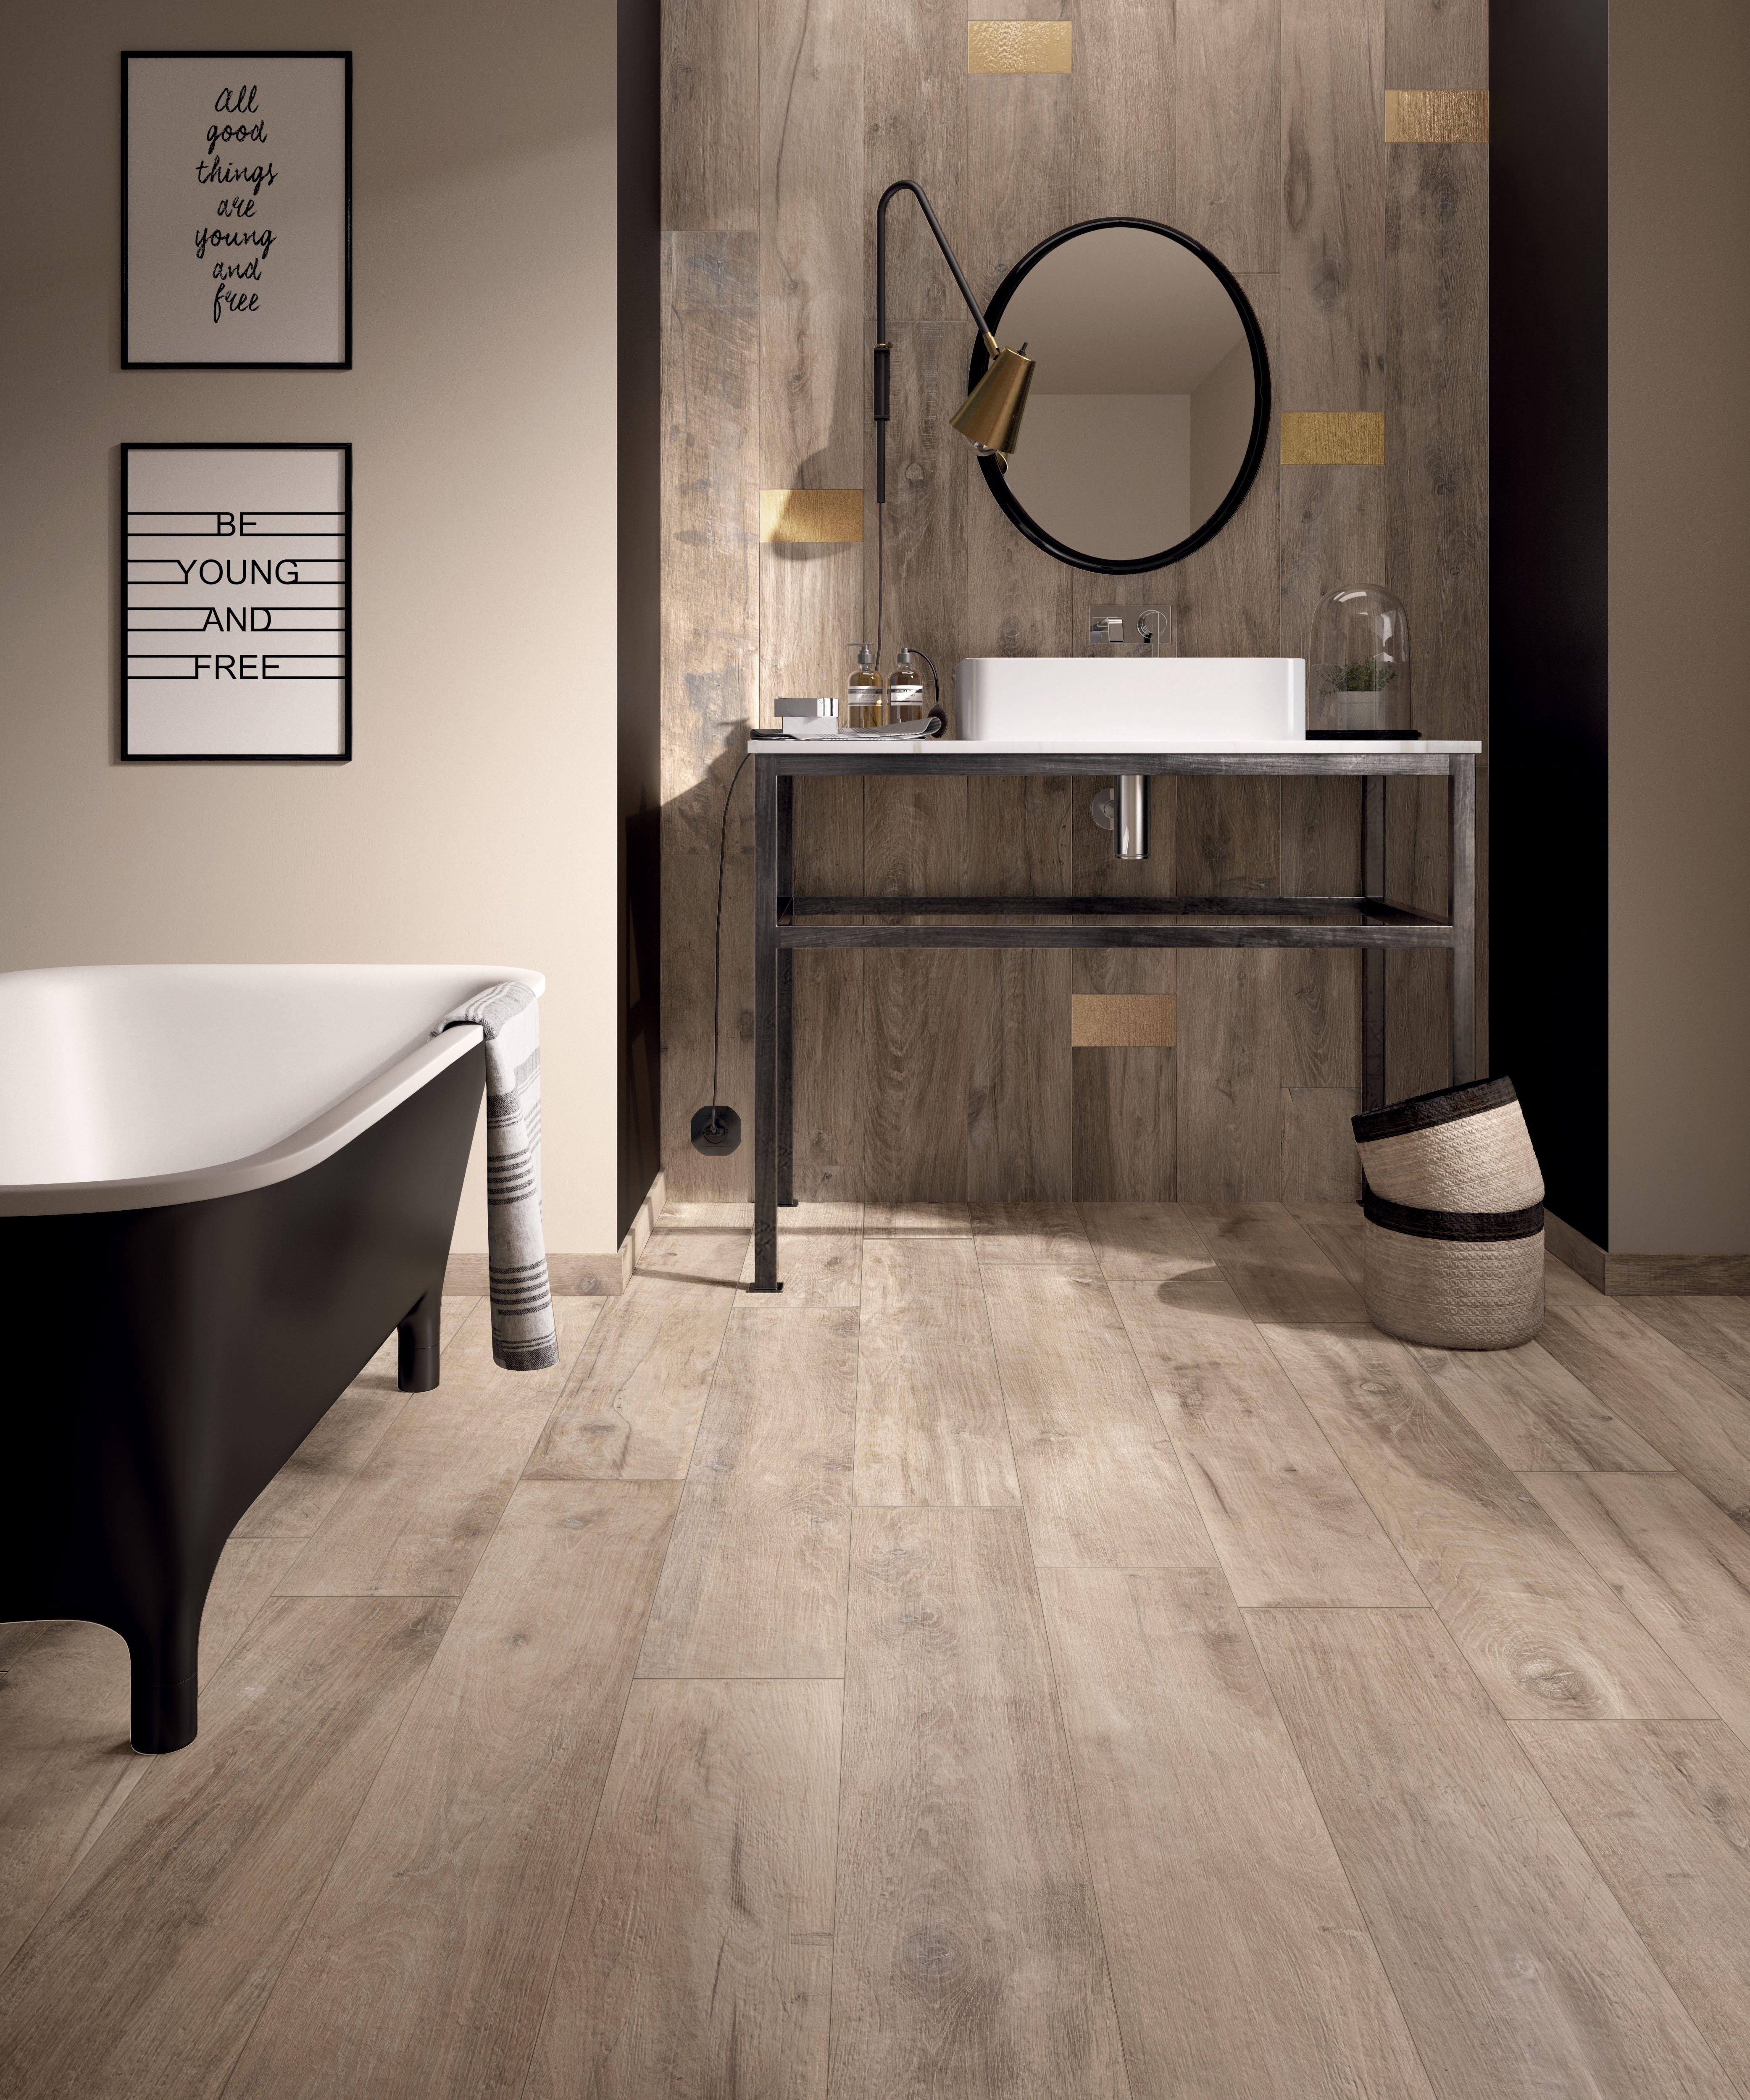
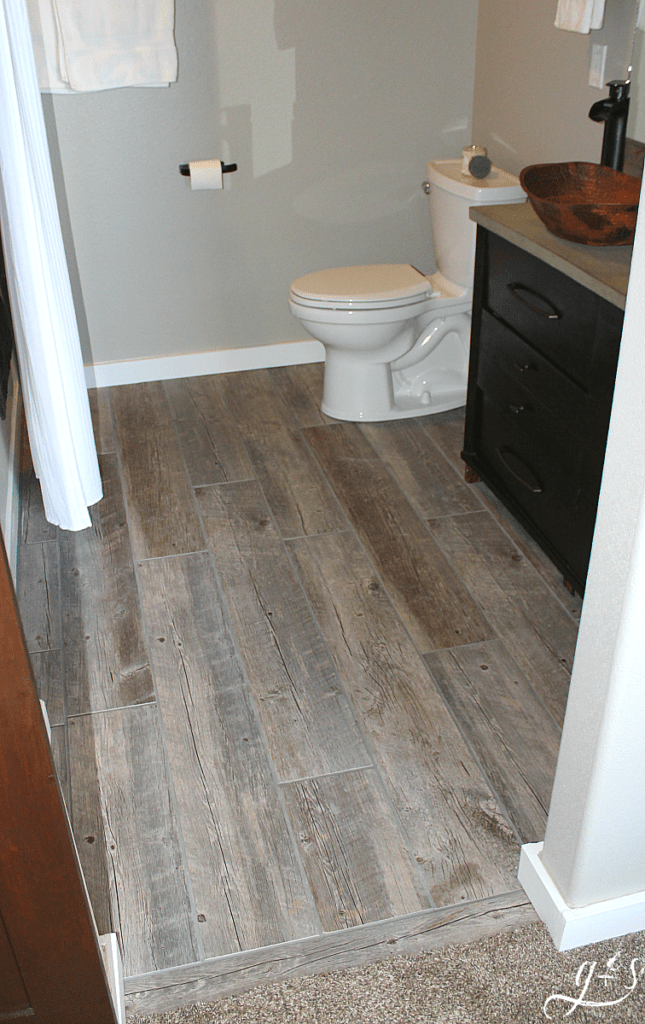
Bathroom Floor With Wood Look Tile
There are a lot of different kinds of bath room flooring available- you are able to go in for ceramic ones, vinyl tiles, linoleum flooring, marble flooring and also hardwood floors. Marble mosaic tiles might have a matte or glossy finish. You will have to discuss the backing totally with glue if you want to put it with the floor.
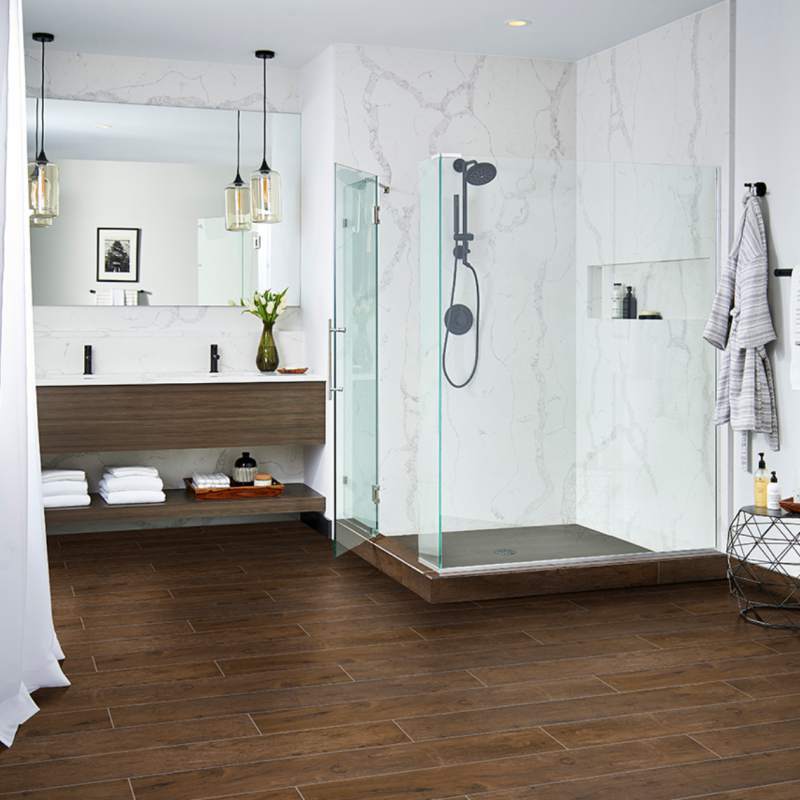
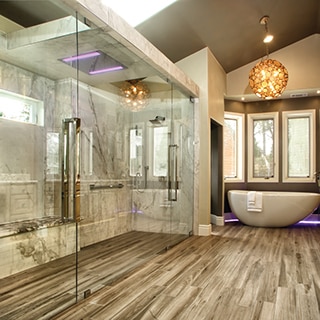
Move Over, HardwoodPorcelain Wood-Look Tile Is in the House!
This's a wonderful solution which has been utilized since time immemorial by home owners across the world. Bathroom vinyl tiles are produced in shades that are different and textures. You are able to also experiment with colored grout. These tiles can be arranged to form patterns & themes. You can find prints of popular paintings or maybe scenarist or even plain geometric patterns.
Images Related to Bathroom Floor With Wood Look Tile
Willow Kilauea 12×24 Wood Look Porcelain Tile

Is Wood Look Porcelain Tile A Good Choice When Remodeling
Durable Porcelain Tile That Looks Just Like Natural Birch
Plank Tile Bathroom Flooring – HappiHomemade with Sammi Ricke
How to Keep Bathroom Floors Warm in the Winter

Wood Look Tile: 17 Distressed, Rustic, Modern Ideas Wood tile

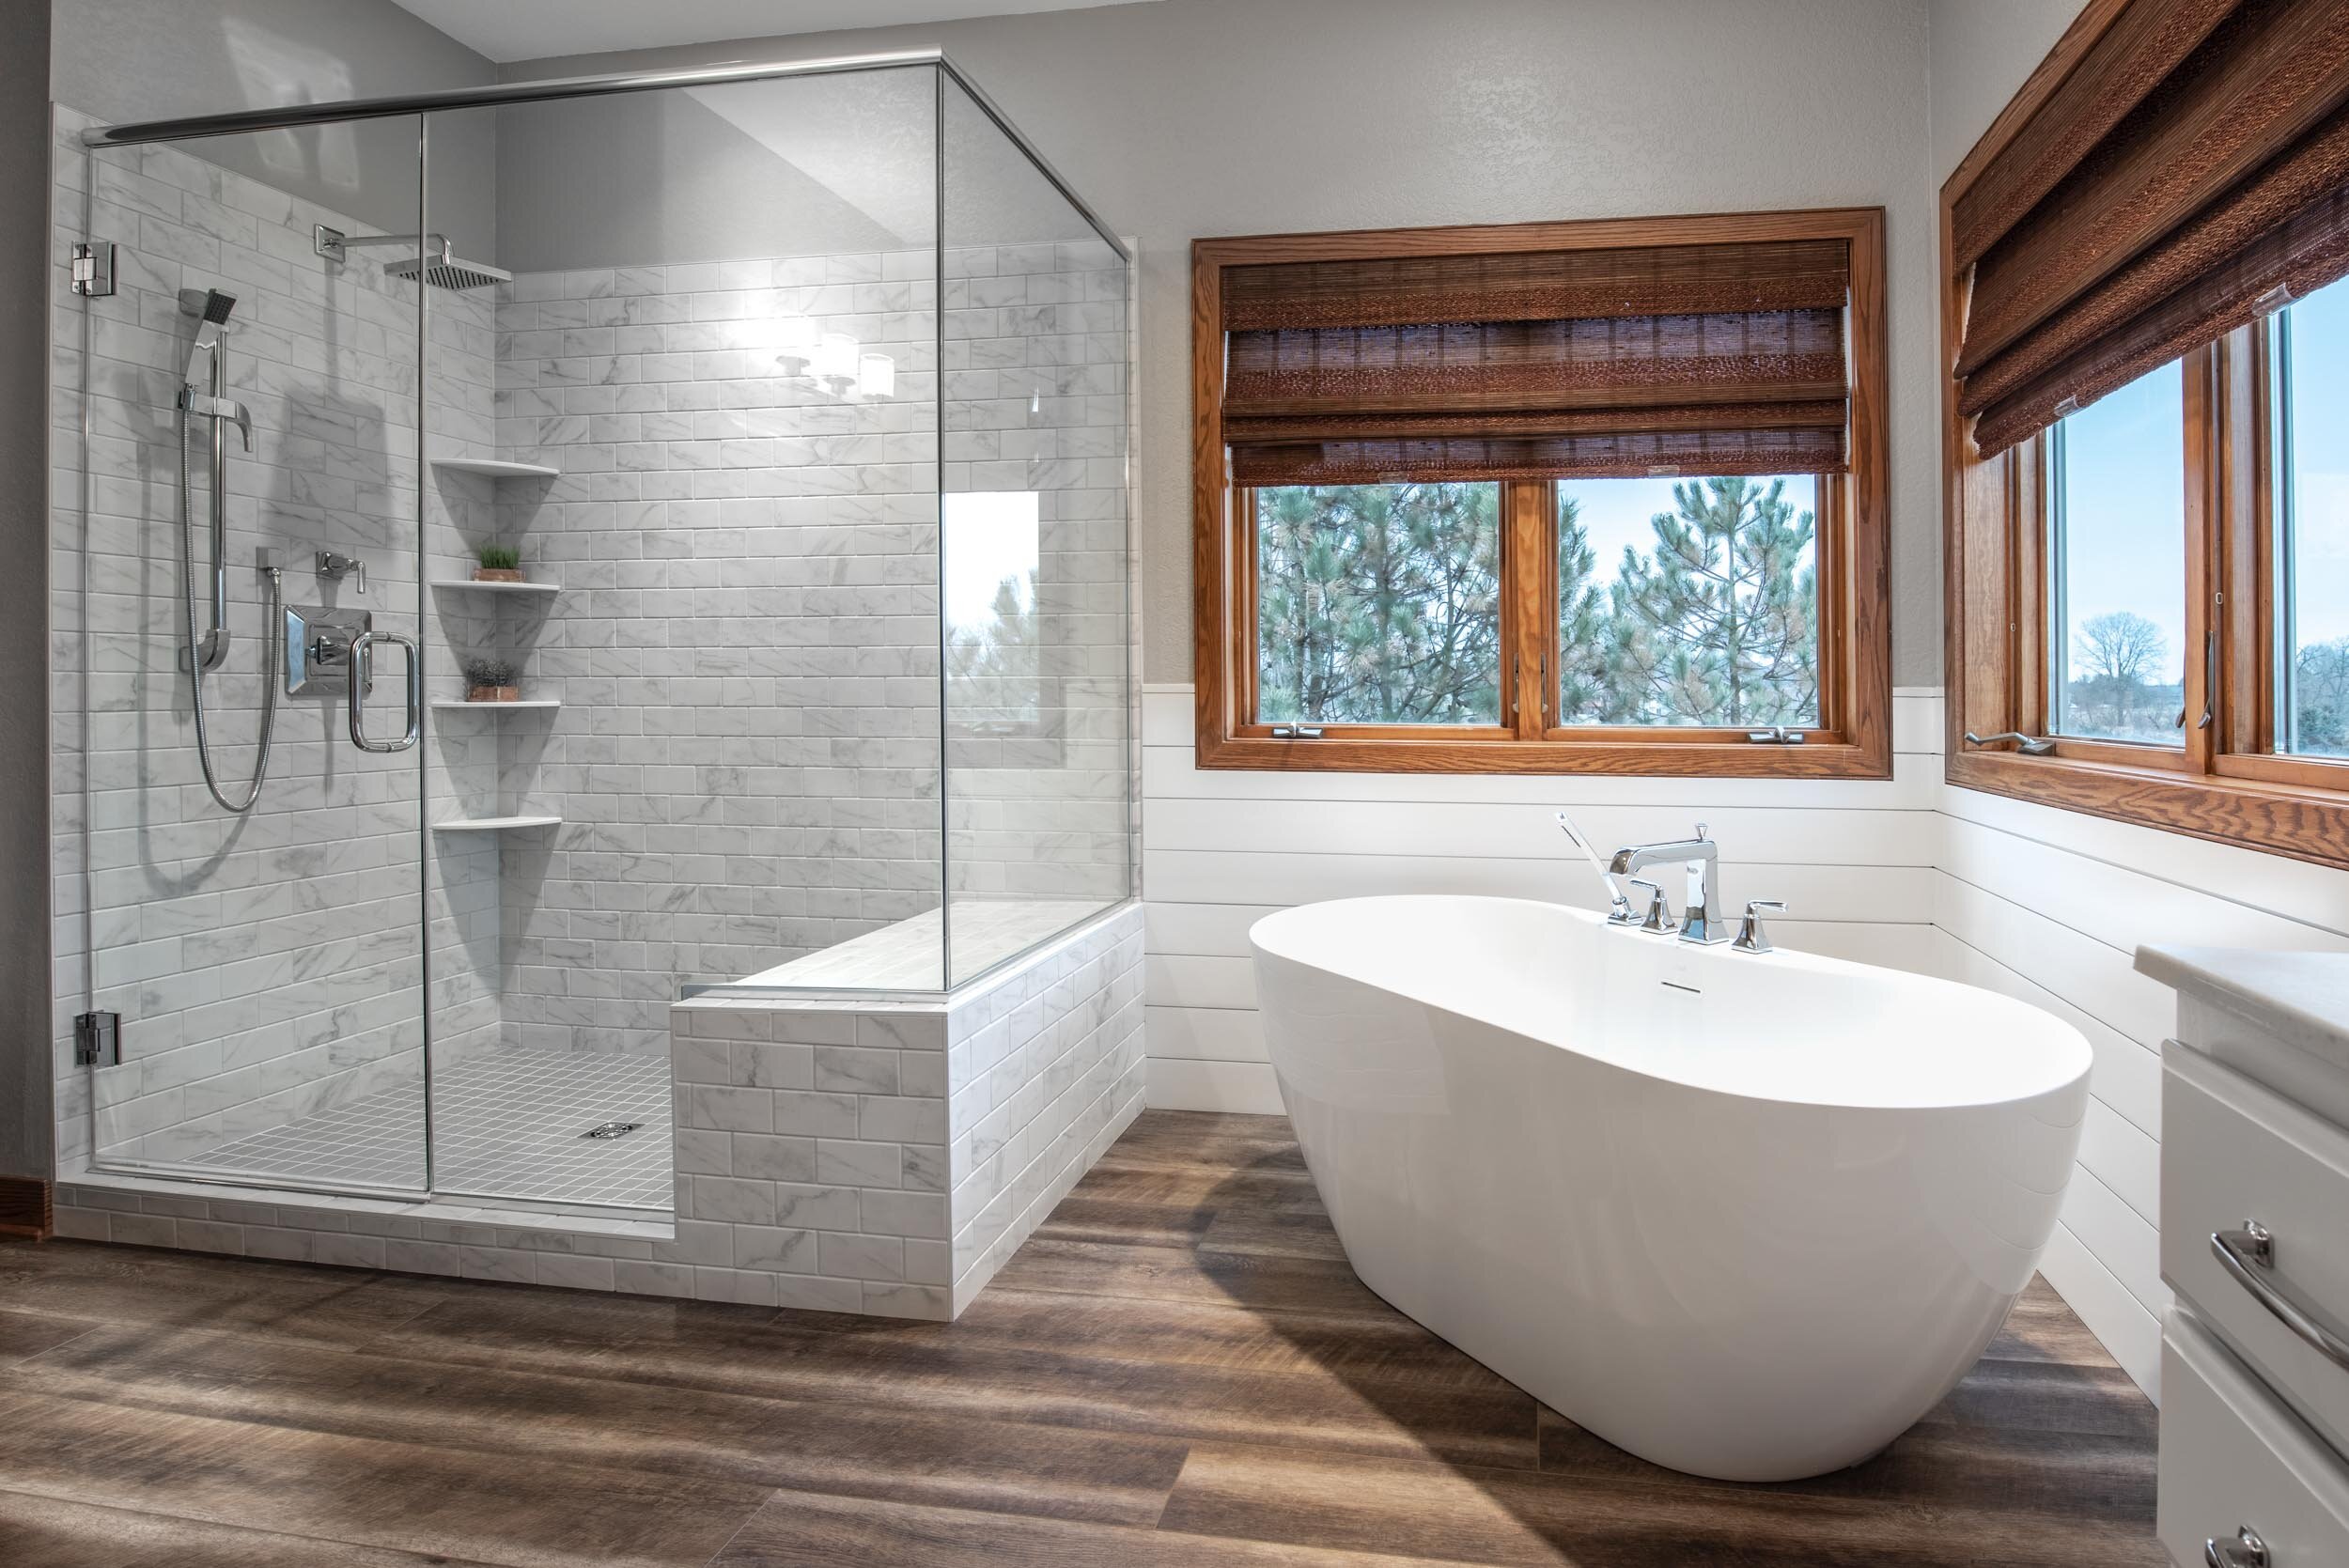
Wood Look Tile in the Shower Daltile
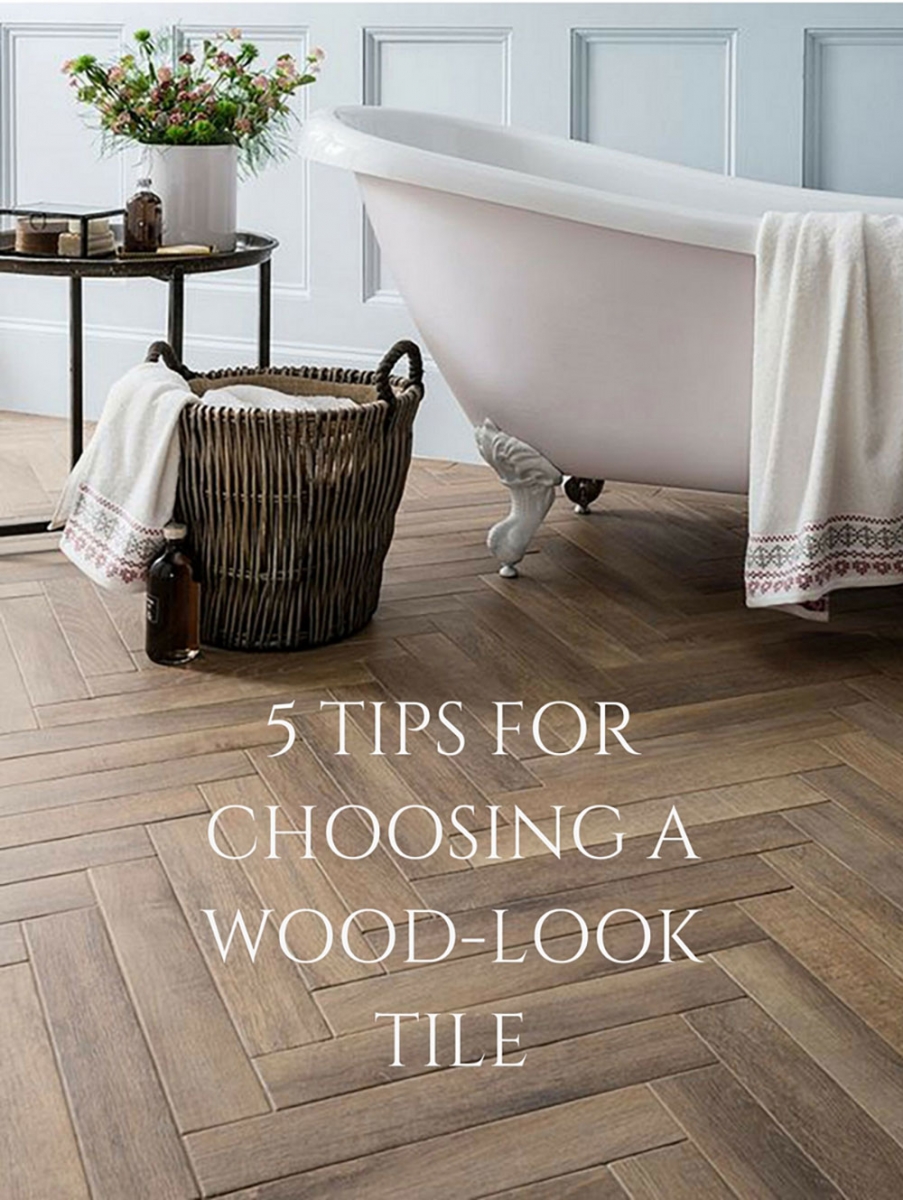
5 TIPS FOR CHOOSING A WOOD-LOOK TILE
5 Reasons Wood-Look Tile Is A Smart Alternative To Hardwood

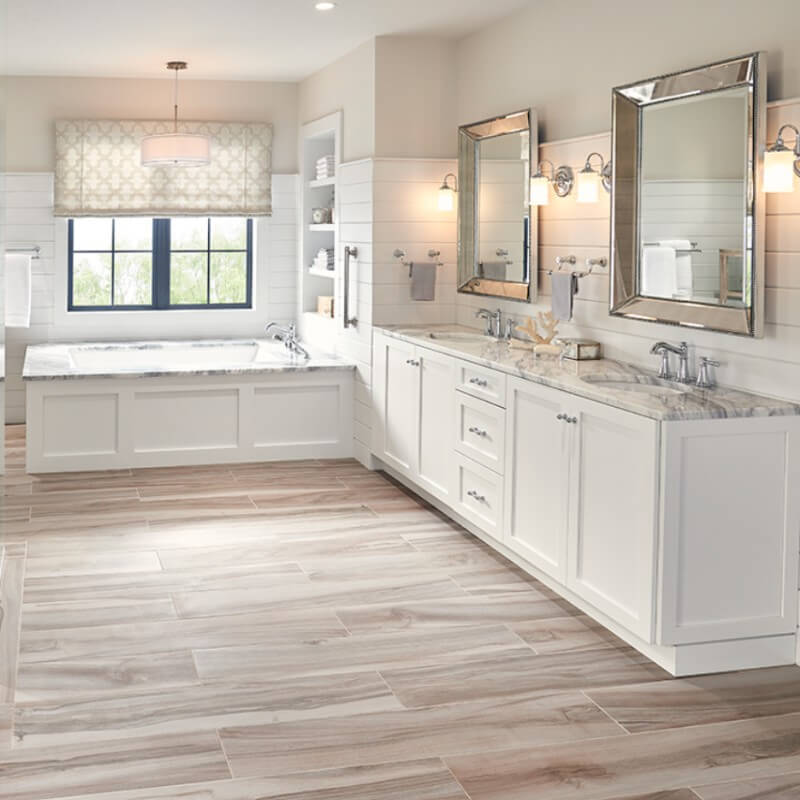
Style Selections Woods Natural 6-in x 24-in Glazed Porcelain Wood
Elements of Design: Fun Bathroom Flooring – Sinkology

Why are Homeowners Choosing Porcelain Wood Look Tile? – Conestoga Tile

Related articles:
- Vintage Bathroom Floor Tile Patterns
- Bathroom Floor Tile DIY
- Limestone Bathroom Floor Tiles
- Bathroom Floor Porcelain Tile
- Concrete Bathroom Floor Ideas
- White Bathroom Ceramic Tiles
- Bathroom Floor Baseboard
- Rustic Bathroom Flooring Ideas
- Bathroom Flooring Options
- Bamboo Bathroom Flooring Ideas
Bathroom Floor With Wood Look Tile: The Perfect Blend of Style and Durability
Introduction:
When it comes to bathroom flooring, homeowners are always on the lookout for a material that combines style, durability, and ease of maintenance. One such option that has been gaining popularity in recent years is wood look tile. This innovative flooring solution offers the timeless beauty of wood with the practical advantages of porcelain or ceramic tiles. In this article, we will delve into the world of bathroom floors with wood look tile, exploring the benefits, design options, installation process, and how to maintain this stunning flooring choice.
Benefits of Wood Look Tile in the Bathroom:
1. Durability: One of the primary reasons homeowners choose wood look tile for their bathroom floors is its exceptional durability. Unlike traditional hardwood floors, which are susceptible to water damage and warping, wood look tile is entirely waterproof. This makes it an ideal choice for bathrooms where moisture levels are high. Additionally, wood look tile is resistant to scratches and stains, ensuring that your bathroom floor will maintain its pristine appearance for years to come.
2. Versatility: Wood look tile comes in a variety of colors, patterns, and textures, allowing you to achieve any design aesthetic you desire in your bathroom. Whether you prefer the rustic charm of reclaimed barnwood or the sleek elegance of a modern oak finish, there is a wood look tile option to suit every taste. Furthermore, these tiles can be arranged in various patterns such as herringbone or chevron to add visual interest to your space.
3. Low Maintenance: Unlike natural hardwood floors that require regular sanding, refinishing, and sealing to maintain their beauty, wood look tile requires minimal maintenance. A simple routine of sweeping or vacuuming followed by mopping with a mild detergent is sufficient to keep your bathroom floor looking clean and fresh. Say goodbye to tedious upkeep and hello to more time enjoying your beautiful bathroom!
Design Options:
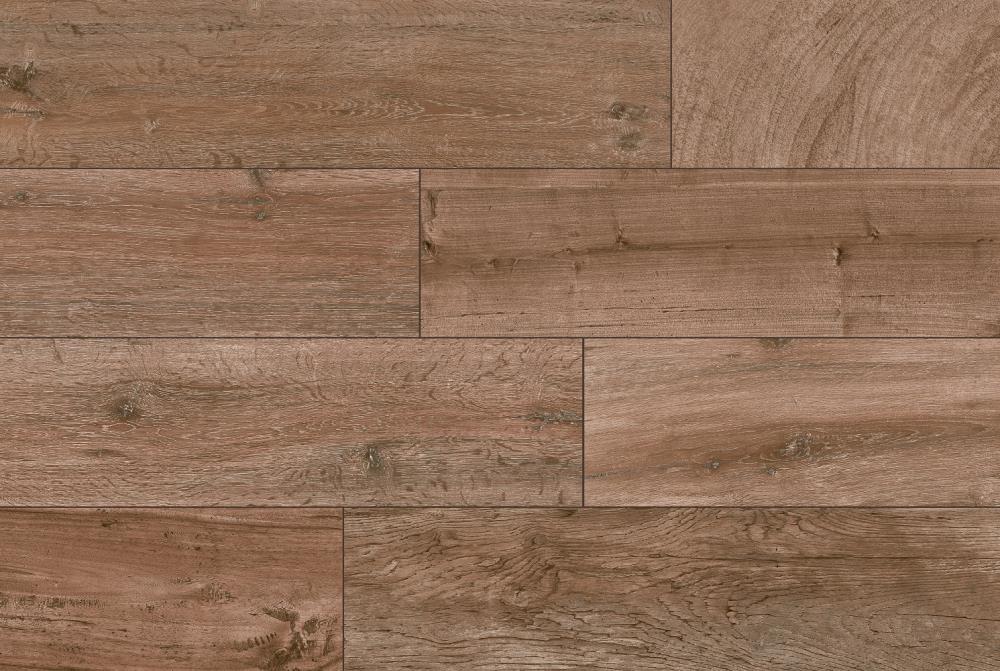
1. Colors: Wood look tiles offer a vast array of colors to choose from. From warm, honey-toned oak to rich, dark walnut, you can find a shade that complements your bathroom decor perfectly. Lighter shades can make a small bathroom feel more spacious, while darker tones create a cozy and inviting atmosphere.
2. Patterns: Wood look tiles can be laid in various patterns to create different visual effects. The most popular choices include the traditional plank pattern, herringbone, chevron, and basket weave. Each pattern adds its unique touch of elegance and charm to your bathroom floor.
3. Sizes: Wood look tiles are available in a range of sizes, allowing you to customize the appearance of your bathroom floor. Larger tiles create a seamless, modern look, while smaller tiles can add texture and visual interest. Mixing and matching different sizes can result in a truly unique and personalized design.
Installation Process:
Installing wood look tile in your bathroom requires careful planning and attention to detail. Here is an overview of the installation process:
1. Preparation: Before installing wood look tile, ensure that your bathroom floor is clean, level, and free of any debris or imperfections. If necessary, repair any cracks or uneven areas before proceeding.
2. Underlayment: Depending on the condition of your existing subfloor, you may need to install an underlayment to provide a smooth surface for the tile installation. This step is crucial for preventing cracks or movement in the tiles over time.
3. Tile Layout: Begin by laying out the tiles in your desired pattern To ensure a proper fit and aesthetic appeal. This step allows you to make any necessary adjustments or cuts before starting the installation process.
4. Adhesive Application: Apply a thin layer of tile adhesive to the prepared subfloor using a trowel. Make sure to follow the manufacturer’s instructions for proper adhesive application.
5. Tile Installation: Start laying the wood look tiles in your desired pattern, pressing them firmly into the adhesive. Use tile spacers to maintain consistent spacing between tiles for grout lines.
6. Grouting: Once the tiles are installed, allow them to set for the recommended time before applying grout. Mix the grout according to the manufacturer’s instructions and apply it using a grout float, making sure to fill in all the gaps between tiles.
7. Sealing: After the grout has dried, apply a tile sealer to protect the wood look tiles from moisture and stains. Follow the manufacturer’s instructions for proper sealing techniques and frequency.
8. Finishing Touches: Finally, clean any excess grout from the surface of the tiles using a damp sponge or cloth. Allow the floor to fully cure before walking on it or placing any furniture or fixtures on it.
In conclusion, wood look tile is an excellent choice for your bathroom floor due to its durability, versatility, low maintenance, and design options. With careful planning and proper installation, you can achieve a stunning and long-lasting bathroom floor that mimics the beauty of natural wood without the drawbacks. It is important to note that wood look tile is not suitable for wet areas such as showers or bathtubs. For these areas, it is recommended to use ceramic or porcelain tiles specifically designed for wet environments. Additionally, it is always best to consult with a professional tile installer to ensure proper installation and to address any specific considerations for your bathroom. Overall, the process for installing wood look tile in a bathroom includes preparation, underlayment installation, tile layout, adhesive application, tile installation, grouting, sealing, and finishing touches. It is important to ensure that the bathroom floor is clean, level, and free of any imperfections before starting the installation. An underlayment may be necessary to provide a smooth surface for the tiles and prevent cracks or movement over time. The tiles should be laid out in the desired pattern before applying a thin layer of adhesive to the subfloor. The tiles can then be installed, pressing them firmly into the adhesive and using spacers to maintain consistent spacing for grout lines. After allowing the tiles to set, grout should be applied to fill in all gaps between tiles. Once the grout has dried, a tile sealer should be applied to protect the wood look tiles from moisture and stains. Any excess grout should be cleaned from the surface of the tiles before allowing the floor to fully cure. It is important to note that wood look tile is not suitable for wet areas such as showers or bathtubs and it is recommended to use ceramic or porcelain tiles specifically designed for these areas. Consulting with a professional tile installer can help ensure proper installation and address any specific considerations for your bathroom.