Someone came up with the notion that maybe now there was a much better use for this wood – and were they ever before correct! Suppliers take this old wood, repair it, mill it, and then they make wood flooring in which they advertise it to home owners as wood floors in brand new and existing homes. Almost certainly you will not pay any additional because of this reclaimed wood flooring than you’d for quite similar species different wood flooring.
Images Related to Wood Floor To Vinyl Transition
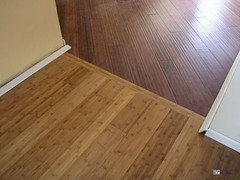
Wood Floor To Vinyl Transition
![]()
Wood floor surfaces have returned to popularity with a vengeance. There are wood flooring types which are attached to the sub flooring beneath it. Nevertheless, wooden flooring is currently getting to be far more popular because of the main reason that engineered wood flooring has created the selection both more efficient and a lot cheaper so that it’s the perfect method for every home.
Pin by Rosie Britton on Home ideas Transition flooring, Floor

Did they are available in on budget? How long did it take to the floor to become installed? Did they get a discount on the flooring if you purchased it from the professional individual or service that installed the floor? Quite often the items are considerably cheaper in case you buy the flooring from the business enterprise putting in the wood flooring. They are additionally relatively simple to maintain.
Vinyl Plank to Hardwood Transition – Ready To DIY
![]()
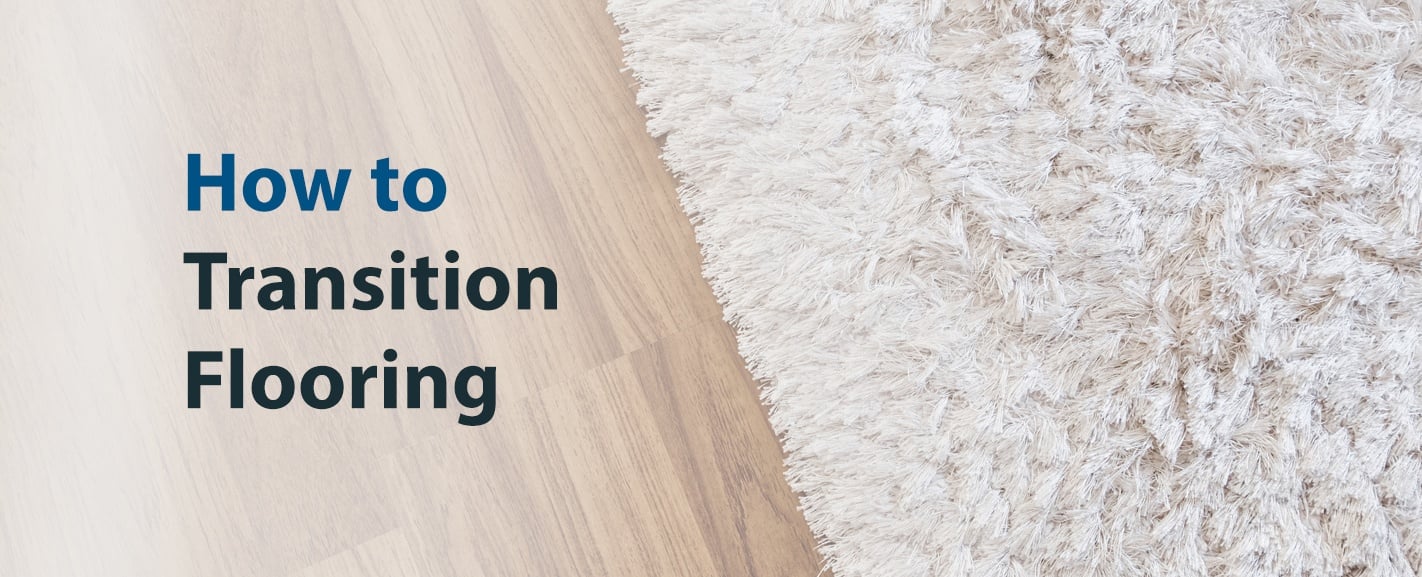
How to Transition Flooring 50 Floor
How To Add Floor Trim, Transitions, and Reducers Young House Love
![]()
How to Properly Execute Flooring Transitions – Builders Surplus

Lifeproof Luxury Vinyl Plank Flooring – Just Call Me Homegirl
![]()
How to transition vinyl floors to hardwood floors carpettoolz.com

Guide to Flooring Transitions
![]()
Guide to Floor Transition Strips
![]()
Can butting vinyl plank floors to real hardwood work?
Your Guide to Flooring Transitions Americau0027s Floor Source

Floor Transition Strips u0026 All Your Options for Wood Floor
![]()
Pin on Sheu0027s crafty.

Related articles:
- Black Walnut Wood Flooring
- Wood Flooring Designs
- Wood Flooring Options For Kitchens
- Contemporary Wood Flooring Ideas
- Dark Wood Floor Bedroom Ideas
- Real Wood Flooring For Kitchens
- Natural Wood Floor Stain
- Oak Wood Flooring
- Birch Wood Flooring Reviews
- Wood Floor Damage Repair
Wood Floor To Vinyl Transition: A Comprehensive Guide
Introduction:
A seamless transition between different flooring materials can greatly enhance the aesthetics and functionality of any space. One such transition that is commonly encountered is from wood flooring to vinyl. Whether you are considering this transition for your home or commercial space, it is essential to understand the process and considerations involved. In this comprehensive guide, we will delve into the details of a wood floor to vinyl transition, covering everything from preparation to installation techniques and maintenance tips.
I. Understanding the Transition:
Before embarking on any flooring project, it is crucial to have a clear understanding of the materials involved. Wood flooring exudes warmth and natural beauty, while vinyl offers durability and versatility. However, transitioning from wood to vinyl requires careful planning to ensure a seamless blend between the two surfaces.
A. Assessing the Existing Wood Floor:
The first step in a wood floor to vinyl transition is evaluating the condition of your existing wood floor. Check for any signs of damage, such as warped or cracked boards, and address them before proceeding with the transition. Additionally, consider the thickness of your wood floor, as it may affect the height difference between the two materials during installation.
FAQs:
1. Can I install vinyl directly over my wood floor?
No, installing vinyl directly over a wood floor is not recommended. The wood floor should be properly prepared before proceeding with the installation of vinyl.
2. How do I determine the thickness of my wood floor?
To determine the thickness of your wood floor, remove a baseboard or threshold trim and measure its depth using a tape measure.
B. Selecting the Right Vinyl Flooring:
Choosing the right type of vinyl flooring is crucial for achieving a successful transition. There are various options available, including luxury vinyl planks (LVP) and luxury vinyl tiles (LVT). Consider factors such as color, texture, and pattern to ensure compatibility with your existing wood floor.
C. Planning the Transition:
Planning the transition involves deciding on the layout and direction of the vinyl flooring. It is essential to create a clear visual separation between the wood and vinyl sections, ensuring a smooth flow from one material to another. Additionally, consider the placement of transition strips, which help bridge the height difference between the two surfaces.
FAQs:
1. What are transition strips?
Transition strips are narrow pieces of molding used to create a smooth transition between different flooring materials. They can be made from various materials, including wood, metal, or vinyl.
2. How do I choose the right transition strip?
The choice of transition strip depends on the height difference between your wood floor and vinyl flooring. Measure this difference accurately and select a transition strip that can accommodate it.
II. Preparing for Installation:
Proper preparation is key to achieving a successful wood floor to vinyl transition. This includes ensuring a clean and level surface, as well as addressing any potential moisture issues.
A. Removing Baseboards and Trim:
Before installing vinyl flooring, remove baseboards and trim along the perimeter of the room. This allows for a clean installation and ensures a neat finish.
B. Cleaning and Leveling the Subfloor:
A clean and level subfloor is essential for proper vinyl flooring installation. Remove any dirt, debris, or adhesive residues from the surface. If necessary, use a leveling compound to correct any uneven areas.
C. Addressing Moisture Concerns:
Moisture can adversely affect vinyl flooring, leading to warping or mold growth. Perform a moisture test on your Wood floor to ensure it is dry before installing vinyl. If moisture is present, address the issue before proceeding with installation. This may involve using a moisture barrier or addressing any underlying moisture problems.
III. Installing Vinyl Flooring:
Once the wood floor is properly prepared, you can proceed with installing the vinyl flooring. Follow these steps for a successful installation:
A. Acclimating the Vinyl Flooring:
Before installation, allow the vinyl flooring to acclimate to the room’s temperature and humidity for at least 48 hours. This helps prevent expansion or contraction after installation.
B. Installing Underlayment (if necessary):
Depending on the type of vinyl flooring you choose, you may need to install an underlayment. Follow the manufacturer’s instructions for proper installation.
C. Cutting and Fitting Vinyl Planks or Tiles:
Measure and cut the vinyl planks or tiles to fit your space, leaving a small gap around the perimeter of the room for expansion. Ensure a snug fit and use adhesive or click-lock mechanisms to secure them in place.
D. Installing Transition Strips:
If needed, install transition strips along the edges where the wood floor meets the vinyl flooring. Secure them in place according to the manufacturer’s instructions.
E. Finishing Touches:
Once all the vinyl planks or tiles are installed, replace baseboards and trim along the perimeter of the room to complete the transition from wood to vinyl flooring.< Adding the finishing touches will ensure a seamless transition from wood to vinyl flooring. Replace the baseboards and trim along the perimeter of the room to cover any gaps and create a polished look. Use nails or adhesive to secure them in place according to the manufacturer’s instructions. Double-check for any loose boards or tiles and make any necessary adjustments before completing the installation. Finally, clean the entire floor surface to remove any dust or debris, and enjoy your newly installed wood floor to vinyl transition. Here are the steps for proper vinyl flooring installation:
1. Prepare the wood floor: Remove any dirt, debris, or adhesive residues from the surface. If necessary, use a leveling compound to correct any uneven areas.
2. Address moisture concerns: Perform a moisture test on your wood floor to ensure it is dry before installing vinyl. If moisture is present, address the issue before proceeding with installation. This may involve using a moisture barrier or addressing any underlying moisture problems.
3. Acclimate the vinyl flooring: Before installation, allow the vinyl flooring to acclimate to the room’s temperature and humidity for at least 48 hours. This helps prevent expansion or contraction after installation.
4. Install underlayment (if necessary): Depending on the type of vinyl flooring you choose, you may need to install an underlayment. Follow the manufacturer’s instructions for proper installation.
5. Cut and fit vinyl planks or tiles: Measure and cut the vinyl planks or tiles to fit your space, leaving a small gap around the perimeter of the room for expansion. Ensure a snug fit and use adhesive or click-lock mechanisms to secure them in place.
6. Install transition strips (if needed): If needed, install transition strips along the edges where the wood floor meets the vinyl flooring. Secure them in place according to the manufacturer’s instructions.
7. Finish touches: Replace baseboards and trim along the perimeter of the room to complete the transition from wood to vinyl flooring. Use nails or adhesive to secure them in place according to the manufacturer’s instructions.
8. Double-check and clean: Double-check for any loose boards or tiles and make any necessary adjustments before completing the installation. Finally, clean the entire floor surface to remove any dust or debris.
Following these steps will ensure a successful and seamless transition from wood to vinyl flooring installation.