Proceed using this technique until you have finished the room. The dirt can't be totally eliminated with scrubbing or perhaps cleaning techniques. You can get on a pattern or lay them out randomly for a unique design. Even though tiles are exceedingly durable and withstand rough use for years, the absence of proper maintenance can easily make floor tile floors incredibly dull and tarnished.
Images Related to Vintage Tile Flooring Bathroom
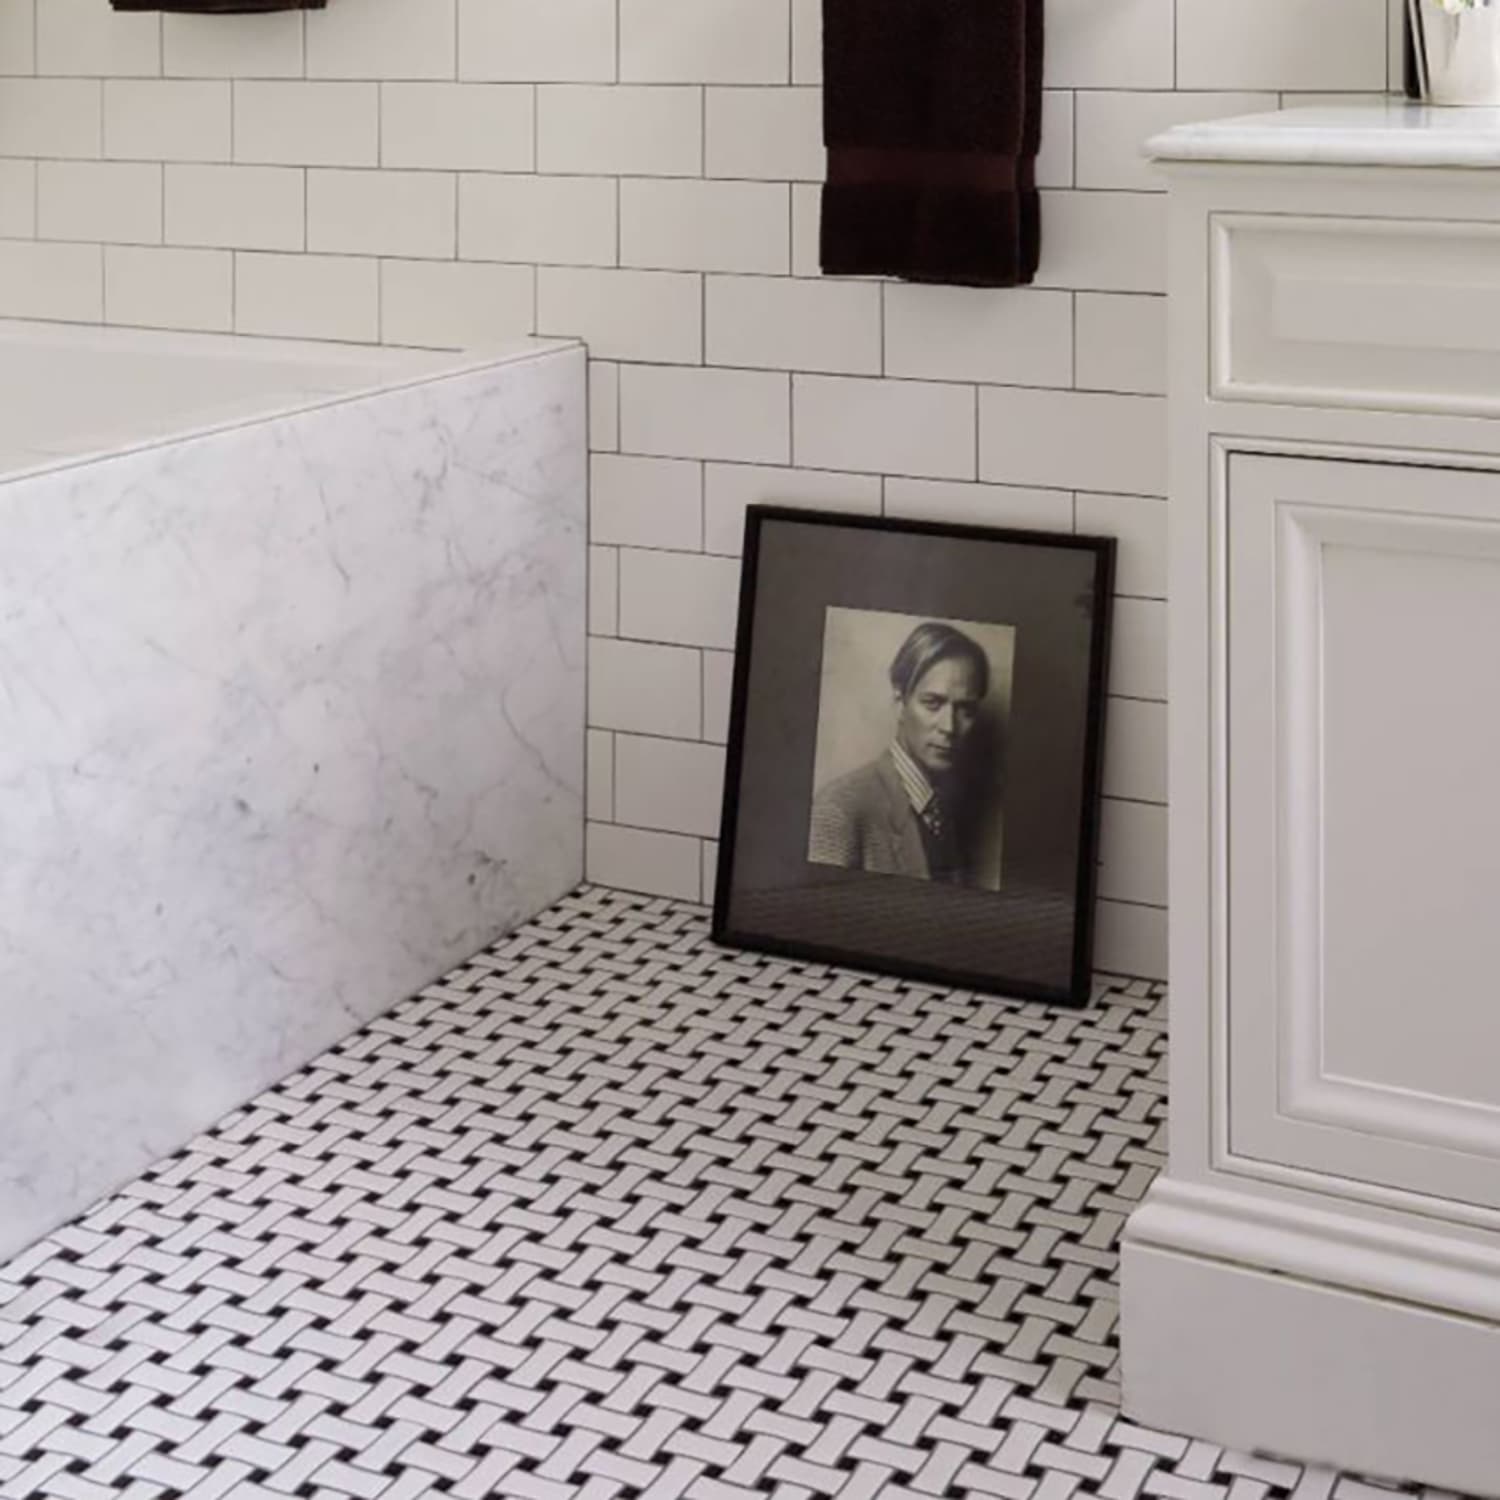
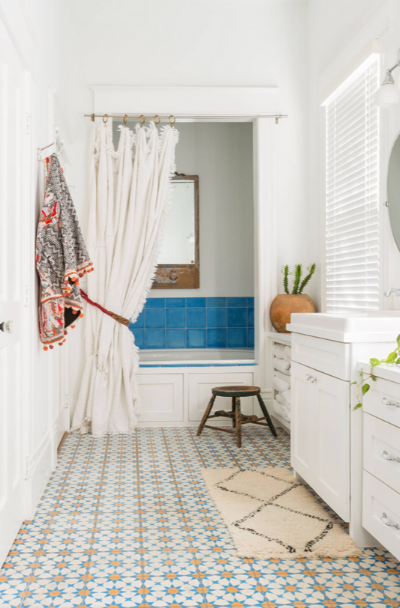
Vintage Tile Flooring Bathroom
/cdn.vox-cdn.com/uploads/chorus_asset/file/19502703/vintagebath_02.jpg)
You are able to in addition cut the tile while you are placing it, but in that case you've to be positive you haven't laid down the mortar right up until you have made the necessary cuts. Eliminate all nails and waste and check the subfloor carefully for symptoms of rot, broken spots and warped boards. Styles cover anything from lively to subdued; textures vary from classically smooth to antiqued markings.
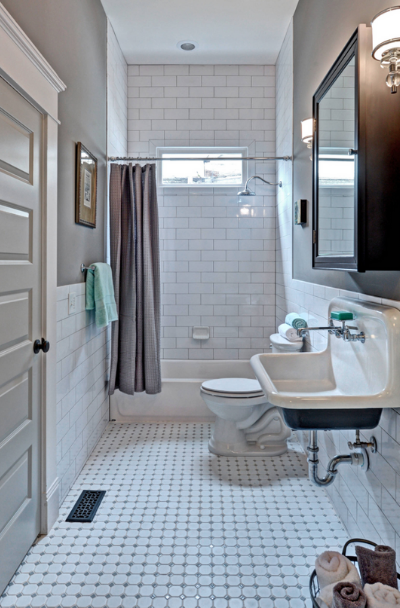
Mosaic Tile Floor Ideas for Vintage Style Bathrooms Apartment
For that issue, natural stone such as marble as well as granite are actually on the other conclusion of the spectrum – they crack actually easier compared to ceramic tile and shouldn't be used in settings where some surplus deflection is actually achievable. The floor tiles must be sealed and regularly resealed with a commercially available sealant in comparison to ceramic tiles which just need to have their grout lines sealed. Denver tile flooring will provide you with a great assortment of tile. process is not only easy but is additionally quite quickly.
23 Vintage Tile Design Ideas – Sebring Design Build
Vintage Bathroom Floor Tile Ideas Before You Start Your Remodeling

23 Vintage Tile Design Ideas – Sebring Design Build
35 Vintage Bathroom Tile ideas tile bathroom, bathroom floor

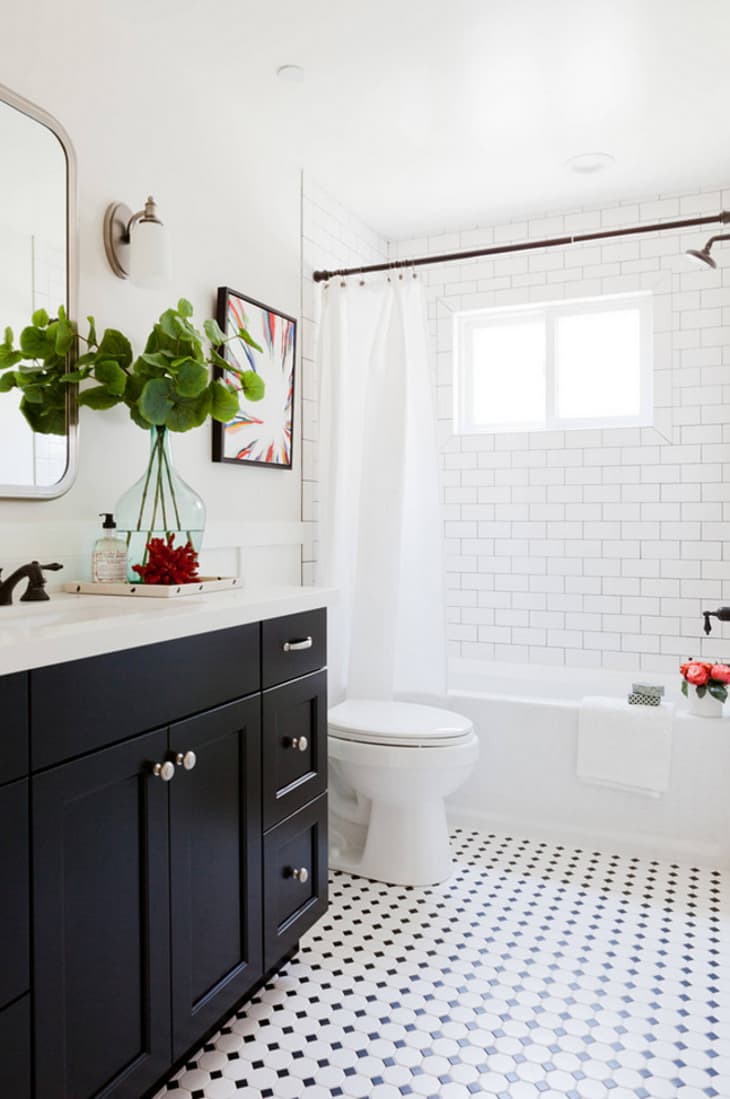
15 Bathrooms With Amazing Tile Flooring
:max_bytes(150000):strip_icc()/c9f04e043aad-59f9fe92d088c0001a193876.jpg)
Mosaic Tile Floor Ideas for Vintage Style Bathrooms Apartment
11 Mosaic Tile Floors Shining w/ Vintage Style u2014 DESIGNED

Historic Bathroom Tile Designs: ORC Week Two u2014 T. Moore Home
15 Stunning Vintage Black and White Tiles for bathrooms – The

Vintage Bathroom Makeover With a Special Tile Touch

Bathroom Floor Tile: 14 Top Options – Bob Vila

23 Vintage Tile Design Ideas – Sebring Design Build
Related articles:
- Bathroom Floor Baseboard
- Rustic Bathroom Flooring Ideas
- Bathroom Flooring Options
- Bamboo Bathroom Flooring Ideas
- Small Bathroom Floor Tile Patterns Ideas
- Choosing Bathroom Floor Tile
- Dark Wood Bathroom Floor
- Bathroom Flooring Choices
- Mosaic Bathroom Floor Tile Design
- Epoxy Resin Bathroom Floor
Vintage Tile Flooring Bathroom: Timeless Elegance for Your Space
Introduction:
When it comes to designing a bathroom, one of the key elements that can enhance its overall aesthetic appeal is the flooring. Vintage tile flooring, with its timeless elegance and charm, has become increasingly popular among homeowners who desire a classic and sophisticated look for their bathrooms. In this article, we will explore the various aspects of vintage tile flooring in bathrooms, including its benefits, types, installation process, maintenance tips, and frequently asked questions.
Benefits of Vintage Tile Flooring:
1. Timeless Elegance: Vintage tile flooring adds a touch of nostalgia to your bathroom, creating a sense of timeless beauty and elegance. The intricate patterns and designs found in vintage tiles can transform any ordinary bathroom into a luxurious retreat.
2. Durability: One of the most significant advantages of vintage tile flooring is its durability. Made from high-quality materials such as ceramic or porcelain, these tiles are built to last for decades. Unlike other flooring options that may require frequent replacement, vintage tiles can withstand heavy foot traffic and resist wear and tear.
3. Versatility: Vintage tile flooring comes in a wide range of colors, patterns, and sizes, allowing you to customize your bathroom according to your personal style preferences. Whether you prefer bold and vibrant colors or subtle pastels, there is a vintage tile design to suit every taste.
4. Easy Maintenance: Vintage tiles are relatively easy to maintain compared to other flooring materials. Regular sweeping or vacuuming followed by mopping with a mild detergent solution is sufficient to keep them clean. Additionally, any minor stains or scratches can be easily repaired or concealed without compromising the overall appearance of the floor.
Types of Vintage Tile Flooring:
1. Ceramic Tiles: Ceramic tiles are one of the most popular choices for vintage-style bathrooms. They come in various shapes such as hexagon, subway, or penny round tiles and offer a wide range of color options. Ceramic tiles are known for their durability and resistance to moisture, making them an ideal choice for bathrooms.
2. Porcelain Tiles: Porcelain tiles are another excellent option for vintage tile flooring in bathrooms. They are highly durable, resistant to stains, and have a low water absorption rate. Porcelain tiles can mimic the look of natural stone or wood, adding a touch of authenticity to your vintage-inspired bathroom.
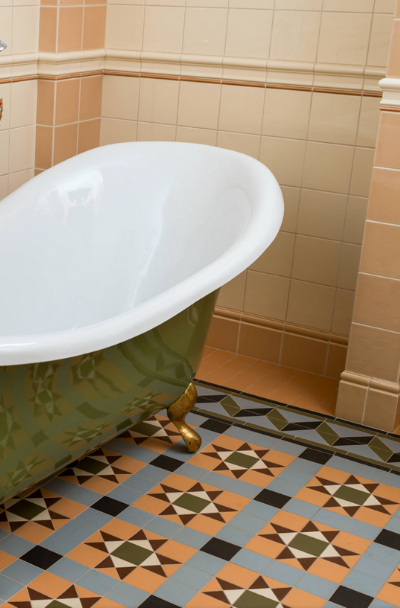
3. Mosaic Tiles: Mosaic tiles are small pieces of colored glass, ceramic, or stone that are arranged in intricate patterns or designs. These tiles offer endless design possibilities and can be used to create stunning focal points or accent areas within your bathroom. Mosaic tiles are particularly suitable for creating a vintage look with their retro patterns and vibrant colors.
Installation Process:
Installing vintage tile flooring in your bathroom requires careful planning and attention to detail. Here is a step-by-step guide to help you through the installation process:
1. Prepare the Subfloor: Ensure that the subfloor is clean, level, and free from any debris or imperfections. Repair any cracks or uneven areas before proceeding with the installation.
2. Measure and Layout: Measure the dimensions of your bathroom to determine the amount of tile needed. Plan the layout by marking the center point of each wall and snapping chalk lines as guides.
3. Apply Adhesive: Spread a layer of thin-set mortar adhesive on the subfloor using a notched trowel. Work in small sections to ensure proper adhesion.
4. Lay the Tiles: Begin laying the tiles along the chalk lines, Starting from the center of the room and working your way outwards. Press each tile firmly into the adhesive, making sure they are level and properly aligned with the surrounding tiles.
5. Cut Tiles: Use a tile cutter or wet saw to cut tiles as needed to fit around edges, corners, or fixtures. Take accurate measurements and make precise cuts to ensure a seamless installation.
6. Grout the Tiles: Once all the tiles are in place and the adhesive has dried, mix grout according to the manufacturer’s instructions and apply it between the tiles using a grout float. Remove any excess grout with a damp sponge and allow it to dry completely.
7. Seal the Grout: To protect the grout from stains and moisture, apply a grout sealer following the manufacturer’s instructions. This will help prolong the lifespan of your vintage tile flooring.
8. Clean and Maintain: After the installation is complete, clean the tiles with a mild detergent solution and a soft cloth or mop. Avoid using abrasive cleaners or tools that can damage the surface of the tiles.
In conclusion, vintage tile flooring offers several advantages for bathroom renovations. Its timeless charm, durability, versatility, and easy maintenance make it an excellent choice for creating a vintage-inspired look in your bathroom. With careful planning and proper installation techniques, you can enjoy beautiful and long-lasting vintage tile flooring for years to come. Vintage tile flooring can be a stunning addition to your bathroom, creating focal points or accent areas. Its retro patterns and vibrant colors are particularly suitable for achieving a vintage look. Installing vintage tile flooring requires careful planning and attention to detail. Here is a step-by-step guide to help you through the installation process:
1. Prepare the Subfloor: Ensure that the subfloor is clean, level, and free from any debris or imperfections. Repair any cracks or uneven areas before proceeding with the installation.
2. Measure and Layout: Measure the dimensions of your bathroom to determine the amount of tile needed. Plan the layout by marking the center point of each wall and snapping chalk lines as guides.
3. Apply Adhesive: Spread a layer of thin-set mortar adhesive on the subfloor using a notched trowel. Work in small sections to ensure proper adhesion.
4. Lay the Tiles: Begin laying the tiles along the chalk lines, starting from the center of the room and working your way outwards. Press each tile firmly into the adhesive, ensuring they are level and aligned with surrounding tiles.
5. Cut Tiles: Use a tile cutter or wet saw to cut tiles as needed to fit around edges, corners, or fixtures. Take accurate measurements and make precise cuts for a seamless installation.
6. Grout the Tiles: Once all tiles are in place and the adhesive has dried, mix grout according to manufacturer’s instructions and apply it between the tiles using a grout float. Remove excess grout with a damp sponge and let it dry completely.
7. Seal the Grout: To protect the grout from stains and moisture, apply a grout sealer following manufacturer’s instructions. This will help prolong the lifespan of your vintage tile flooring.
8. Clean and Maintain: After installation is complete, clean the tiles with a mild detergent solution and a soft cloth or mop. Avoid abrasive cleaners or tools that can damage the tiles’ surface.
In conclusion, vintage tile flooring offers several advantages for bathroom renovations. Its timeless charm, durability, versatility, and easy maintenance make it an excellent choice for creating a vintage-inspired look in your bathroom. With careful planning and proper installation techniques, you can enjoy beautiful and long-lasting vintage tile flooring for years to come.