Why is basement floor waterproofing too frequently overlooked, when in case it was done when the basement was built, there'd be fewer complications with seepage and flooding? Basements will often be thought of as only locations for storage that have concrete floors and walls where you can put old toys, other things and tools. Vinyl or acrylic chips are mixed in with the coating to supply a non-slippery surface.
Here are Images about Subfloor For Laminate Flooring In Basement
Subfloor For Laminate Flooring In Basement
As you can see, you've many different options in terms of choosing, replacing or fixing the basement flooring of yours. When you're planning on renovating your basement, one of the most crucial things you need to think about is your basement flooring. When some individuals first take on a new project like finishing a cellar, they understand instantly what the end product is likely to be.
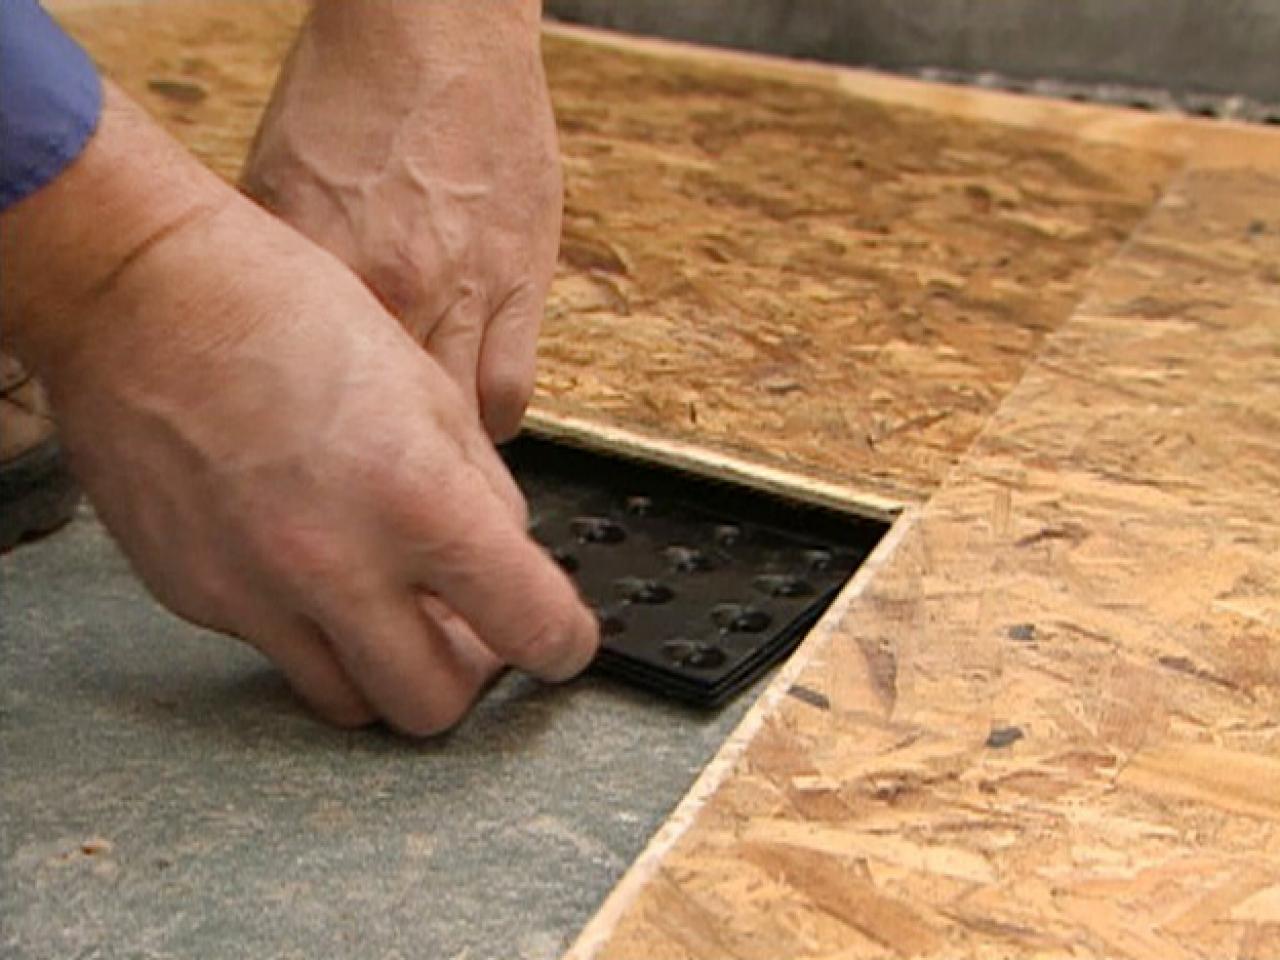
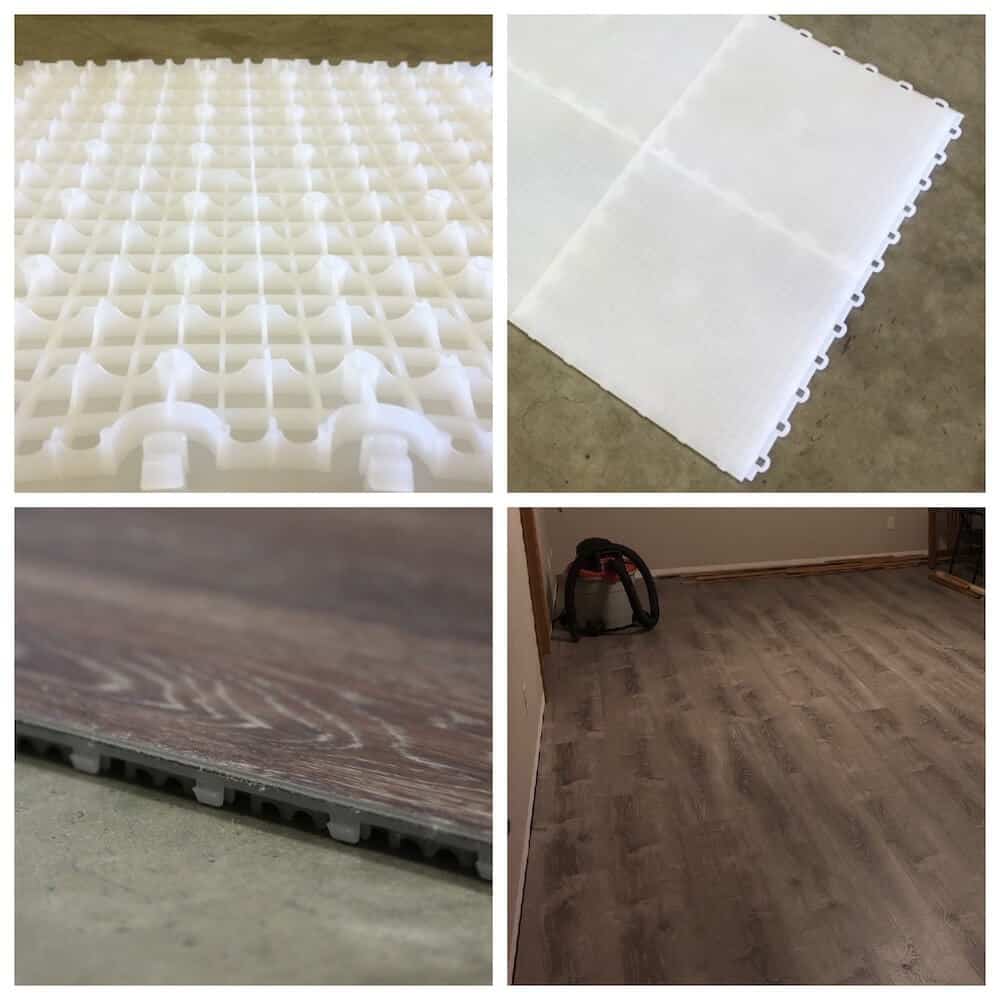
Basement Subfloor Interlocking Tiles – 12″ x 12″
Nonetheless, how about the basement of yours? It's frequently one of the last spaces a homeowner considers about with regards to flooring. Thus, you must make a plan to prevent this damage type to occur in the future. Do not discount the benefits of flooring in the basement of yours.
Images Related to Subfloor For Laminate Flooring In Basement
Subfloor Options for Basements HGTV
DELTA®-FL Plastic Sub-Floor

Basement Subfloor Options DRIcore Versus Plywood – Sebring Design
Dorken DELTA-FL Plastic Subfloor System for Basements

Can You Use Two Layers Of Underlay Under Laminate Flooring? u2013 All
Preparing Subfloor for Laminate Flooring – Wood and Concrete Subfloors

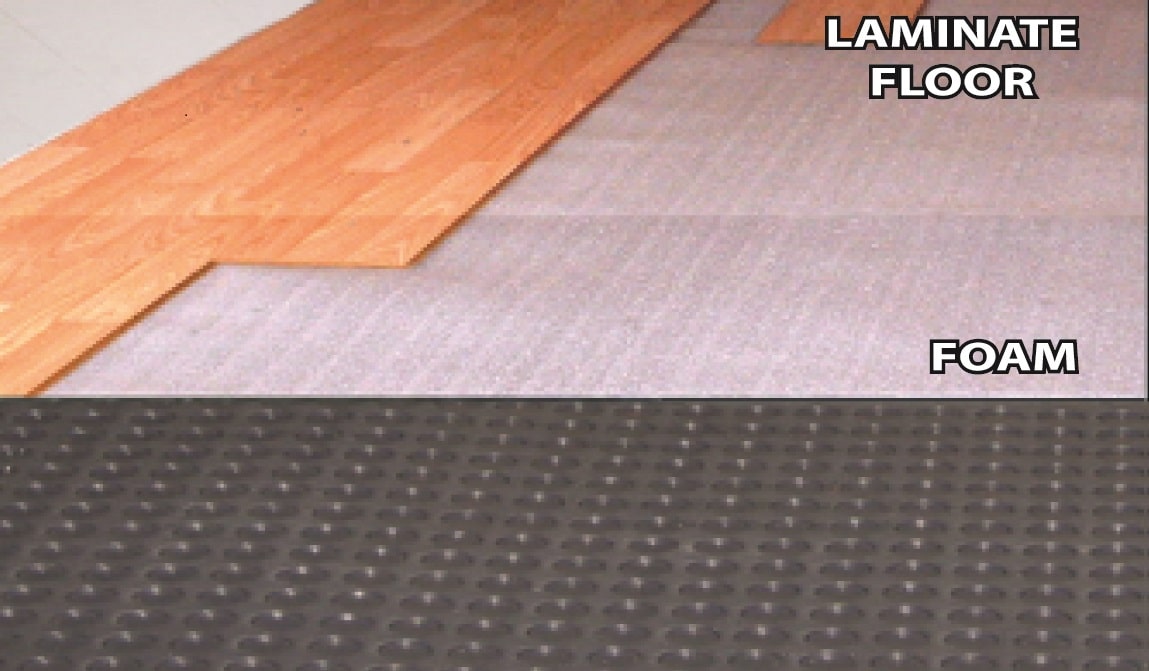
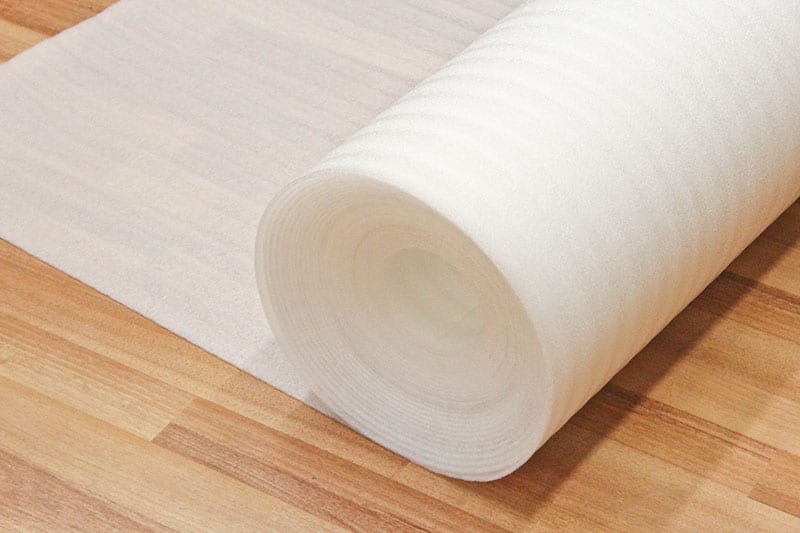
Laminate Underlayment – Installation Basics
/underlayment-for-laminate-flooring-1822245-hero-be0c4fb9077141af982ebdf260f16971.jpg)
Basement Subfloor Interlocking Tiles – 12″ x 12″
Types of Subfloor Materials in Construction Projects
/GettyImages-892047030-5af5f46fc064710036eebd22.jpg)
How to Install Laminate Floor in a Basement – YouTube

Tips and Tricks for Using Laminate Flooring in the Basement

How to Install Underlayment and Laminate Flooring HGTV

Related articles:
- Stained Concrete Basement Floor
- Finishing Basement Floor
- Refinish Concrete Basement Floor
- Best Flooring For Basement
- Basement Gym Flooring Ideas
- Laminate Flooring In Basement
- Basement Concrete Floor Sweating
- Basement Floor Finishing Ideas
- Painting Unfinished Basement Floor
- Unique Basement Flooring
Subfloor For Laminate Flooring In Basement
When it comes to finishing your basement, laminate flooring is a popular choice. It offers durability, affordability, and a wide range of design options. However, before installing laminate flooring in your basement, it is crucial to have a proper subfloor in place. In this article, we will explore the importance of a subfloor for laminate flooring in the basement and provide detailed information on how to create the ideal subfloor for this type of flooring.
I. The Importance of a Subfloor for Laminate Flooring
A subfloor serves as the foundation for your laminate flooring, providing stability, moisture protection, and insulation. It acts as a buffer between the concrete slab or other existing floor and the laminate planks, ensuring a smooth and even surface for installation. Without a proper subfloor, you may encounter issues such as moisture damage, unevenness, and premature wear and tear of your laminate flooring.
II. Choosing the Right Subfloor Material
1. Plywood Subfloor:
One common option for creating a subfloor in a basement is plywood. Choose plywood with tongue-and-groove edges for easy installation and improved stability. The thickness of the plywood will depend on the condition of your basement floor. If moisture is not a concern and your basement floor is relatively even, 1/2-inch thick plywood should suffice. However, if there are moisture issues or unevenness, opt for 3/4-inch thick plywood.
FAQ: Can I install laminate flooring directly on concrete without a subfloor?
Answer: While it is possible to install laminate flooring directly on concrete, it is not recommended due to potential moisture issues. Concrete can absorb moisture from the ground, leading to warping and damage to your laminate flooring over time. Installing a subfloor provides an extra layer of protection against moisture.
2. Floating Subfloor System:
Another option to consider is a floating subfloor system specifically designed for basement environments. These systems typically consist of interlocking panels made from high-density polyethylene (HDPE) or other moisture-resistant materials. They create a raised, insulated surface that helps mitigate moisture and provides enhanced comfort underfoot.
FAQ: Can I use a vapor barrier instead of a subfloor?
Answer: A vapor barrier can be used in conjunction with a subfloor, but it is not a substitute for it. A vapor barrier helps prevent moisture from seeping into the subfloor and damaging the laminate flooring. However, it does not provide the necessary stability and insulation that a proper subfloor offers.
III. Preparing the Basement Floor
Before installing the subfloor, it is essential to prepare the basement floor properly. Follow these steps to ensure a solid foundation for your laminate flooring:
1. Clean the Floor:
Thoroughly clean the basement floor to remove any dirt, dust, or debris. Use a broom or vacuum cleaner followed by a damp mop to achieve a clean surface.
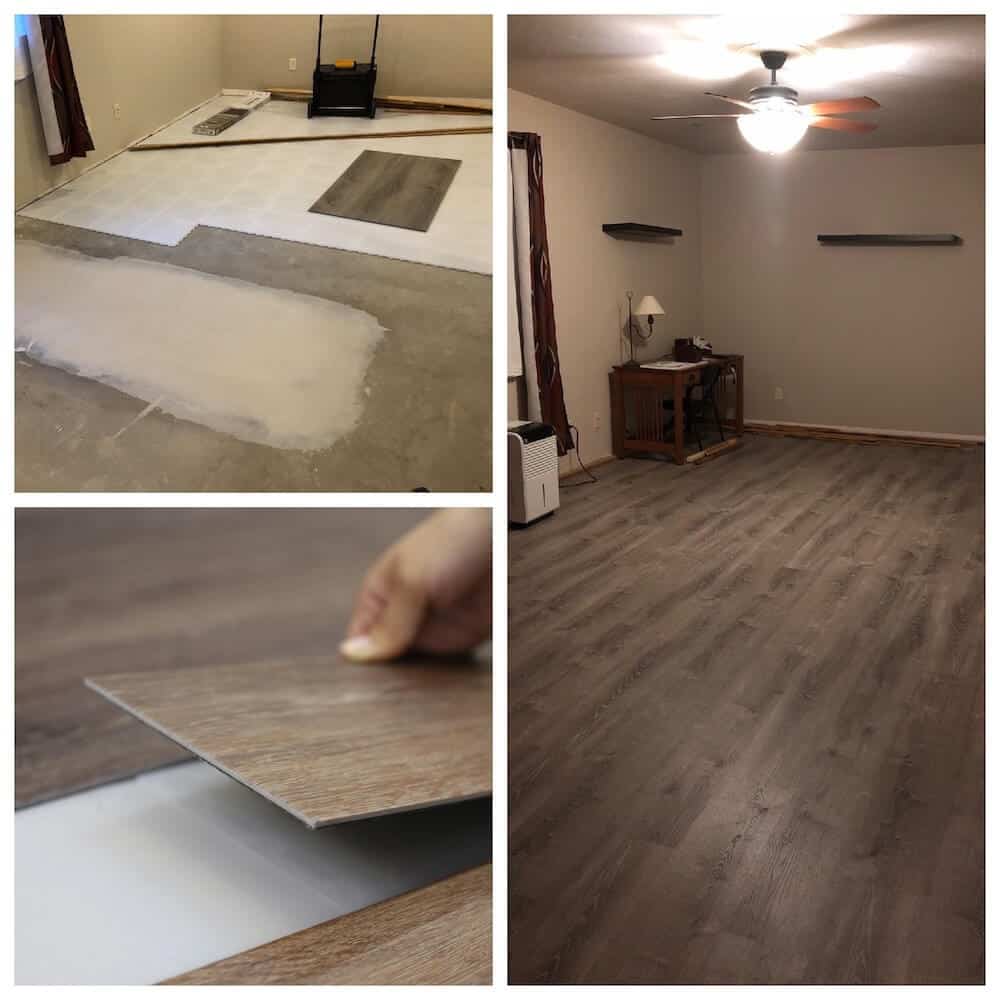
2. Level the Floor:
Check for any unevenness or dips in the basement floor. Use a leveling compound or self-leveling underlayment to fill in low spots and create a smooth surface. Follow the manufacturer’s instructions for mixing and applying the leveling compound.
3. Address Moisture Issues:
If your basement has moisture problems, such as high humidity or water seepage, it is crucial to address them before proceeding with the subfloor installation. Consider installing a dehumidifier or waterproofing measures to control moisture levels.
IV. Installing the Subfloor Once the basement floor is properly prepared, you can begin installing the subfloor. Here are the steps to follow:
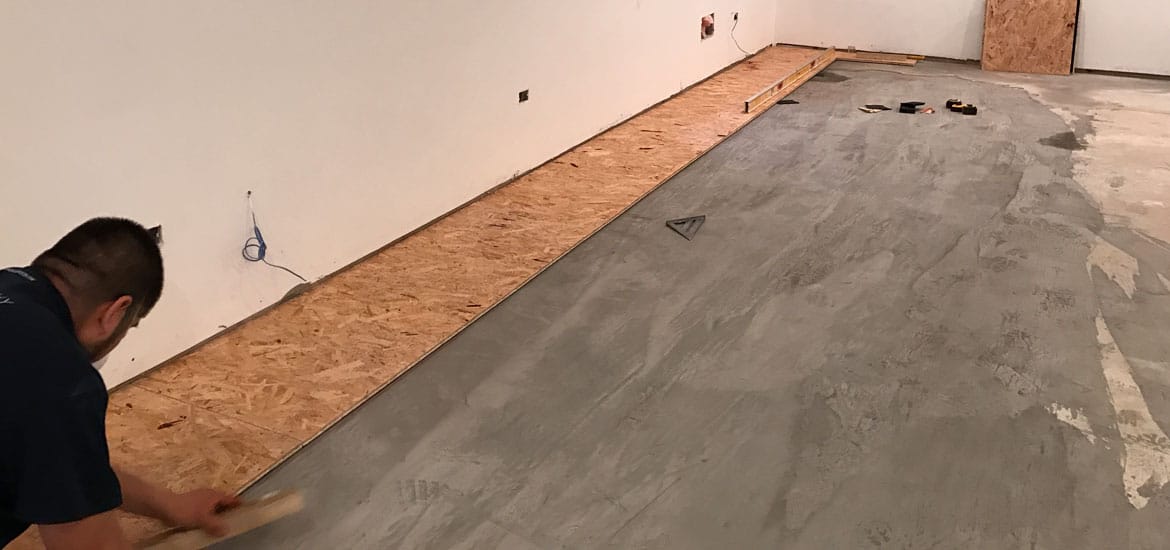
1. Lay out the plywood or interlocking panels: Start at one corner of the basement and lay out the plywood or interlocking panels with the tongue-and-groove edges facing each other. Leave a 1/4-inch gap between the panels and walls to allow for expansion.
2. Secure the panels: Use screws or nails to secure the panels to the basement floor. Place fasteners every 6 inches along the edges and every 12 inches in the center of each panel. Make sure to countersink the fasteners slightly below the surface of the subfloor.
3. Continue laying out and securing panels: Repeat step 1 and 2 until you have covered the entire basement floor with subflooring. Cut any necessary pieces to fit around obstacles such as columns or pipes.
4. Install moisture barriers (if using): If you are using a floating subfloor system that includes moisture-resistant panels, follow the manufacturer’s instructions for installing any required moisture barriers or underlayment.
5. Inspect for gaps and unevenness: After all panels are installed, inspect for any gaps or unevenness in the subfloor. Use a leveling compound or fill in any gaps with additional plywood or underlayment as needed.
6. Test for stability: Walk on the subfloor to ensure it feels stable and does not flex or squeak excessively. If there is excessive movement, add additional screws or nails to secure the subfloor more firmly.
7. Proceed with laminate flooring installation: Once the subfloor is installed and stable, you can proceed with installing your laminate flooring according to the manufacturer’s instructions.
Remember to always follow local building codes and regulations when installing a subfloor in your basement. If you are unsure about any steps or have specific concerns about your basement, consult a professional contractor or flooring specialist for guidance. Installing a subfloor in your basement can help create a stable and comfortable surface for your laminate flooring. Here are the steps to follow:
1. Prepare the Basement Floor:
– Clean the basement floor thoroughly, removing any debris or loose particles.
– Repair any cracks or damage in the concrete using a concrete repair compound.
– Seal the concrete with a concrete sealer to prevent moisture from seeping through.
2. Level the Floor:
– Check for any unevenness or dips in the basement floor.
– Use a leveling compound or self-leveling underlayment to fill in low spots and create a smooth surface.
– Follow the manufacturer’s instructions for mixing and applying the leveling compound.
3. Address Moisture Issues:
– If your basement has moisture problems, address them before proceeding with the subfloor installation.
– Install a dehumidifier or consider waterproofing measures to control moisture levels.
4. Lay out the Plywood or Interlocking Panels:
– Start at one corner of the basement and lay out the plywood or interlocking panels with tongue-and-groove edges facing each other.
– Leave a 1/4-inch gap between the panels and walls for expansion.
5. Secure the Panels:
– Use screws or nails to secure the panels to the basement floor.
– Place fasteners every 6 inches along the edges and every 12 inches in the center of each panel.
– Countersink the fasteners slightly below the surface of the subfloor.
6. Continue Laying out and Securing Panels:
– Repeat steps 4 and 5 until you have covered the entire basement floor with subflooring.
– Cut any necessary pieces to fit around obstacles such as columns or pipes.
7. Install Moisture Barriers (if using):
– If using a floating subfloor system with moisture-resistant panels, follow manufacturer’s instructions for installing moisture barriers or underlayment.
8. Inspect for Gaps and Unevenness:
– After all panels are installed, inspect for any gaps or unevenness in the subfloor.
– Use a leveling compound or fill in gaps with additional plywood or underlayment as needed.
9. Test for Stability:
– Walk on the subfloor to ensure it feels stable and does not flex or squeak excessively.
– If there is excessive movement, add additional screws or nails to secure the subfloor more firmly.
10. Proceed with Laminate Flooring Installation:
– Once the subfloor is installed and stable, follow the manufacturer’s instructions to install your laminate flooring.
Remember to consult a professional contractor or flooring specialist if you have specific concerns about your basement or are unsure about any steps. It’s important to follow local building codes and regulations for a safe and proper installation.