Therefore in case you’re going for a rustic look in your living room or maybe an elegant atmosphere in your dining room, your local hardwood experts can help! Many can do historical renovations. Significant savings are obvious when installed by the household, reducing overall costs to approximately $2. One can still purchase unfinished hardwoods now.
Here are Images about Repairing Hardwood Floor Boards
Repairing Hardwood Floor Boards
If you are purchasing floors on a source & install basis you want to make sure the company warrants their installers work along with the installers are competent. Frequently referred to as wood laminate flooring surfaces, engineered wood floor surfaces are easily accessible in a wide variety of specifications, each meant to coincide with a particular room of the house.
Hardwood Floor Repair – This Old House
/cdn.vox-cdn.com/uploads/chorus_asset/file/19491004/wood_floors_x.jpg)
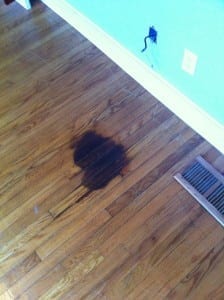
Furthermore, poor original installation techniques, unforeseen tragedies (such as flooding high-moisture, accidents, and) atmospheres can in addition cause harm to a hardwood floor. The floor will certainly take some damage as a direct result of your dog, though it’ll also take injury as a result of you too.
Images Related to Repairing Hardwood Floor Boards
How To: Repair Hardwood Floors The Craftsman Blog

Hardwood Floor Repair, Easy Steps That Work
Repair Hole in Damaged Hardwood Floor Slaughterbeck Floors, Inc.

A Guide on How You Can Patch a Wooden Floor Wood floor design

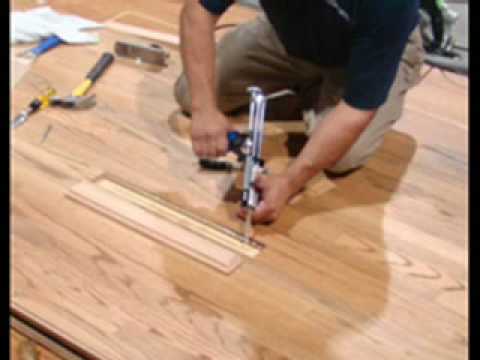
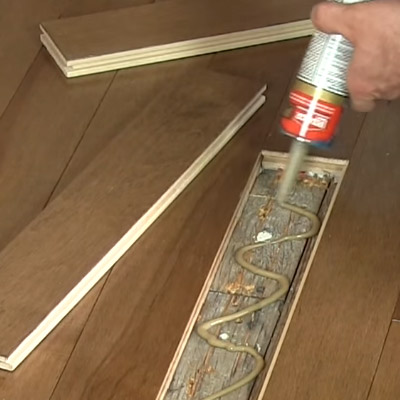
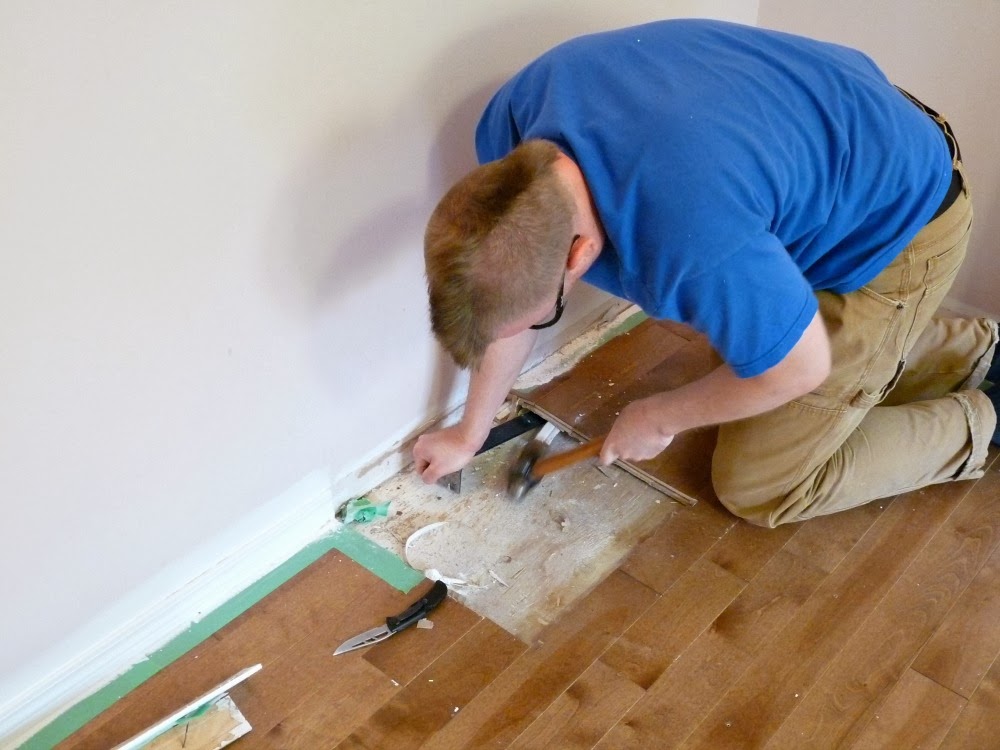
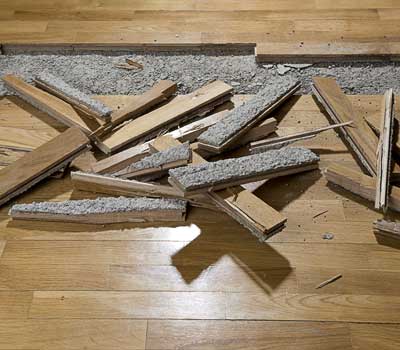
Removing u0026 replacing a damaged hardwood flooring board
How to Replace Damaged Hardwood Floorboards Dans le Lakehouse
When to Replace vs. Refinish a Hardwood Floor City Floor Supply

Hardwood Floor

How To: Repair Hardwood Floors The Craftsman Blog
Hardwood Floor Repair! How to Replace Hardwood Boards! It is So Easy!

How to Repair and Replace Wood Flooring – Pro Tool Reviews

Hardwood Floor Repair, Easy Steps That Work
Related articles:
- Hardwood Floor Finish Brands
- Hand Scraped Hardwood Flooring
- Home Hardwood Floor
- Hardwood Floor Deep Cleaner
- Engineered Hardwood Floor
- Cherry Hardwood Flooring Reviews
- Hardwood Floor Cleaning And Refinishing
- Wide Plank Pine Hardwood Flooring
- Hardwood Flooring Designs Photos
- Hardwood Floor Selection Guide
Repairing Hardwood Floor Boards: A Comprehensive Guide to Restoring Your Floors
Introduction:
Hardwood floors add a touch of elegance and warmth to any space. However, over time, wear and tear can take a toll on these beautiful floorboards, leaving them scratched, dented, or even warped. Fortunately, repairing hardwood floor boards is a relatively straightforward process that can restore their original beauty and extend their lifespan. In this article, we will delve into the step-by-step process of repairing hardwood floor boards, providing you with all the information you need to bring your floors back to life.
I. Assessing the Damage:
Before diving into the repair process, it’s crucial to assess the extent of the damage to your hardwood floor boards. This evaluation will help you determine the appropriate course of action and ensure you have all the necessary materials for the repair.
– FAQ: How do I identify the type of damage on my hardwood floor?
To identify different types of damage on your hardwood floor, closely inspect each board. Scratches are usually shallow and affect only the surface finish. Dents may penetrate deeper into the wood but are still localized. Warping or buckling occurs when moisture causes boards to expand or contract unevenly.
II. Repairing Minor Scratches:
Minor scratches are a common issue with hardwood floors and can be easily fixed with minimal effort. Follow these steps to repair minor scratches in your floorboards:
1. Clean the area: Begin by thoroughly cleaning the scratched area using a soft-bristle broom or vacuum cleaner to remove any dirt or debris.
2. Sanding: Gently sand the scratched area by hand with fine-grit sandpaper along the grain of the wood until the scratch is no longer visible.
3. Stain application: Apply a matching wood stain using a clean cloth or brush, ensuring an even distribution across the sanded area.
4. Buffing: Once the stain has dried, buff the repaired area with a soft cloth to blend it seamlessly with the rest of the floor.
– FAQ: Can I use steel wool to sand the scratches?
We do not recommend using steel wool for sanding hardwood floor scratches as it can leave behind fine metal particles that may rust and further damage the wood. Stick to using fine-grit sandpaper.
III. Repairing Deep Scratches and Gouges:
While minor scratches can be easily remedied, deep scratches or gouges require a more extensive repair process. Here’s how to tackle deeper damage on your hardwood floor boards:
1. Cleaning and filling: Begin by cleaning the damaged area, ensuring it is free from dirt and debris. Fill the scratch or gouge with a wood filler that matches the color of your floor. Use a putty knife to spread the filler evenly, slightly overfilling it to compensate for shrinkage during drying.
2. Drying and leveling: Allow the wood filler to dry completely according to the manufacturer’s instructions. Once dry, lightly sand the filled area until it is level with the surrounding floorboards.
3. Staining and sealing: Apply a matching wood stain to the repaired area using a clean cloth or brush, ensuring it blends seamlessly with the rest of the floor. Once dry, seal the entire floor with a polyurethane coating for a consistent finish.
– FAQ: Can I skip staining if I use a wood filler that matches my floor color?
It is generally recommended to stain repaired areas even if you have used a matching wood filler. This helps ensure a consistent color throughout the floor and camouflage any slight differences in the filler. Staining the repaired area will help blend it seamlessly with the rest of the floor and create a more uniform appearance. 5. Regular maintenance: To prevent future scratches and damage, it is important to maintain your hardwood floors regularly. This includes using furniture pads or protective mats under heavy furniture, avoiding dragging or sliding objects across the floor, and regularly cleaning and sweeping to remove dirt and debris that can cause scratches.
6. Professional repair: If you have deep scratches or gouges that are beyond your DIY repair skills, it may be best to consult a professional for repairs. They have the knowledge and expertise to properly assess and fix the damage without causing further harm to your hardwood floors.
– FAQ: How often should I refinish my hardwood floors?
The frequency of refinishing your hardwood floors depends on various factors such as the amount of foot traffic, wear and tear, and the type of finish used. As a general guideline, it is recommended to refinish hardwood floors every 3-5 years. However, if you notice significant wear or damage before that time frame, it is advisable to refinish them sooner to protect the wood and maintain its appearance.
Remember, prevention is key in maintaining the beauty and longevity of your hardwood floors. Regular care, maintenance, and prompt repair of any scratches or damage will help keep your floors looking their best for years to come.