It's important to have flooring that's not merely comfy, but helps you lead a quality lifestyle. Synthetic staining is able to form could tell is in patents on the concrete floor of yours and can be utilized in new or even old concrete slabs. Polished concrete floors are actually the best flooring options for homeowners & designers due to their versatility, gorgeous looks & long lasting features.
Here are Images about Raising Concrete Floor For Tile
Raising Concrete Floor For Tile
![]()
With regards to floors, polished concrete floors are materials which are excellent, which are a lot more ordinarily used. The truth is: concrete comes pre-installed in many homes, because most houses are built on concrete slabs. The time it takes to finish the setting up of a concrete floor is depending on how big or small the floor area is.
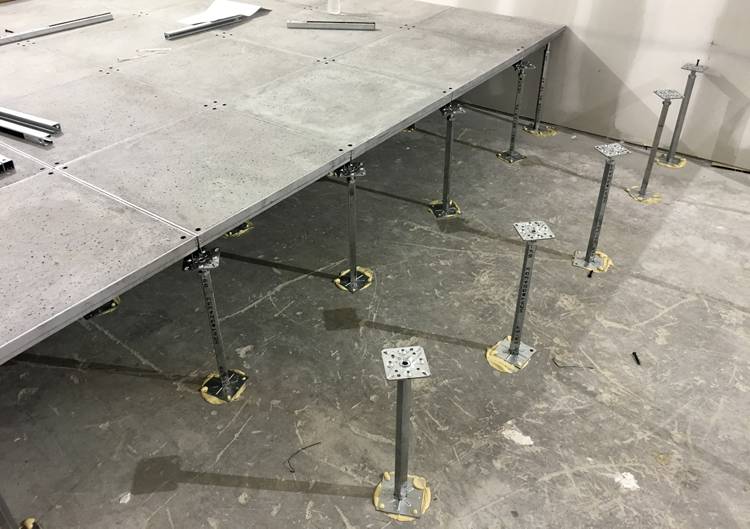
Raised Access Flooring – Archtoolbox
If you take a look at this concrete floors in contrast to cork options, it's no surprise which concrete polishing floors are going up in demand, particularly in contemporary homes where minimalism is actually key to developing a masterpiece of room. The countless advantages which tag together with concrete polishing has made individuals choose it, not to mention its economical gains.
Images Related to Raising Concrete Floor For Tile
Raised pavings Marazzi

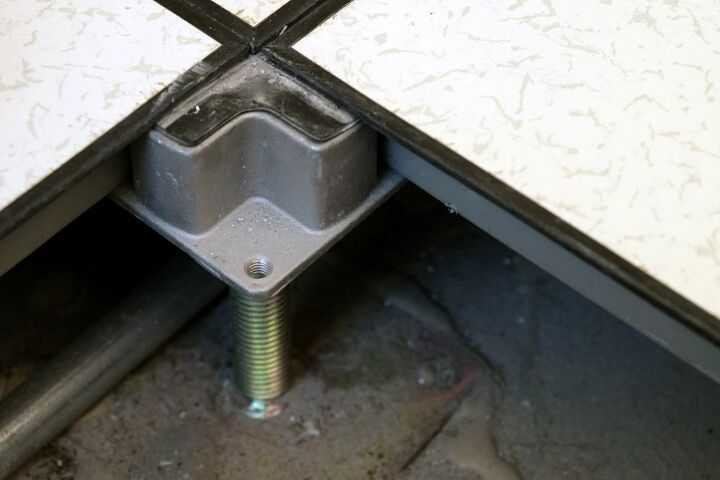
How To Build A Raised Floor Over Concrete Slab? Detailed Access
Raised Floors Marazzi

How To Build A Raised Floor On A Concrete Slab (Do This
Raised Floor System: Floating Floor and Raised Floors
Subfloors and Underlayment for Ceramic Tile Floors
/best-subfloors-to-use-for-laying-tile-1822586-hero-efcfac9422ab457da5d2cbc7f7361df7.jpg)
Raised floor – Wikiwand

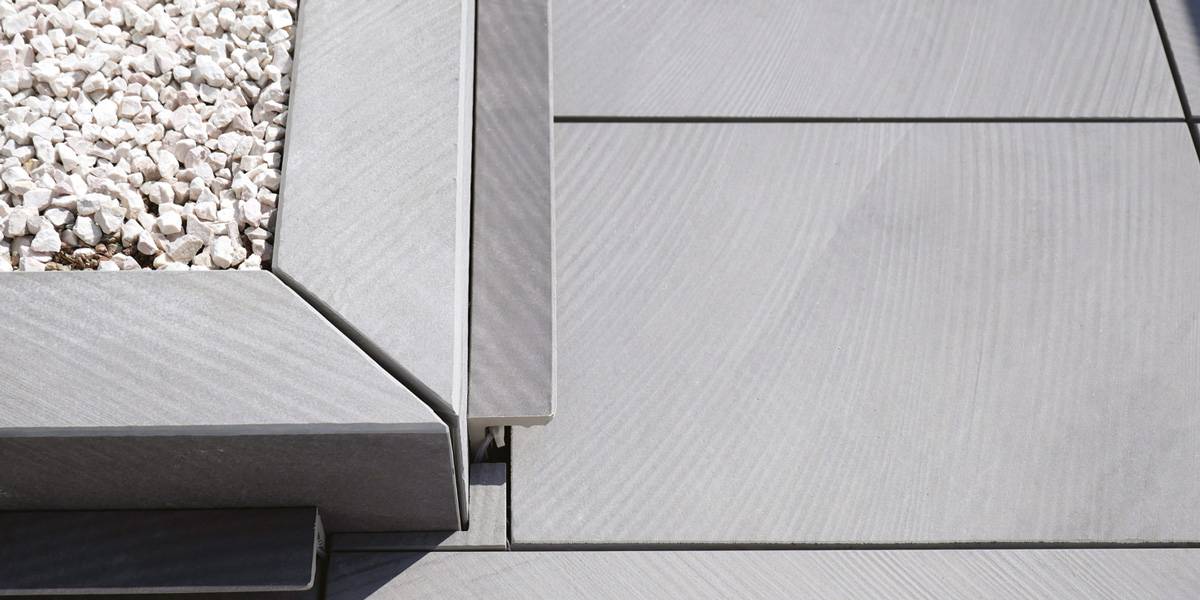
Floating floor tiles for terrace and patios – Kronos Ceramiche

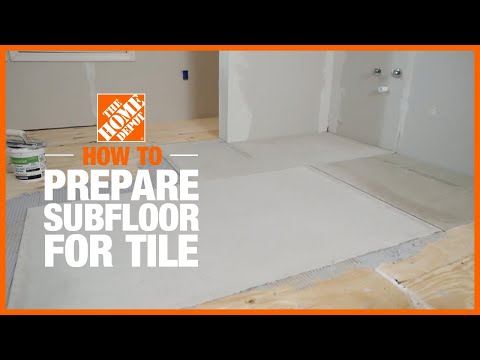
How to Prepare a Subfloor for Tile Installation
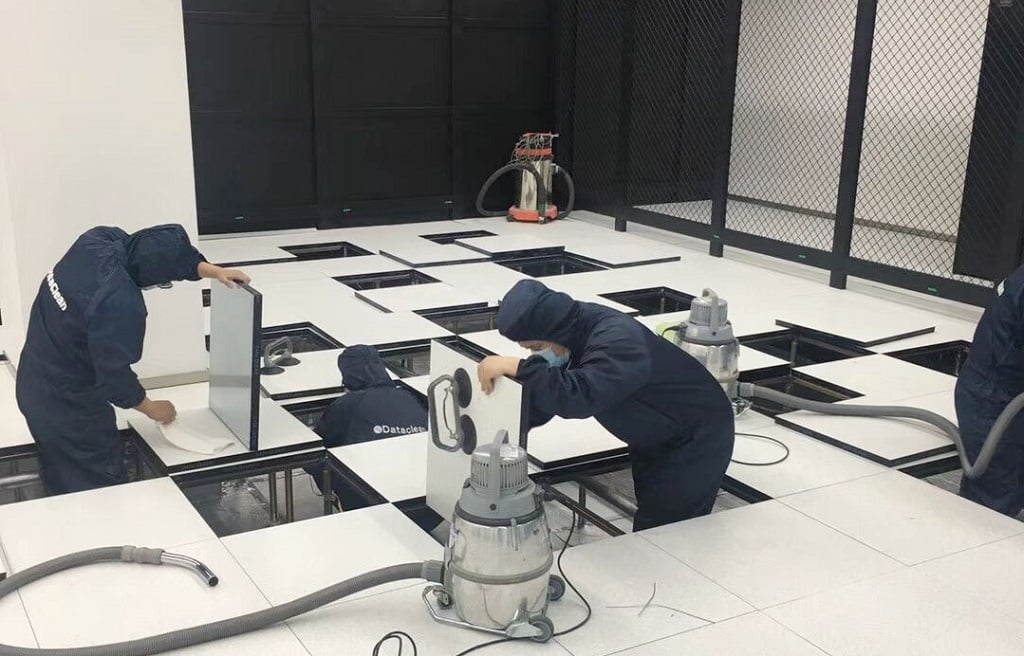
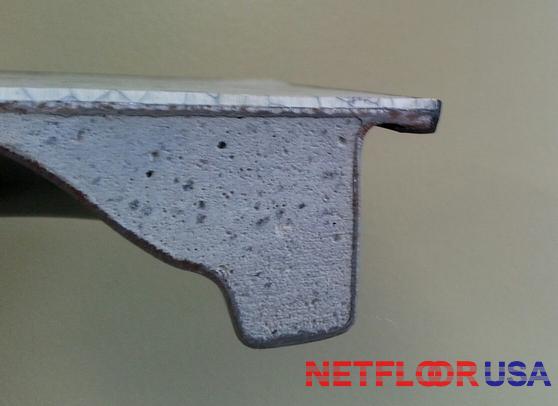
Everything You Need to Know about Raised Access Floors Netfloor
Waterproof Raised Max Tile Modular Basement Flooring

RAISED FLOOR SYSTEM u2013 Barafatin

Related articles:
- Stained Concrete Floors Design
- Decorative Concrete Floors
- Acid Stained Concrete Floors
- Polished Concrete Floor In Bathroom
- Concrete Floor Stain And Polish
- White Mold On Concrete Floor
- Polished Concrete Floor
- Polished Concrete Floor Cleaning
- Staining Concrete Floors Indoors Yourself
- Flooring Options For Concrete Floors
Raising Concrete Floor For Tile: A Detailed Guide
Introduction:
When it comes to installing tile flooring, having a level surface is crucial for achieving optimal results. However, sometimes the existing concrete floor may not be perfectly level, which can pose challenges during the tile installation process. In such cases, raising the concrete floor becomes necessary to ensure a smooth and even surface for tiling. In this article, we will provide you with a detailed guide on how to raise a concrete floor for tile, along with some frequently asked questions and their answers.
I. Assessing the Existing Concrete Floor:
Before you begin raising the concrete floor, it is essential to assess the condition of the existing surface. Look for any cracks, uneven areas, or dips in the concrete. These imperfections can affect the overall stability and longevity of your tiled floor. Use a straightedge or level to identify any uneven spots or deviations from the desired flatness.
FAQ 1: Can I install tiles directly on an uneven concrete floor?
Answer: No, it is not recommended to install tiles directly on an uneven concrete floor. Uneven surfaces can cause tiles to crack or loosen over time. Therefore, it is essential to raise the concrete floor to create a level base for tile installation.
FAQ 2: How much deviation from flatness is acceptable?
Answer: The acceptable deviation from flatness depends on the type and size of tiles you plan to install. As a general rule of thumb, the maximum allowable deviation is usually specified by the tile manufacturer. However, most experts recommend keeping the deviation within 1/8 inch per 10 feet for large format tiles.
II. Preparing the Concrete Surface:
Once you have assessed the condition of your concrete floor and identified any uneven areas, it’s time to prepare the surface for raising. Follow these steps:
1. Clean the Surface:
Start by thoroughly cleaning the concrete floor to remove any dirt, dust, or debris. Use a broom, vacuum cleaner, or pressure washer to ensure a clean and dust-free surface.
2. Fill Cracks and Holes:
Inspect the floor for any cracks or holes and fill them with an appropriate concrete patching compound. Follow the manufacturer’s instructions for mixing and applying the patching material. Allow the patched areas to dry completely before proceeding.
3. Leveling Compound:
Next, apply a self-leveling compound to even out any minor imperfections or low spots on the concrete floor. Ensure that the compound is compatible with tile installation and follow the manufacturer’s instructions for mixing and application.
FAQ 3: Can I use regular concrete mix instead of a self-leveling compound?
Answer: Using regular concrete mix is not recommended as it may not provide the same level of self-leveling properties as a dedicated self-leveling compound. Regular concrete mix can also shrink during curing, leading to unevenness in the raised floor.
III. Raising the Concrete Floor:
Now that you have prepared the concrete surface, it is time to raise the floor to achieve a level base for tile installation. There are several methods you can use, depending on the extent of leveling required:
1. Thinset Mortar:
One common method involves applying a layer of thinset mortar directly onto the concrete floor. Thinset mortar is a cement-based adhesive that can be used to level out minor imperfections in the floor surface. Apply the thinset mortar using a trowel, ensuring an even and consistent layer across the entire floor.
2. Self-Leveling Concrete:
Another method is to use a self-leveling concrete mixture. This mixture is specifically designed to flow and level out on its own, creating a smooth and even surface. Follow the manufacturer’s instructions for mixing and applying the self-leveling concrete.
3. Plywood or Cement Backer Board:
For more significant leveling requirements, you can also use plywood or cement backer board to raise the floor. Cut the boards to size and screw them into the concrete floor, creating a level and stable base for tile installation. Ensure that the boards are securely fastened and level with each other.
FAQ 4: Can I use shims or wedges to level the floor instead?
Answer: While shims or wedges can be used as a temporary solution, they are not recommended for long-term use. Shims or wedges may shift or compress over time, causing the tiles to become uneven or loose. It is best to use a more permanent method such as thinset mortar, self-leveling concrete, or plywood/cement backer board.
IV. Final Steps:
Once you have raised the concrete floor to create a level base, you can proceed with tile installation. Follow these final steps:
1. Apply Tile Adhesive:
Using a notched trowel, apply tile adhesive onto the raised concrete floor in small sections at a time. Spread the adhesive evenly and make sure it covers the entire area where tiles will be installed.
2. Install Tiles:
Carefully place each tile onto the adhesive, pressing it firmly into place. Use spacers between tiles to ensure consistent spacing. Continue installing tiles until the entire floor is covered.
3. Grout the Tiles:
After the adhesive has dried, remove the tile spacers and apply grout between the tiles. Use a grout float to spread the grout evenly and remove any excess. Allow the grout to dry according to the manufacturer’s instructions.
4. Seal the Grout:
Lastly, apply a grout sealer to protect the grout from stains and moisture. Follow the manufacturer’s instructions for applying and curing the sealer.
By following these steps, you can successfully raise an uneven concrete floor and create a level base for tile installation. Remember to follow all manufacturer’s instructions for products used and take necessary precautions for personal safety during the process. It is important to follow the manufacturer’s instructions for mixing and applying the self-leveling concrete. This type of concrete is specifically designed to flow and level out on its own, creating a smooth and even surface.
For more significant leveling requirements, you can also use plywood or cement backer board to raise the floor. Cut the boards to size and screw them into the concrete floor, creating a level and stable base for tile installation. Ensure that the boards are securely fastened and level with each other.
While shims or wedges can be used as a temporary solution, they are not recommended for long-term use. Shims or wedges may shift or compress over time, causing the tiles to become uneven or loose. It is best to use a more permanent method such as thinset mortar, self-leveling concrete, or plywood/cement backer board.
Once you have raised the concrete floor to create a level base, you can proceed with tile installation. First, apply tile adhesive onto the raised concrete floor in small sections at a time using a notched trowel. Spread the adhesive evenly and make sure it covers the entire area where tiles will be installed.
Carefully place each tile onto the adhesive, pressing it firmly into place. Use spacers between tiles to ensure consistent spacing. Continue installing tiles until the entire floor is covered.
After the adhesive has dried, remove the tile spacers and apply grout between the tiles. Use a grout float to spread the grout evenly and remove any excess. Allow the grout to dry according to the manufacturer’s instructions.
Lastly, apply a grout sealer to protect the grout from stains and moisture. Follow the manufacturer’s instructions for applying and curing the sealer.
By following these steps and taking necessary precautions for personal safety, you can successfully raise an uneven concrete floor and create a level base for tile installation.