That will be an incredibly challenging factor when choosing the right floor for the basement of yours since almost all of the materials are porous but at different levels. This makes flooring options notably sparse because the flooring must be mold-resistant and resilient ; this typically rules out tile and carpet.
Here are Images about Preparing Basement Floor For Tile
Preparing Basement Floor For Tile

With the correct floor, your basement could be the first space in your house you think of rather than one of the last. Upgrading this unsightly concrete not simply makes the room much more inviting for you and the family of yours, it could also increase the resale value of the home of yours dramatically. While some floors are suitable for underneath grade installation, others aren't.
Surface Preparation – Preparing a Concrete Floor

If the basement of yours allows moisture into the area, it'll probably ruin some floor your select. What will you would like to make use of this particular room of your house for. Leaks which come about once a heavy rain, for instance, indicate that there is something wrong with the waterproofing. Several basement flooring tips take into consideration the different varieties of materials to be utilized for installation.
Images Related to Preparing Basement Floor For Tile
How to Prepare for Laying Tile Over a Concrete Floor

Tiling over a Cracked Concrete Slab – Fine Homebuilding

How to Tile: Prepare Concrete for Tile (DIY)
Can You Install Tile Over Concrete?
:max_bytes(150000):strip_icc()/can-you-install-tile-directly-on-concrete-1822600-04-458f7bb6c78348c1835cf8054ef36553.jpg)
Subfloors and Underlayment for Ceramic Tile Floors
/best-subfloors-to-use-for-laying-tile-1822586-hero-efcfac9422ab457da5d2cbc7f7361df7.jpg)
How To Prepare Concrete Floor For Self Adhesive Vinyl Tiles (Peel

How to Install Ceramic Tile Flooring in 9 Steps – This Old House
/cdn.vox-cdn.com/uploads/chorus_asset/file/19497064/howto_tile_12.jpg)
How to Install Ceramic Tile Flooring in 9 Steps – This Old House
:no_upscale()/cdn.vox-cdn.com/uploads/chorus_asset/file/19496978/howto_tile_01.jpg)
Can I Cover Asbestos Floor Tiles With Concrete? HGTV
4 Ways to Prepare Concrete Floor for Ceramic Tile – wikiHow

How to Tile a Concrete Basement Floor – The Grout Medic
Can You Lay Tile Directly Over a Plywood Subfloor? – Todayu0027s Homeowner
Related articles:
- Stained Concrete Basement Floor
- Finishing Basement Floor
- Refinish Concrete Basement Floor
- Best Flooring For Basement
- Basement Gym Flooring Ideas
- Laminate Flooring In Basement
- Basement Concrete Floor Sweating
- Basement Floor Finishing Ideas
- Painting Unfinished Basement Floor
- Unique Basement Flooring
When it comes to getting your basement ready for a tile installation, there’s a lot to consider. From ensuring the floor is level and structurally sound to choosing the right tile adhesive, you’ll need to take the time to prepare your basement floor properly before you begin tiling. Read on to learn the necessary steps for preparing your basement floor for tile.
Step 1: Inspect and Level The Floor
The first step in preparing your basement floor for tile is to inspect the existing flooring and make sure it’s level. If there are any large cracks or uneven spots, you may need to repair them first. You can check the level of the floor with a long level or laser level. If the floor isn’t level, you can use self-leveling compound to fill in any low spots.
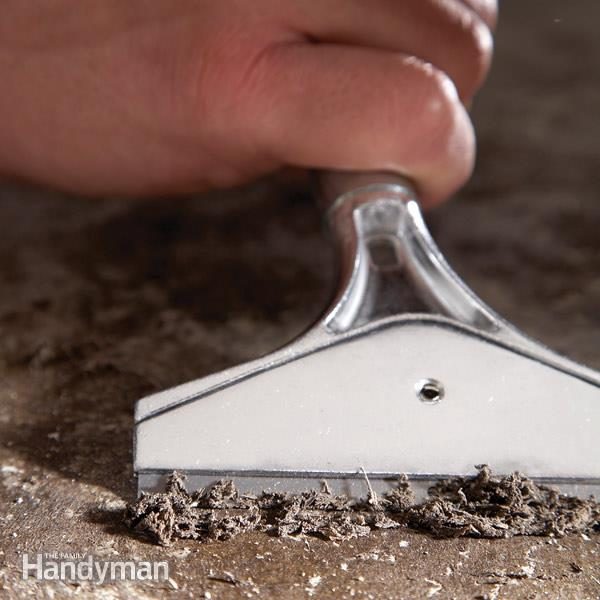
Step 2: Clean and Prep The Floor
Once you’ve ensured that your basement floor is level, it’s time to start cleaning and prepping the surface. Start by sweeping and vacuuming up any dirt, debris, and dust that may be on the floor. Then, use a damp mop to get rid of any remaining dust or dirt. Wait for the floor to dry completely before continuing.
Step 3: Lay Damp-Proof Membrane
Once your basement floor is clean and dry, it’s time to lay a damp-proof membrane. This will help protect your tiles from moisture and water damage. Lay down a layer of plastic sheeting and secure it with duct tape around the edges. Make sure you overlap each piece of sheeting by at least 6 inches (15 cm).
Step 4: Lay Underlayment
Next, you’ll need to lay down an underlayment over the damp-proof membrane. This will provide an extra layer of protection between your tiles and the subfloor. Choose an underlayment that is designed for use with tile floors, such as cement board or foam underlayment. Cut it into sections that fit perfectly into your space and secure them together with thinset mortar or construction adhesive.
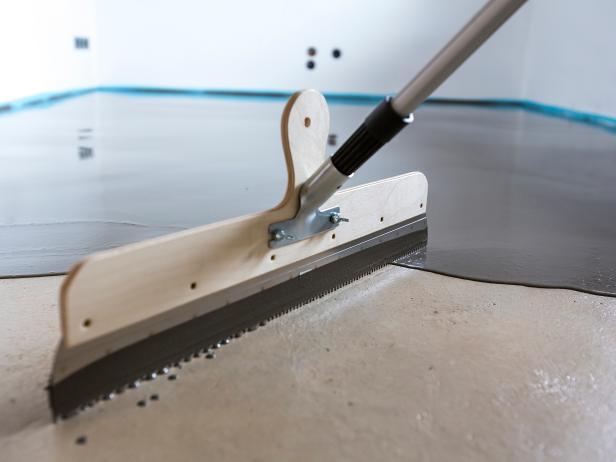
Step 5: Apply Tile Adhesive
Now it’s time to apply the tile adhesive. Make sure you choose a tile adhesive that is appropriate for your subfloor type (concrete, wood, etc.). Spread a thin layer of tile adhesive over your underlayment using a notched trowel. Allow it to dry according to the manufacturer’s instructions before moving on to the next step.
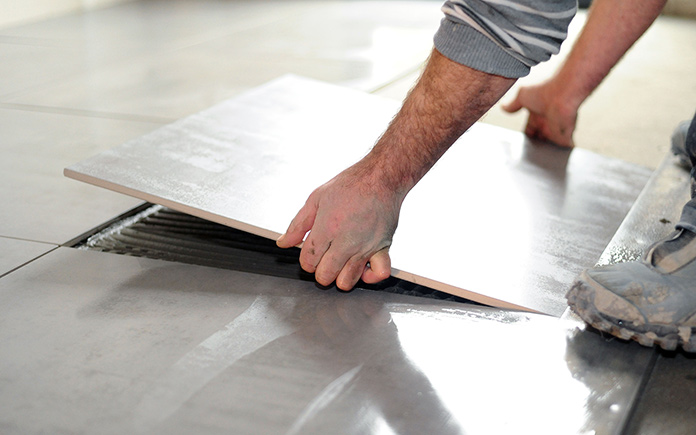
Step 6: Install Your Tiles
Finally, you can install your tiles over the adhesive layer. Start in one corner and work your way out, making sure each tile is firmly pressed into place and aligned with its neighboring tiles. When installing large tiles, it may be helpful to use spacers between them for added stability. Once all of your tiles are in place, let them set according to manufacturer instructions before grouting or sealing them with a sealer.
FAQs About Preparing Basement Floors For Tile
Q: How do I make sure my basement floor is level?
A: The best way to ensure that your basement floor is level is to use a long level or laser level to measure it in multiple places across the room. If there are any low spots or uneven areas, they can be filled in with self-leveling compound before you begin prepping for tile installation.
Q: Do I need to use an underlayment?
A: Yes, it is recommended that you use an underlayment when installing tiles on a basement floor. An underlayment will provide an extra layer of protection between your subfloor and tiles and help reduce noise from foot traffic as well as moisture damage from below.
Q: What kind of adhesive should I use?
A: When choosing an adhesive for tiling a basement floor, make sure you select one that is appropriate for the type of subfloor you have (concrete, wood, etc